Ruined Hotel
Welcome to the final chapter of the complete walkthrough guide for Silent Hill 2 Remake (2024) covering Ruined Lakeview Hotel. Use the key summary below for short, spoiler-free directions and the complete walkthrough section for in-depth guidelines with extra explanations. This walkthrough also includes complete maps with all items and monsters marked for easy reference.
Legend
1 Auto Parts key – key items
2 Radio – equipment
Health Drink – supplies
Map of Silent Hill – maps
Save Point – save points
Flower Shop Message – collectibles: memos, strange photos and glimpses of the past
NG+ – New Game+ items, memos and actions
Contents
Complete Maps |
|
Collectibles count:
- 1 memo
- 2 strange photos
- 1 glimpse of the past
Key Summary
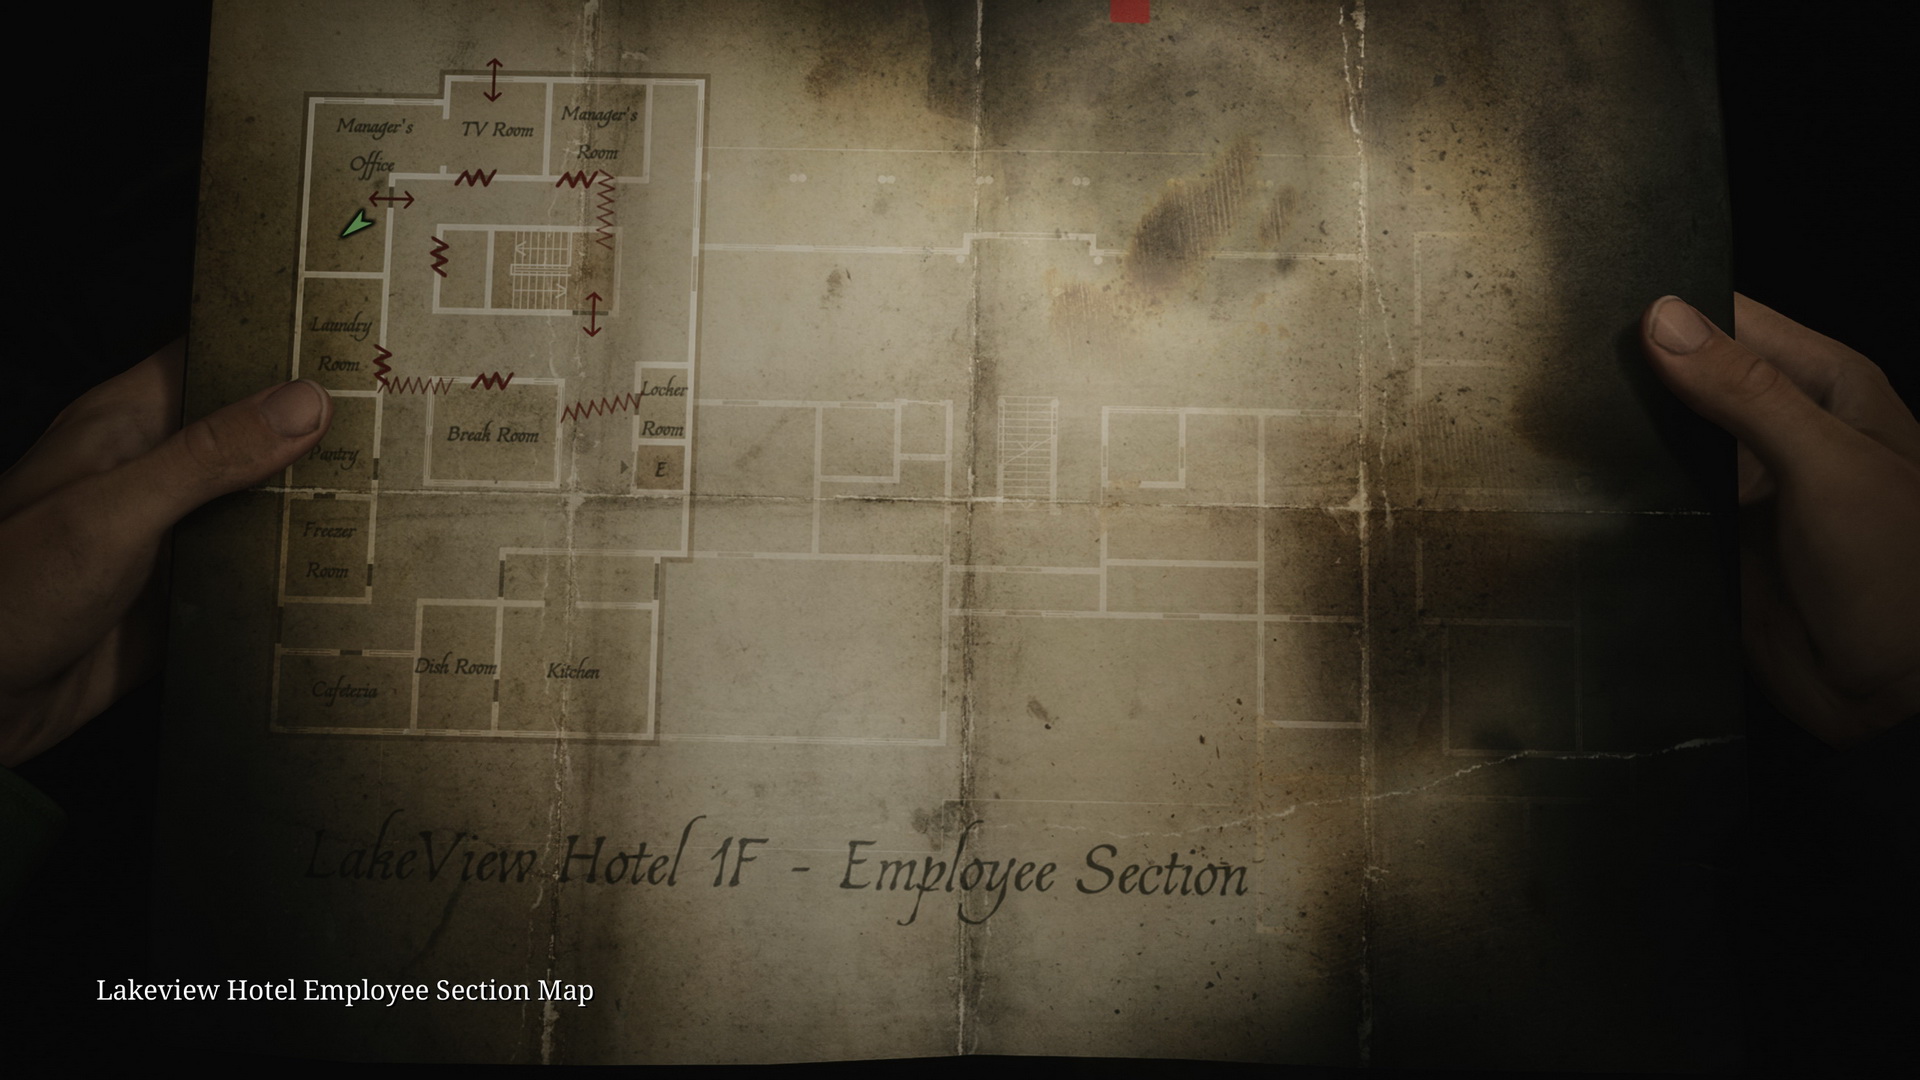
Third Floor
- Go through Rooms 314 and 313 to get to the eastern hallway.
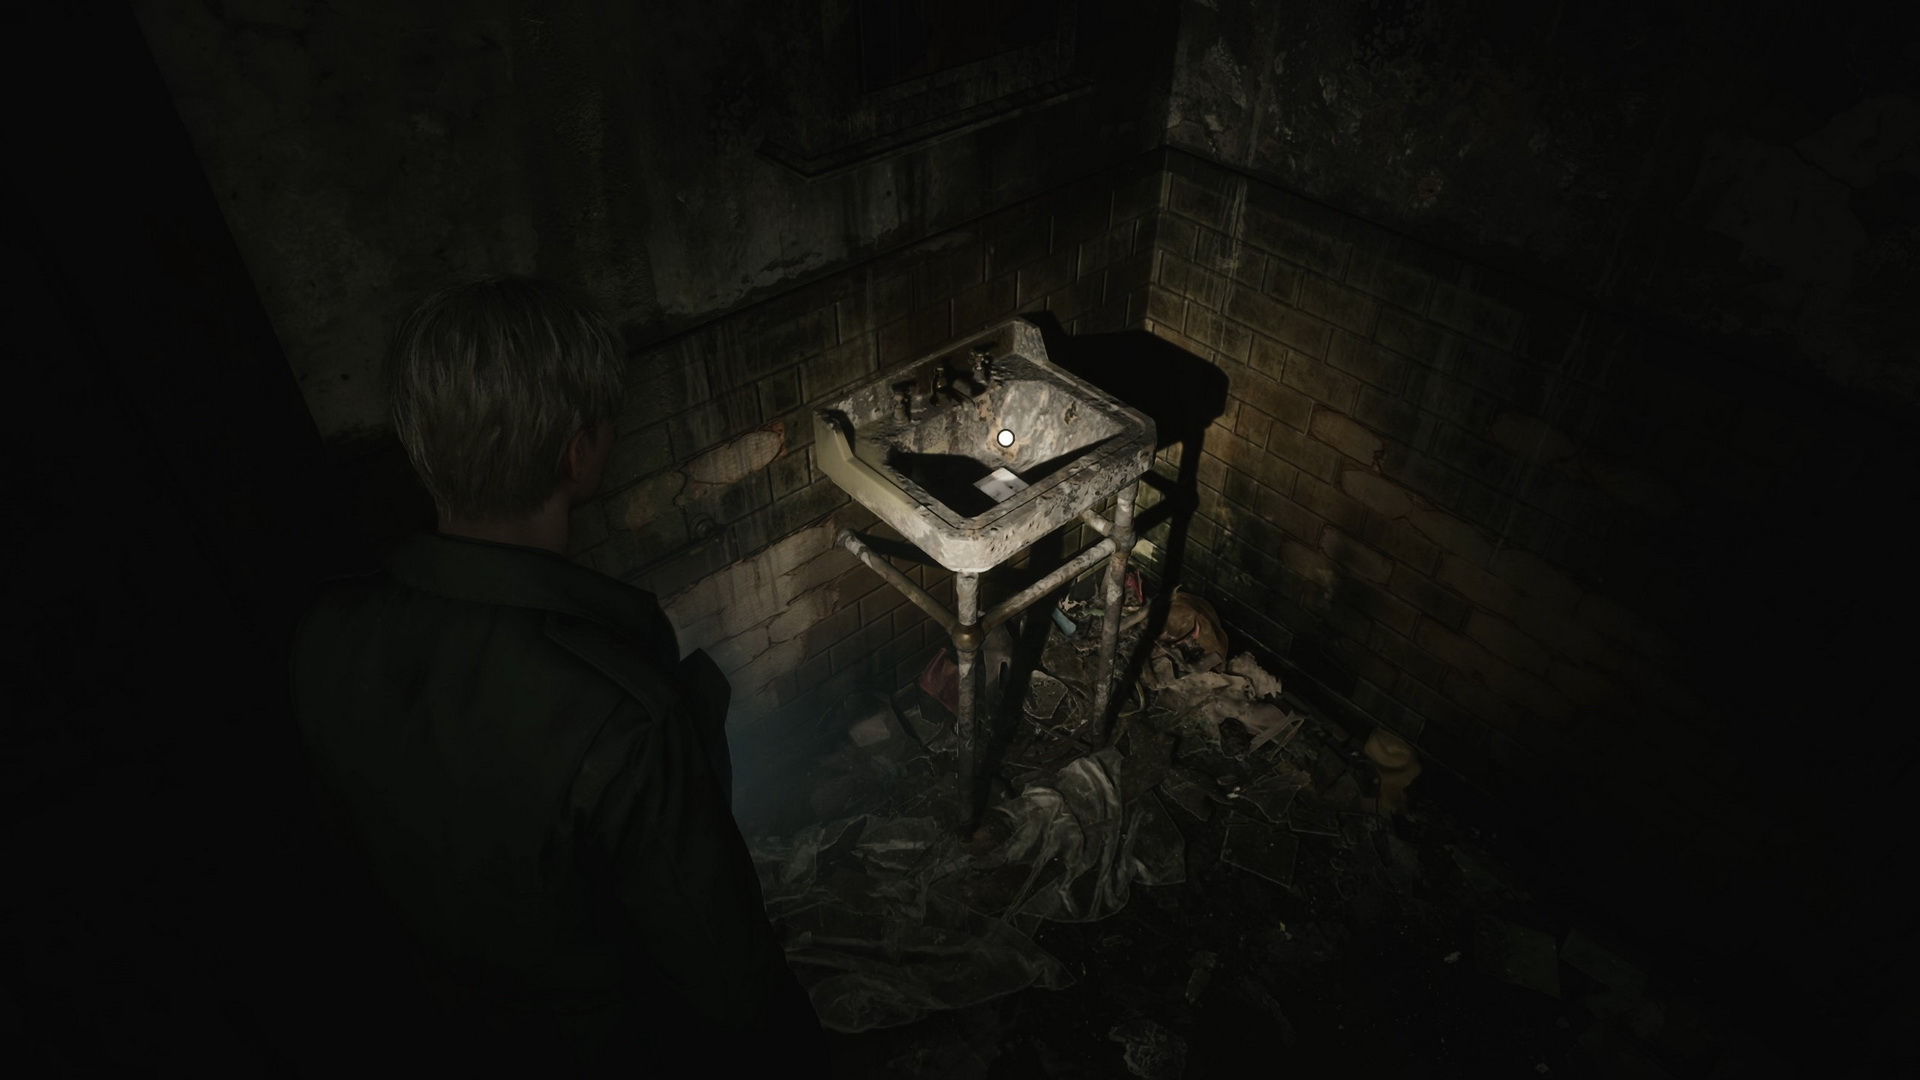
- Strange Photo #25: "Still can’t get it right". In the bathroom of Room 302. Move a cart out of the way to get inside.
- Push the cart to break the floor in front of Room 304 and jump down.
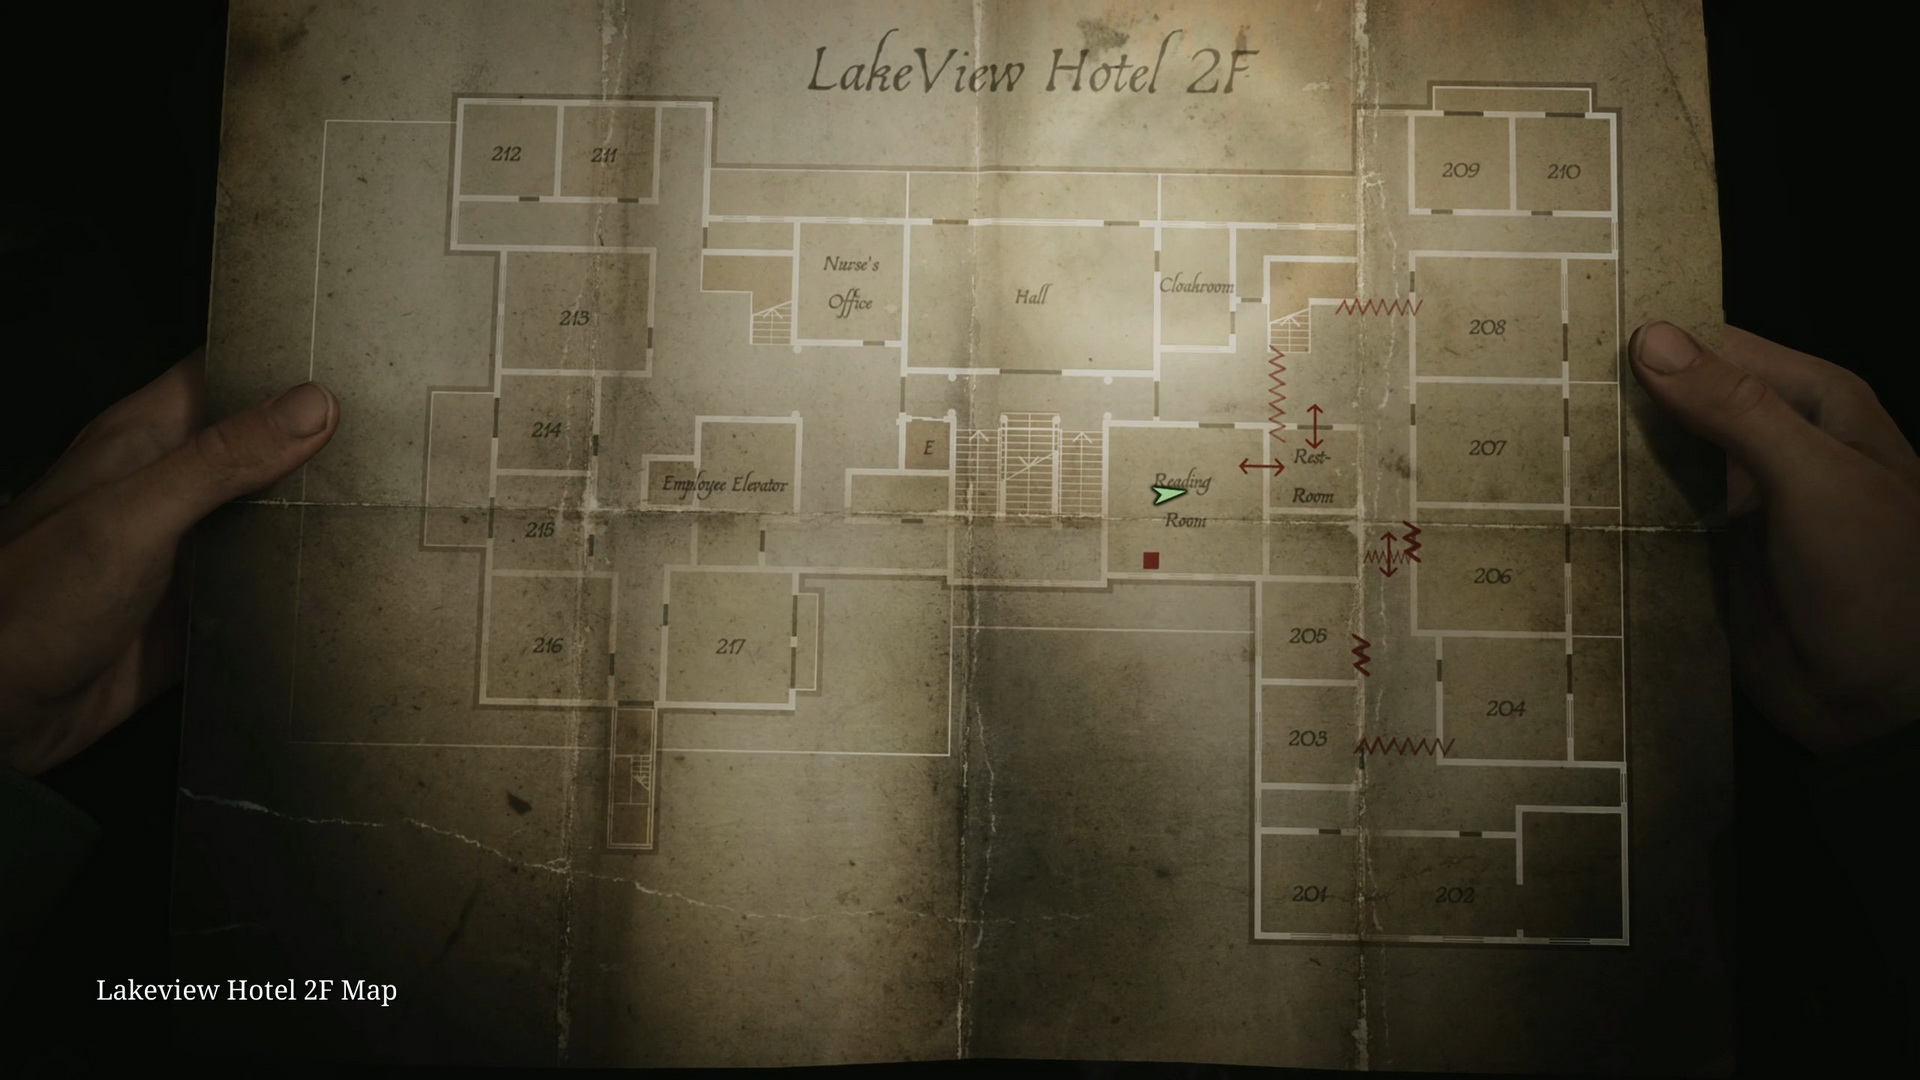
Second Floor
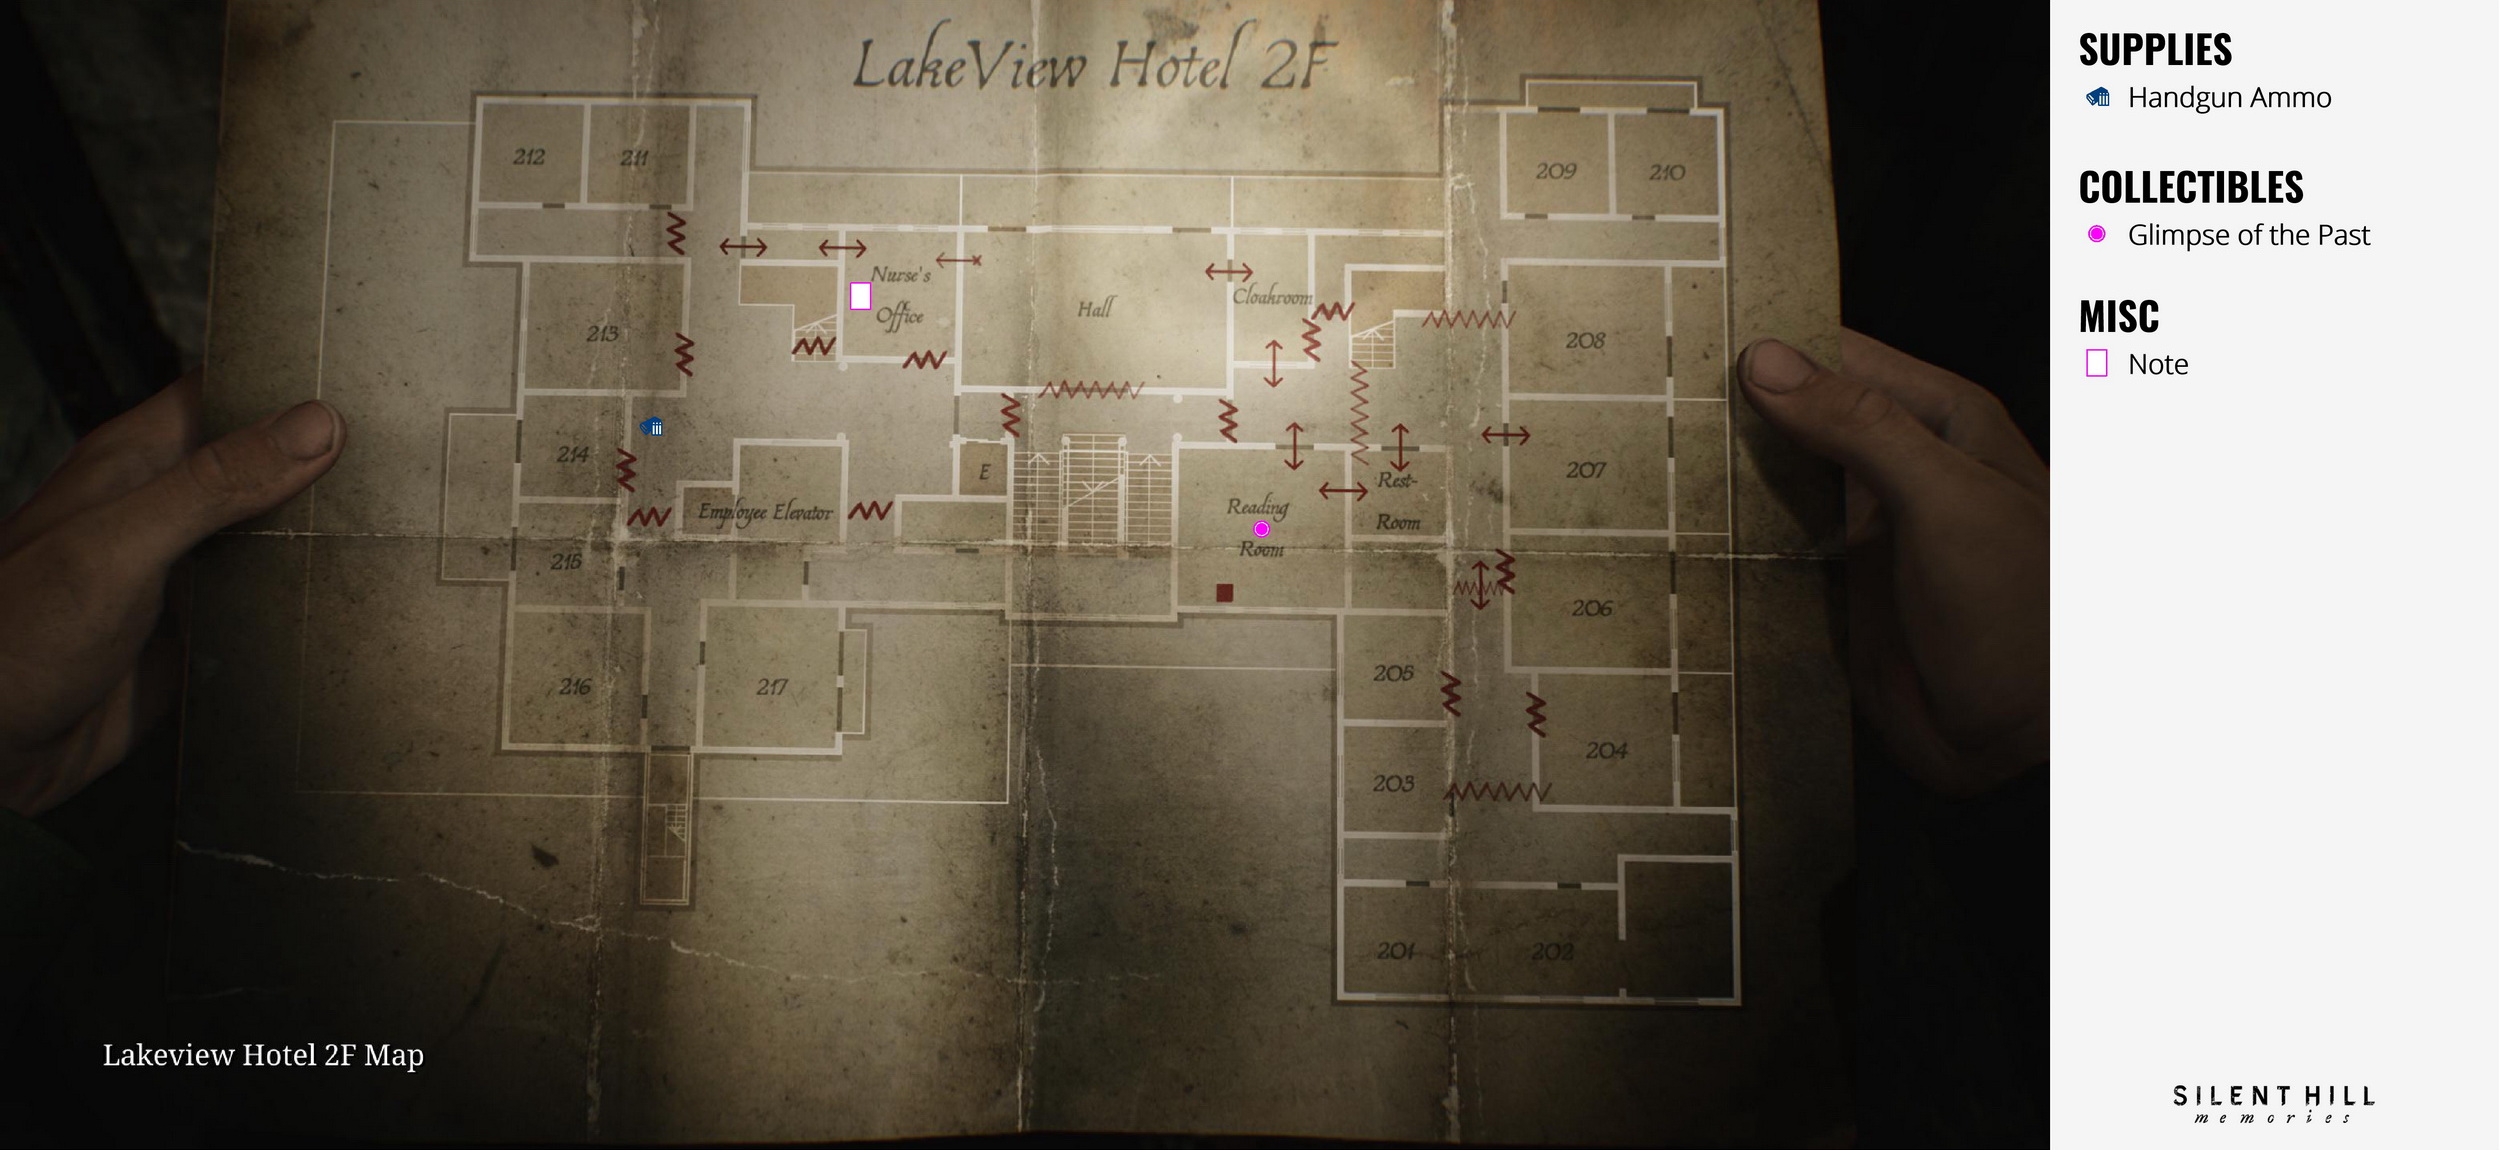
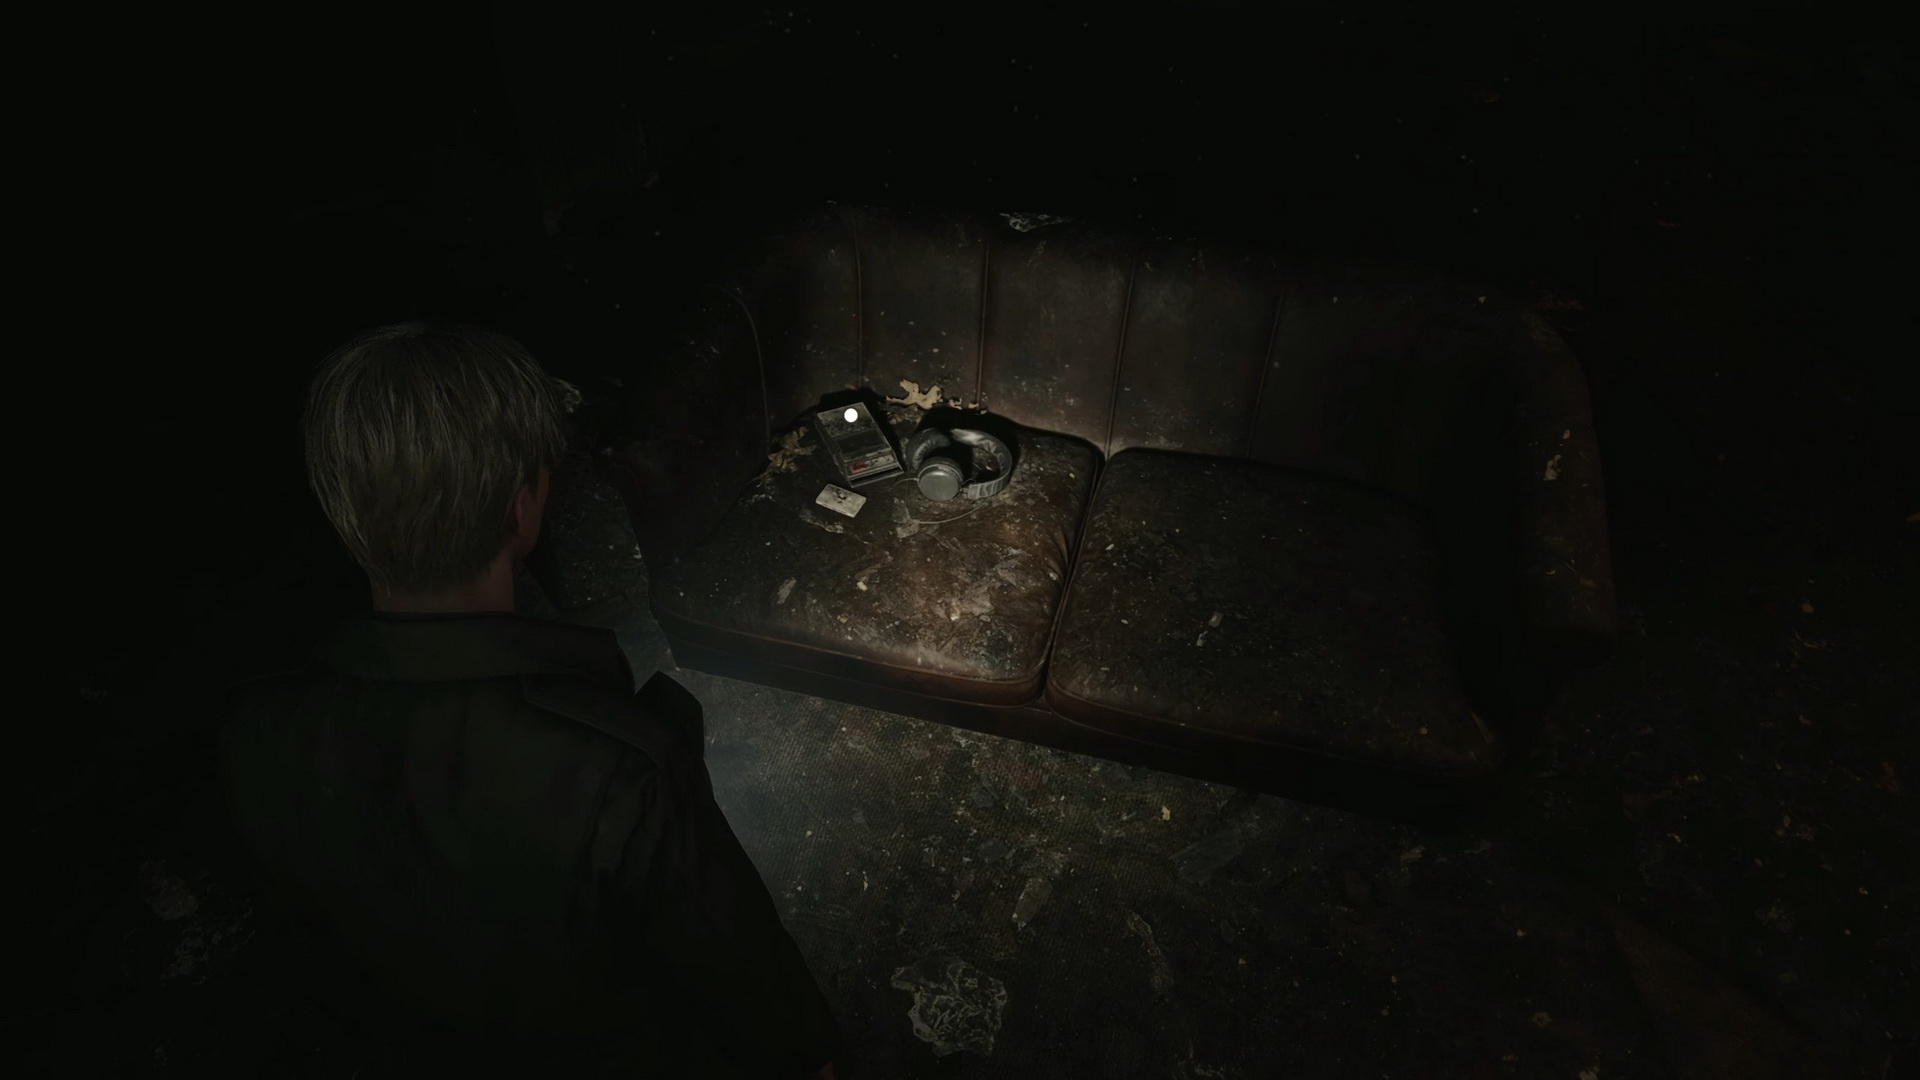
- Proceed through the Restroom and into the Reading Room. There's a Save Point here.
- Glimpse of the Past #26. On the couch in the Reading Room.
- Make your way through the Cloakroom, Hall and Nurse's Office. Get to the hallway and take the elevator to the basement.
Basement
- Proceed through the flooded basement. There's a Save Point in the Venus Tears Bar.
- Get to the stairs for a cutscene and go upstairs after.
First Floor
- Kill or spare three defenseless monsters on this floor (affects the ending).
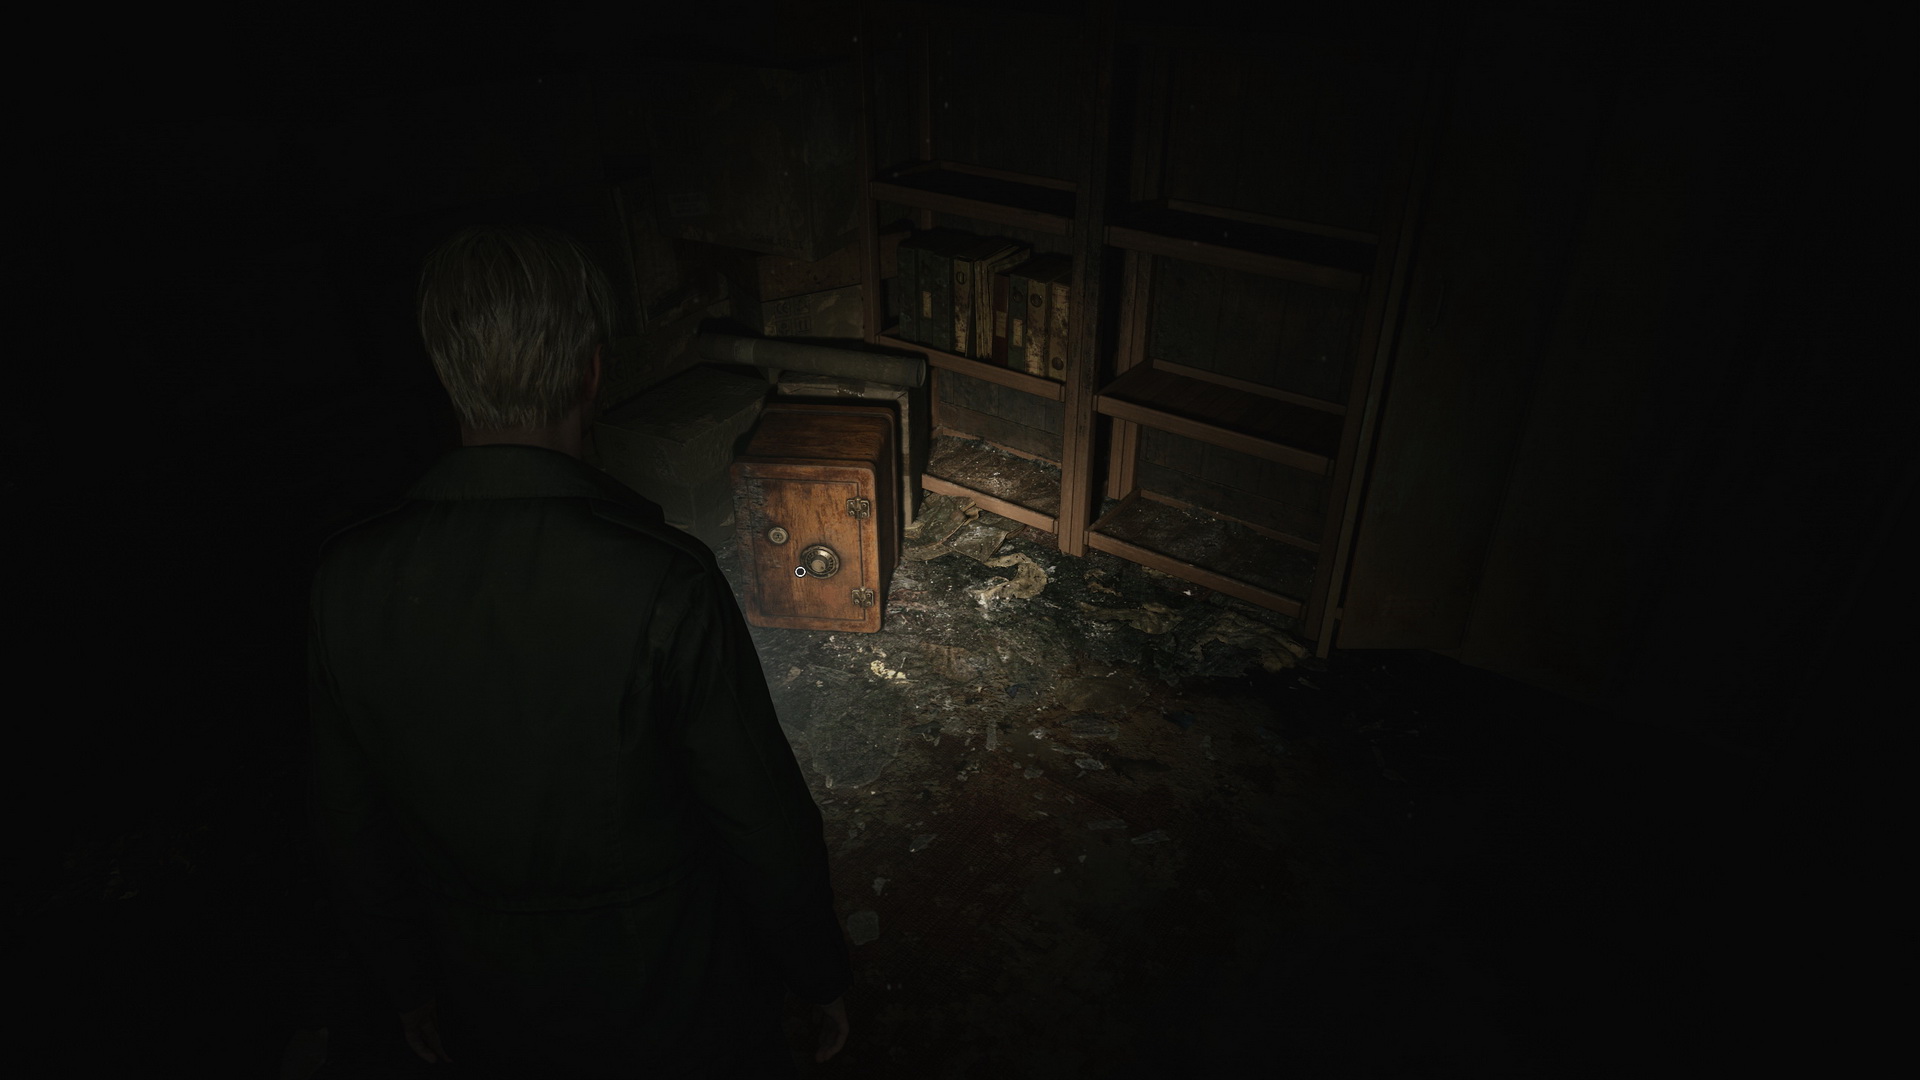
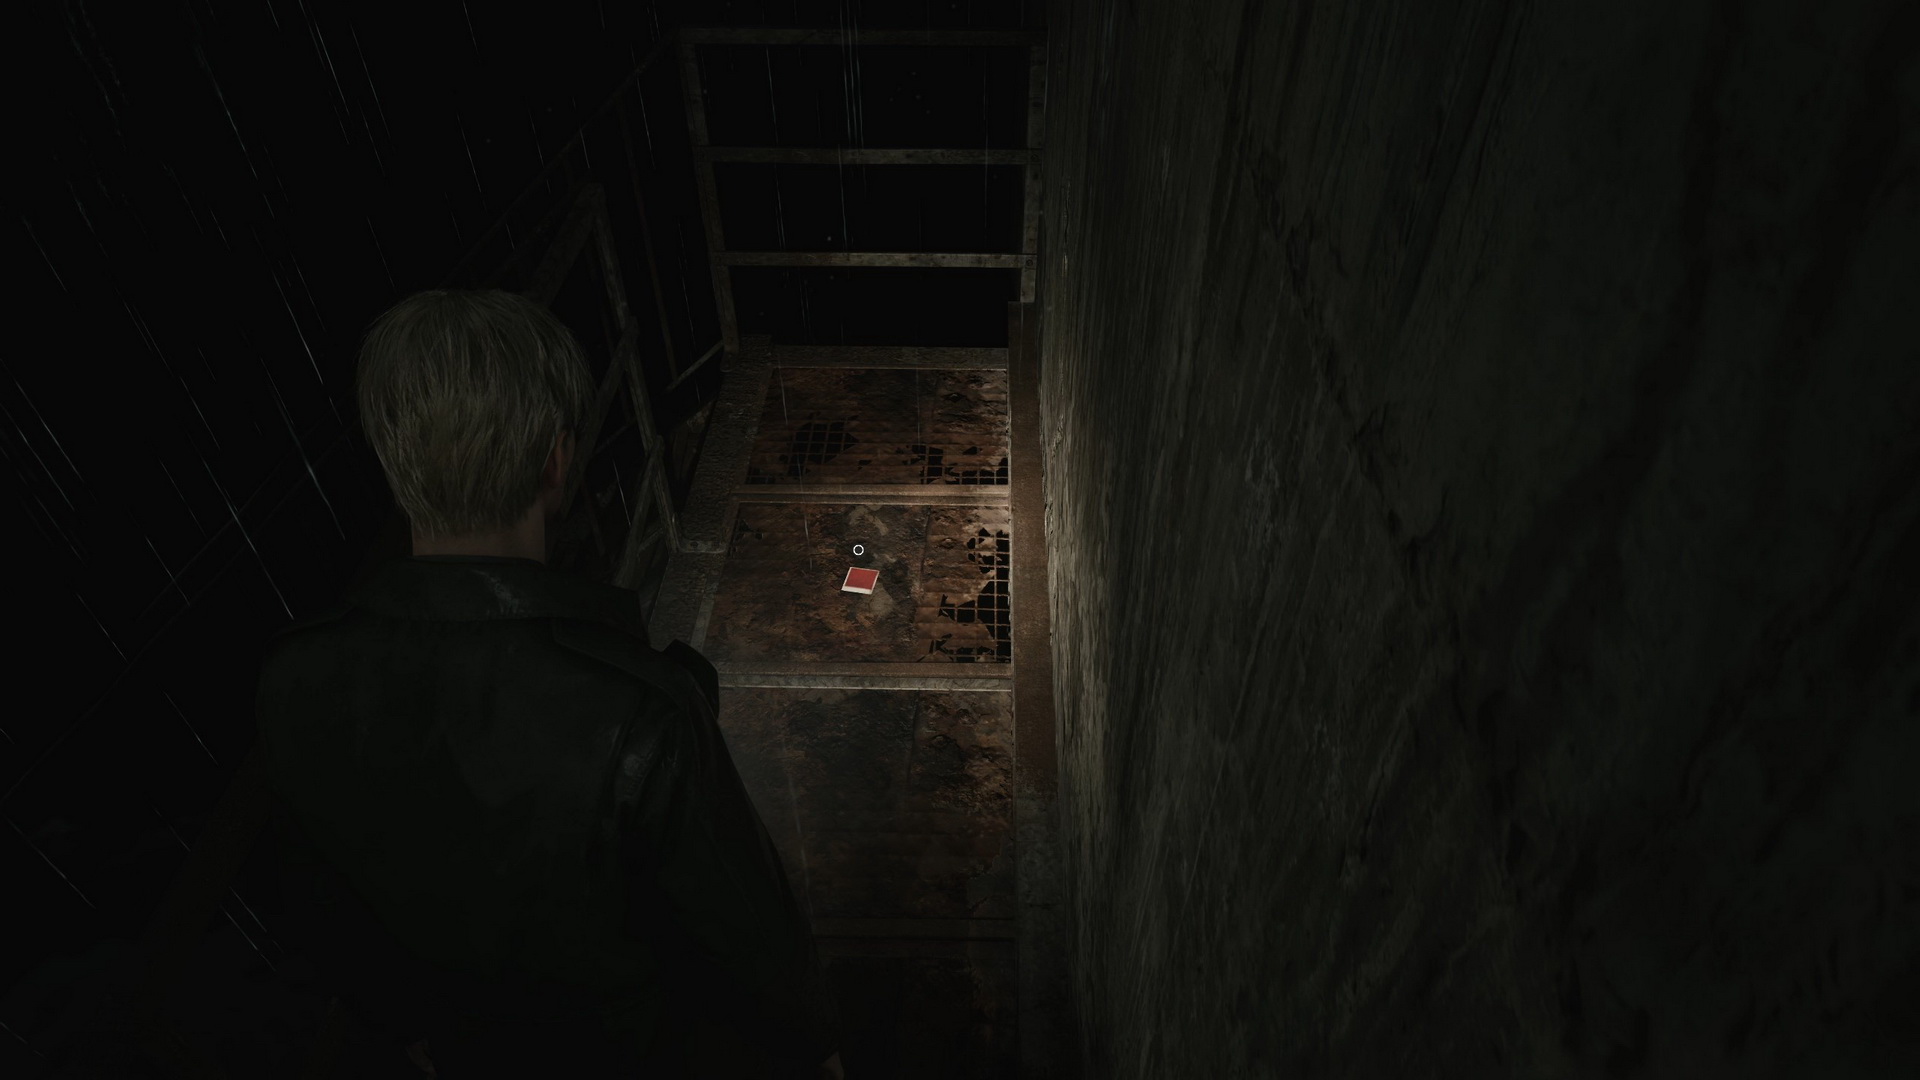
- Memo #68: Burned Note. On the desk in the Manager’s Office.
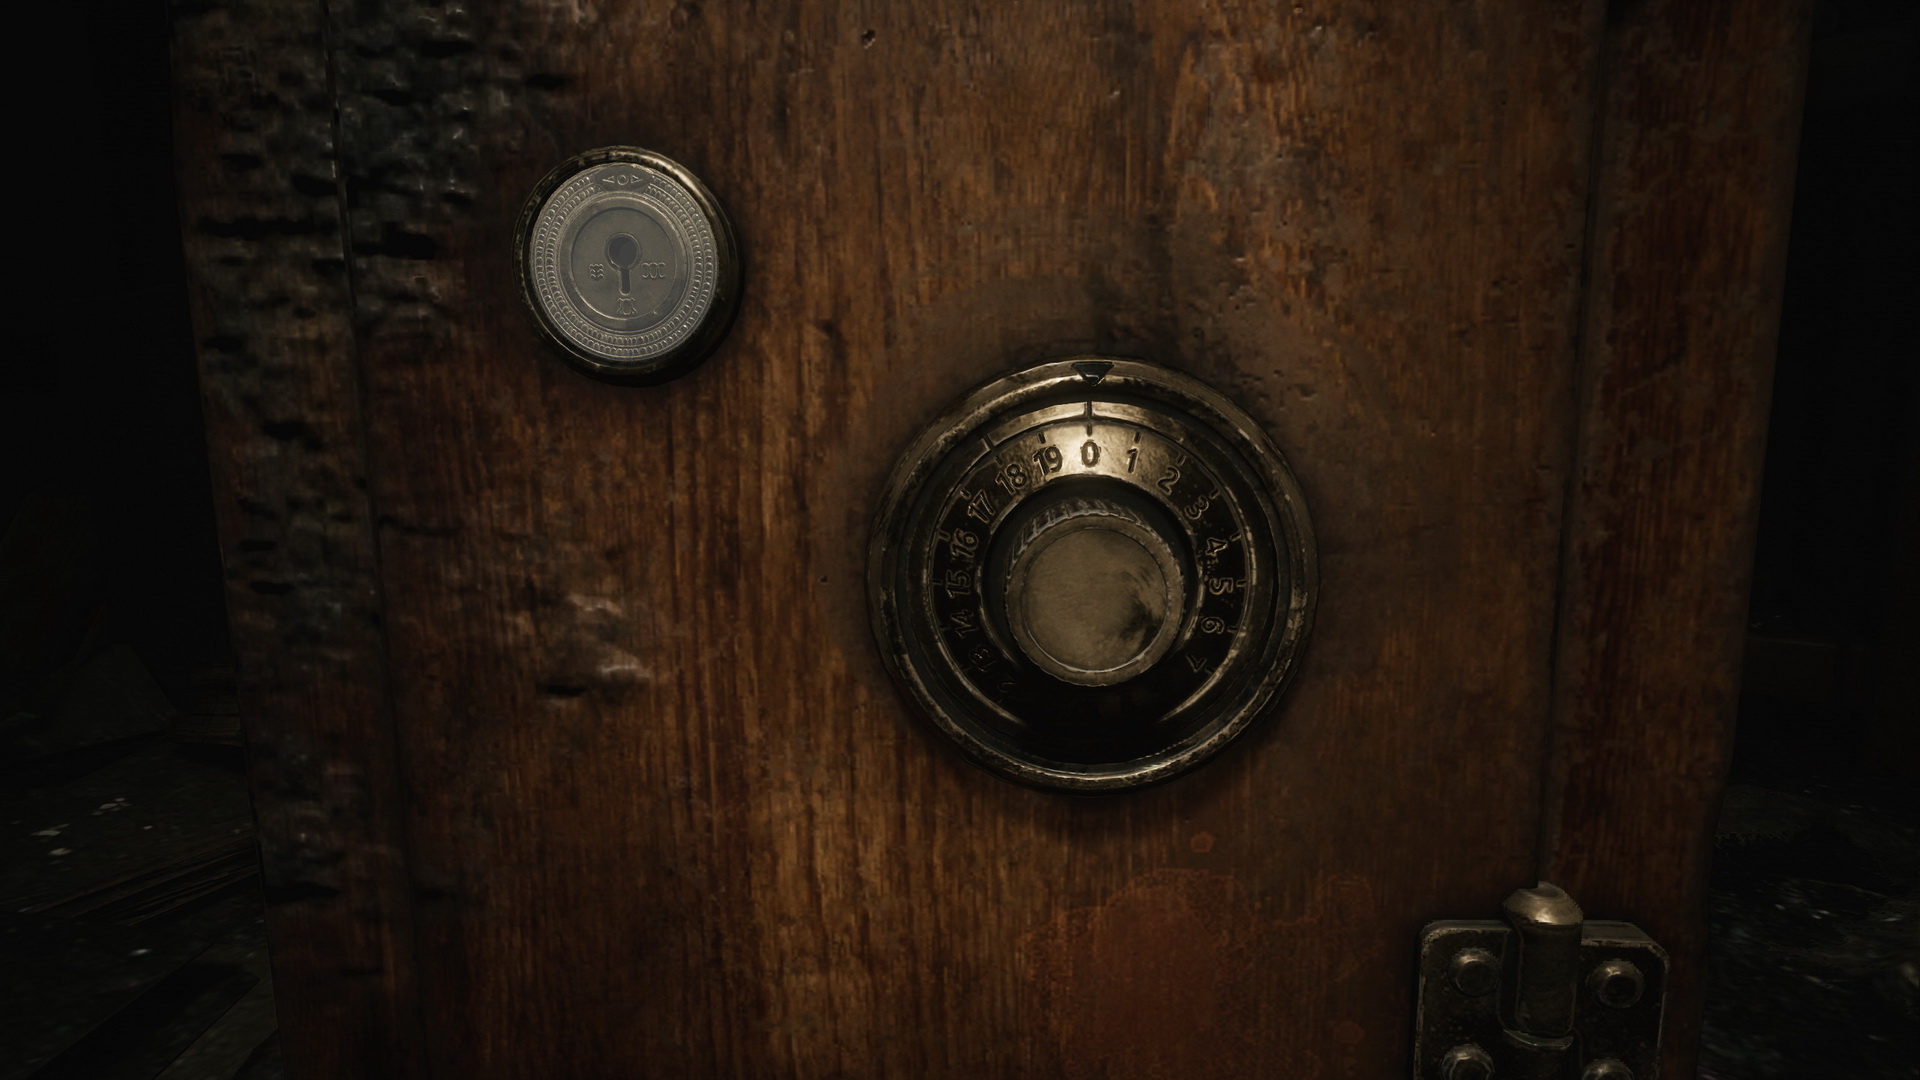
- NG+ E12 Toluca Postcard. Inside a locked safe in the corner of Manager’s Office. Use the Key of Sorrow for the key lock, and input the code 314 (right to 3, left to 1, right to 4) for the combination lock.
- Proceed through the Manager's Office and TV Room.
- Use the Save Point before the boss fight with Pyramid Heads.
- 123 Rust-Colored Egg and 124 Scarlet Egg. Pick these items from each Pyramid Head and insert them in the doors to continue. Choosing the door affects the ending.
- Run down the long hallway and enter the door at the end.
- Strange Photo #26: "SHAPE FORCES THE MIND". At the start of the metal catwalk leading to the final boss.
- Go upstairs for the final boss fight.
Complete Walkthrough
Third Floor
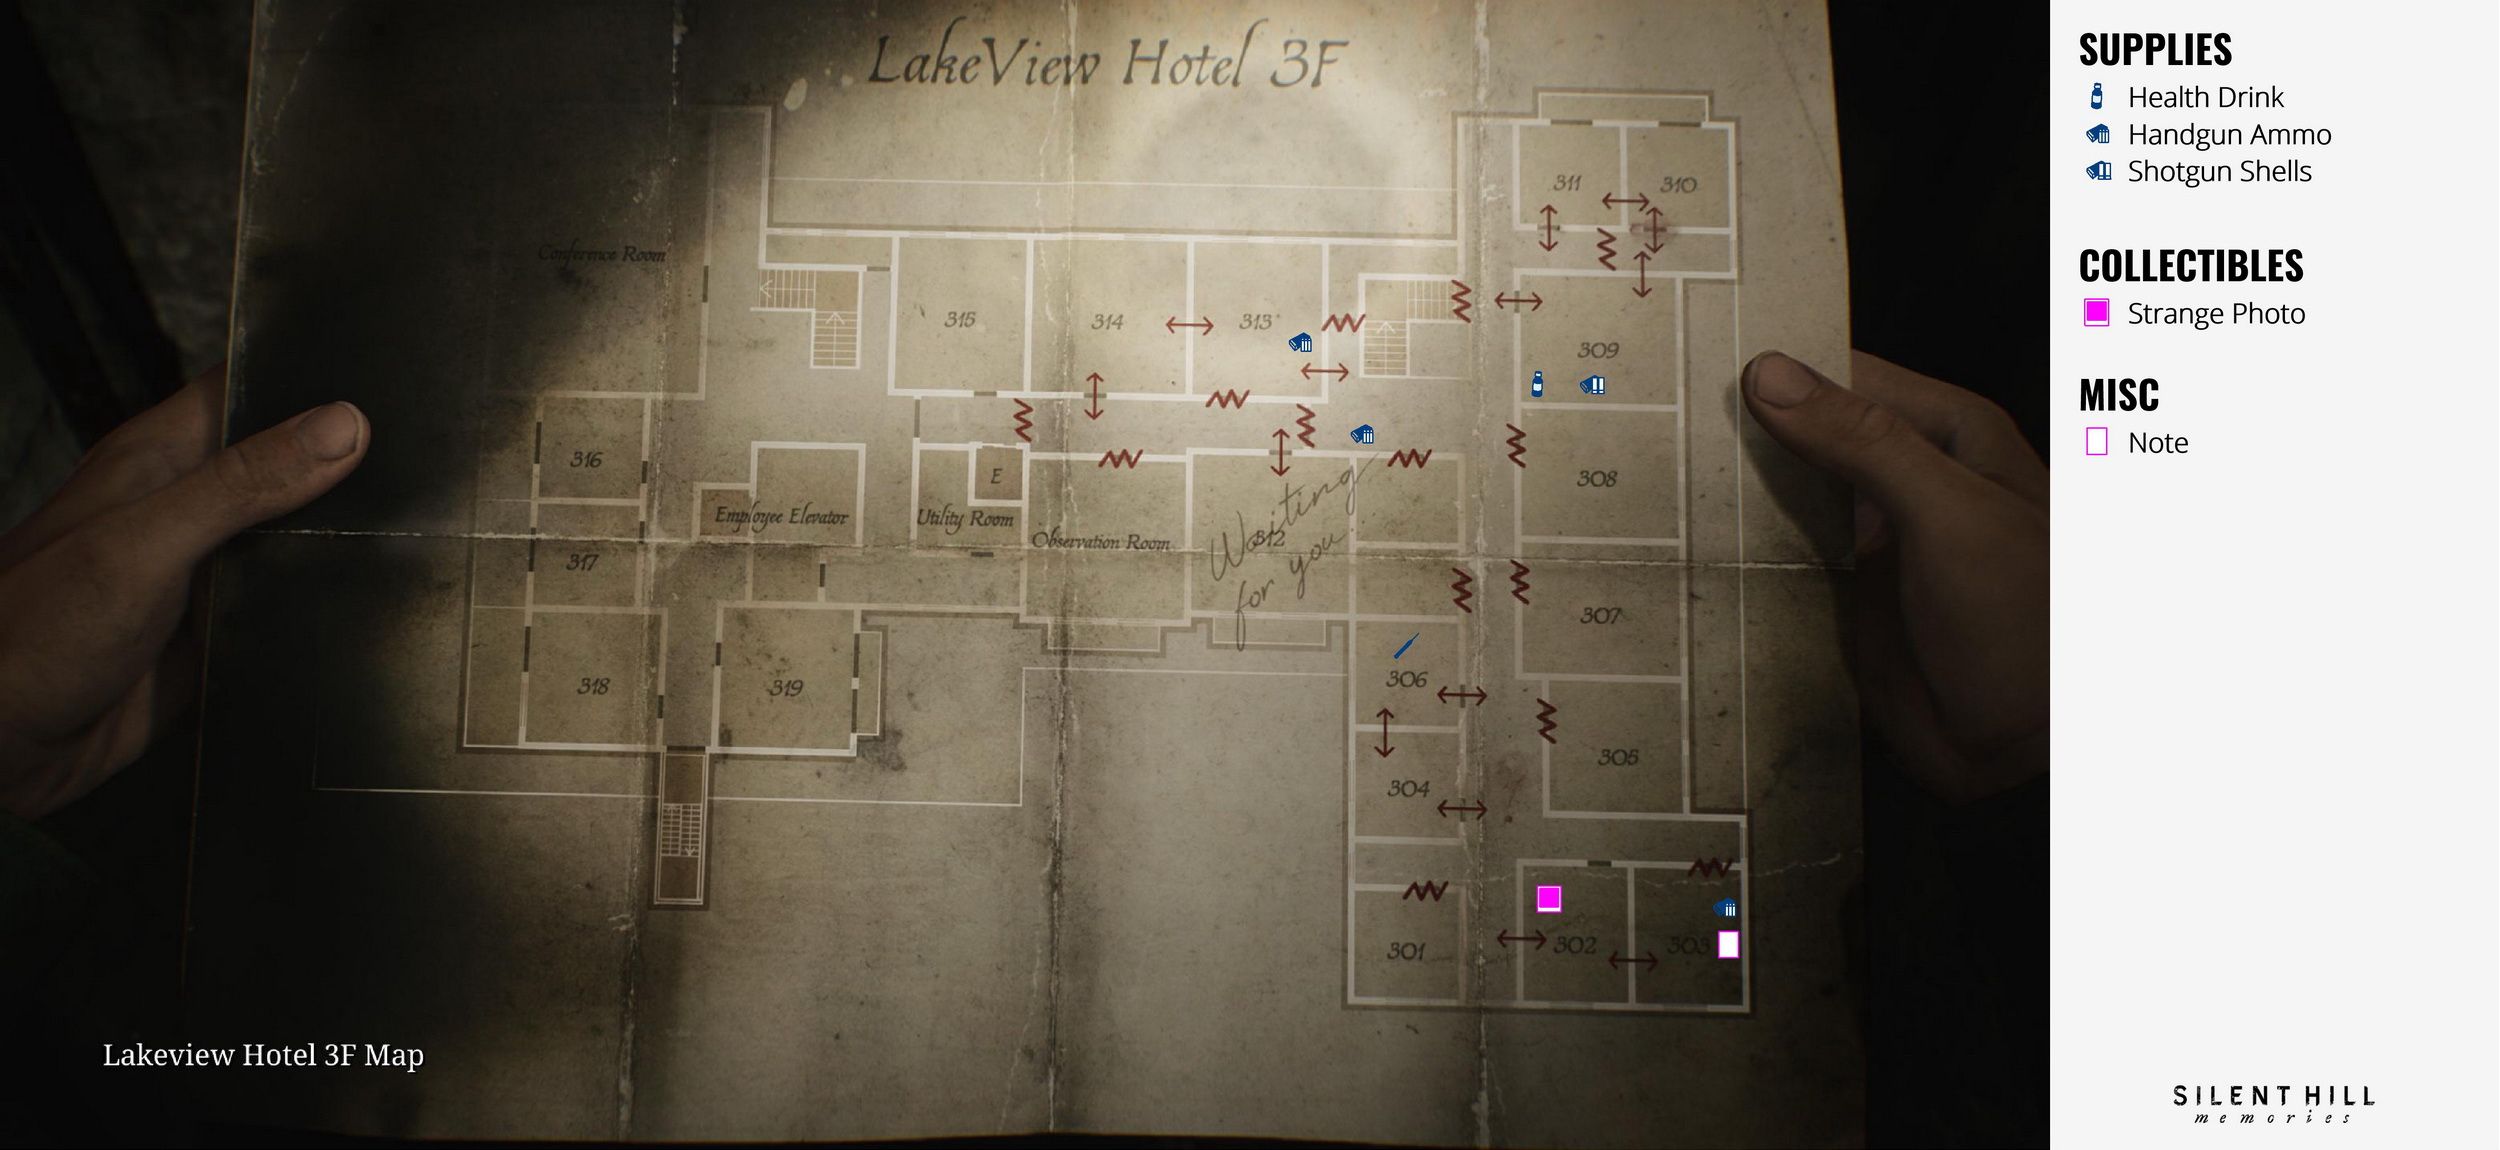
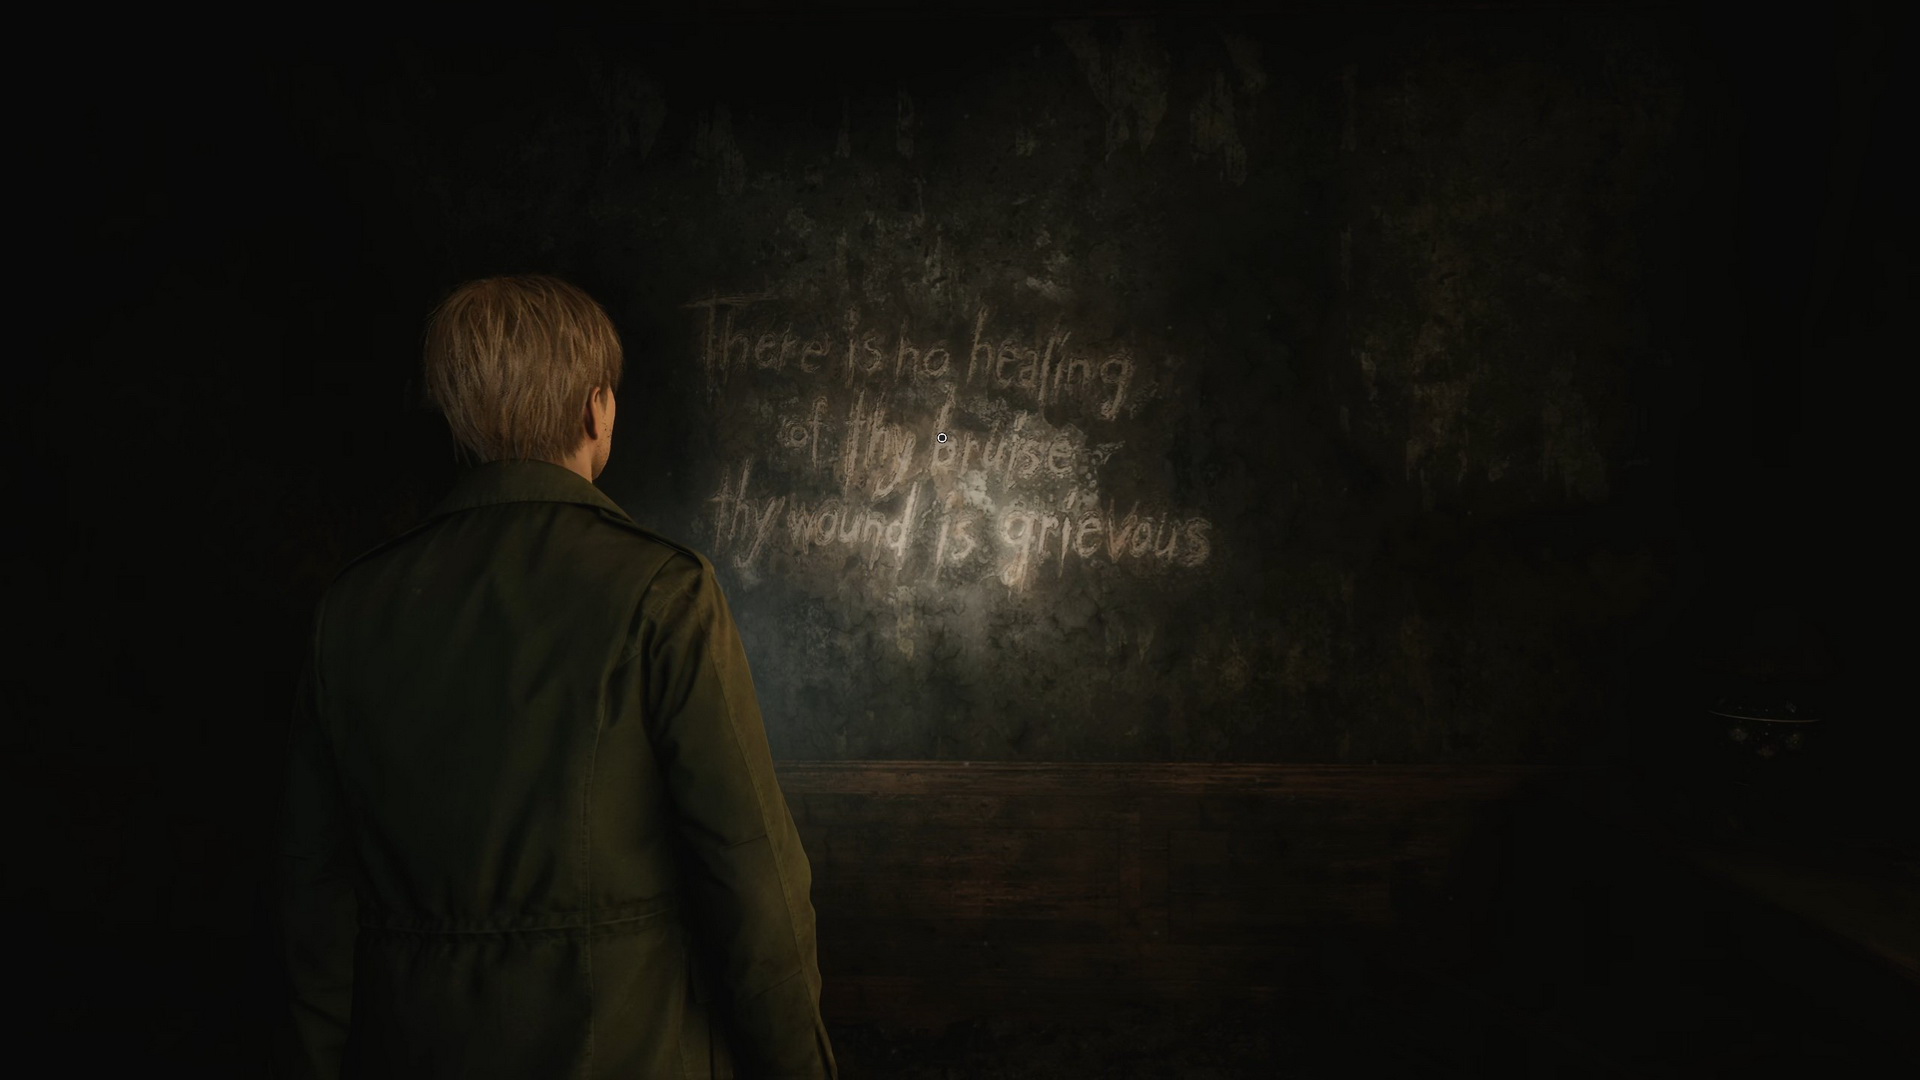
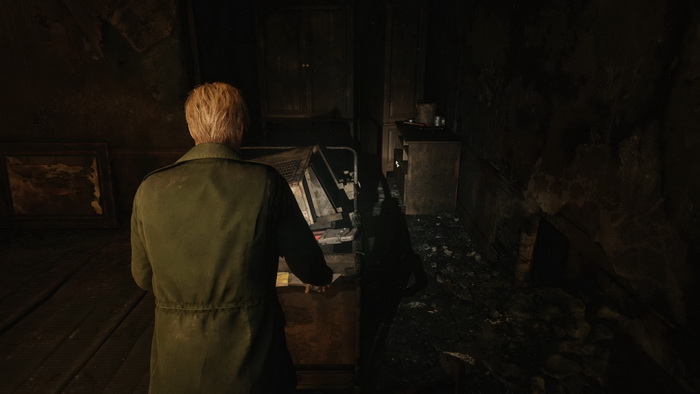
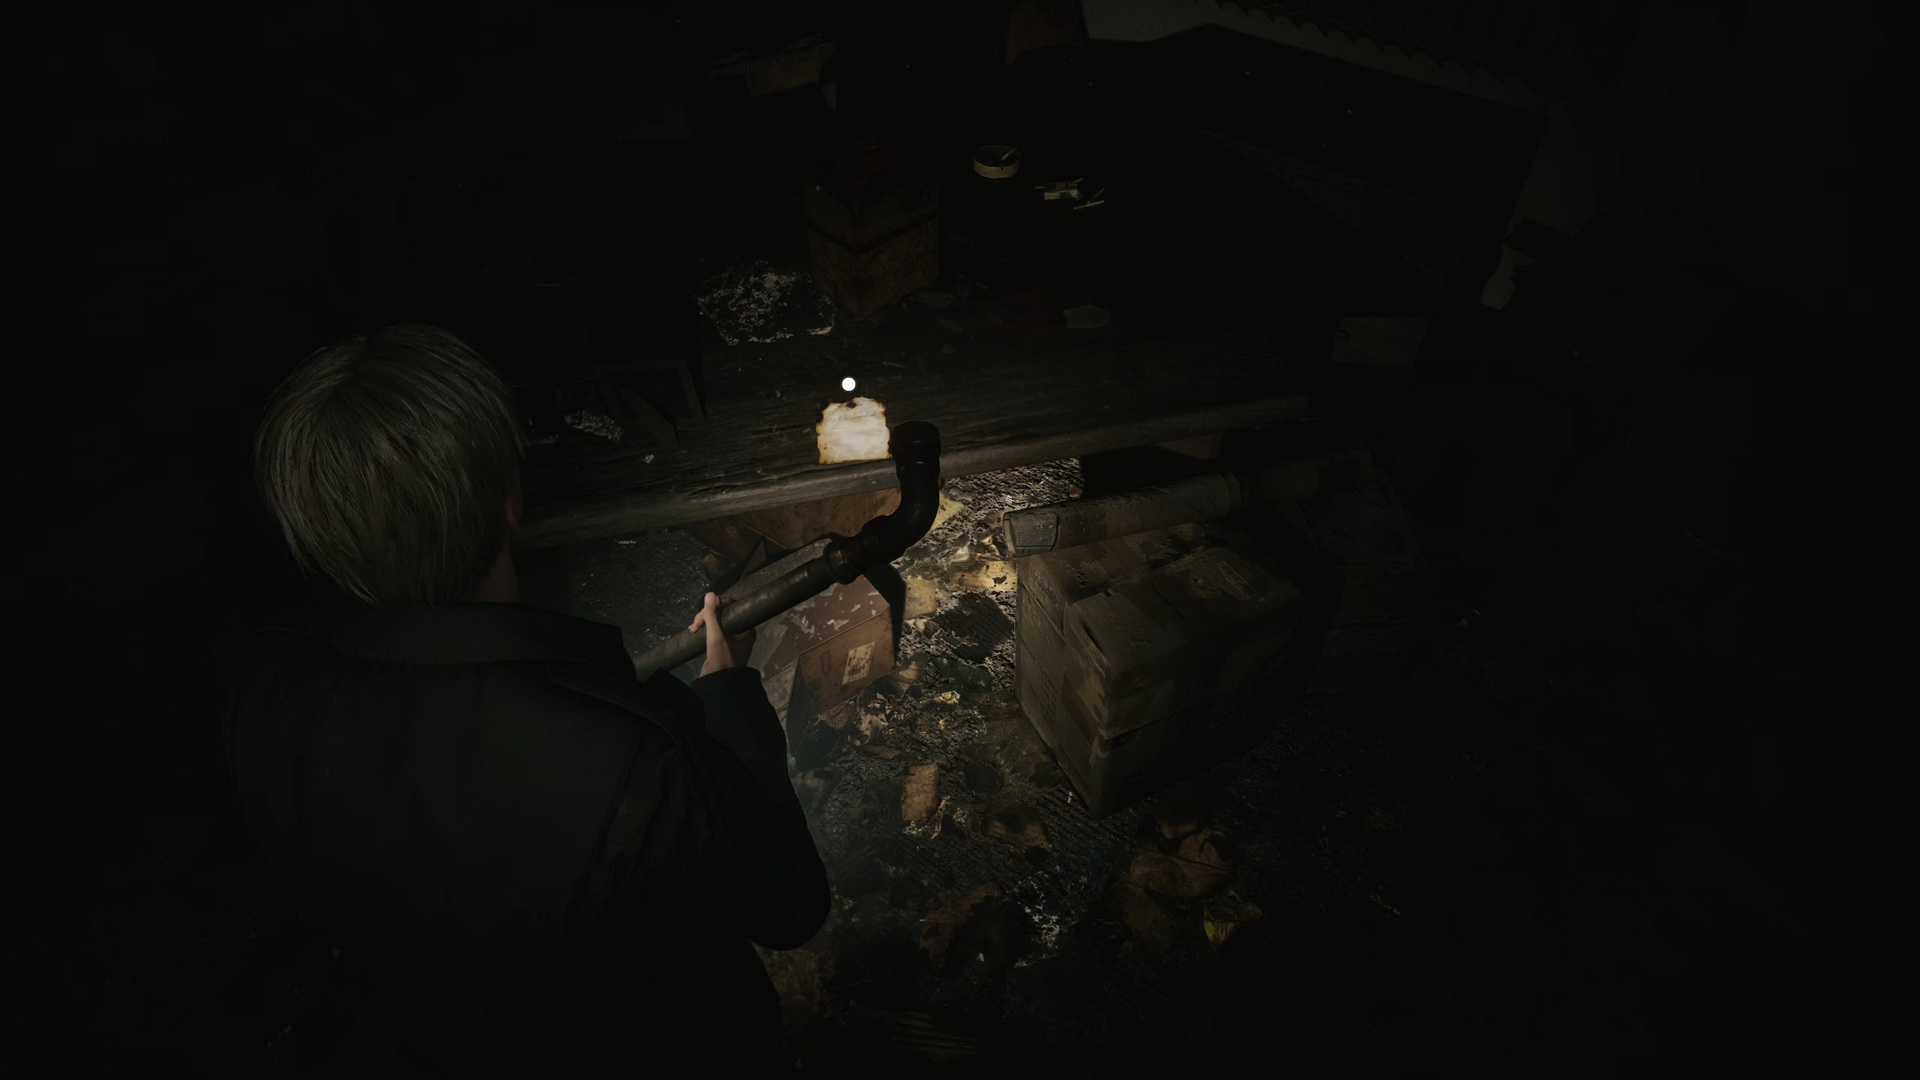
Welcome to the nightmare hotel. Or is it what it looks like in reality? Anyway, it sure seems to be falling apart. Exit the hotel room and go to Room 314. There's Handgun Ammo in a nightstand drawer in Room 313. Proceed through a wall gap in the bathroom. More Handgun Ammo can be found in the drawer in the corridor. You can find Shotgun Shells in a nightstand drawer and a Health Drink in the bathroom in Room 309, which is accessed through Rooms 311 and 310. Go to Room 306 through Room 304 to find a Syringe in a first-aid kit on a bed. Proceed to the north end of the corridor and crawl into Room 303 to find Handgun Ammo in the drawer and a note on the wall.
 |
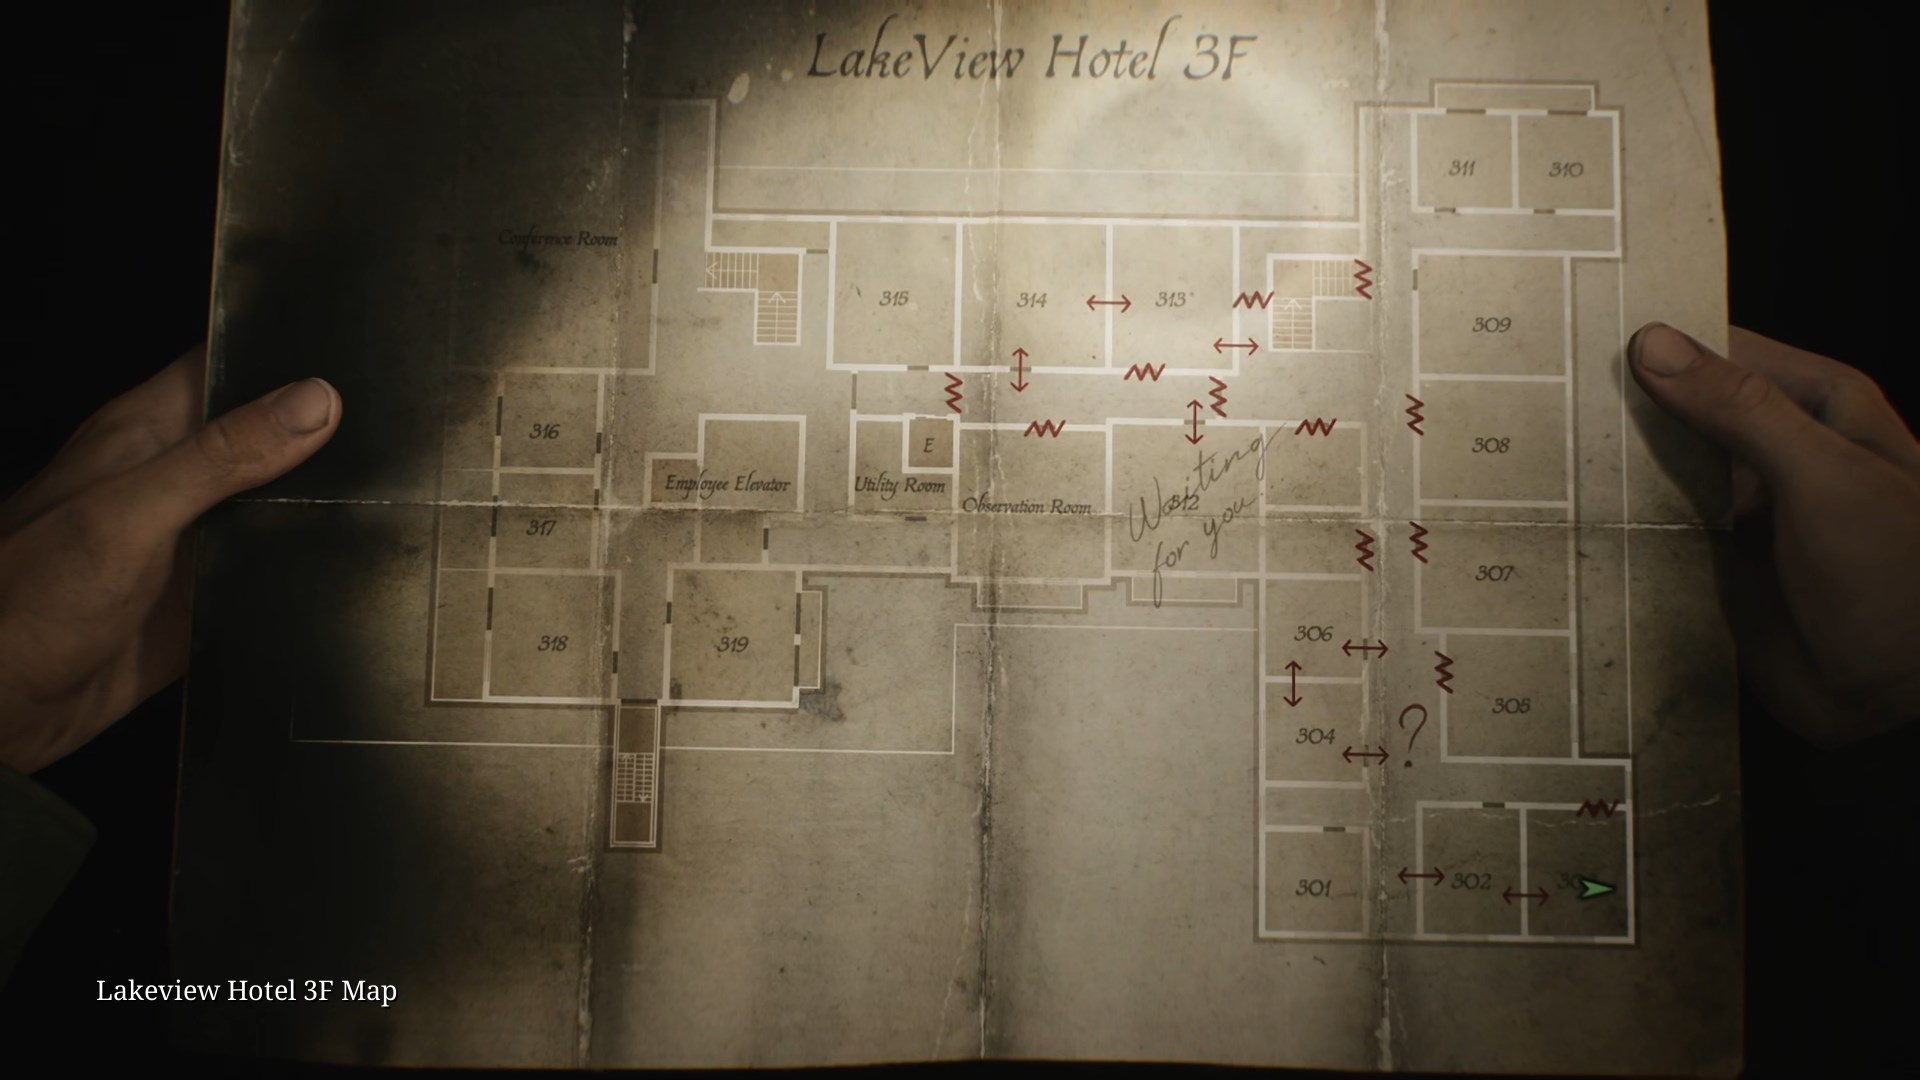 |
Crawl back and grab a cart to move it away from the door. Enter the bathroom of Room 302 to find Strange Photo #25: "Still can’t get it right" in the sink.
 |
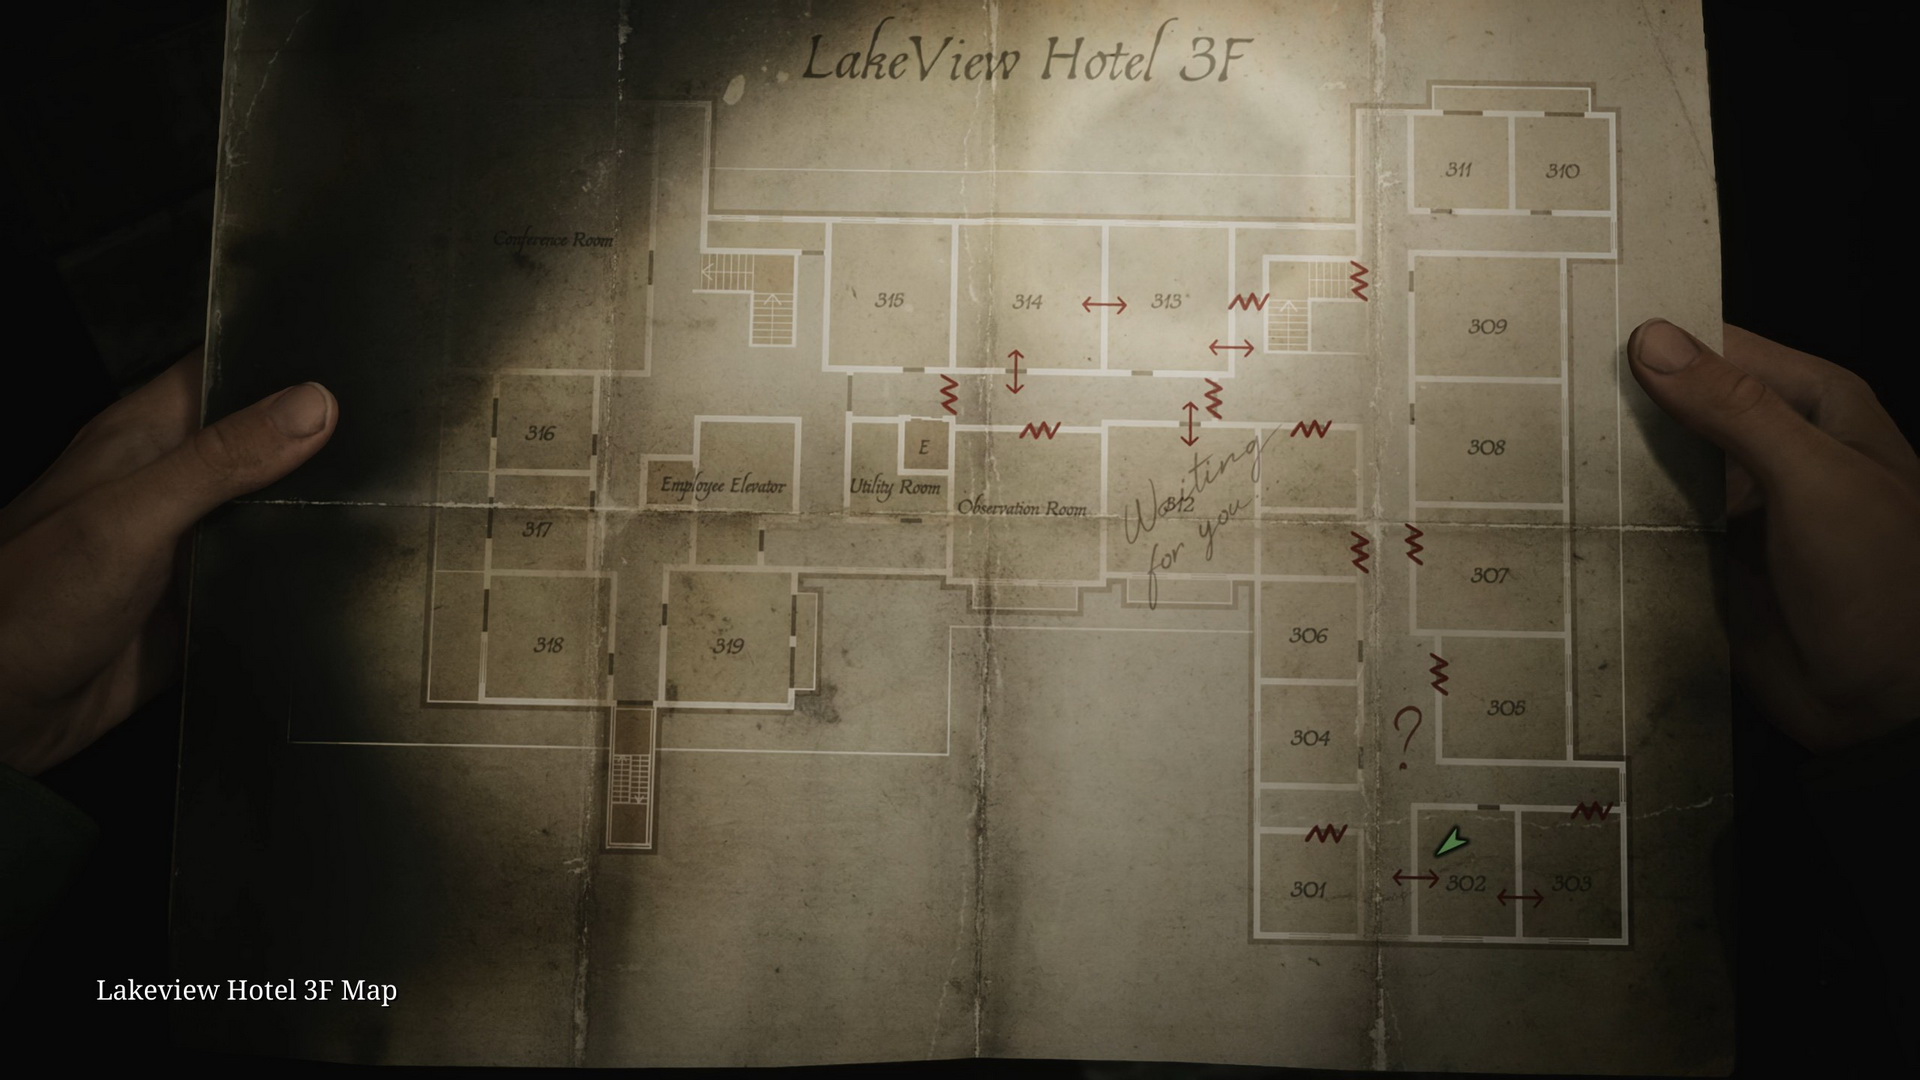 |
Push the cart to break the floor in front of Room 304 and jump down.
Second Floor
Go ahead and proceed to the Reading Room through the Restroom. There's a Save Point here. Check a portable cassette player on the couch for Glimpse of the Past #26.
 |
 |
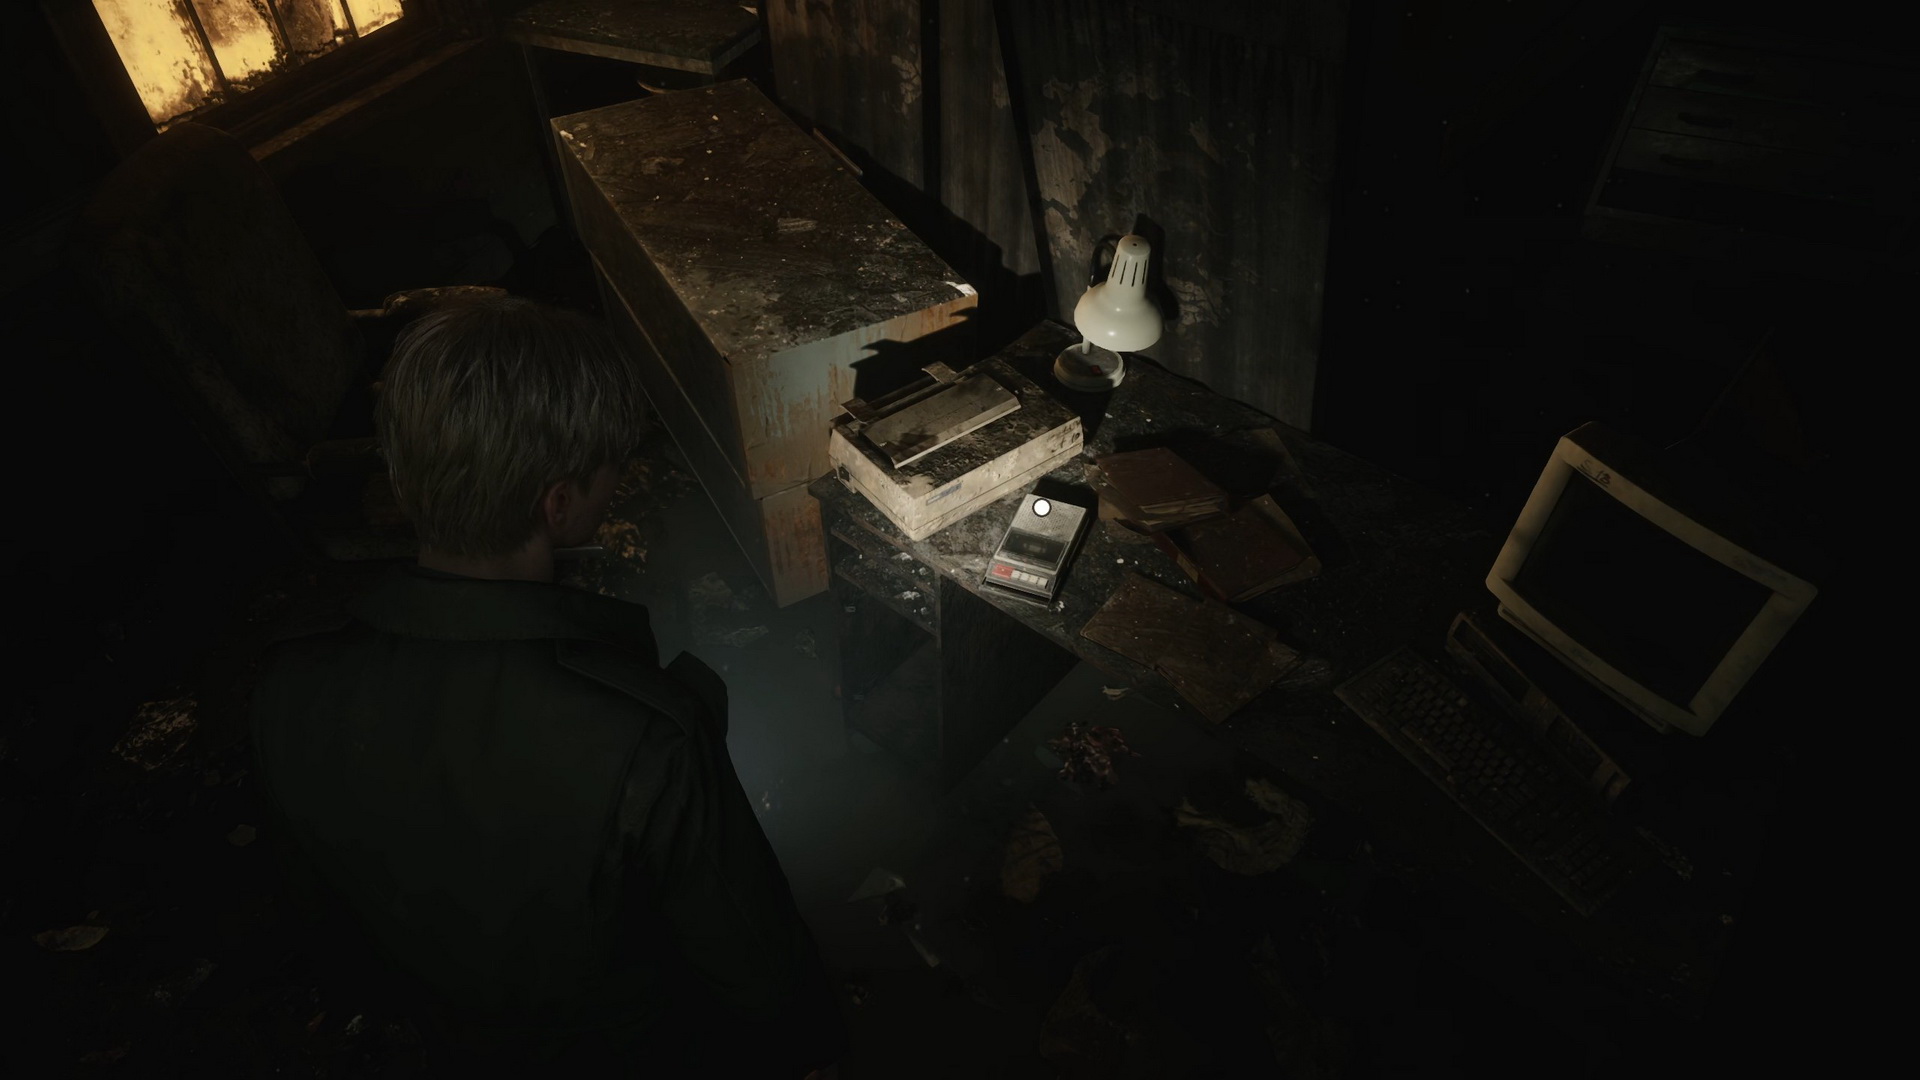
Hop into the Cloakroom and proceed to the Hall. Use the top opening to get inside the Nurse's Office. In the Nurse's Office, you can listen to a tape record.
 |
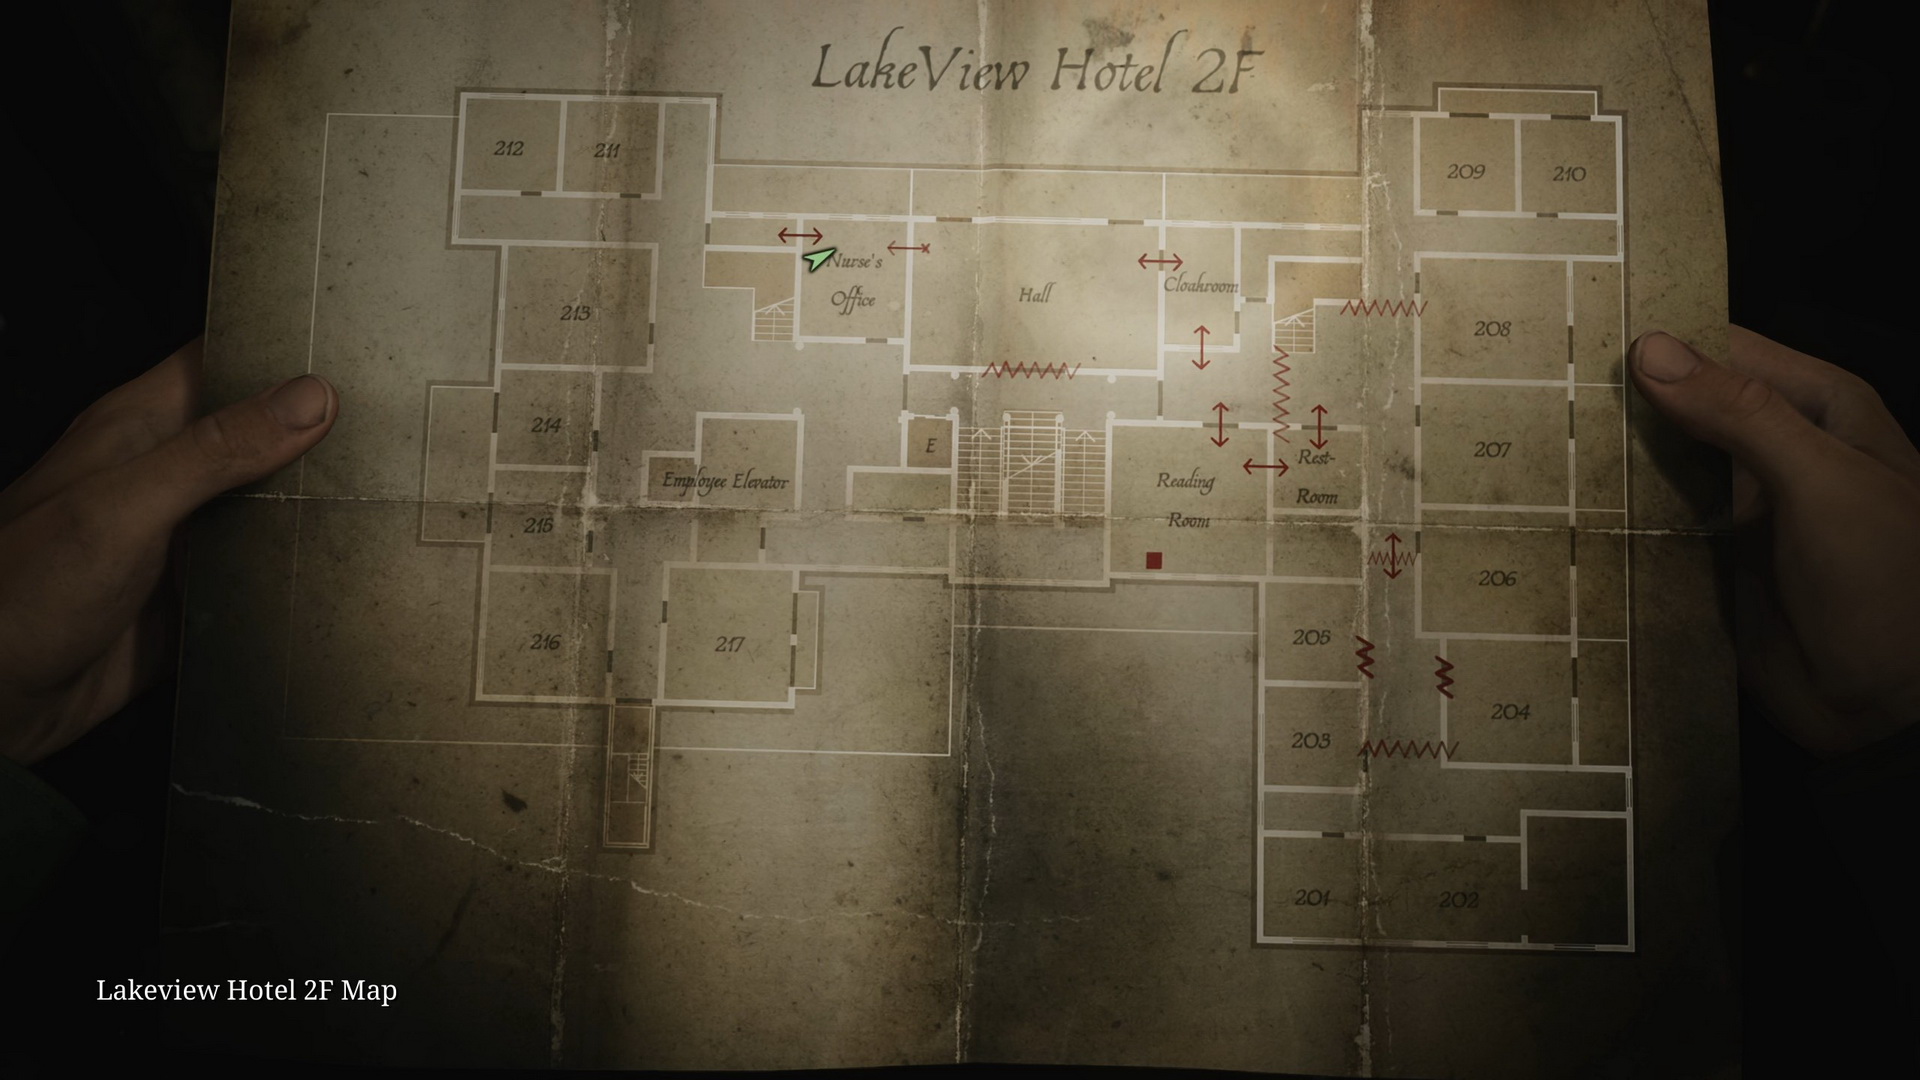 |
Get to the hallway, grab Handgun Ammo from the drawer and take the elevator to the basement.
Basement
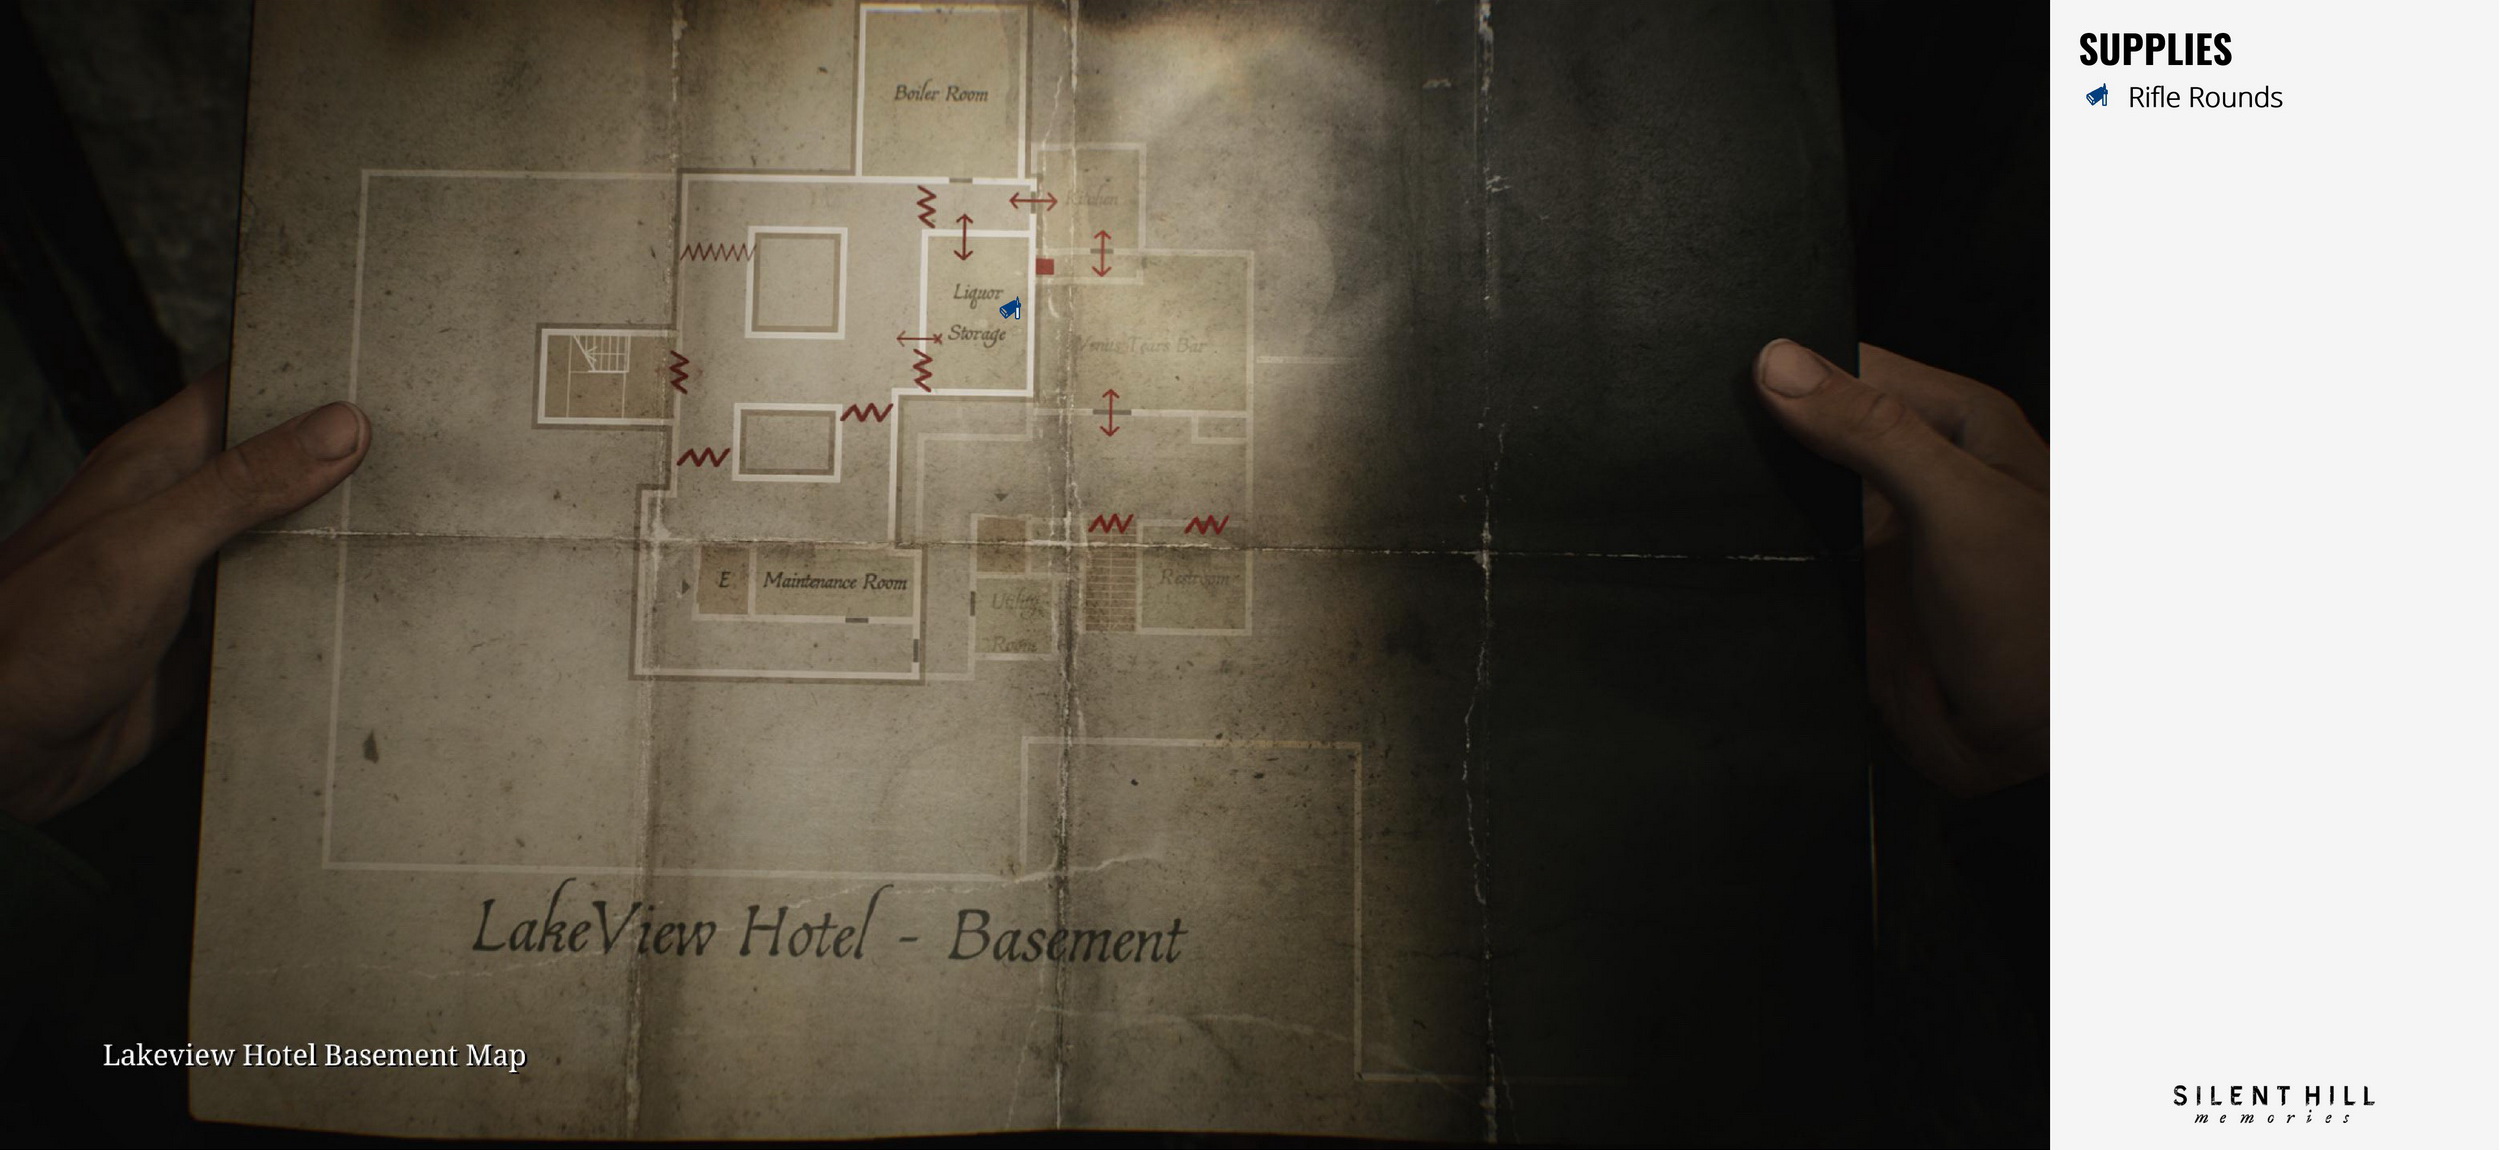
Proceed through the flooded basement. There's a Save Point in the Venus Tears Bar. In the Liquor Storage, you can grab Rifle Rounds from a shelf. Climb through the opening in the storage and enter the stairway for a cutscene.
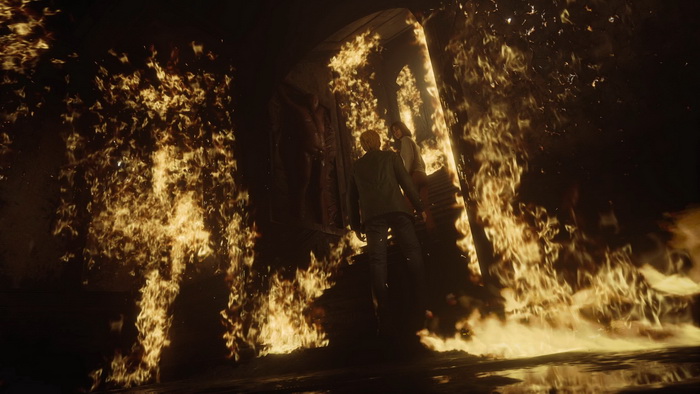
After the cutscene, go upstairs.
First Floor
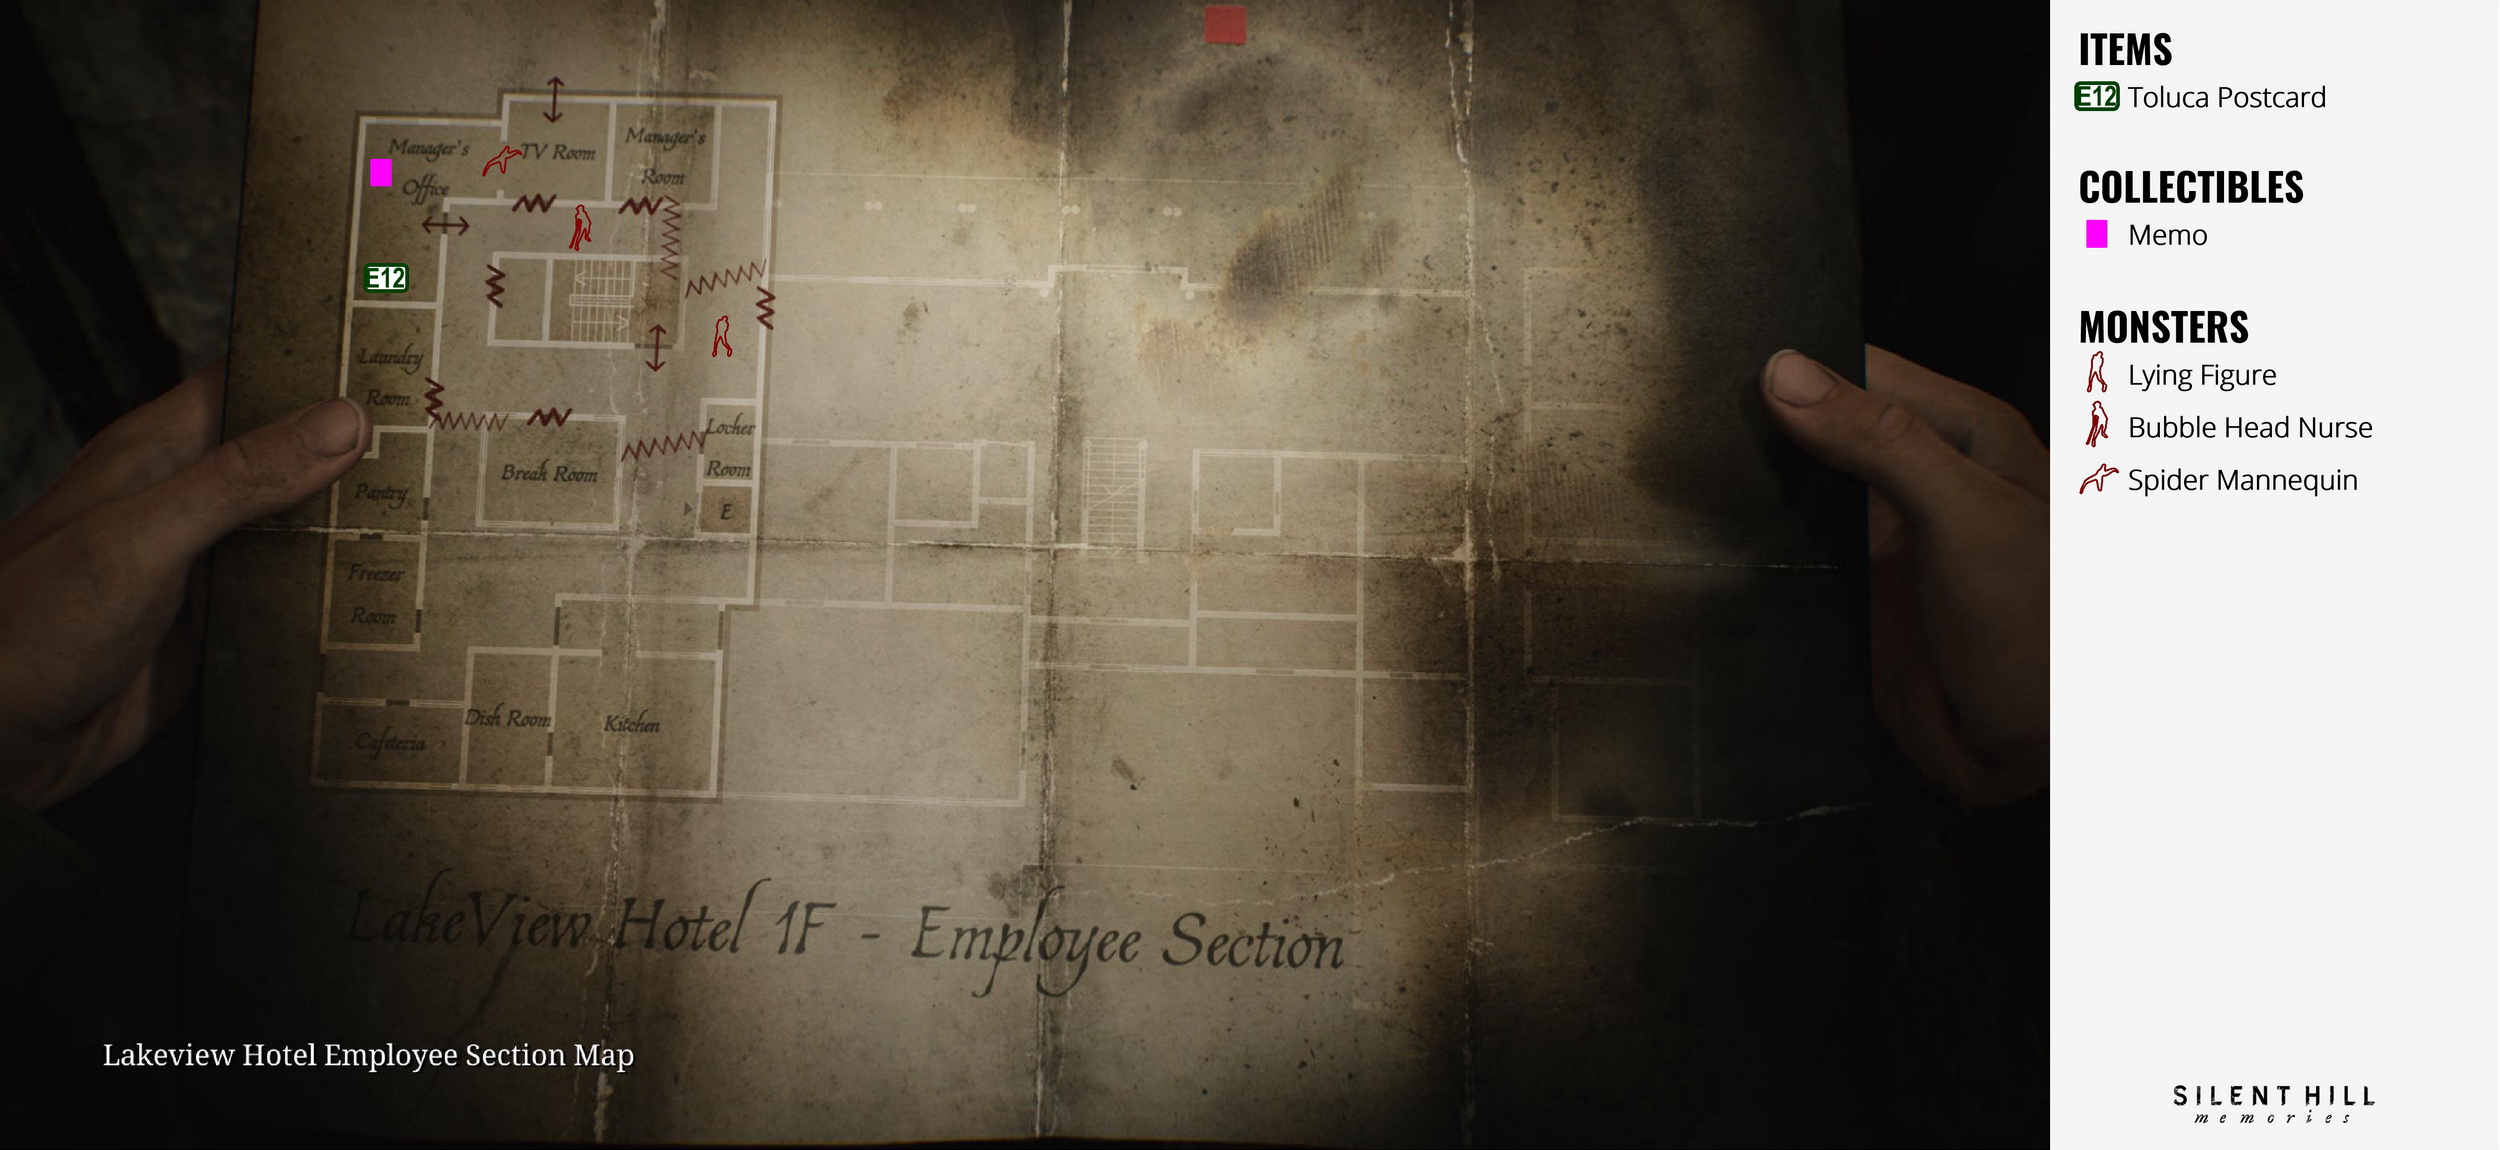
On this floor, you will find three half-dead monsters that do not attack James. You can choose to kill or spare these monsters – this will affect your ending. Enter the Manager's Office and find Memo #68: Burned Note on a desk.
 |
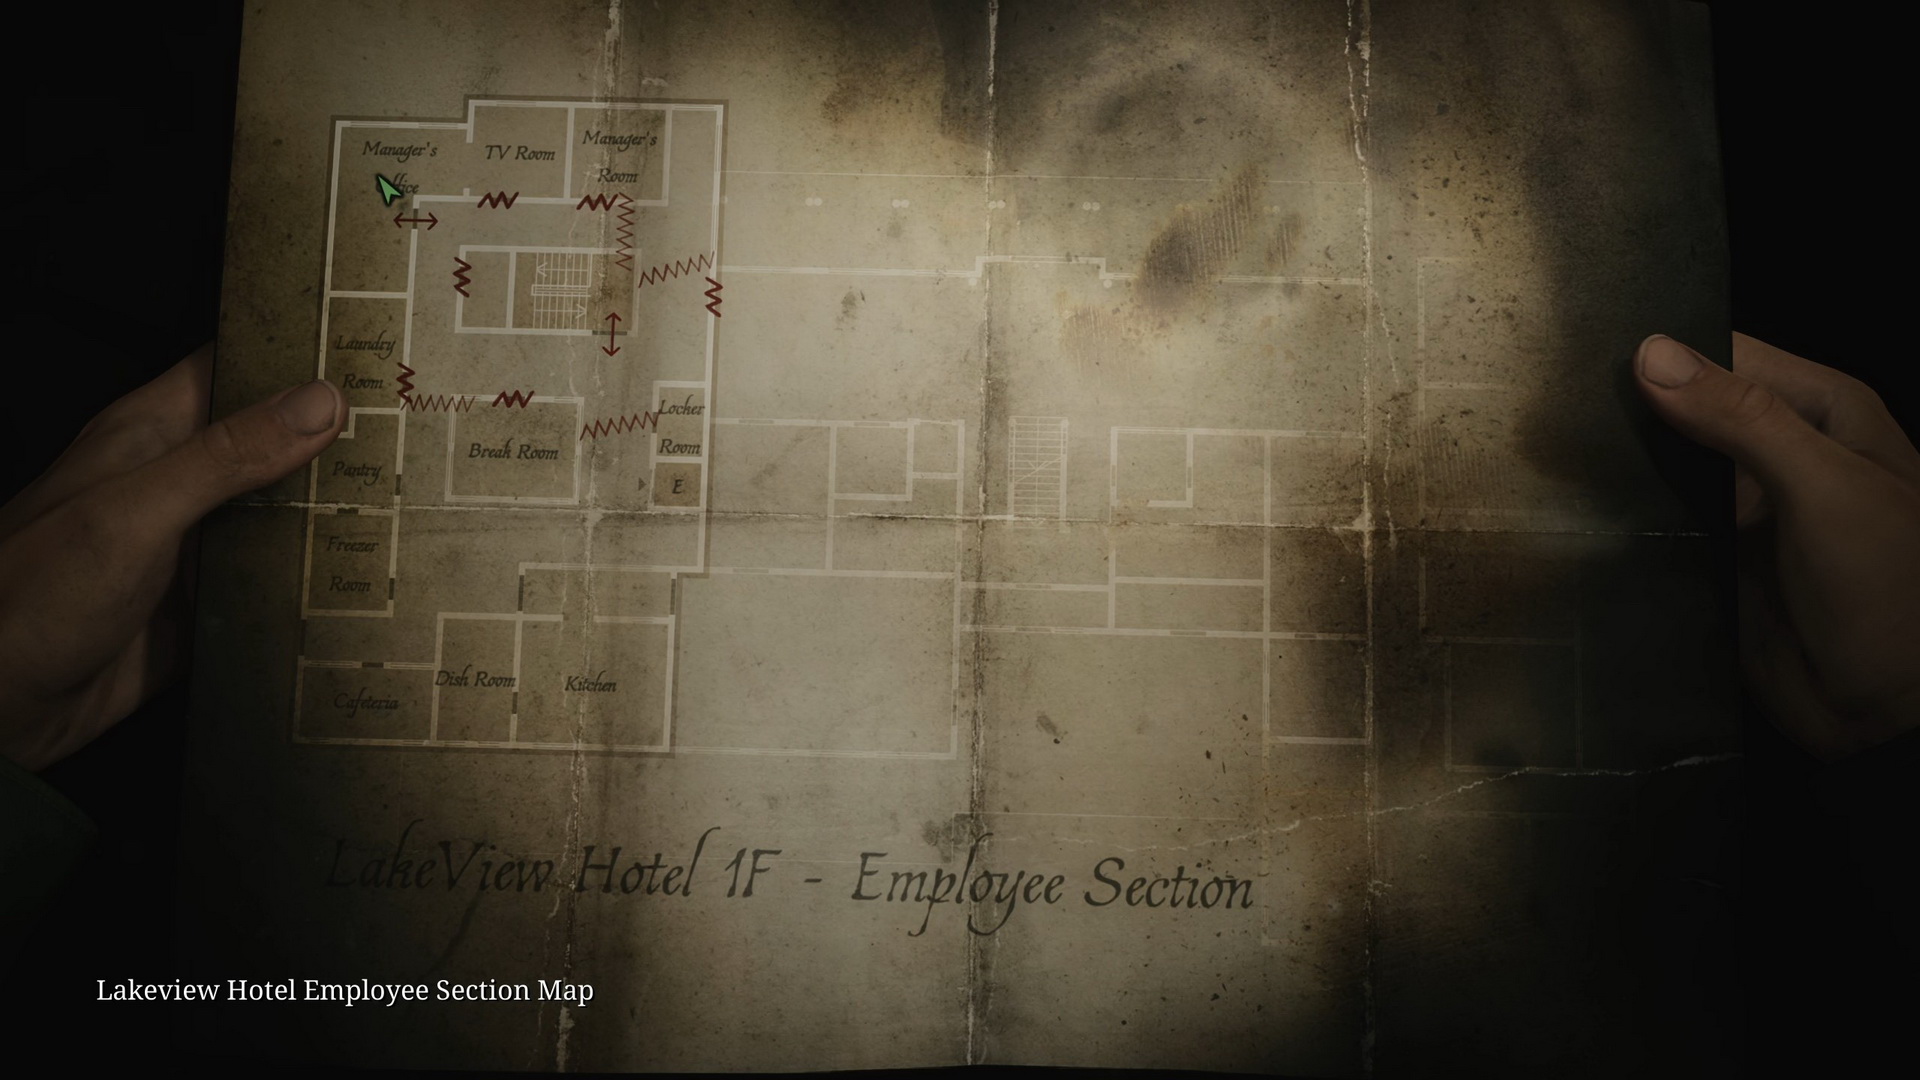 |
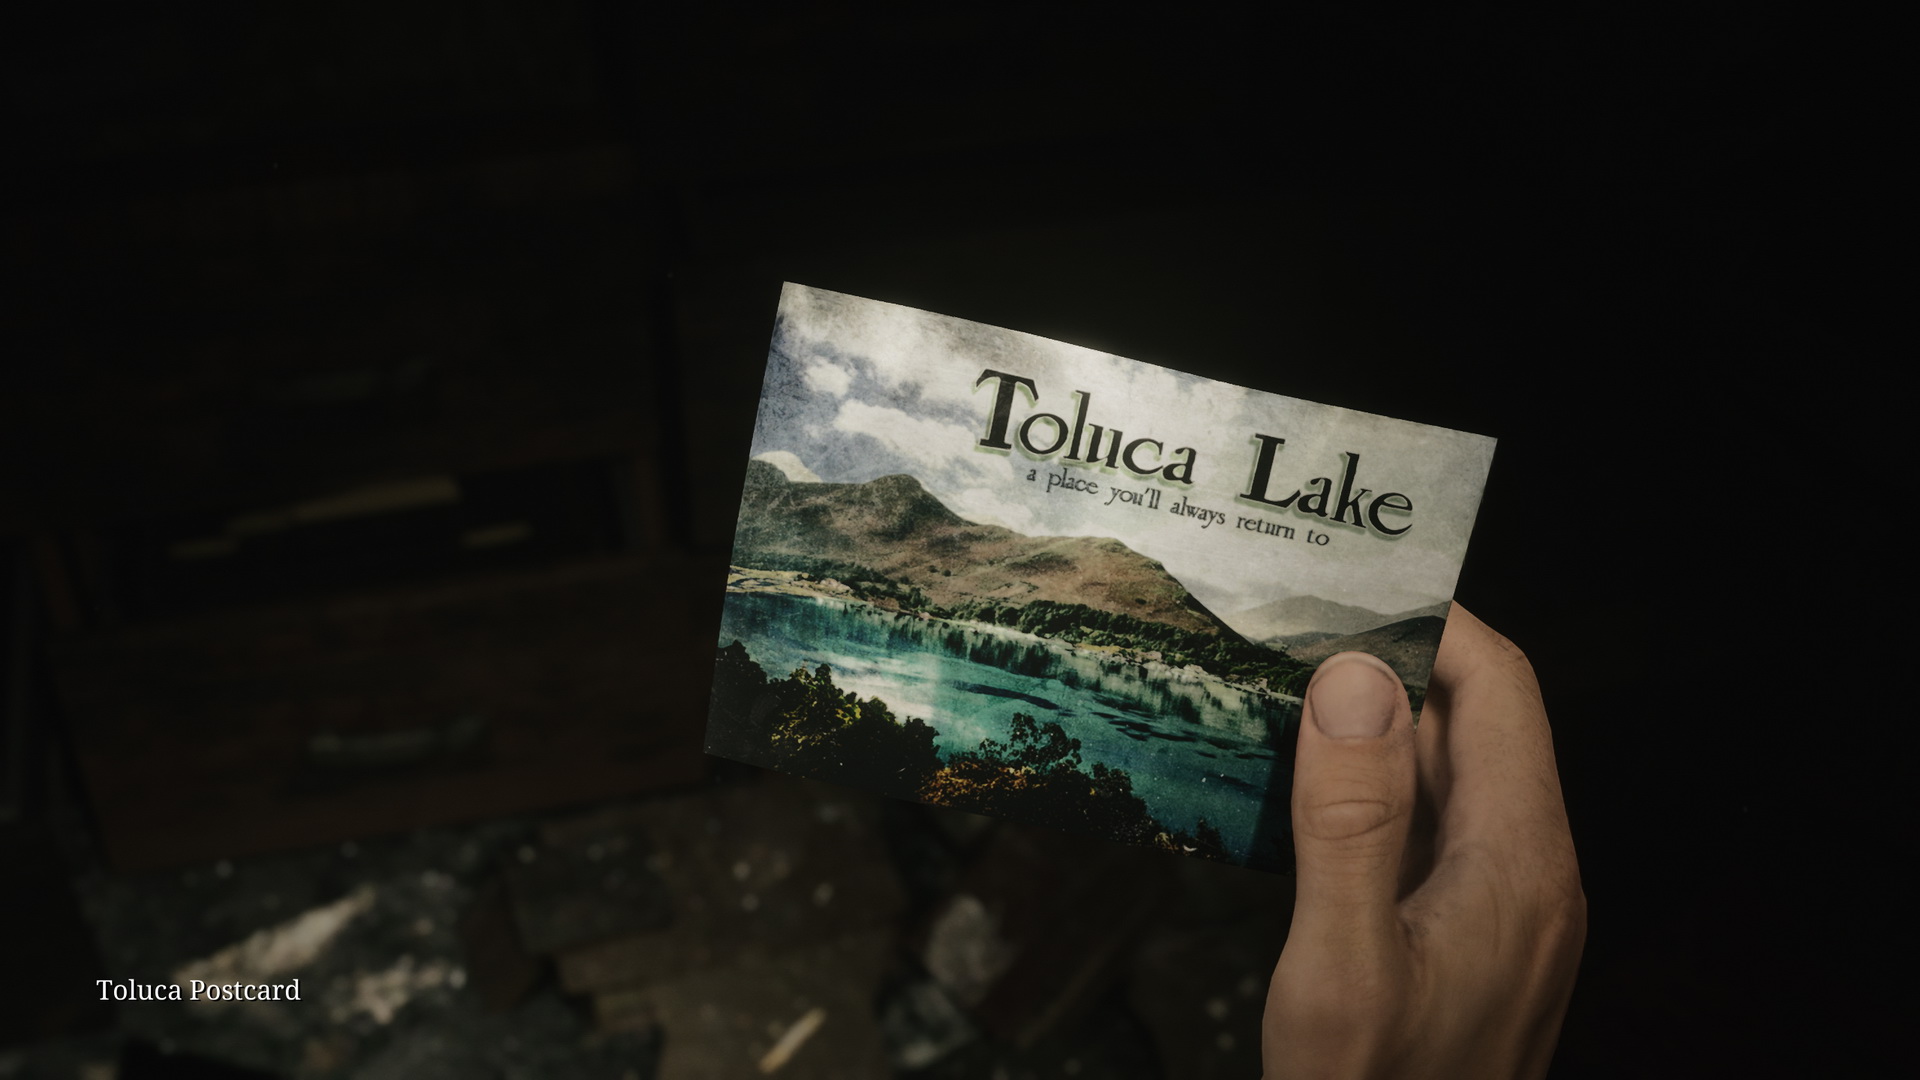
New Game+ Item: Toluca Postcard |
Proceed through the TV Room and use the red door. After a long corridor, you will reach a room with a huge 9-red-square Save Point. Something big is coming up, so you had better save your game. Enter the double doors to the right of the save point.
Boss: Two Pyramid Heads
It is time to face James' biggest enemy, but now there are two of them. This fight is relatively simple and predictable, but it will take time to finish the opponents. Pyramid Heads' primary attack is thrusting with a spear. If you get too close to them, they will try to hit you with a spear, and they can also throw their spear from a distance, so you will have to watch out and dodge them. Note that the two Pyramid Heads share the same health, so it doesn't matter which one you hit.
If you wish to keep yourself safe, you should keep your distance and use your firearms for this battle if you have enough ammo to spare (note that this is not the final boss battle, and you will need ammo later). Make 1-2 shots with the rifle or the shotgun or 3-4 shots with the pistol, dodge Pyramid Heads' attacks and change your position. Reload in a timely manner while strafing and use your health supplies as necessary (there are more supplies in the corners of the room if needed). It should take around 22-24 rifle shots and more than 60 pistol shots to finish the battle on standard difficulty. Note that the rifle is slow to fire and reload, and the arena is small, so shotgun and handgun work better here.
Alternatively, you can use your steel pipe to conserve ammo, but that will require you to time your dodge carefully. Let the enemy approach, dodge their attack and attack from behind by landing one or two blows with the pipe. It will take you only around 22 hits on standard difficulty. It will also be a much quicker fight than using your firearms, albeit a bit riskier.
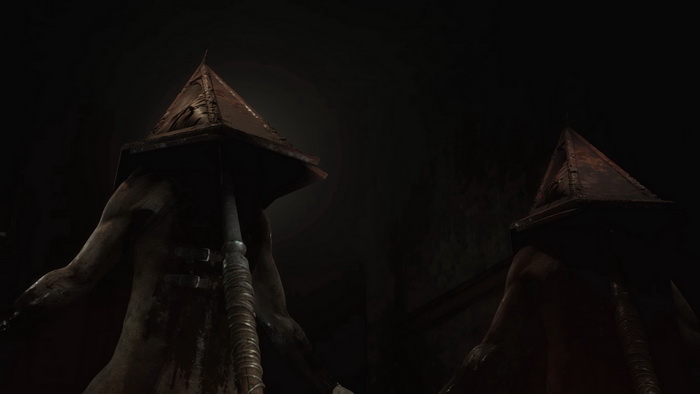
After the fight is over, approach the defeated Pyramid Heads and pick 123 Rust-Colored Egg and 124 Scarlet Egg from their hands. Insert both eggs in the room doors to continue. Choosing the door affects the ending – see the Endings section.

Move through the extremely long corridor while listening to Mary's monologue. You have an option here to listen to it in full or skip its end by running through the corridor and entering the door at the end. This choice will affect the ending – see the Endings section.
Turn right to find Handgun Ammo and a Syringe on the floor as well as Strange Photo #26: "SHAPE FORCES THE MIND" at the start of the metal catwalk.
 |
Turn around and collect more supplies on your way: 2 boxes of Shotgun Shells in front of the door, more Handgun Ammo and Rifle Rounds in the corner. Go upstairs for the cutscene.
Boss: Mary
This is the final boss encounter. Mary will not give up easily, and you will need to work hard to defeat her.

Phase One
During the first phase, Mary stays hovering above the ground. Occasionally, she transforms into a swarm of moths and reappears elsewhere in the arena. The boss's primary attack is using her tentacle when James is within her reach. She can also grab James and strangle him with it, so you will have to stay away and dodge. Mary also sends swarms of moths from a distance, which can be quickly dissipated by hitting the swarm with the pipe or shooting at them. Mary can also use a sound attack to stun James briefly.
The rifle seems to be the perfect weapon in this phase, as you have enough room to take the boss down at a distance and fully utilize the weapon's long-range damaging power. Additional supplies are around the room if you need them. After around 10 rifle or shotgun shots at standard difficulty, Mary will change her form and drop James underground.

Phase Two
During the second phase, you must observe the sparks from above to see where Mary is moving and steer clear when she drops down from the ceiling. You will also have to avoid the usual moth swarms. Collect supplies lining the walls as needed and move around the corridors until you find Mary hanging from the ceiling and exposed to your attacks. Use the shotgun or the handgun to finish this phase. It should take you around 8 shotgun blasts at standard difficulty.
Phase Three
In the final phase, Mary stays on the ground, trying to approach James, attacking with her legs quickly. She will continue to use her transforming into a swarm ability when you have to notice where she will reappear. She will also lunge towards James, knocking him down if you don't dodge this attack.
The rifle works well here from a distance, like in the first phase, although the shotgun might serve you better from a closer range. From time to time, Mary will roar, stunning James briefly. After the third roar, you know you are close to defeating the boss. After Mary is down, approach her to deliver the final blow with a weapon of your choice and enjoy your ending.

Congratulations! You have completed the game. Now, you can replay the game for another ending. You will also unlock the New Game+ mode with extra settings, items, weapons and even more endings.
| 11. Lakeview Hotel |