Puzzle Solutions
On this page, you will find the solutions to each puzzle in Silent Hill 2 Remake (2024) for each difficulty level (light, standard and hard). In addition to the quick answers, the full solution method will be explained in depth.
For the original Silent Hill 2 puzzle solutions, please go to this page.
Contents
Eastern South Vale
Wood Side Apartments
Blue Creek Apartments
Western South Vale
Brookhaven Hospital
Otherworld Hospital
Silent Hill Historical Society
Toluca Prison
Labyrinth
Lakeview Hotel
Eastern South Vale
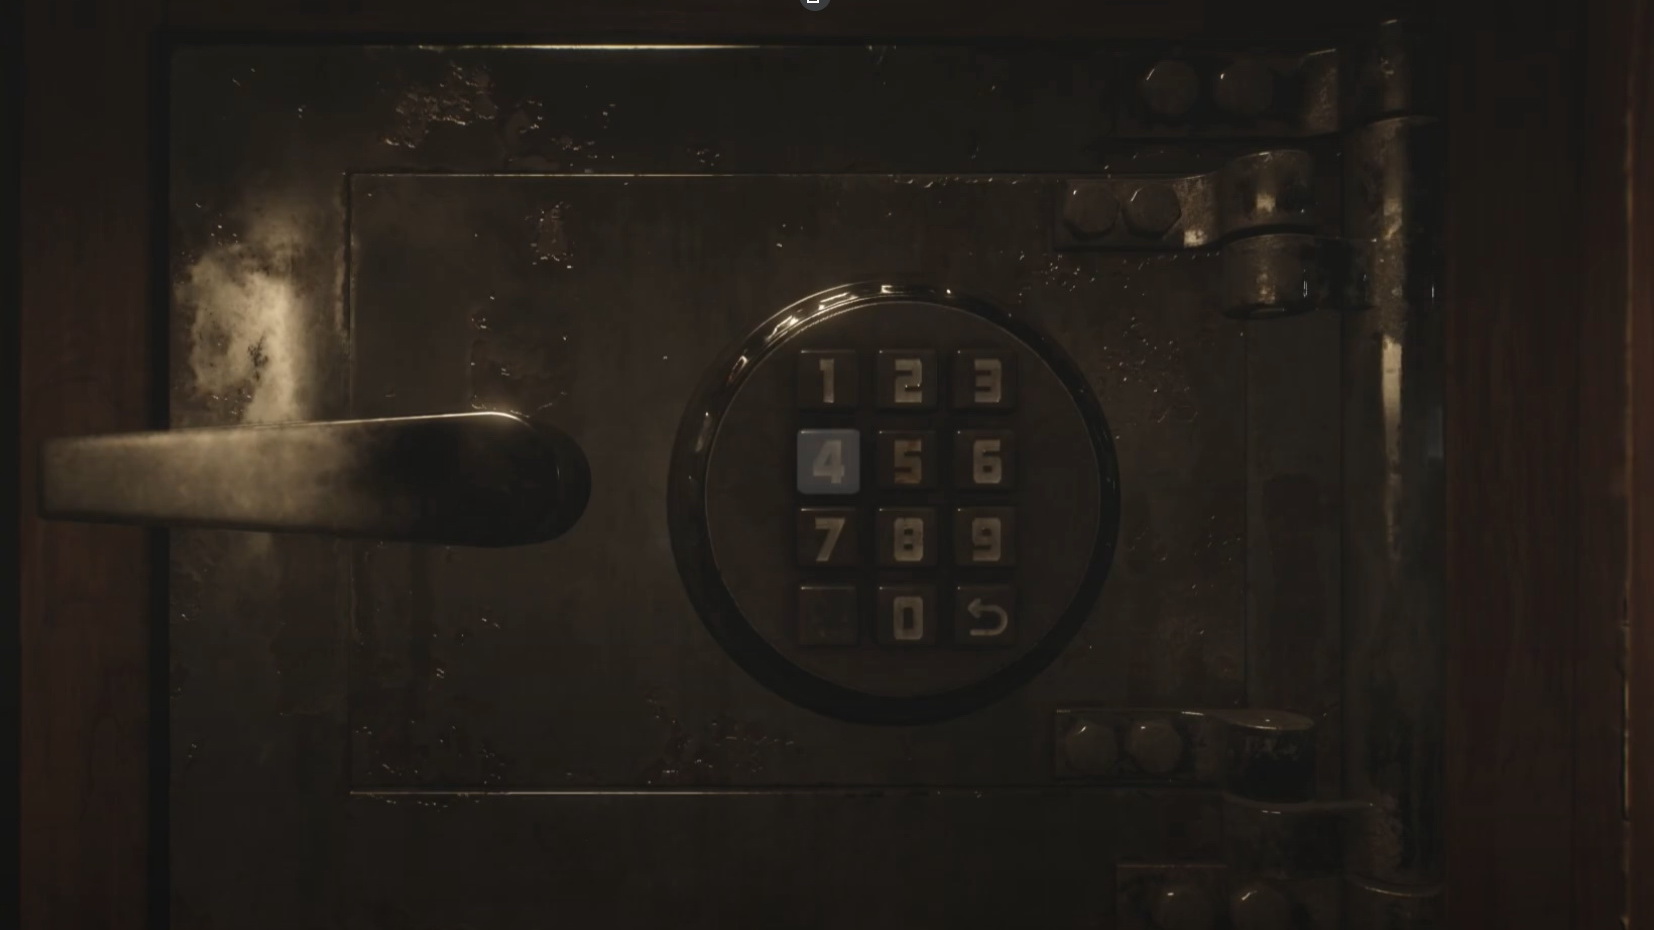
Grand Market Keypad
This puzzle is optional – the reward is supplies. Enter the corresponding back door code to get inside the store.
Light: 4442
Standard: 4444
Hard: 4446
The hint for the code comes from the Code Note found by the semi-truck on Sanders St.
Complete puzzle solution
|
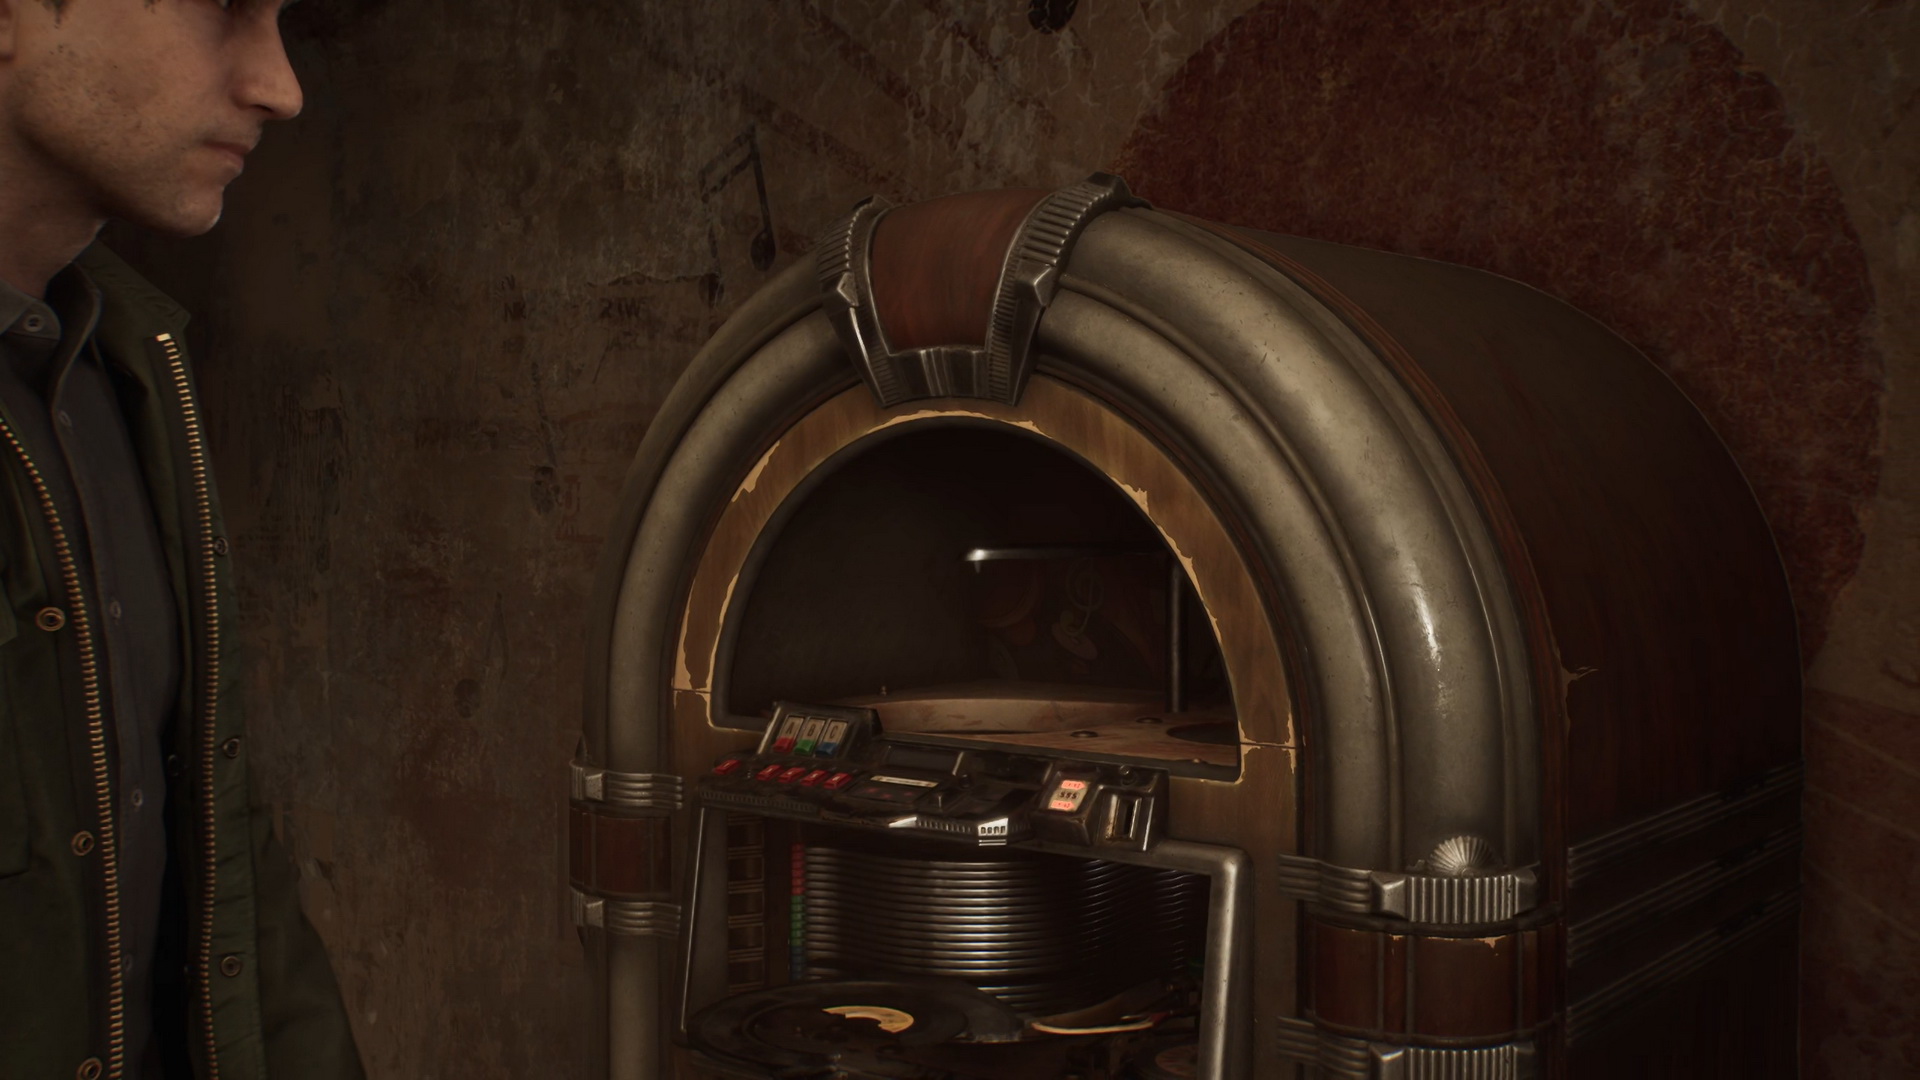
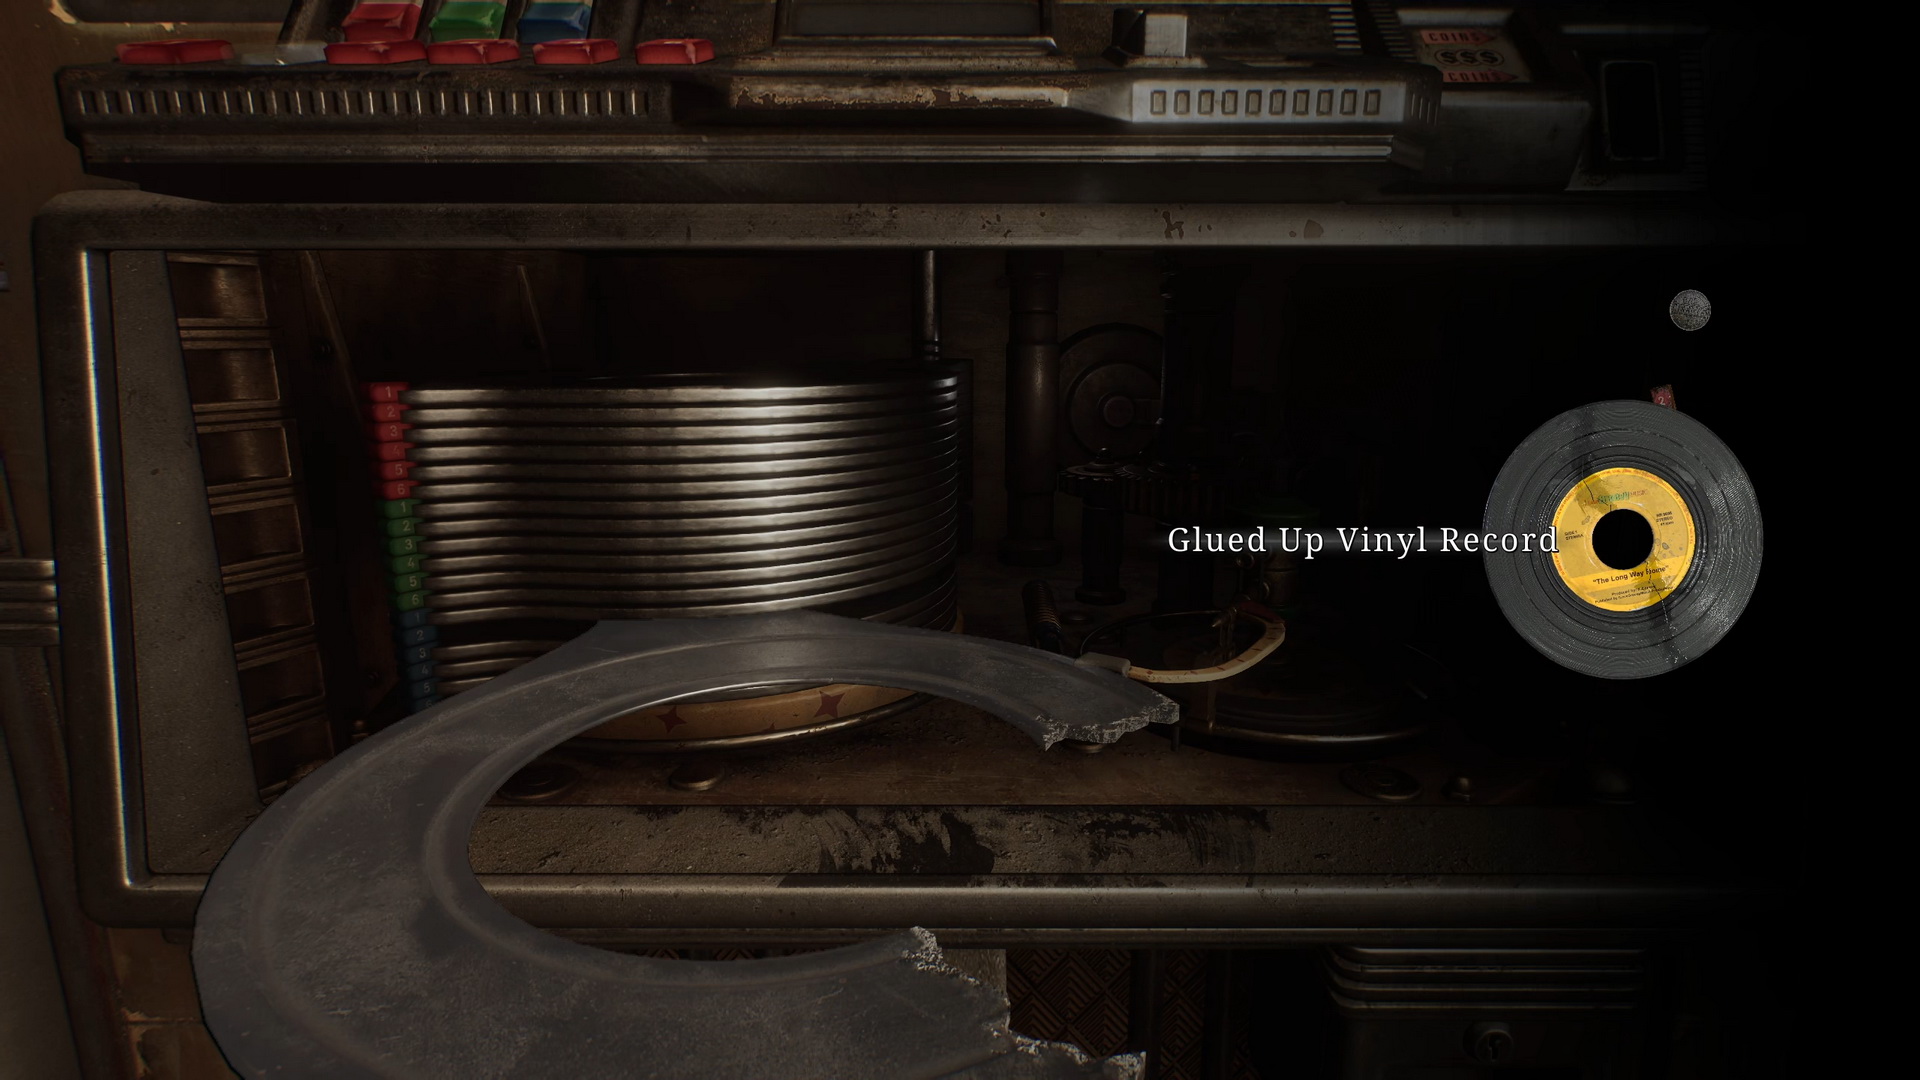
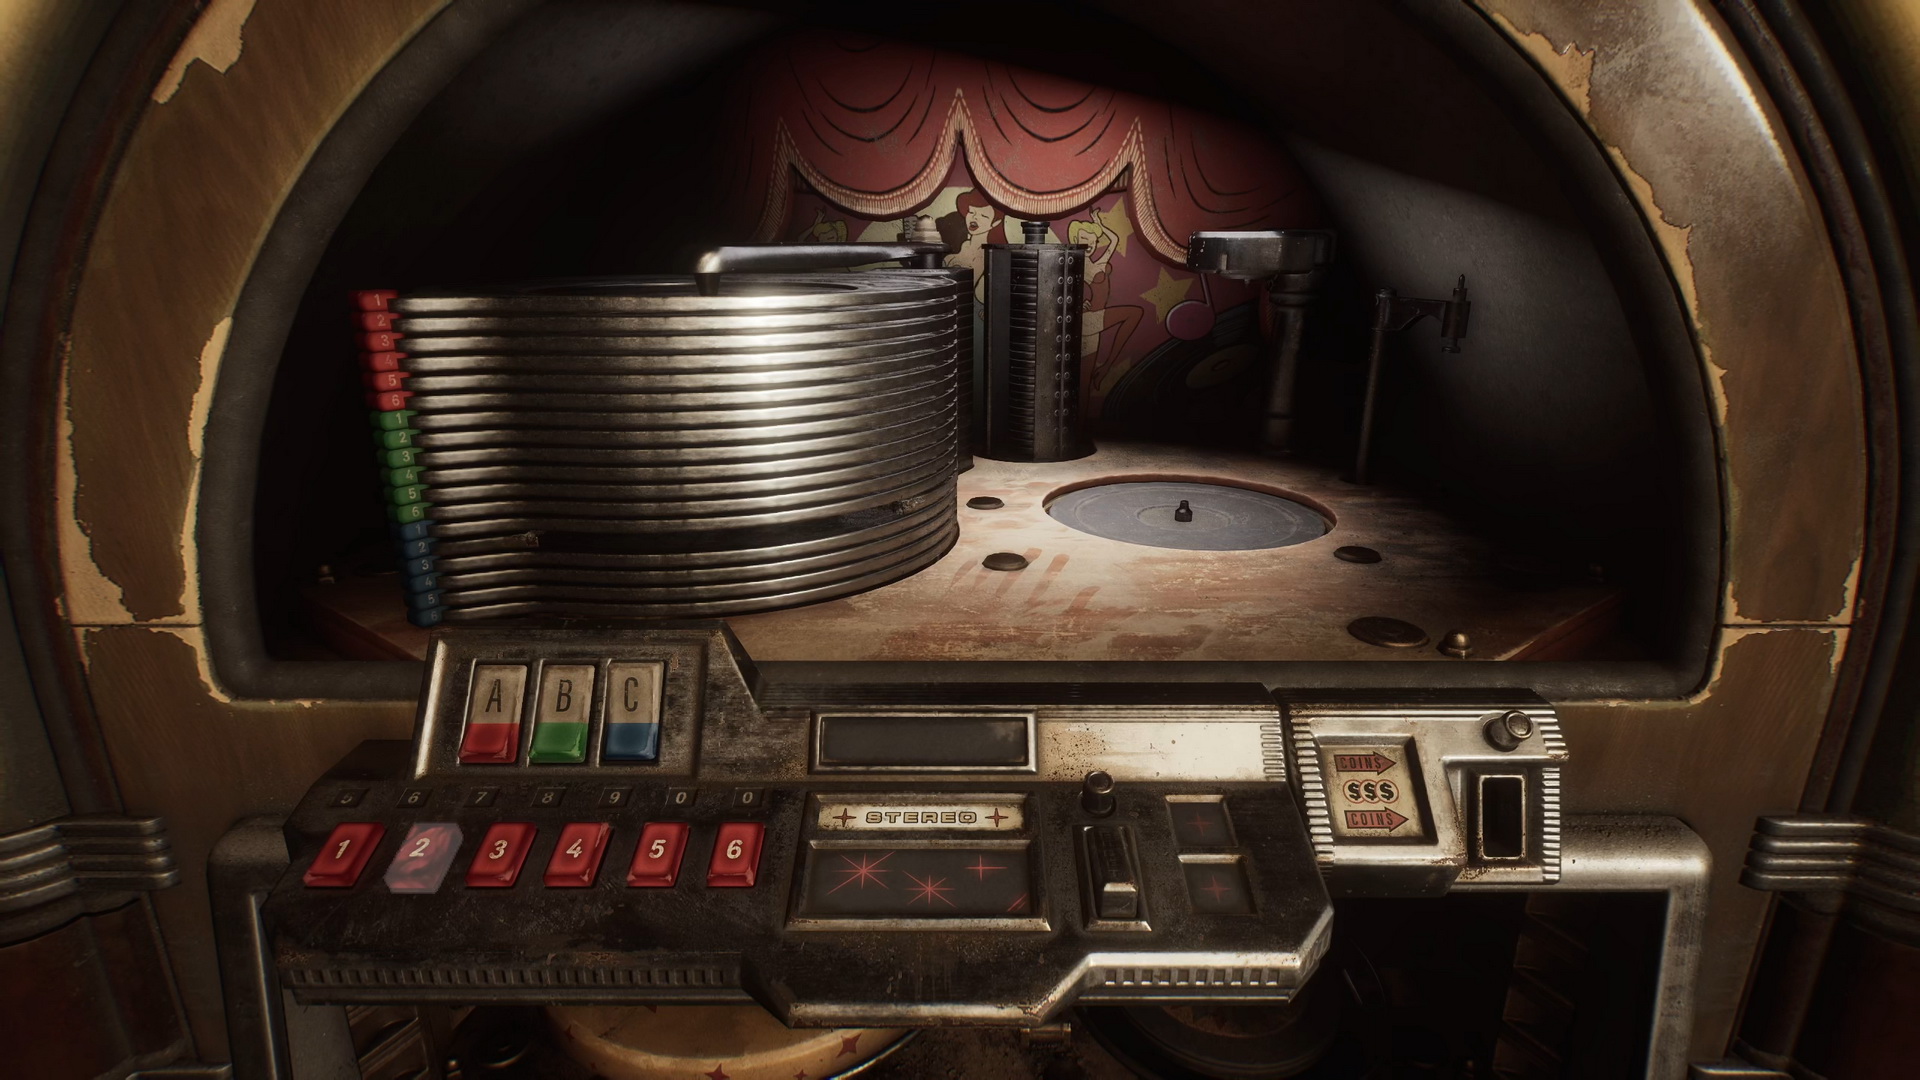
Neely's Bar Jukebox Puzzle
|
Collect the required items around the town:
- Neely's Bar Coin is in Texan Cafe's cash register. Turn the key and then press the button at the bottom to get the coin.
- Checking the jukebox in Neely's Bar will get you one half of a Broken Vinyl Record.
- Another half of the Broken Vinyl Record and Vinyl Glue are on the table behind the glass inside the Groovy Music shop.
- The missing Jukebox Button is found in the bathroom hole at Apartment 9 on the last floor of Saul Street Apartments.
|
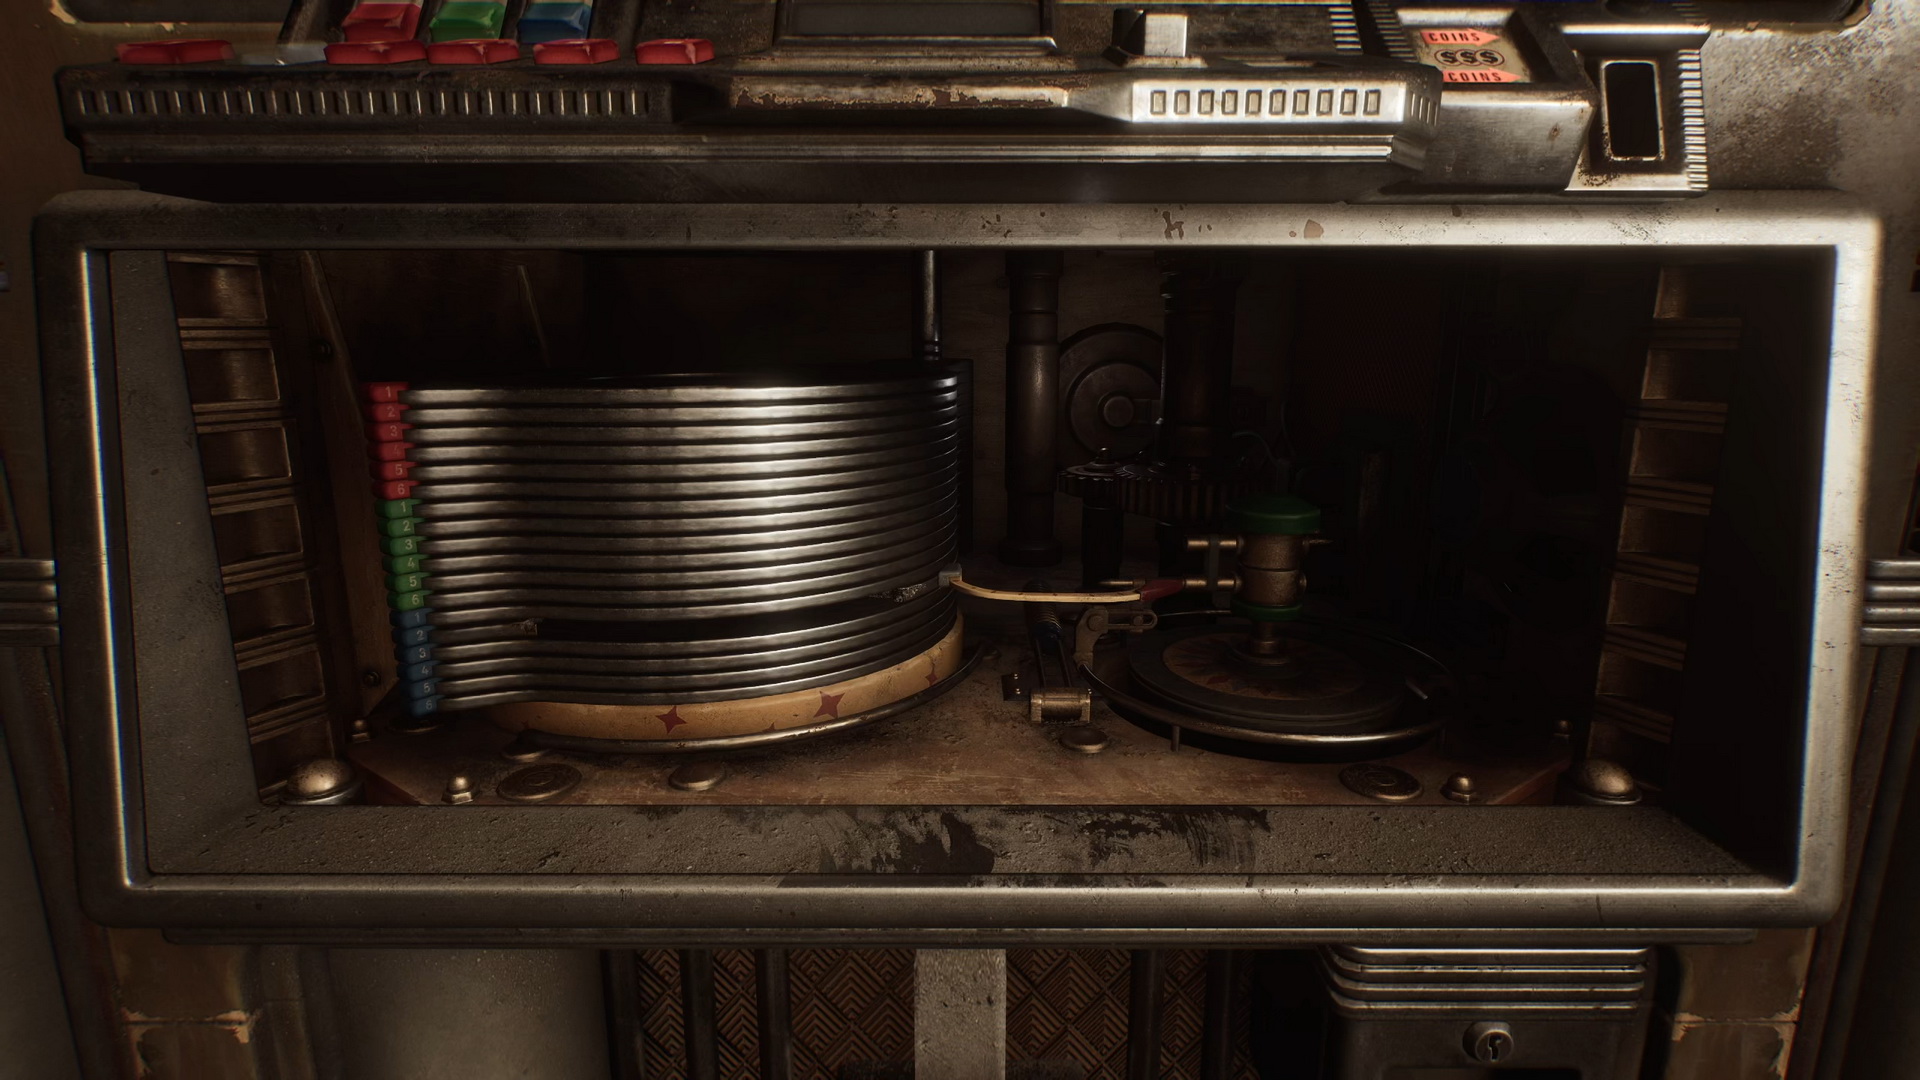
Quick puzzle solution:
- Manipulate the parts at the bottom of the jukebox: rotate the green cylinder, move the red arm to connect to the cylinder, move the cylinder away, and lower the blue cog down.
|
- Rotate the green cylinder twice and insert the Glued Up Vinyl Record.
|
- Highlight the missing button No. 2 and attach the Jukebox Button.
- Highlight the coin slot and insert the Neely's Bar Coin.
- Press buttons C and 2 to play the record.
Complete puzzle solution
|
Wood Side Apartments
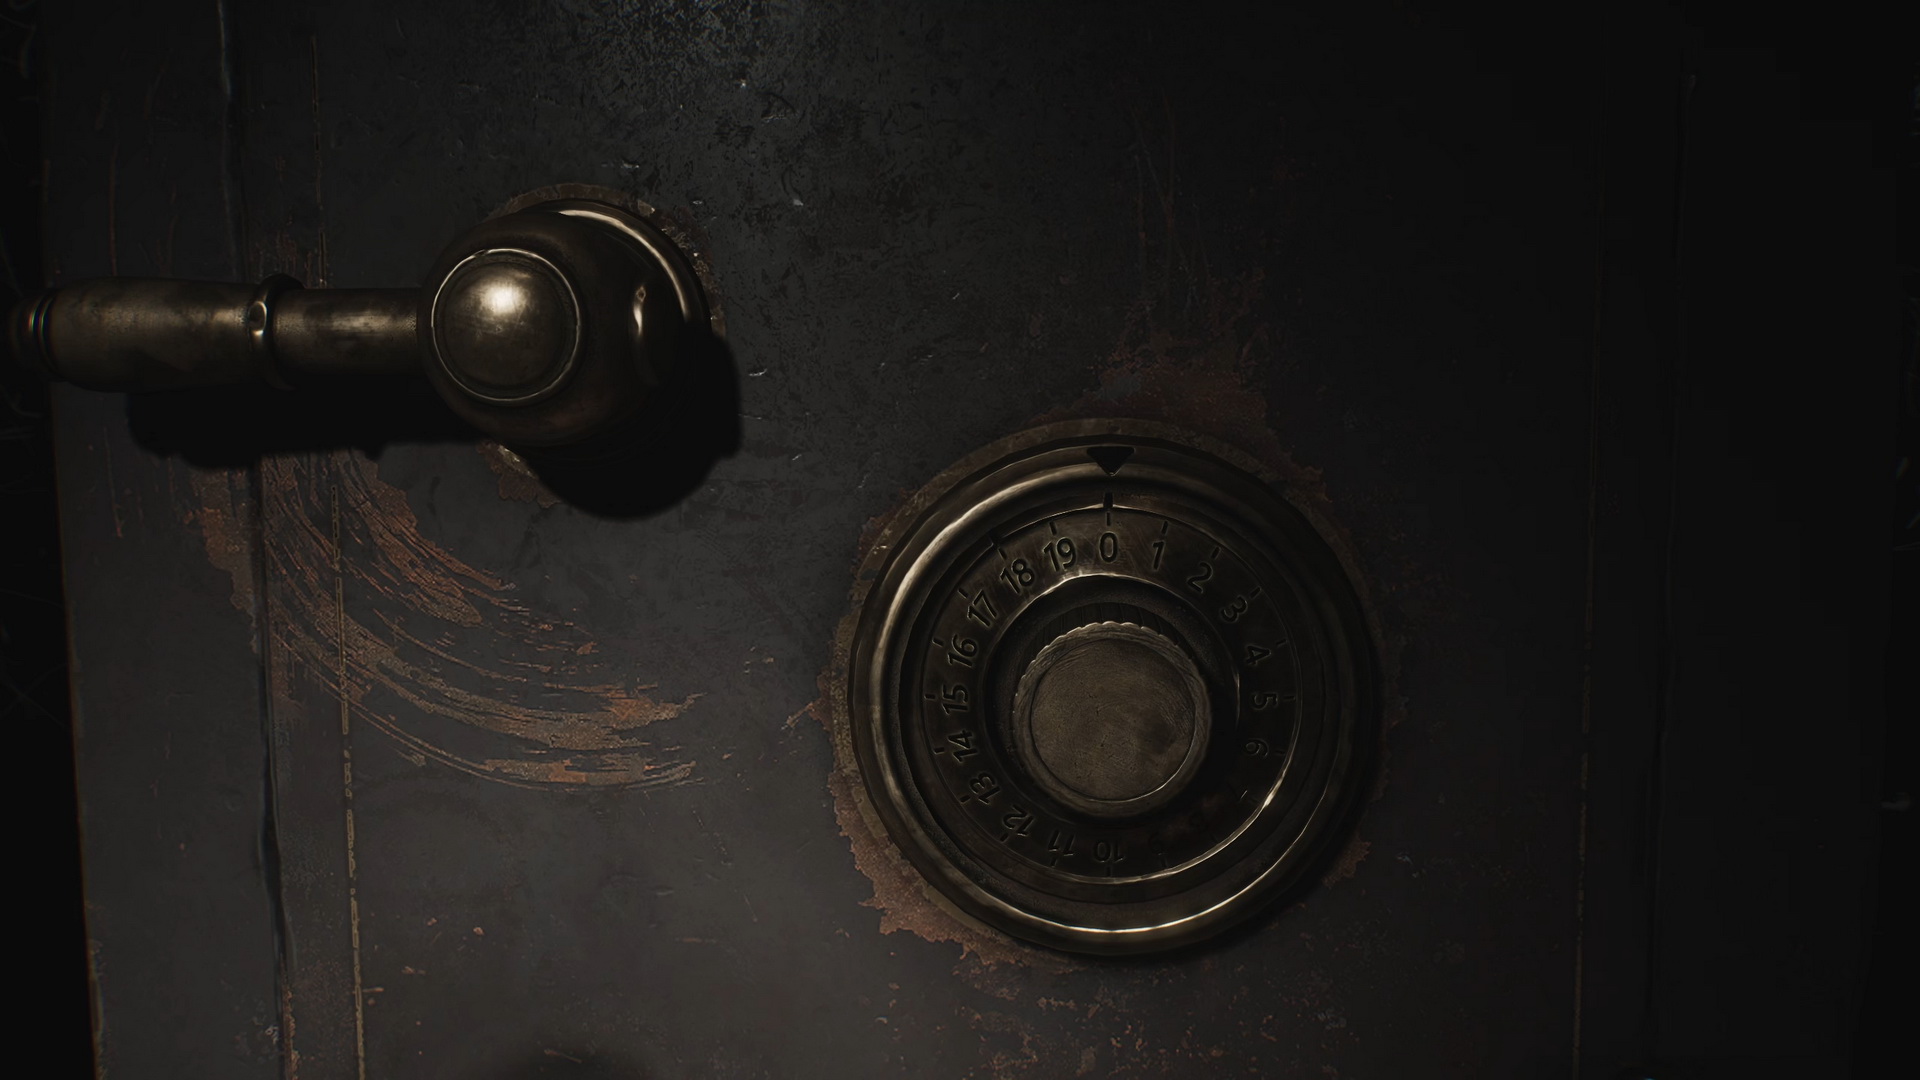
Room 206 Safe Code
Use the following combination for the safe:
Light: Right to 15, left to 11, right to 13
Standard/Hard: Right to 13, left to 7, right to 11
The hints for the puzzle come from the poem behind the safe and three drawings hidden around the room.
Complete puzzle solution
|
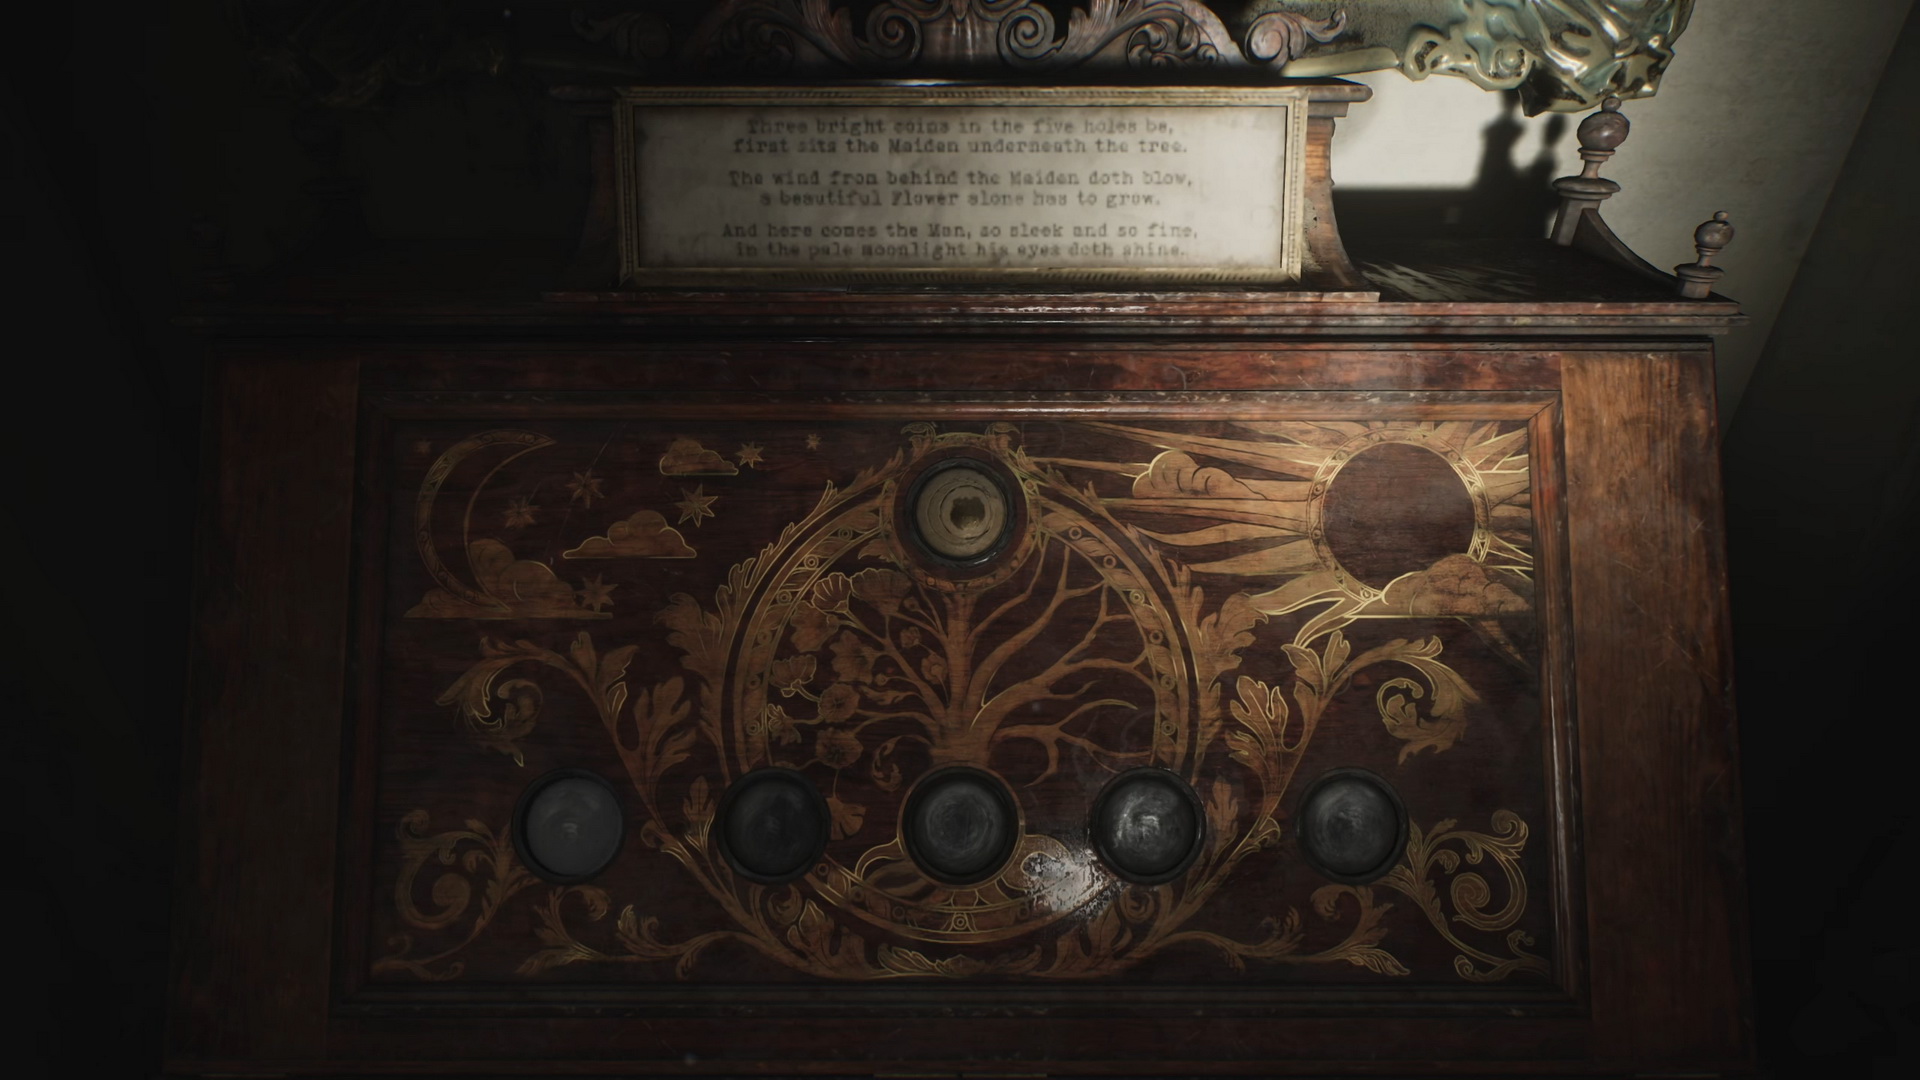
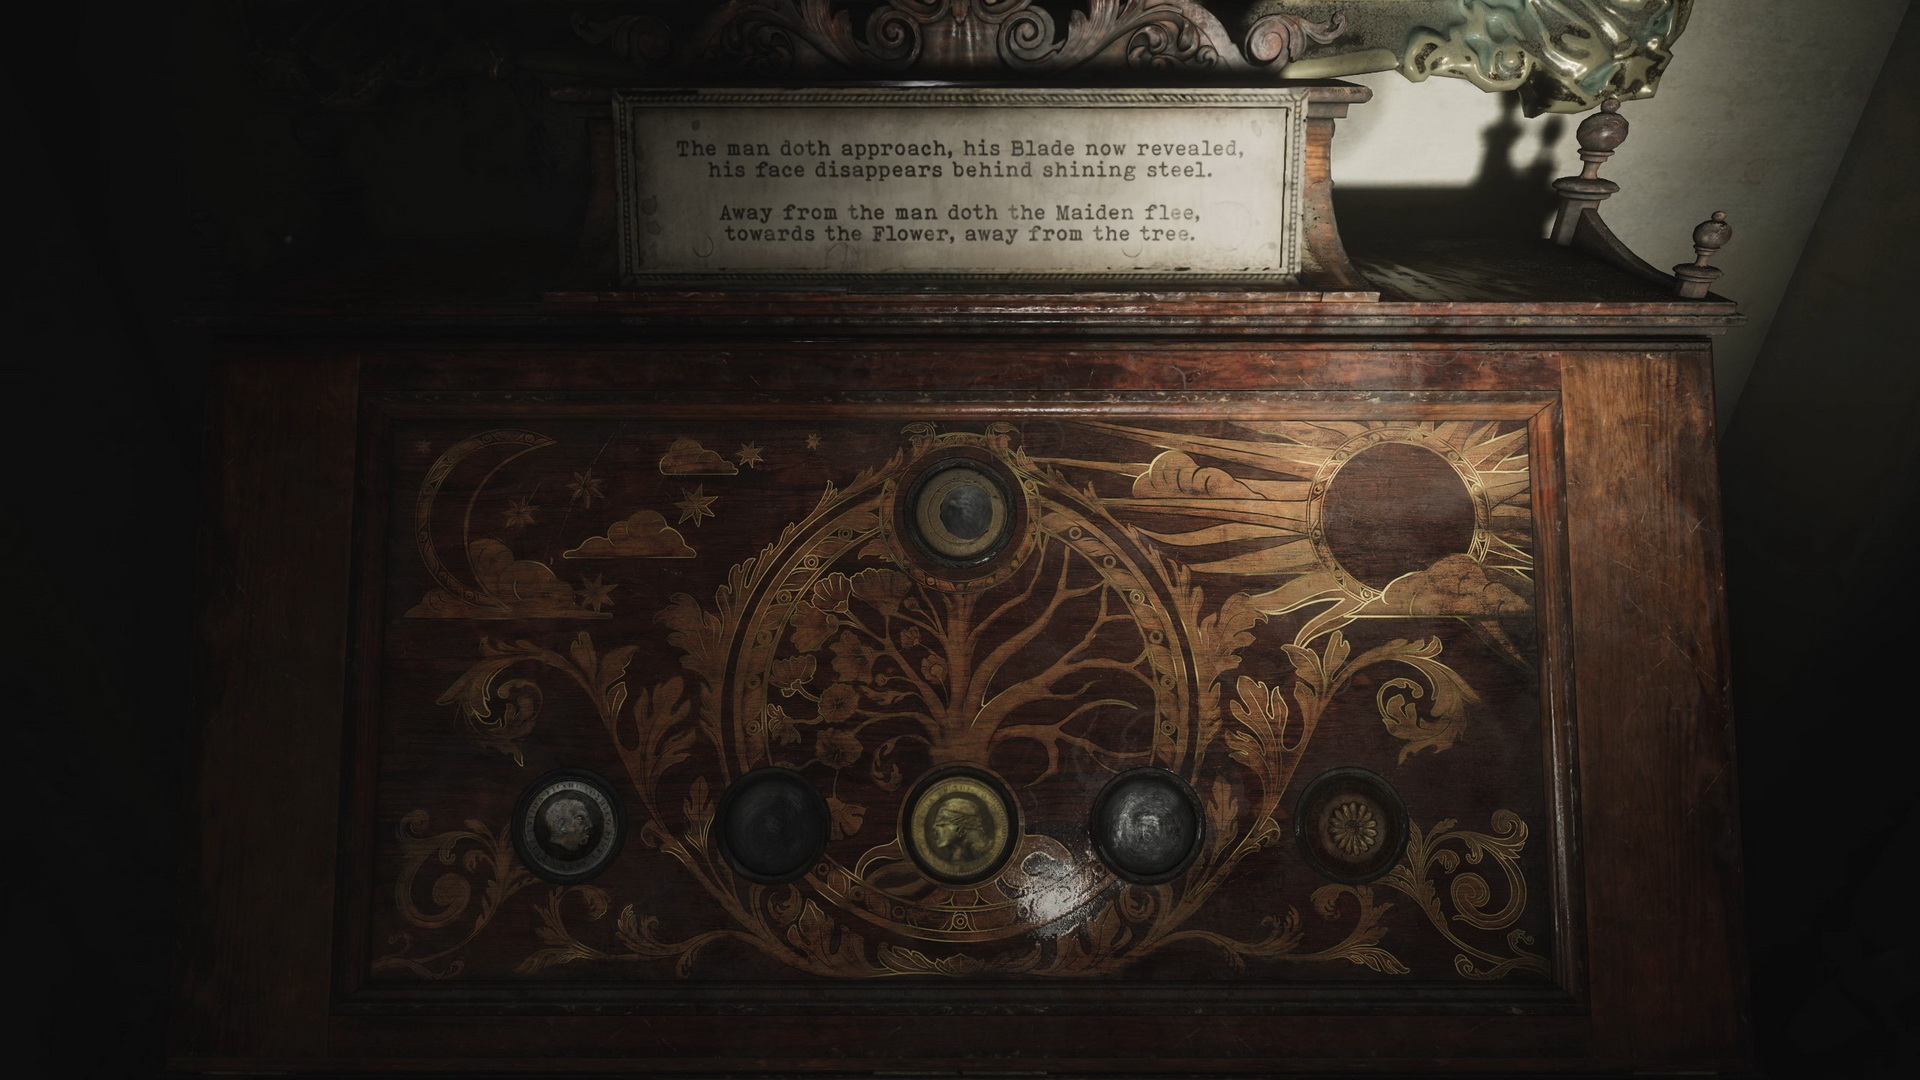
Coin Cabinet Puzzle |
Collect three coins around the apartment complex:
- Coin [Man] is found inside the safe in Apartment 206 after solving the safe puzzle.
- Coin [Woman] is stuck inside the clogged garbage chute. Collect the Canned Juice next to the 3F chute access and throw it inside to push it outside into the inner courtyard.
- Coin [Snake] is inside a red baby strolled inside the apartment pool. You will be able to get to the pool area through Apartment 116.
|
Quick puzzle solution:
Place the coins per poems for every stage. Flip the coins as necessary.
- Man - Sword
- Woman - Gravestone
- Snake - Flower
|
Light
| Moon |
|
Tree |
|
Sun |
| Man |
◯ |
Woman |
◯ |
Flower |
| Sword |
◯ |
Woman |
◯ |
Snake |
| Snake |
◯ |
Grave |
◯ |
Man |
Lastly, place any coin, Man, Woman, or Snake, into the top slot to finish the puzzle (affects the ending).
Standard
| Moon |
|
Tree |
|
Sun |
| Man |
◯ |
Woman |
◯ |
Flower |
| ◯ |
Sword |
◯ |
Woman |
Flower |
| ◯ |
◯ |
Man |
Grave |
Snake |
Lastly, place any coin, Man, Woman, or Snake, into the top slot to finish the puzzle (affects the ending).
Hard
| Moon |
|
Tree |
|
Sun |
| Man |
◯ |
◯ |
Grave |
Snake |
| Grave |
Sword |
Flower |
◯ |
◯ |
| ◯ |
Man |
Woman |
◯ |
Snake |
Lastly, place any coin, Man, Woman, or Snake, into the top slot to finish the puzzle (affects the ending).
Complete puzzle solution
Blue Creek Apartments
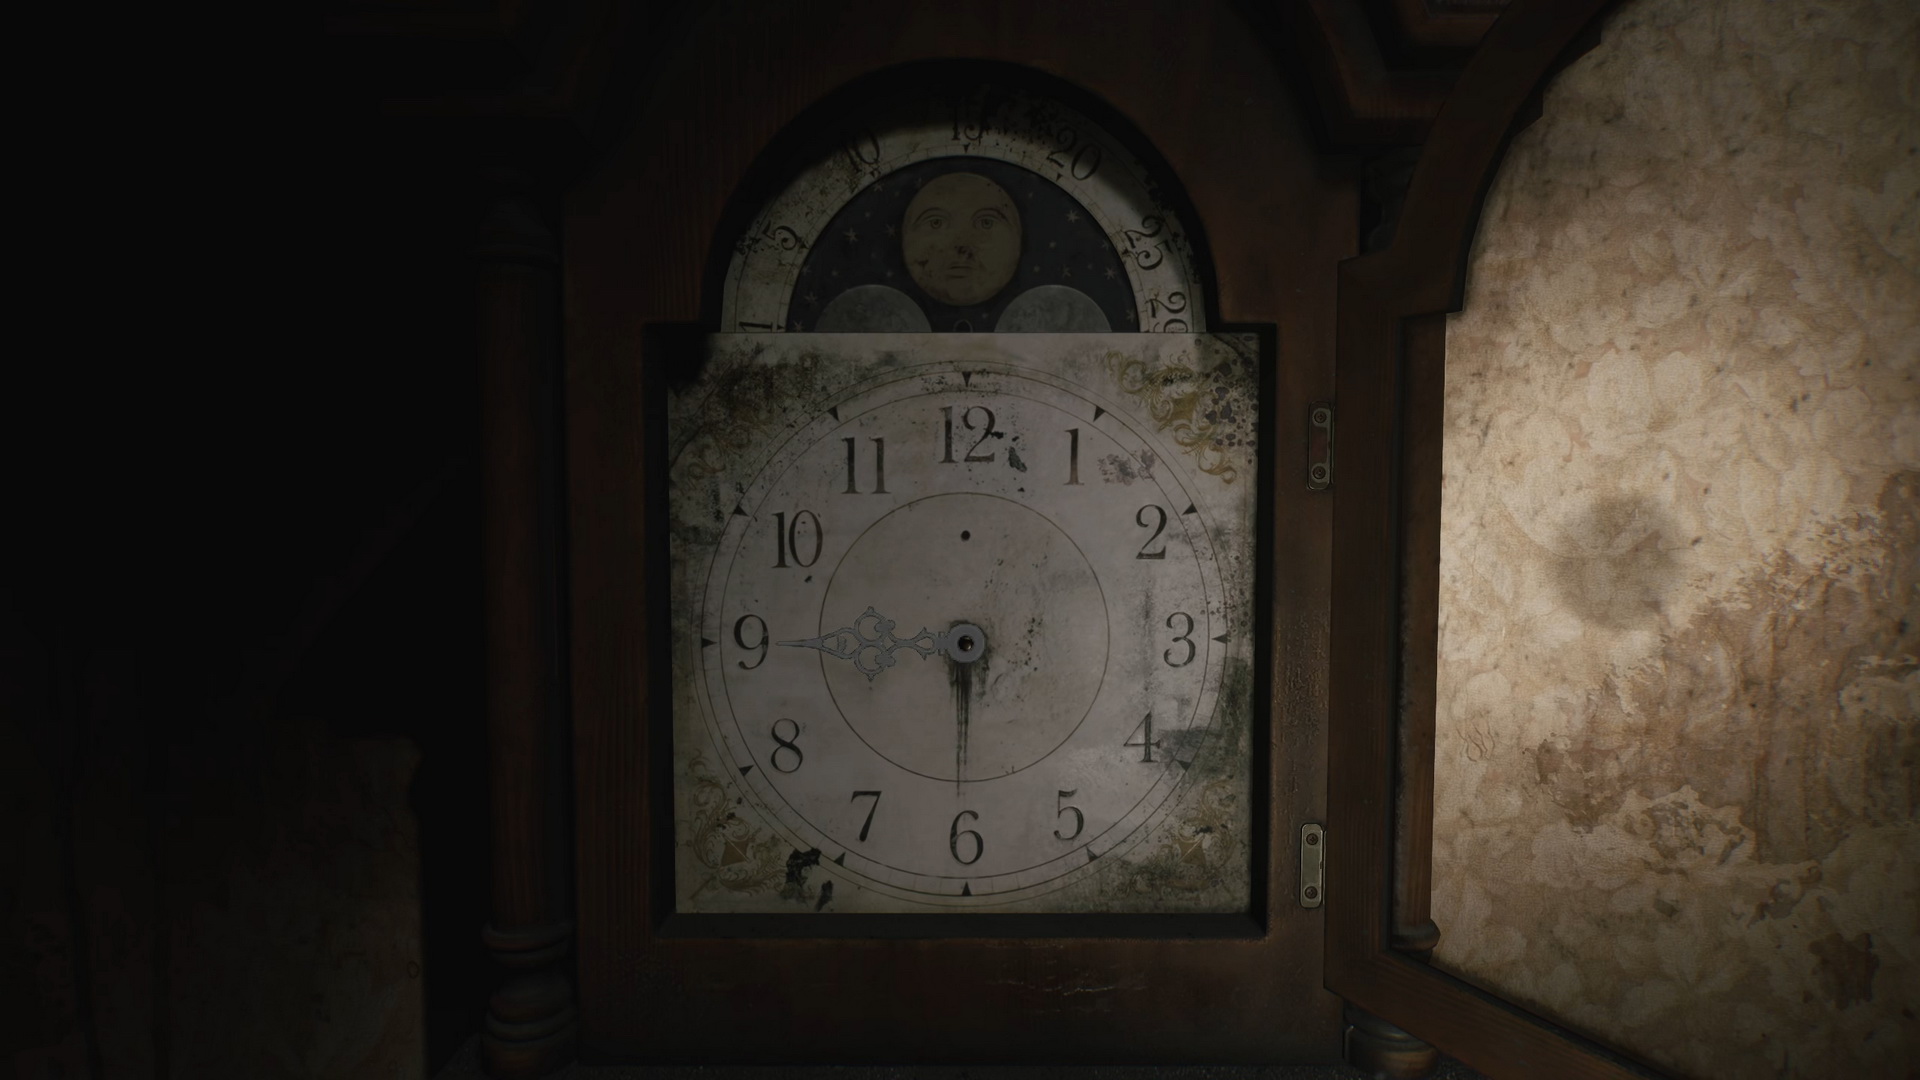
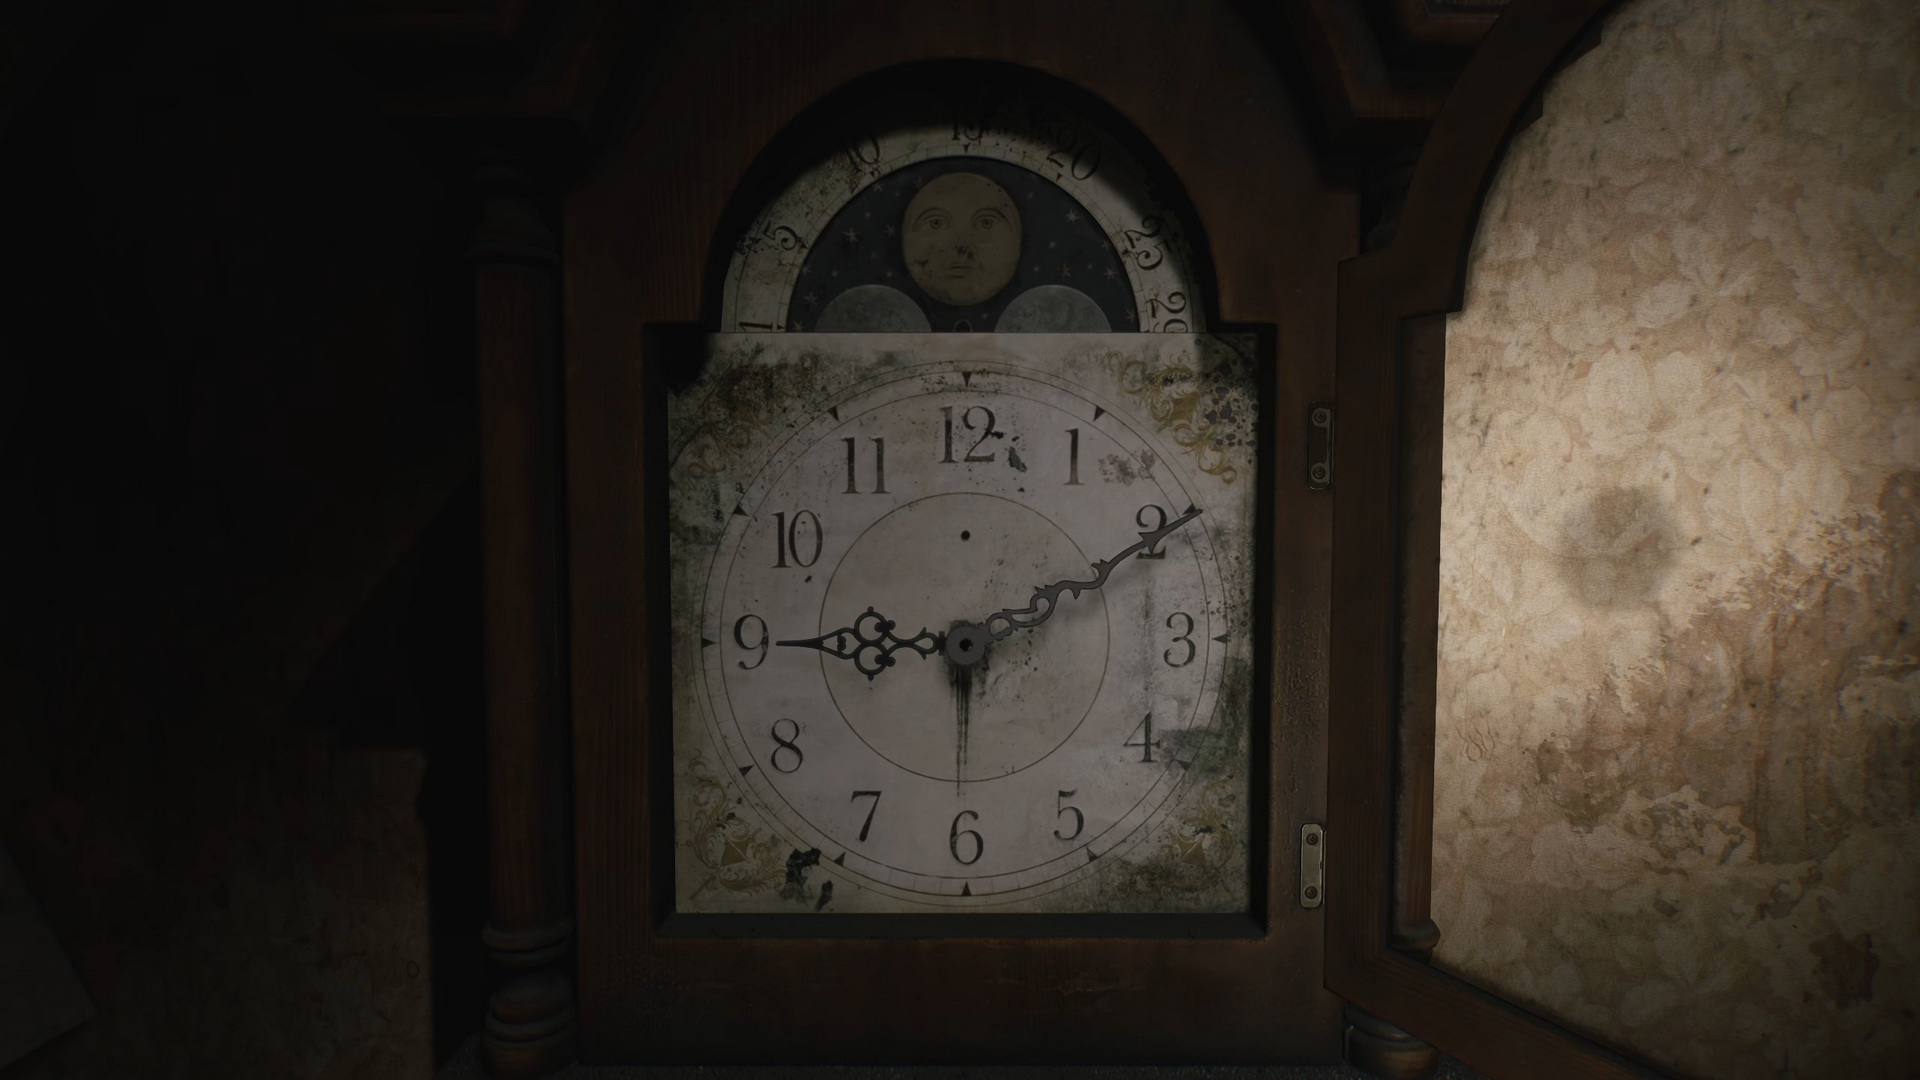
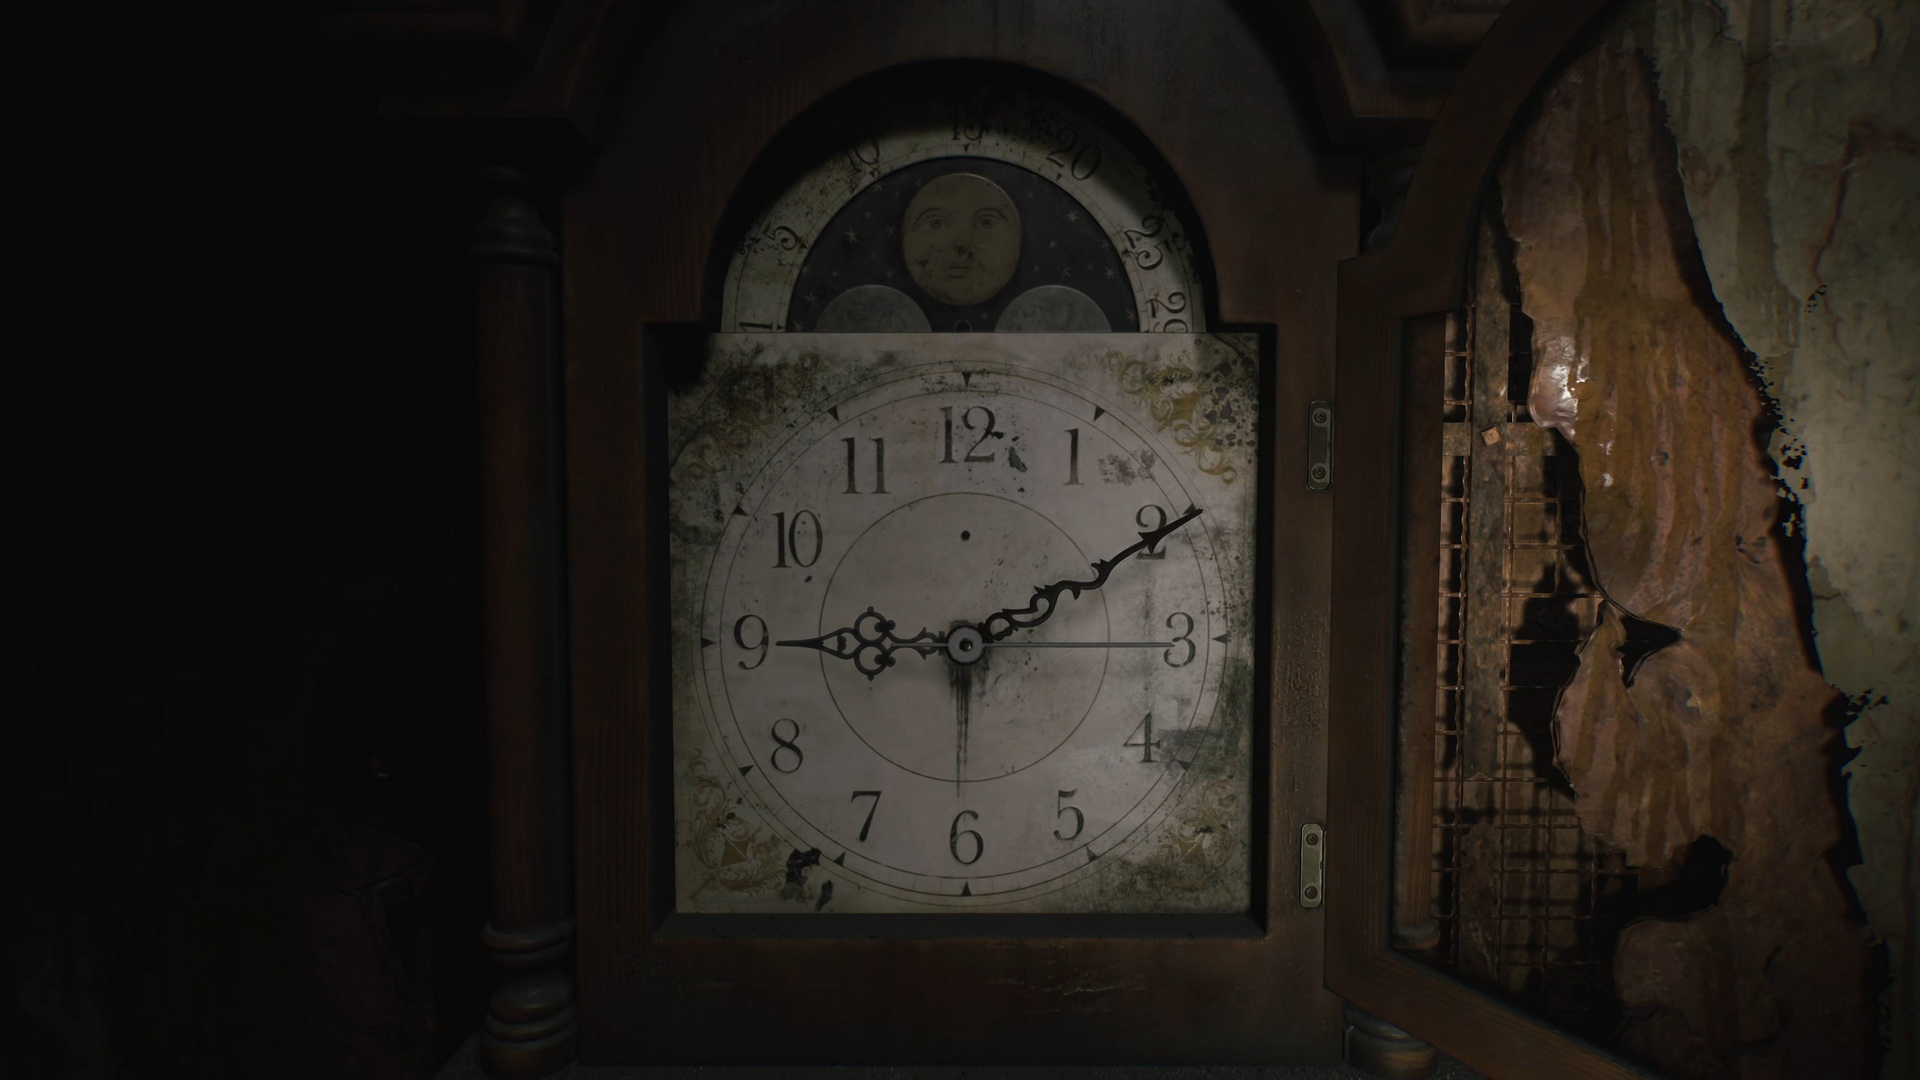
Room 212 Clock Puzzle
Quick puzzle solution:
- Obtain The Hour Hand inside the chained up radio in Room 307 by lowering it.
- Insert the hand into the clock and set it to 9.
|
- Obtain The Minute Hand inside the toilet in Room 210.
- Insert the hand into the clock and set it to 2.
|
|
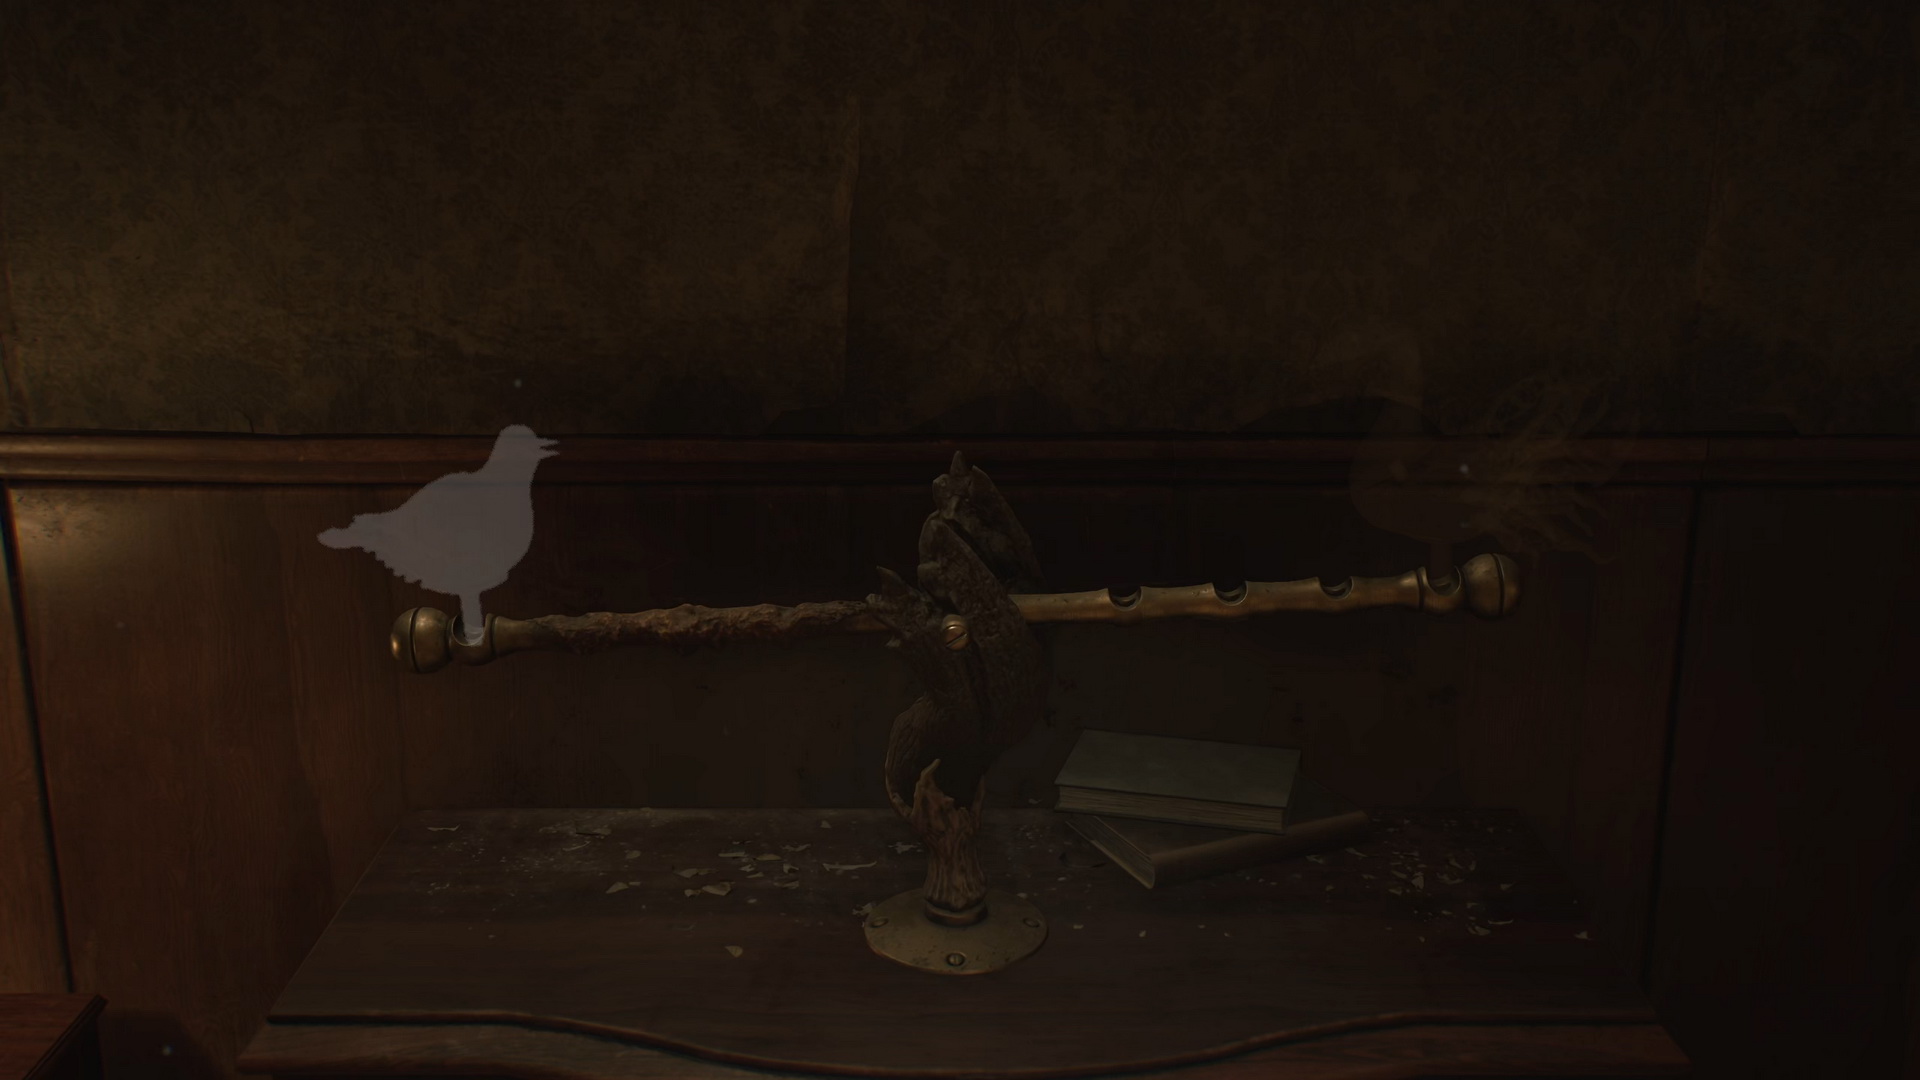
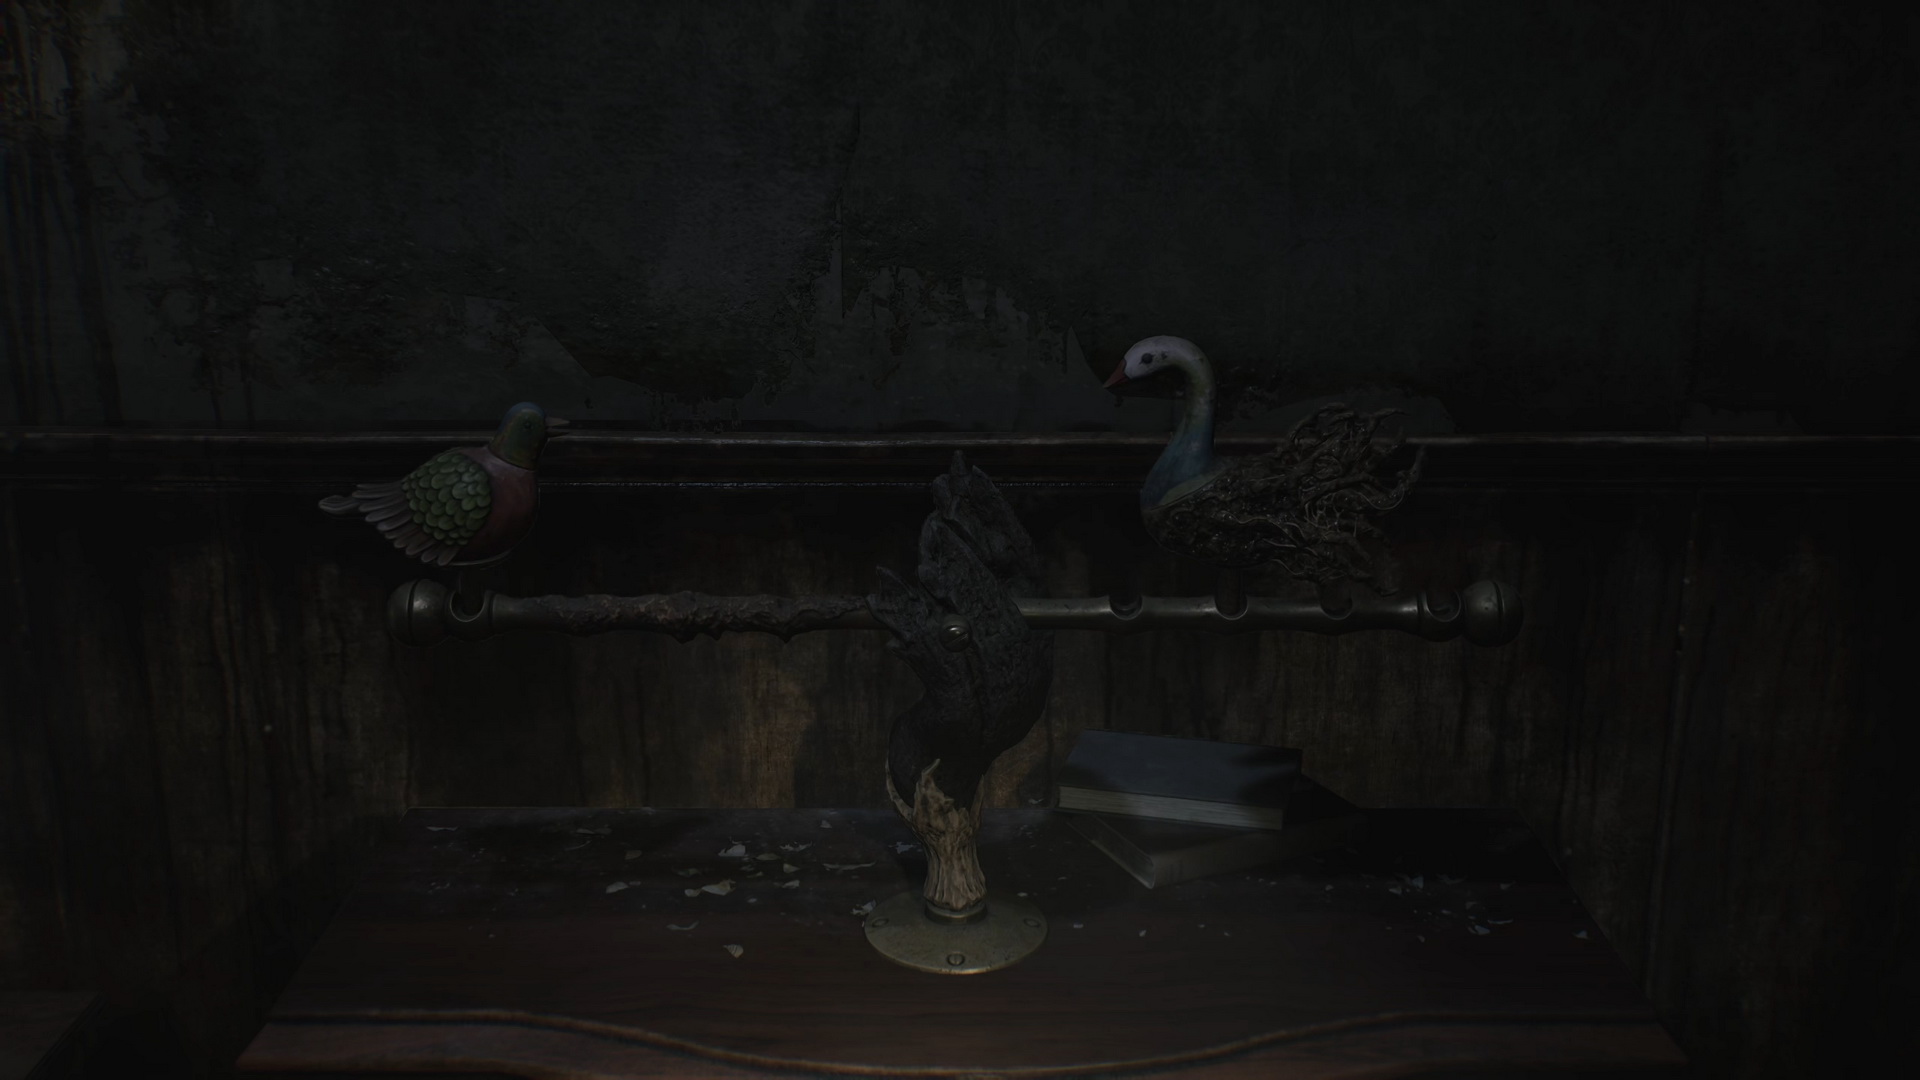
Room 210 Seesaw Puzzle
Collect the required items:
- The Pigeon Figurine is in a cupboard in Room 210 once you collect the Minute Hand in the toilet.
- The Wooden Swan Head is hanging in Room 211.
- The Malformed Figurine Part is hanging above the bathtub in Room 209.
- Combine the Wooden Swan Head and the Malformed Figurine Part to get the Swan Figurine.
|
Quick puzzle solution:
- Place the Pigeon Figurine and the Swan Figurine on the seesaw. Move the Swan Figurine 2 places to the left to balance it out.
Complete puzzle solution
|
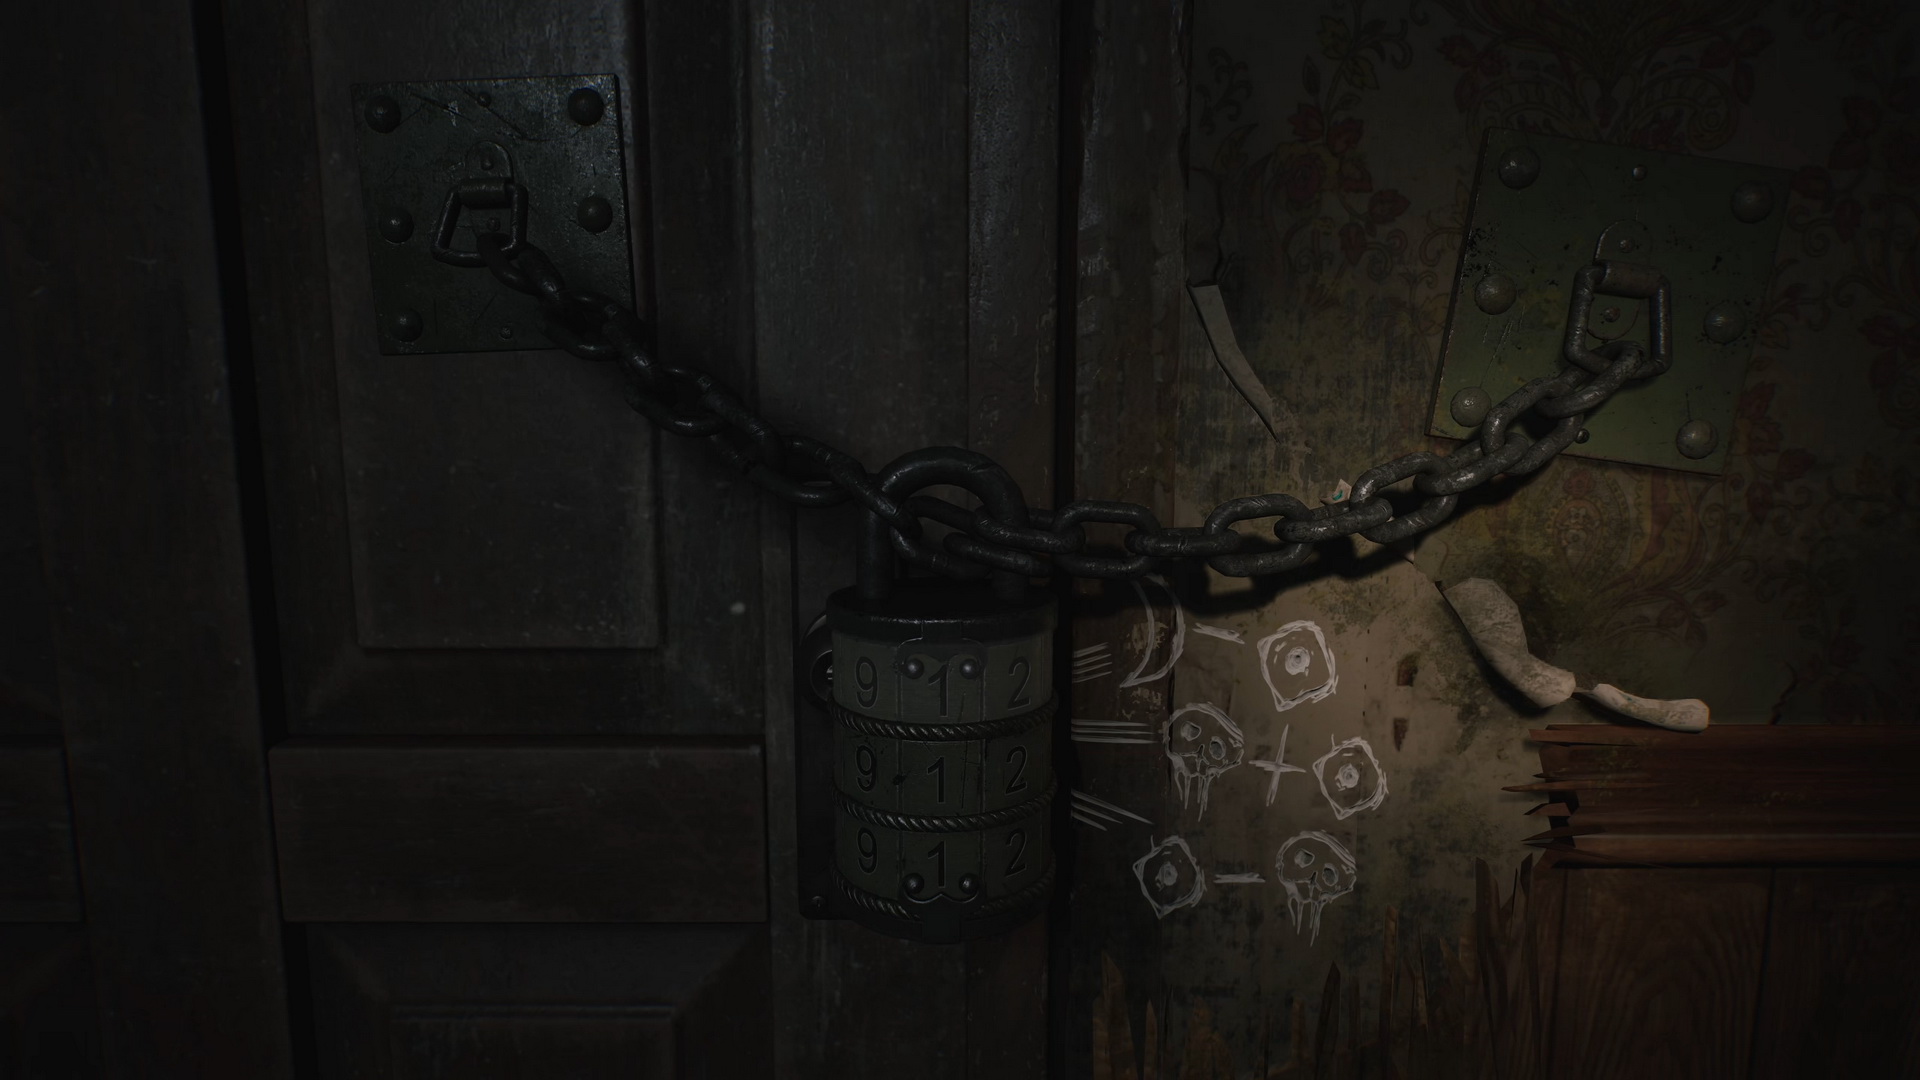
Room 202 Moth Combination Lock
Use the following combination for the lock:
Light: 582
Standard: 373
Hard: 522
Count the symbols on the wings of the moths around the apartment to solve the equation next to the lock.
Complete puzzle solution
|
Western South Vale
Jacks Inn Safe Code
Use the following combination for the motel's safe:
Light/Standard: 0451
Hard: 0533
The hint for the code comes from the Toolbox Memo found in the motel room 107.
Complete puzzle solution
|
Pete's Bowl-O-Rama Safe Code
Only in New Game+.
Use the following combination for the bowling alley's safe – 1887. The code is found in the Bloody Note found by the body at the end of Nathan Avenue.
|
Brookhaven Hospital
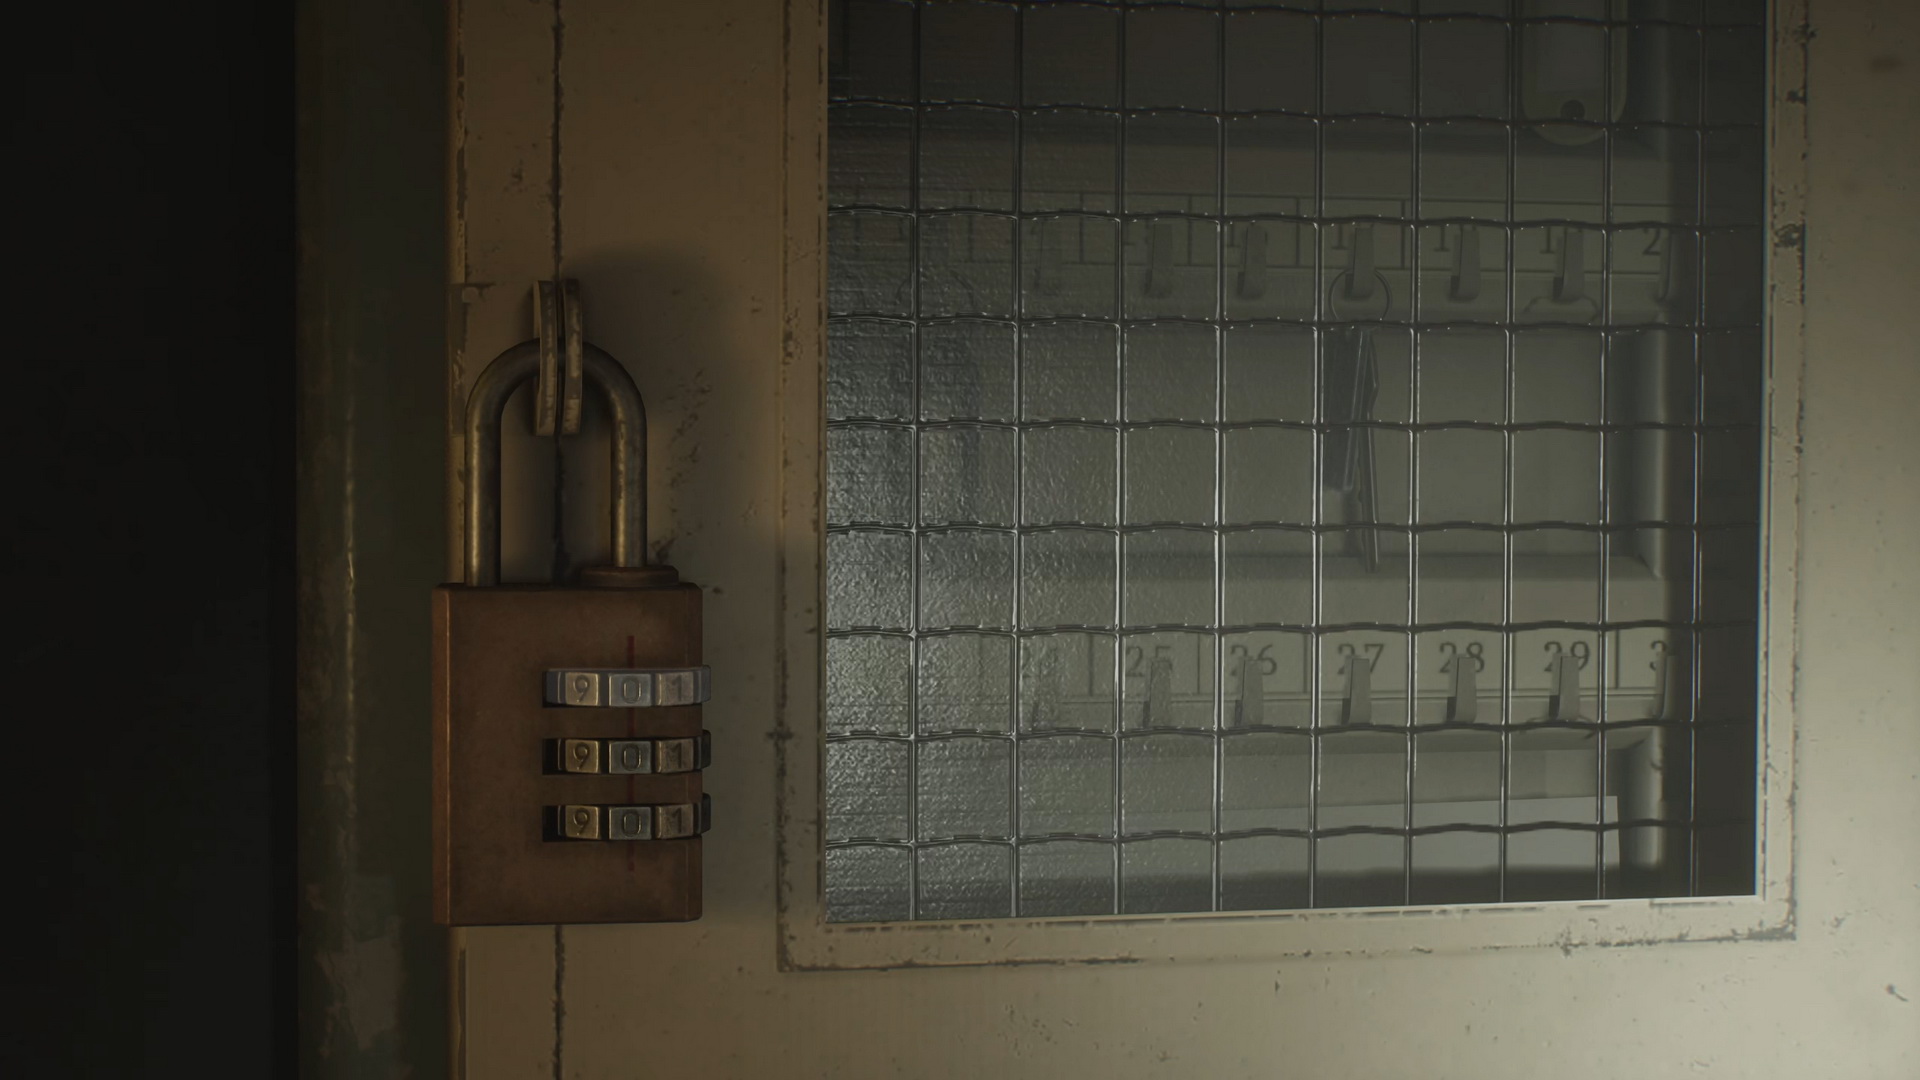
Reception Office Padlock
Use the following combination for the padlock:
Light: 287
Standard: 724
Hard: 152
The hint for the code comes from the Nurse's Memo found inside the desk's drawer next to 1F Examination Room 3.
Complete puzzle solution
|
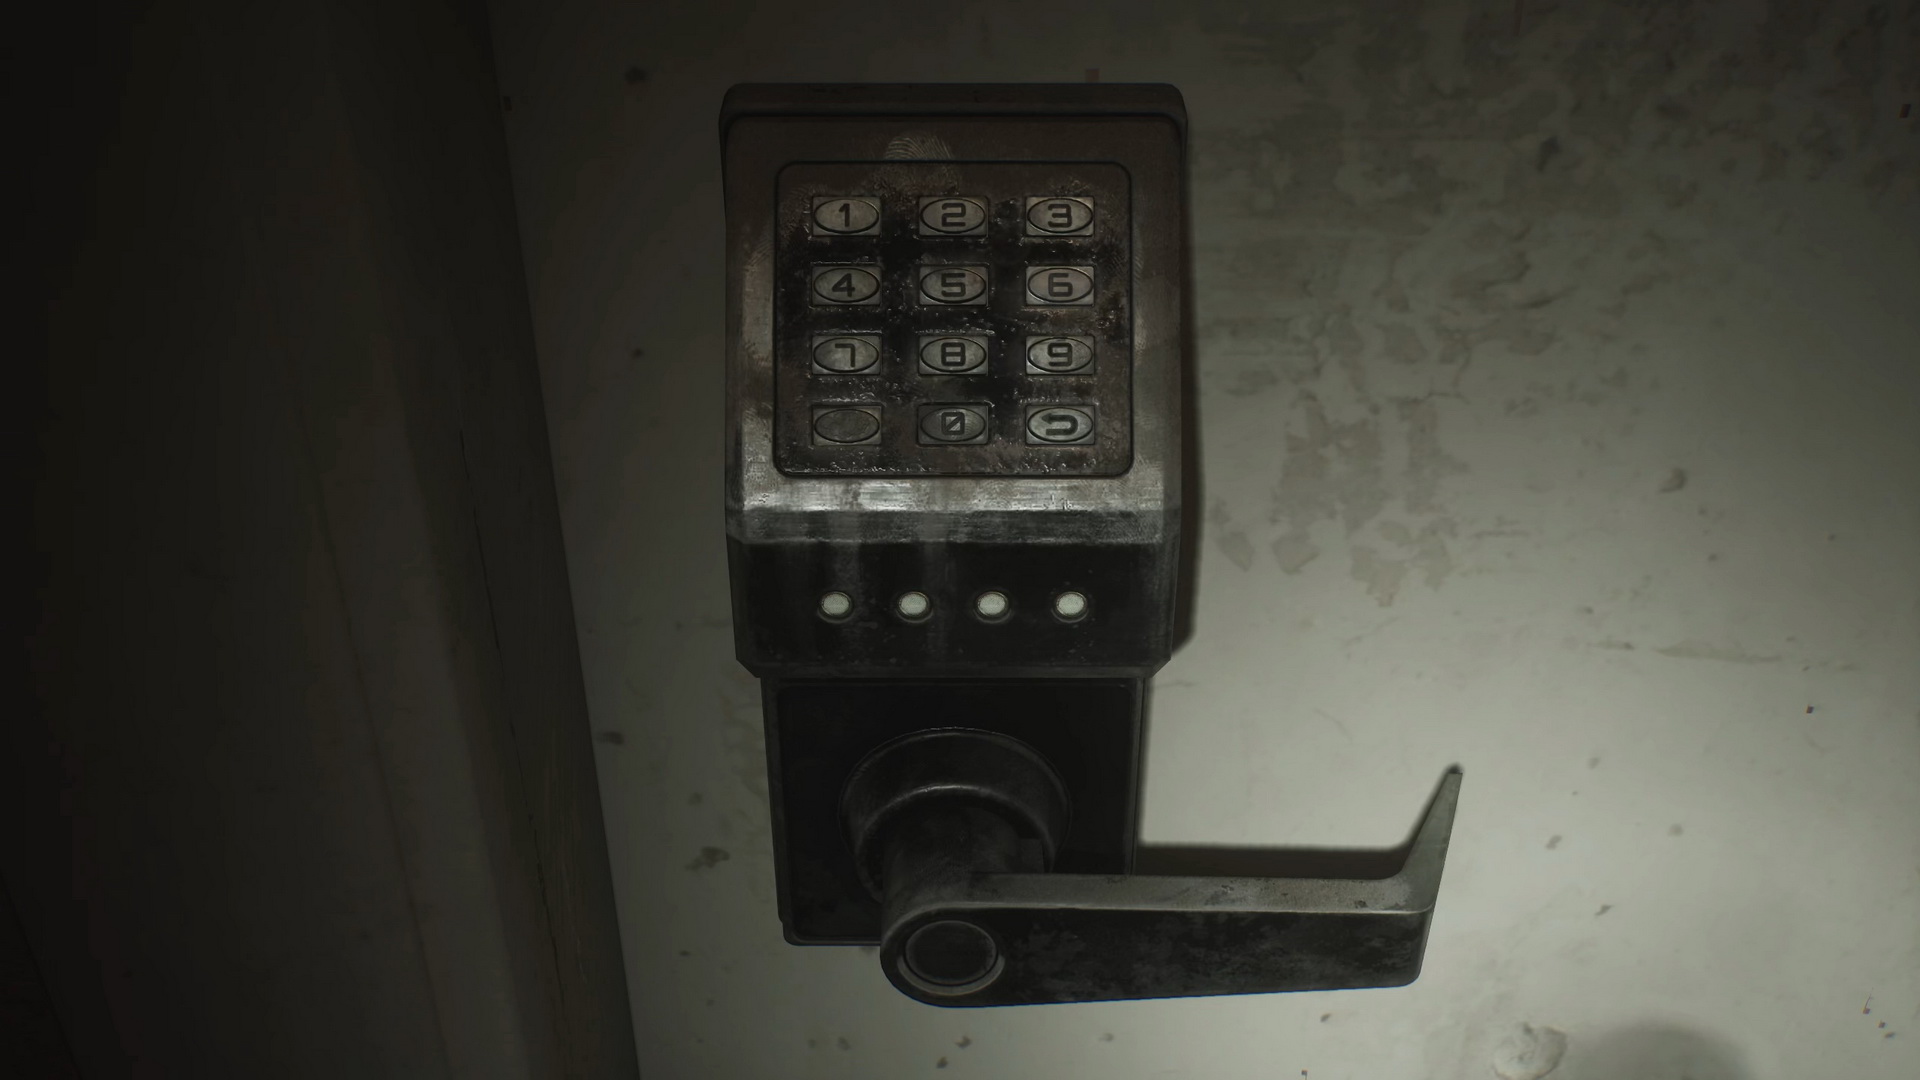
Nurses' Station Keypad Code
Use the following combination for the keypad:
Light/Standard: 3578
Hard: 7456
The hint for the code comes from the Keypad Combination Note found on the bulletin board in the 1F Doctors' Lounge.
Complete puzzle solution
|
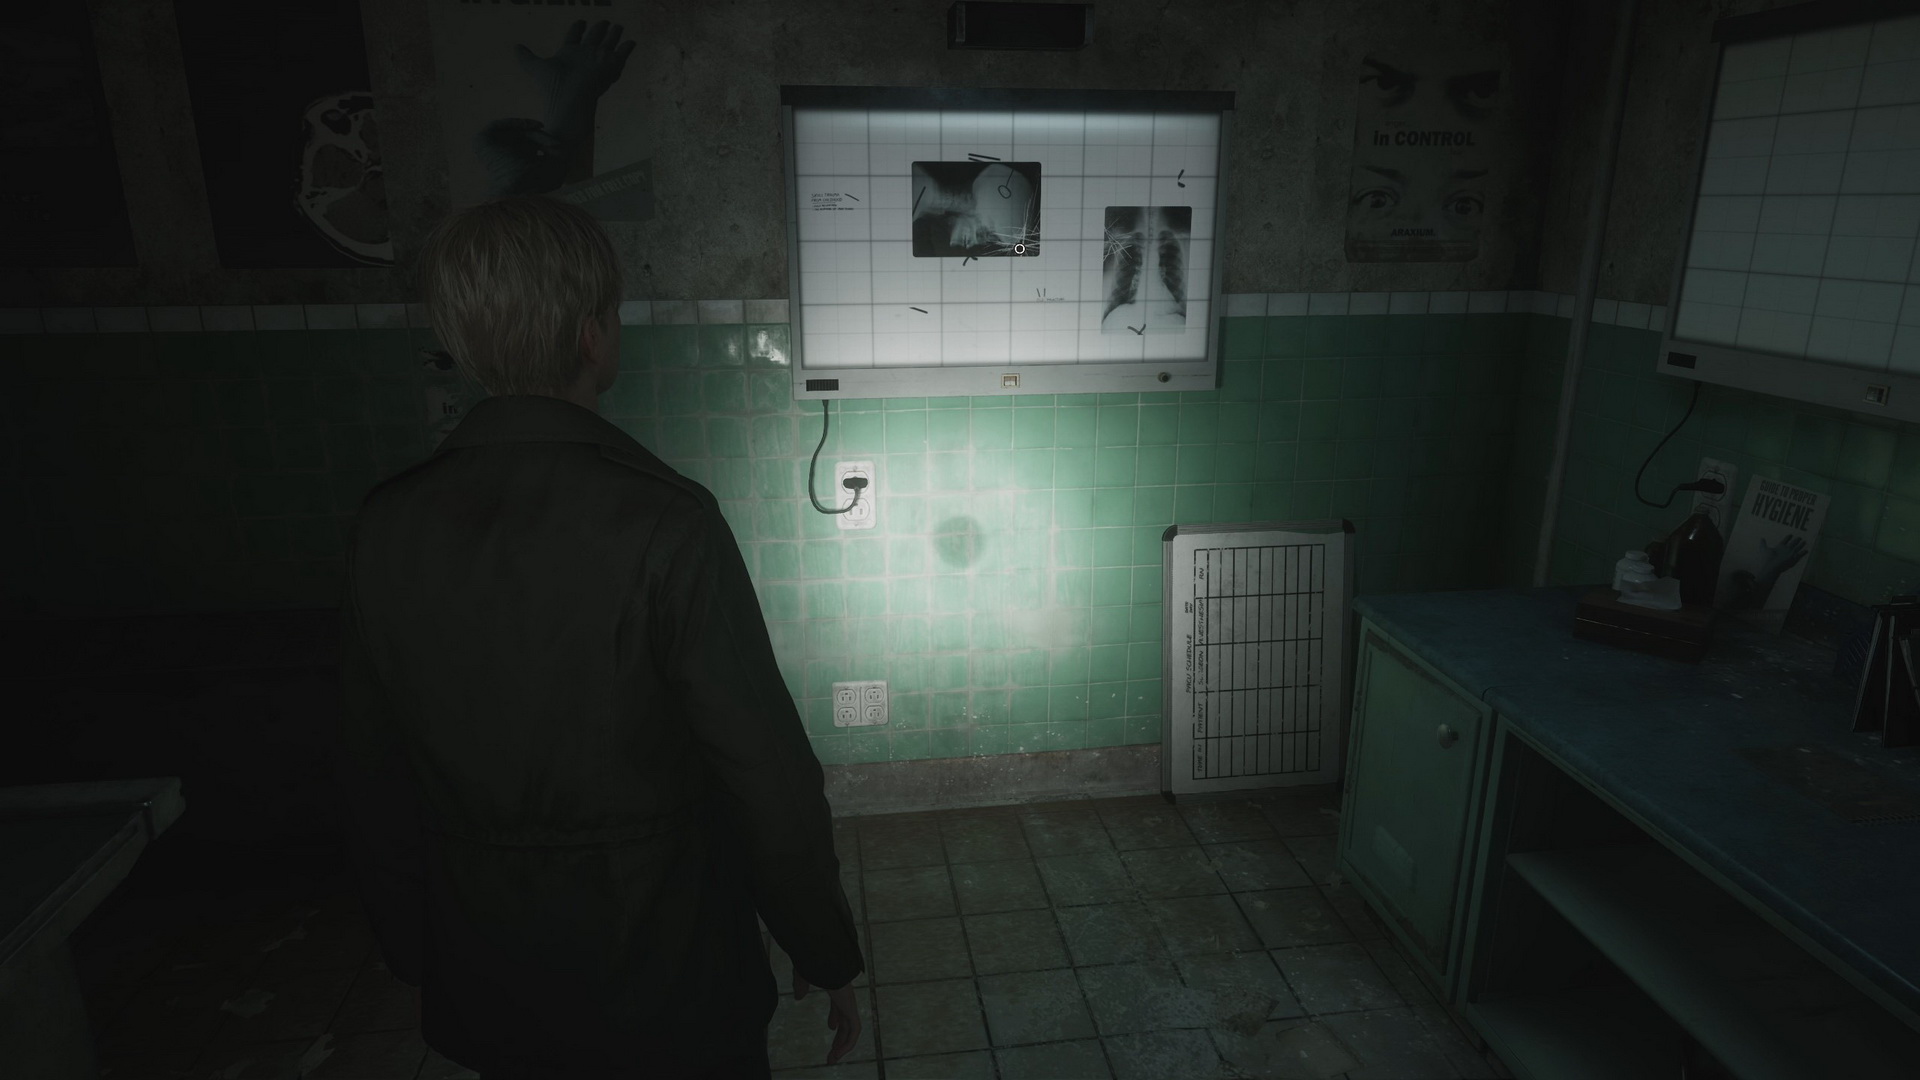
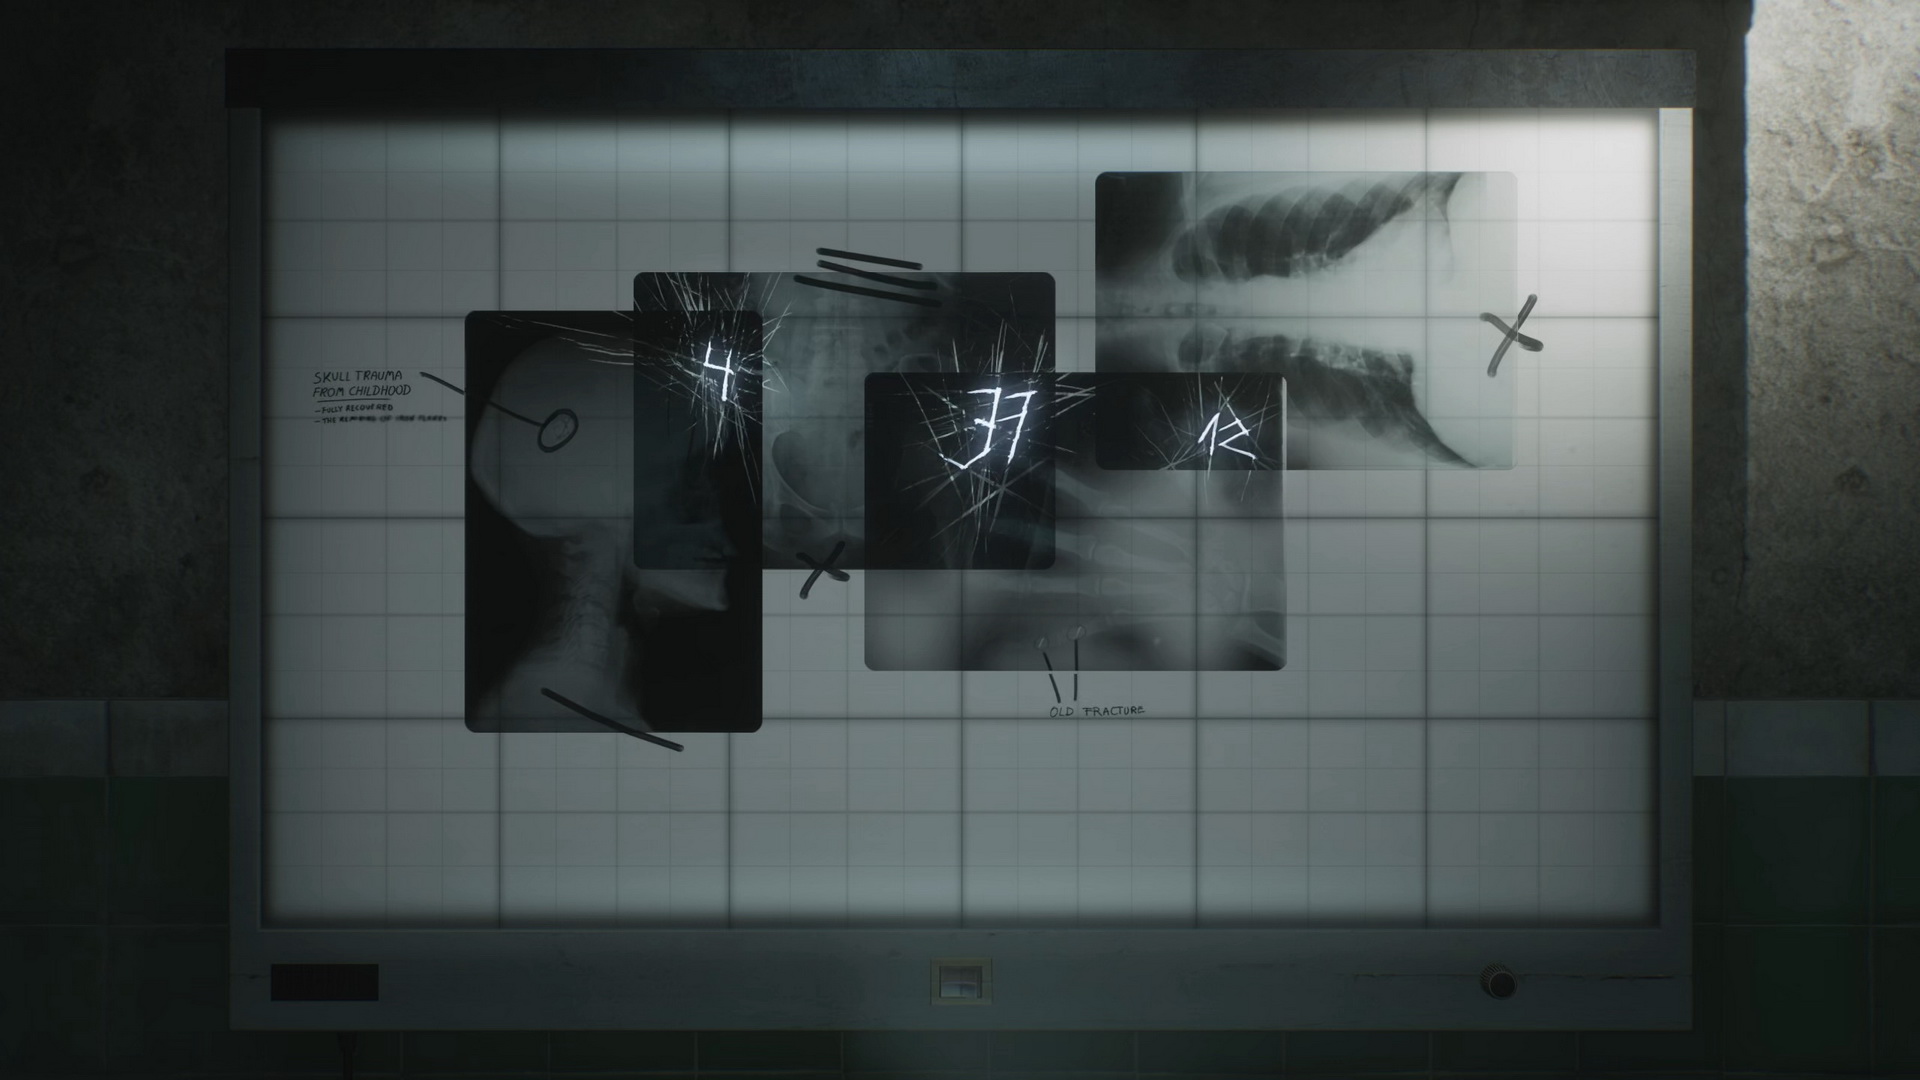
X-Ray Viewer Puzzle |
Collect the required items (skippable as the code for the combination lock will always be the same):
- The Radiograph of a Pelvis is on the examination table under the X-ray Memo next to the x-ray viewer.
- The Moldy Radiograph is in the bathtub in the 2F Treatment Room, accessible through the Nurses' Station. You will need to enter the code you learned through another puzzle.
- The Mold Remover is in the Kitchen on the first floor, sitting on the garbage chute's hatch.
- Combine the Moldy Radiograph with the Mold Remover to get the Cleaned Up Radiograph.
|
Quick puzzle solution:
Place two missing radiographs on the X-ray viewer lining up with the black pen marks to see the revealed numbers – 4, 37, 12. Use it for the Room D1 combination lock – right to 4, left to 37, right to 12.
Complete puzzle solution
|
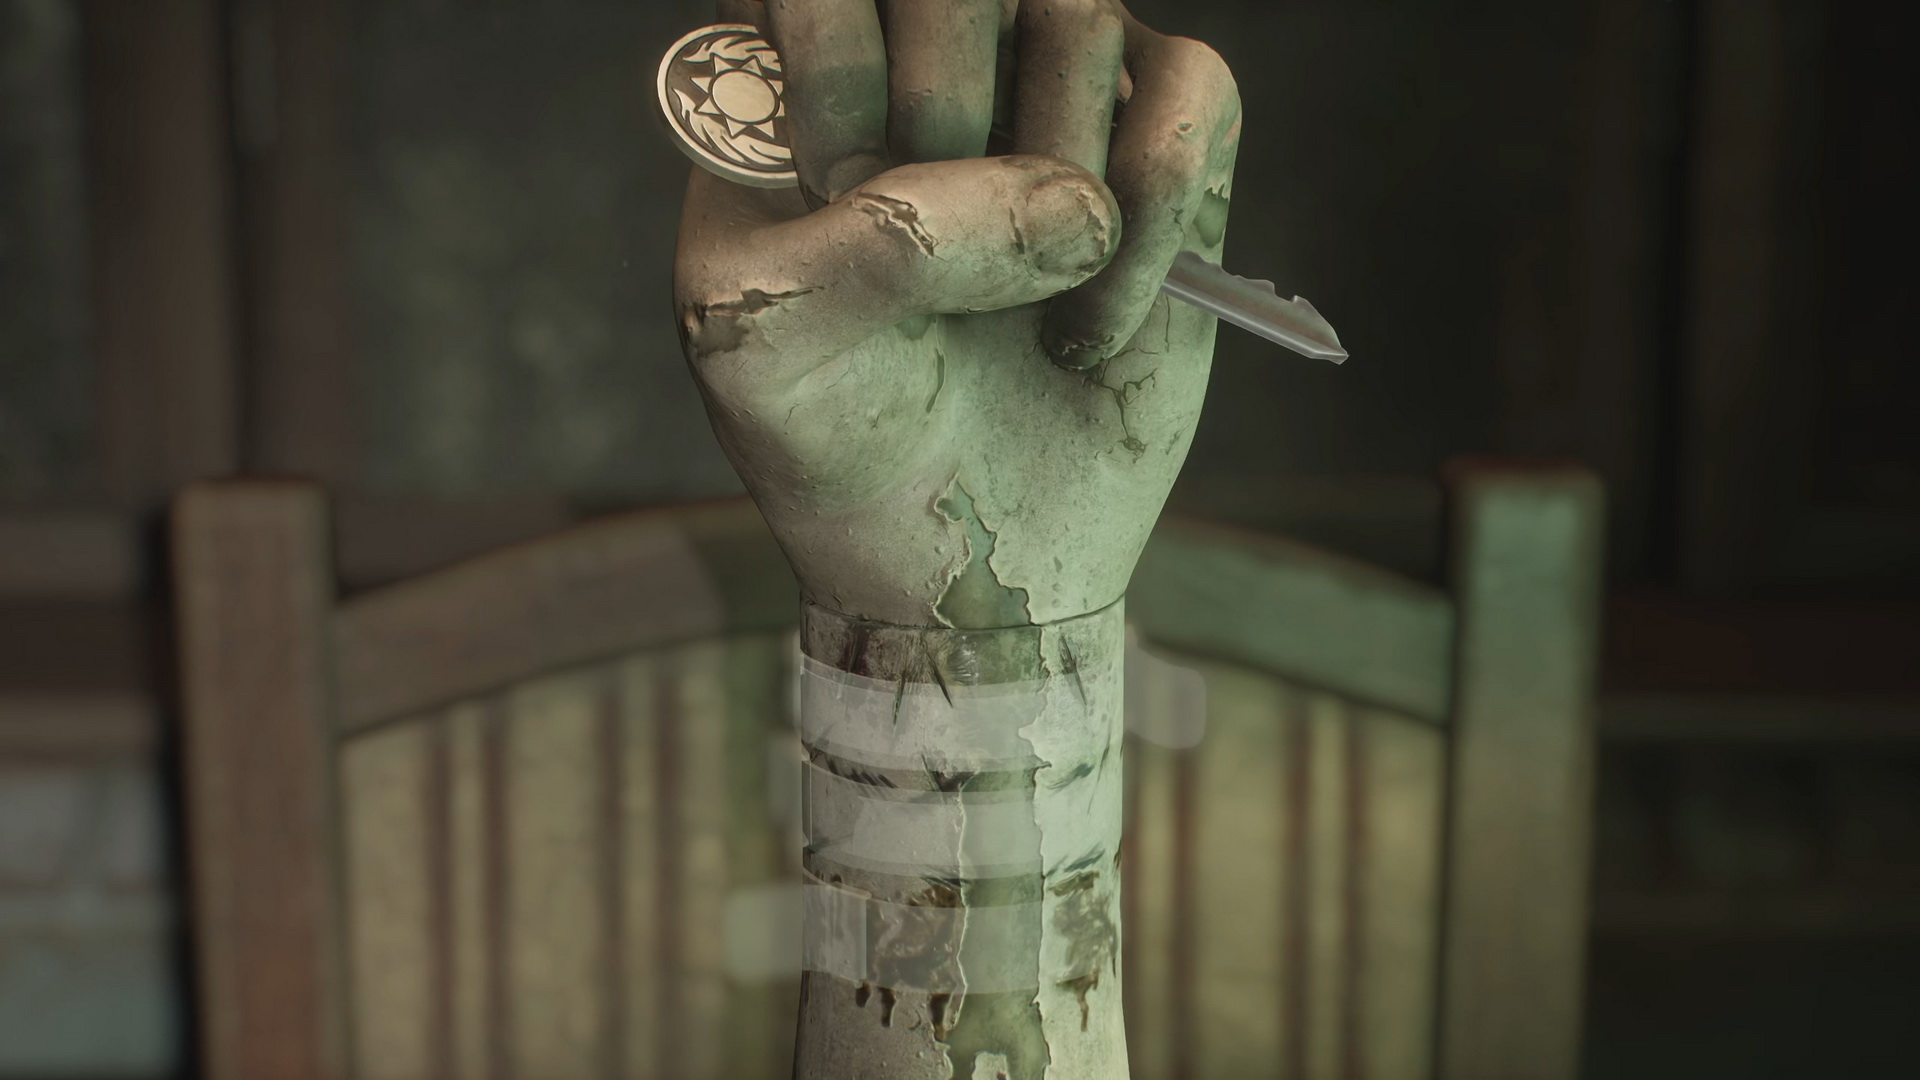
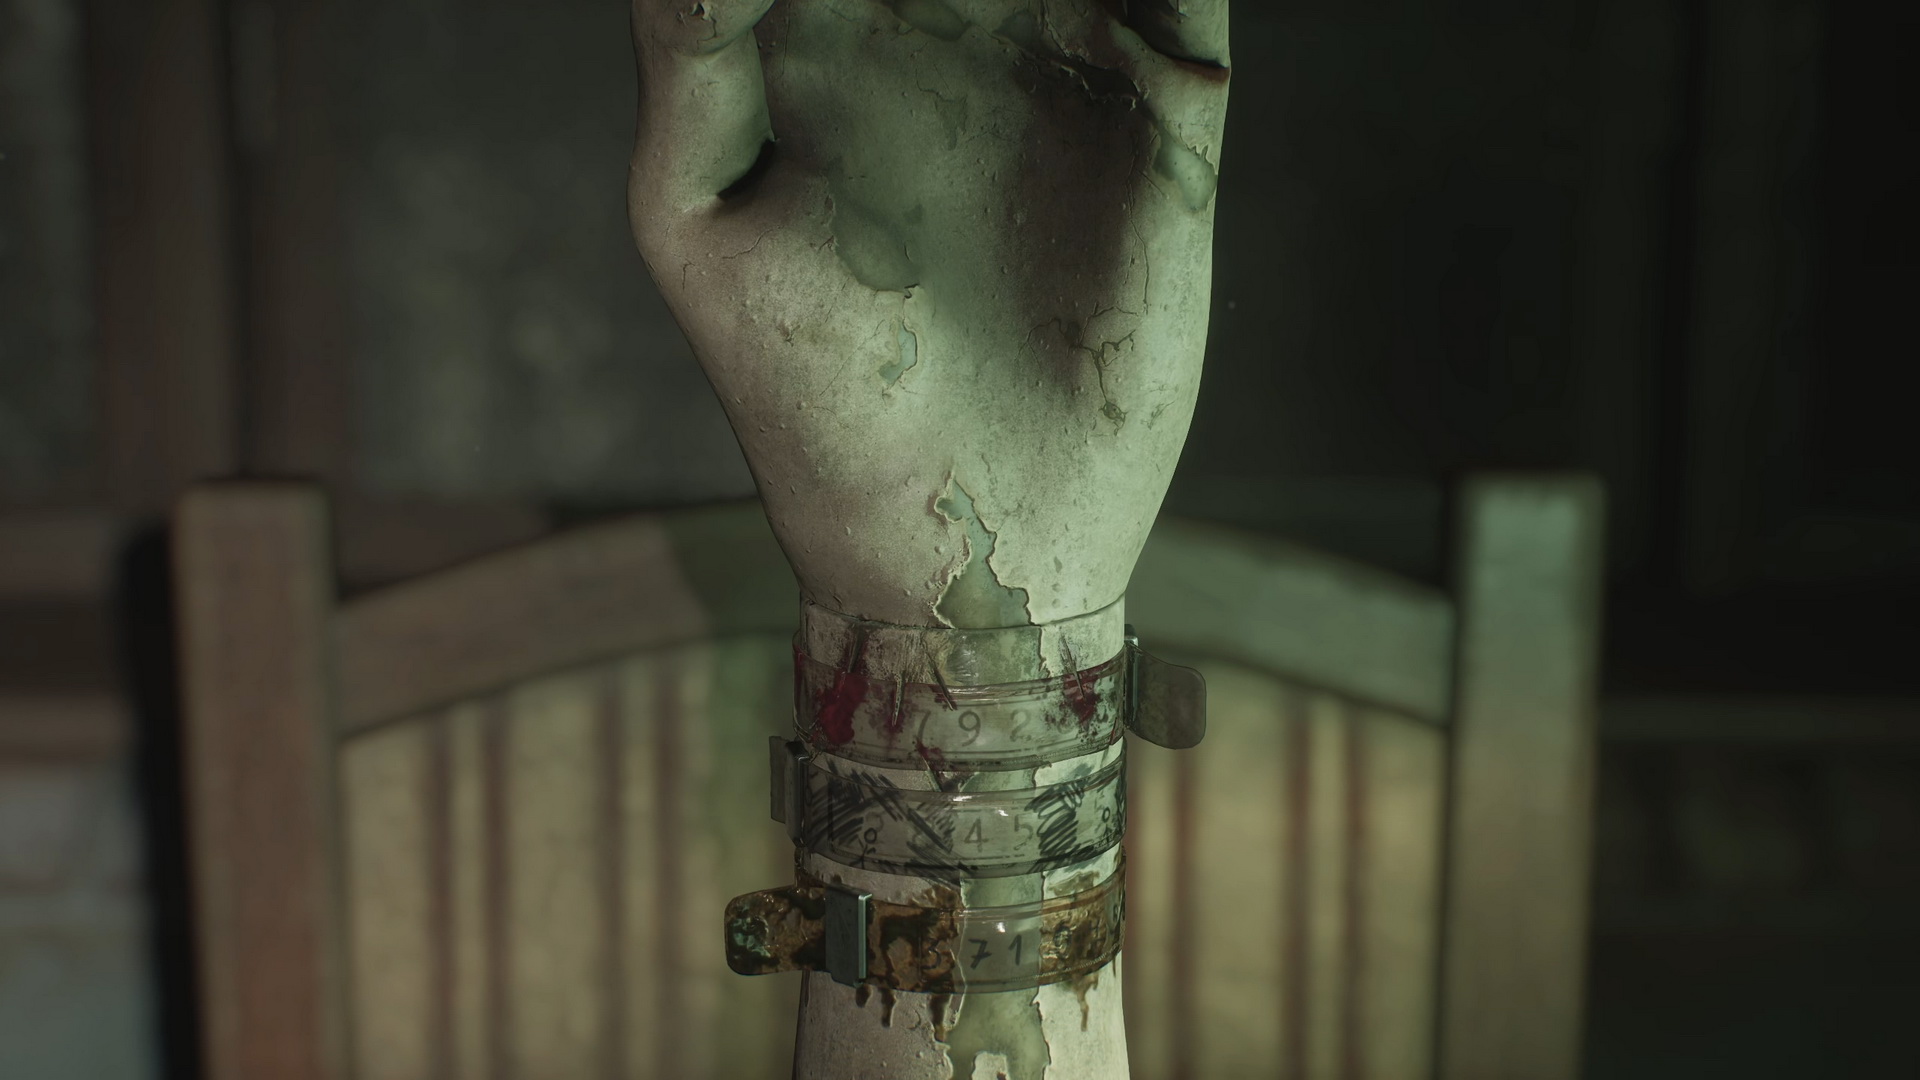
Director's Office Hand Puzzle
Collect the three bracelets in the hospital:
- Find the Marked Bracelet in 1F Medical Records. Accessed from the 2F Utility Room via a hole in the wall.
- Find the Filthy Bracelet on the bed in 3F Room D1 after solving the X-ray viewer puzzle.
- Find the Bloodstained Bracelet inside the drained pool's wall on the first floor.
|
Place and rotate the bracelets on the hand matching the stains and markings in the following order, top to bottom:
- Bloodstained Bracelet
- Marked Bracelet
- Filthy Bracelet
The resulting code is 92, 45, 71.
Complete puzzle solution
|
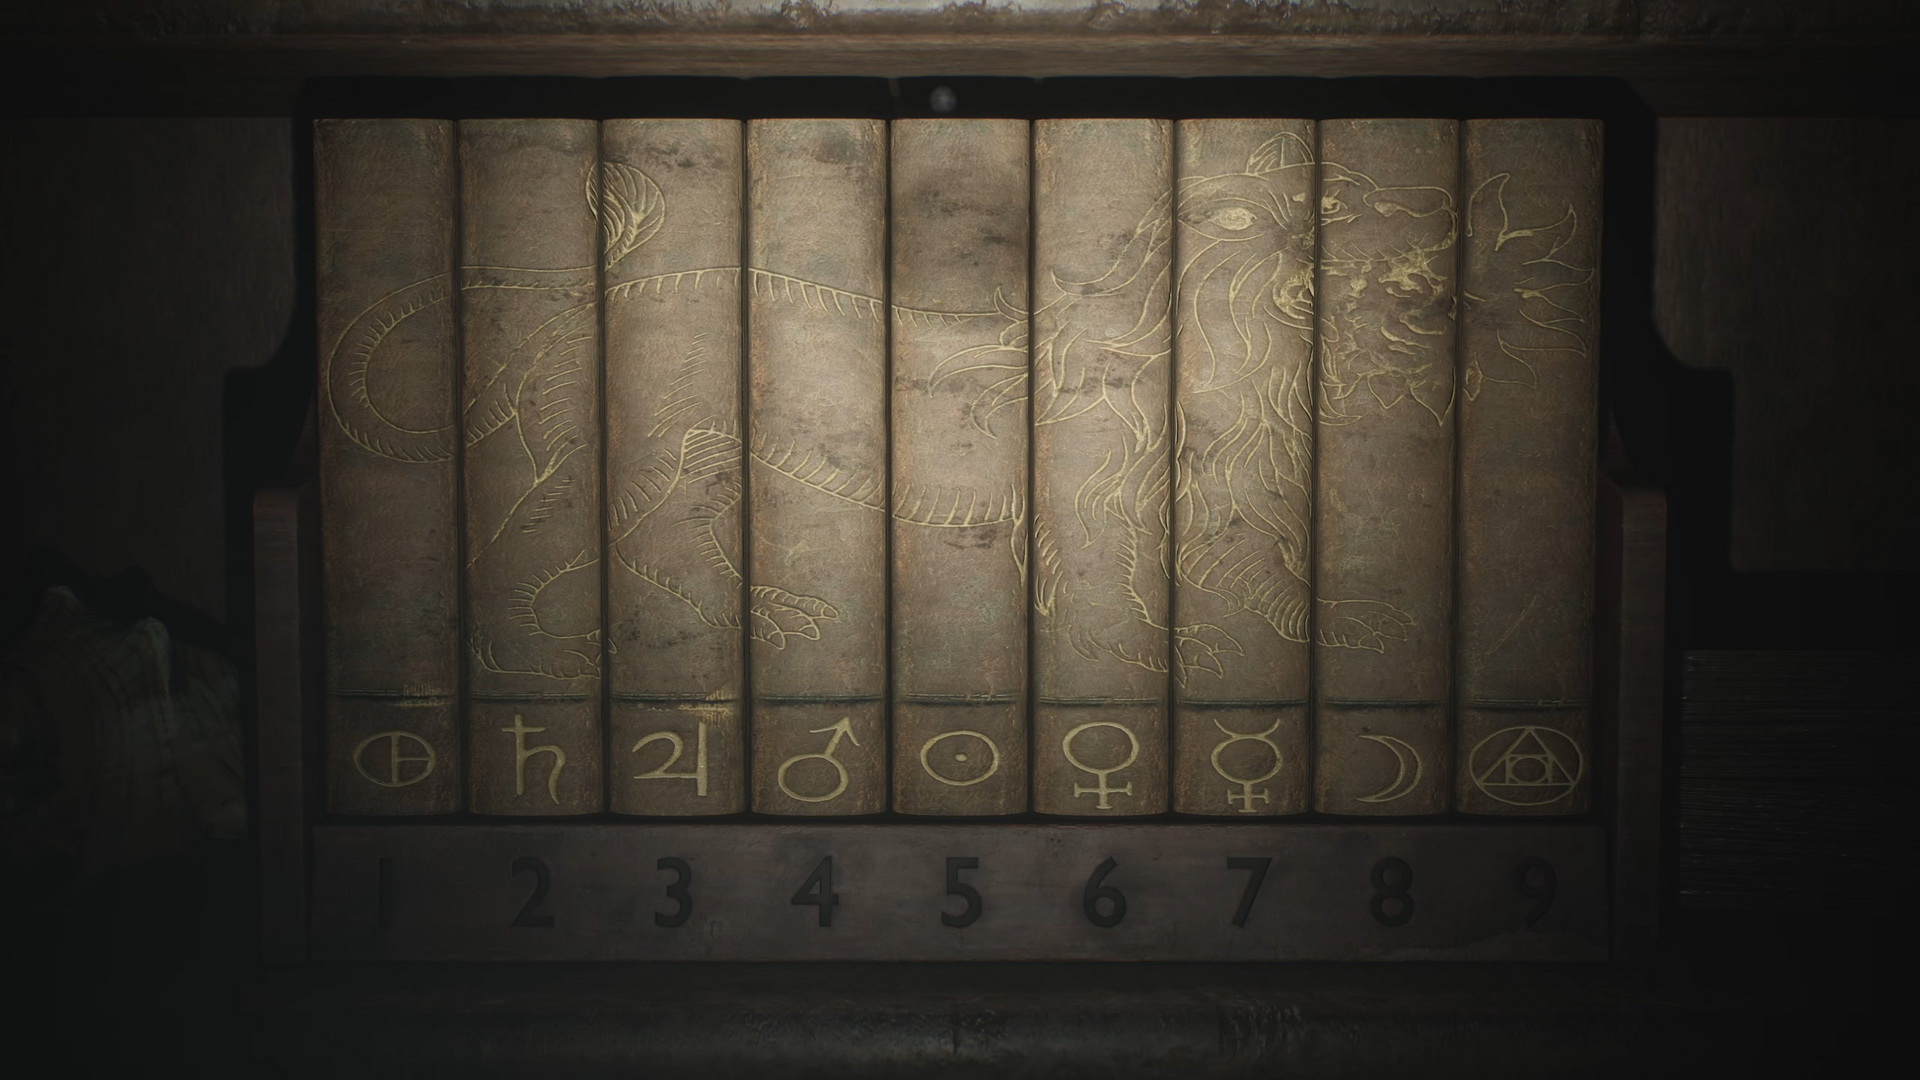
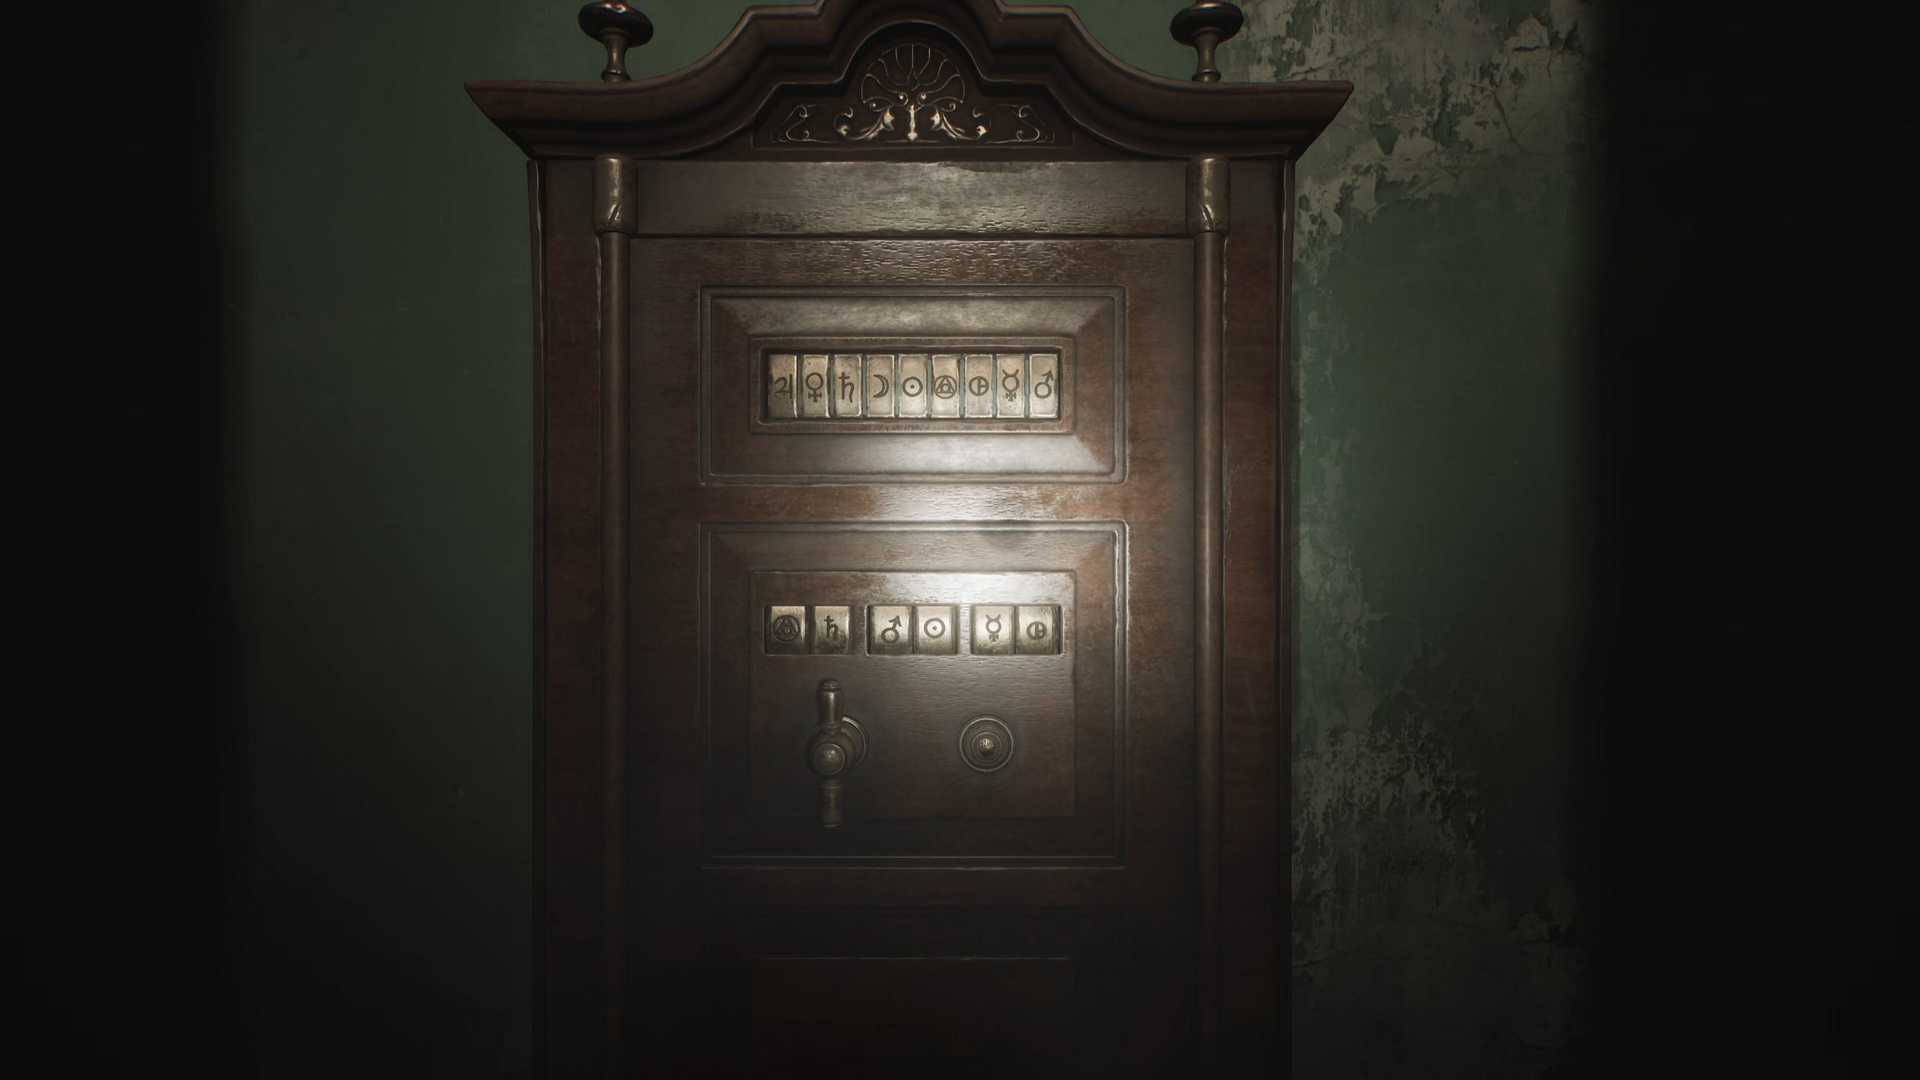
Director's Office Safe Puzzle
Quick puzzle solution:
- Rearrange the books in the Director's Office's storage to match astrological symbols with the numbers and learn the cipher.
|
- Insert the missing safe button. Enter the 92, 45, 71 code using the astrological symbols as shown in the image.
Complete puzzle solution
|
Otherworld Hospital
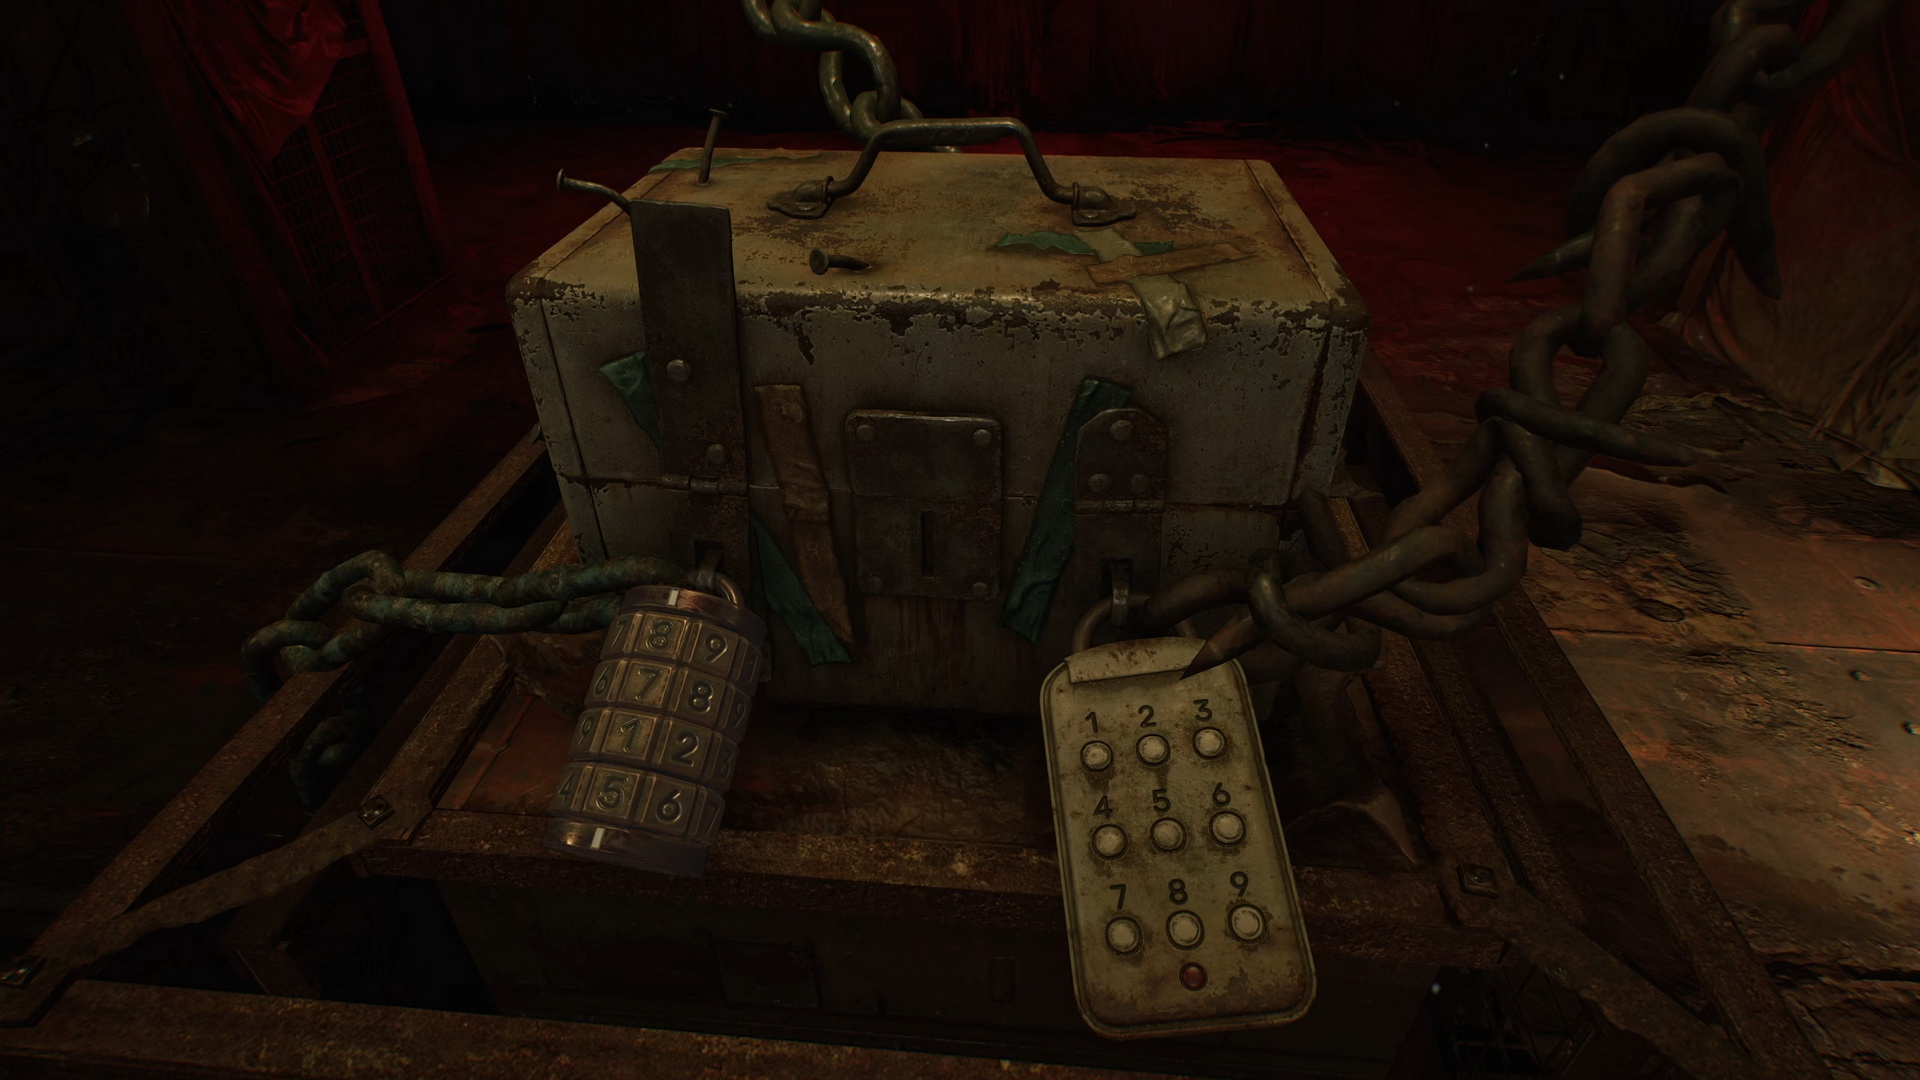
Chained Box Puzzle
Quick puzzle solution:
- Obtain the Lapis Eye Key from the dummy in a surgical chair in 3F Exam Room 4 using the Instrument of Force and the Key of Bliss on the mannequin. Use the key on the box.
- Input the code from the Calendar Page memo in Room M2 on the left combination lock – 1622 (you can skip looking for the memo).
- Power up the treatment stretcher in 3F Room I7 to reveal a code (you can skip looking for the code). Input the resulting code into the right keypad – 9659.
Complete puzzle solution
|
Pharmacy Decorative Box Puzzle
This puzzle is optional – the reward is supplies. Enter the correct answers to the elevator "Trick or Treat" quiz:
- Q1 – 2
- Q2 – 3
- Q3 – 1
Complete puzzle solution
|
Silent Hill Historical Society
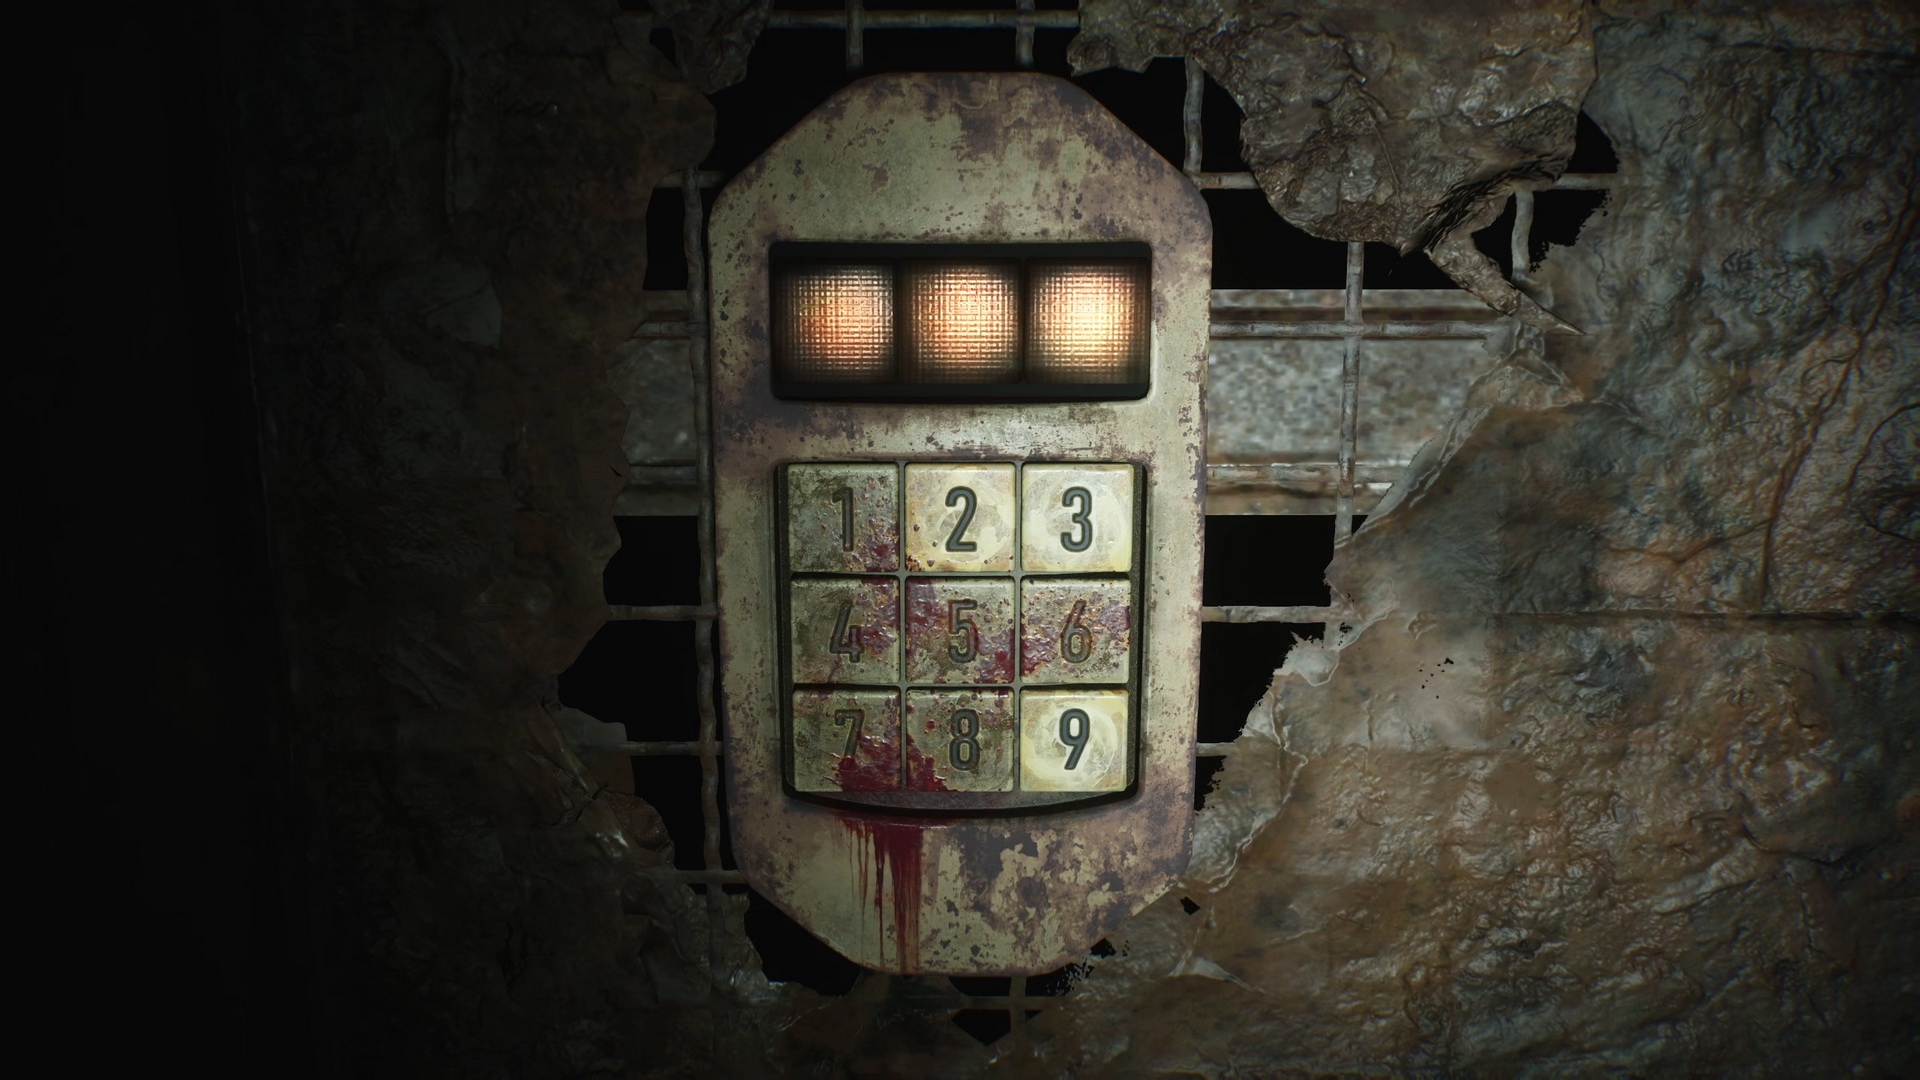
Bug Room Keypad Code
The code will be a random three-digit combination of the unstained lit up buttons on the keypad: 2, 3, and 9 – input by trial and error. All possible variations are: 239, 293, 329, 392, 923, 932.
|
Toluca Prison
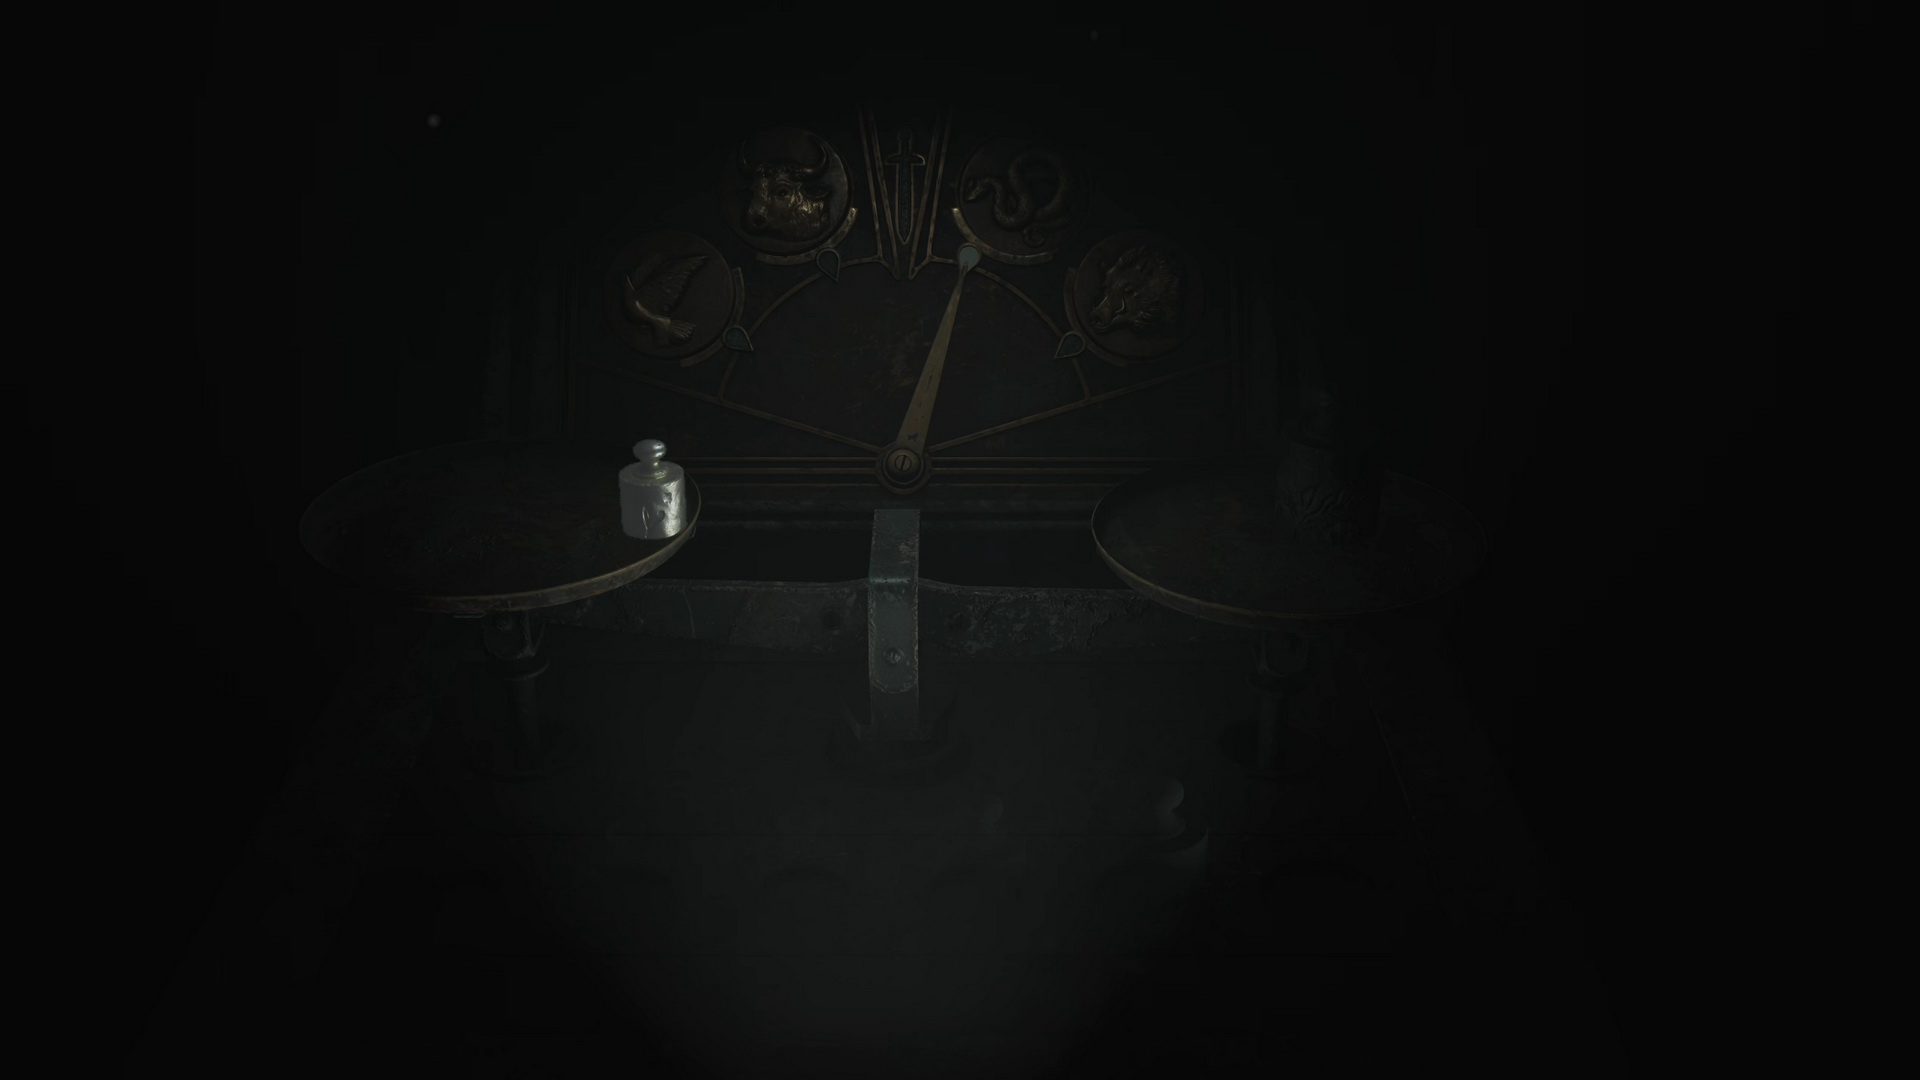
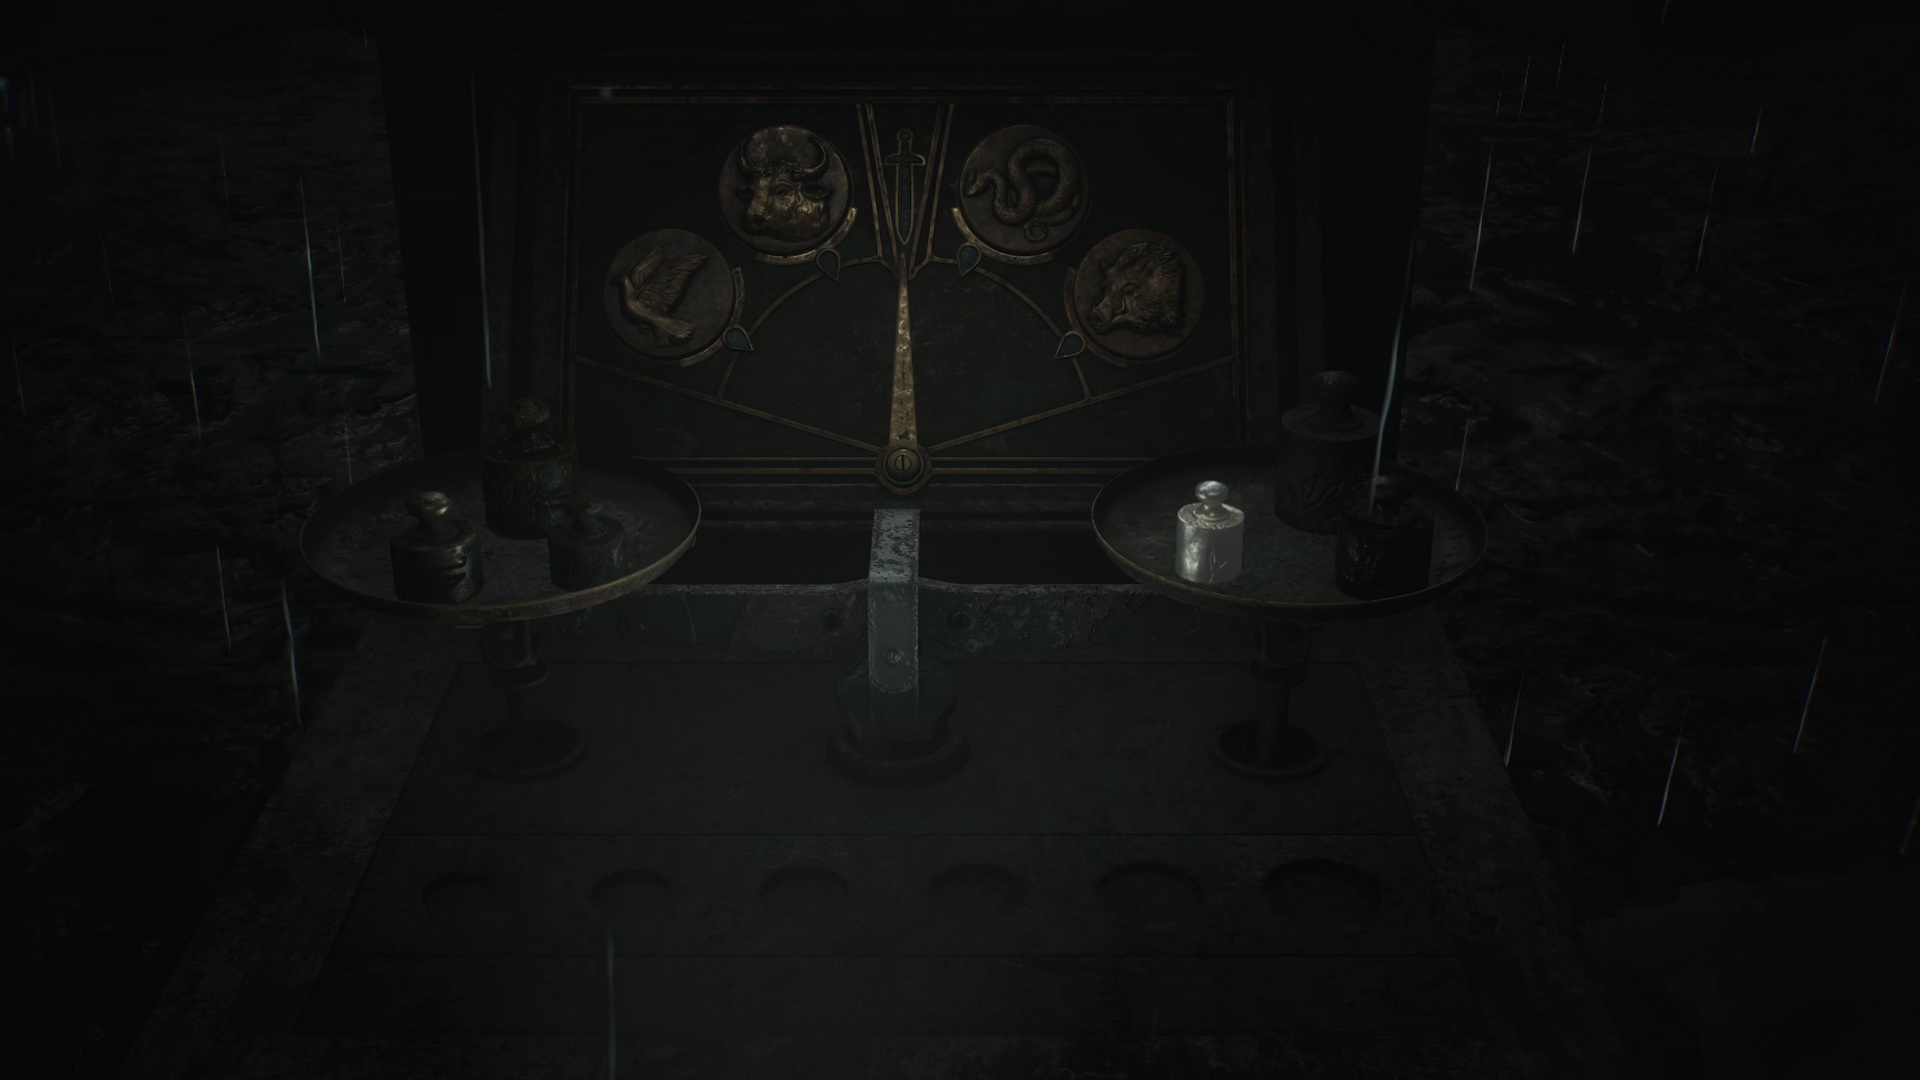
Weights and Scales Puzzle
You need to place the weights on the scales to unlock various areas of the prison. Some of the weights you will have to collect in different places. The six weights from left to right are: Starter (1) - The Lightest (2) - Light (3) - Medium (4) - Heavy (5) - The Heaviest (6)
- Collect the Heaviest Weight from the altar in the Chapel, Main Section.
- Put the Starter Weight (1) on the left scale and the Heaviest Weight (6) on the right one to unlock the Headless Serpent door.
|
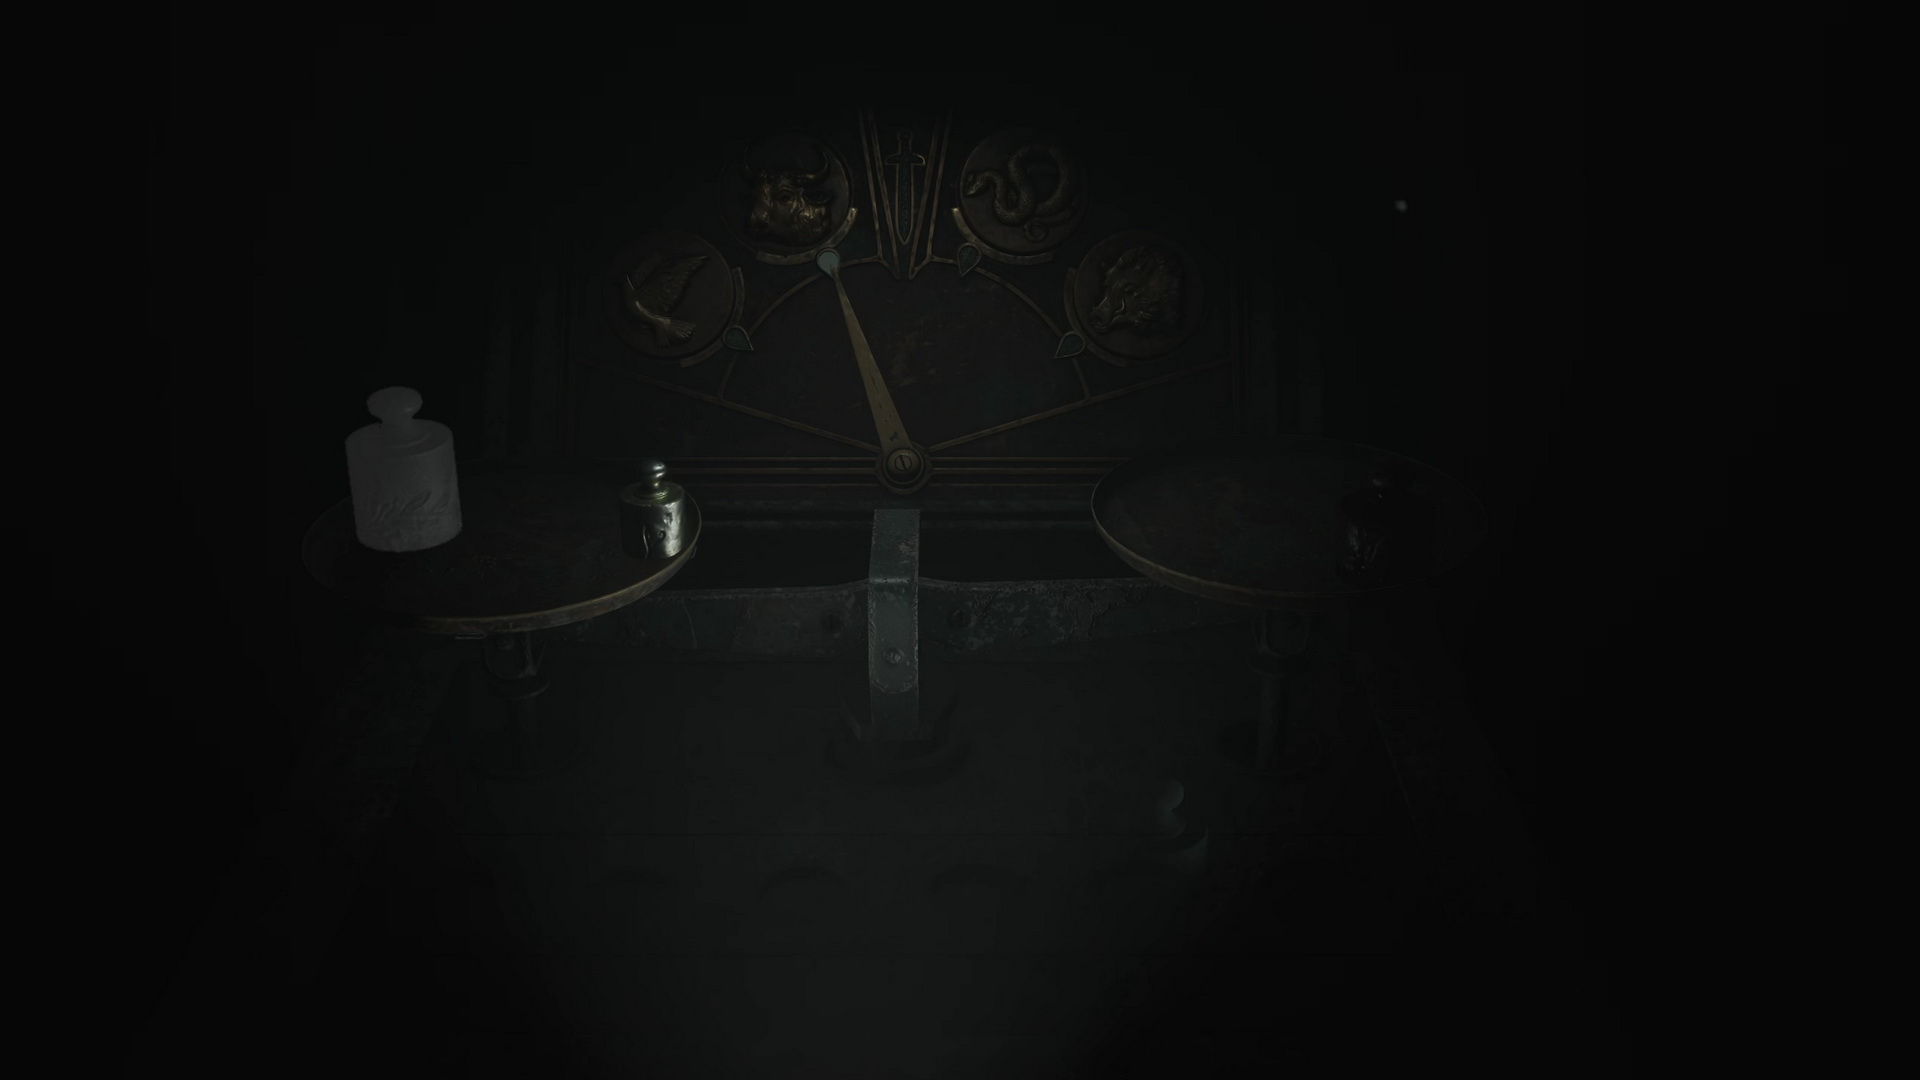
- Collect the Medium Weight off the chair in the Death Chamber, Serpent Section after solving the Witness Room generator puzzle.
- Put the Starter (1) and The Heaviest Weights (6) on the left scale and the Medium Weight (4) on the right one to unlock the Hornless Ox door.
|
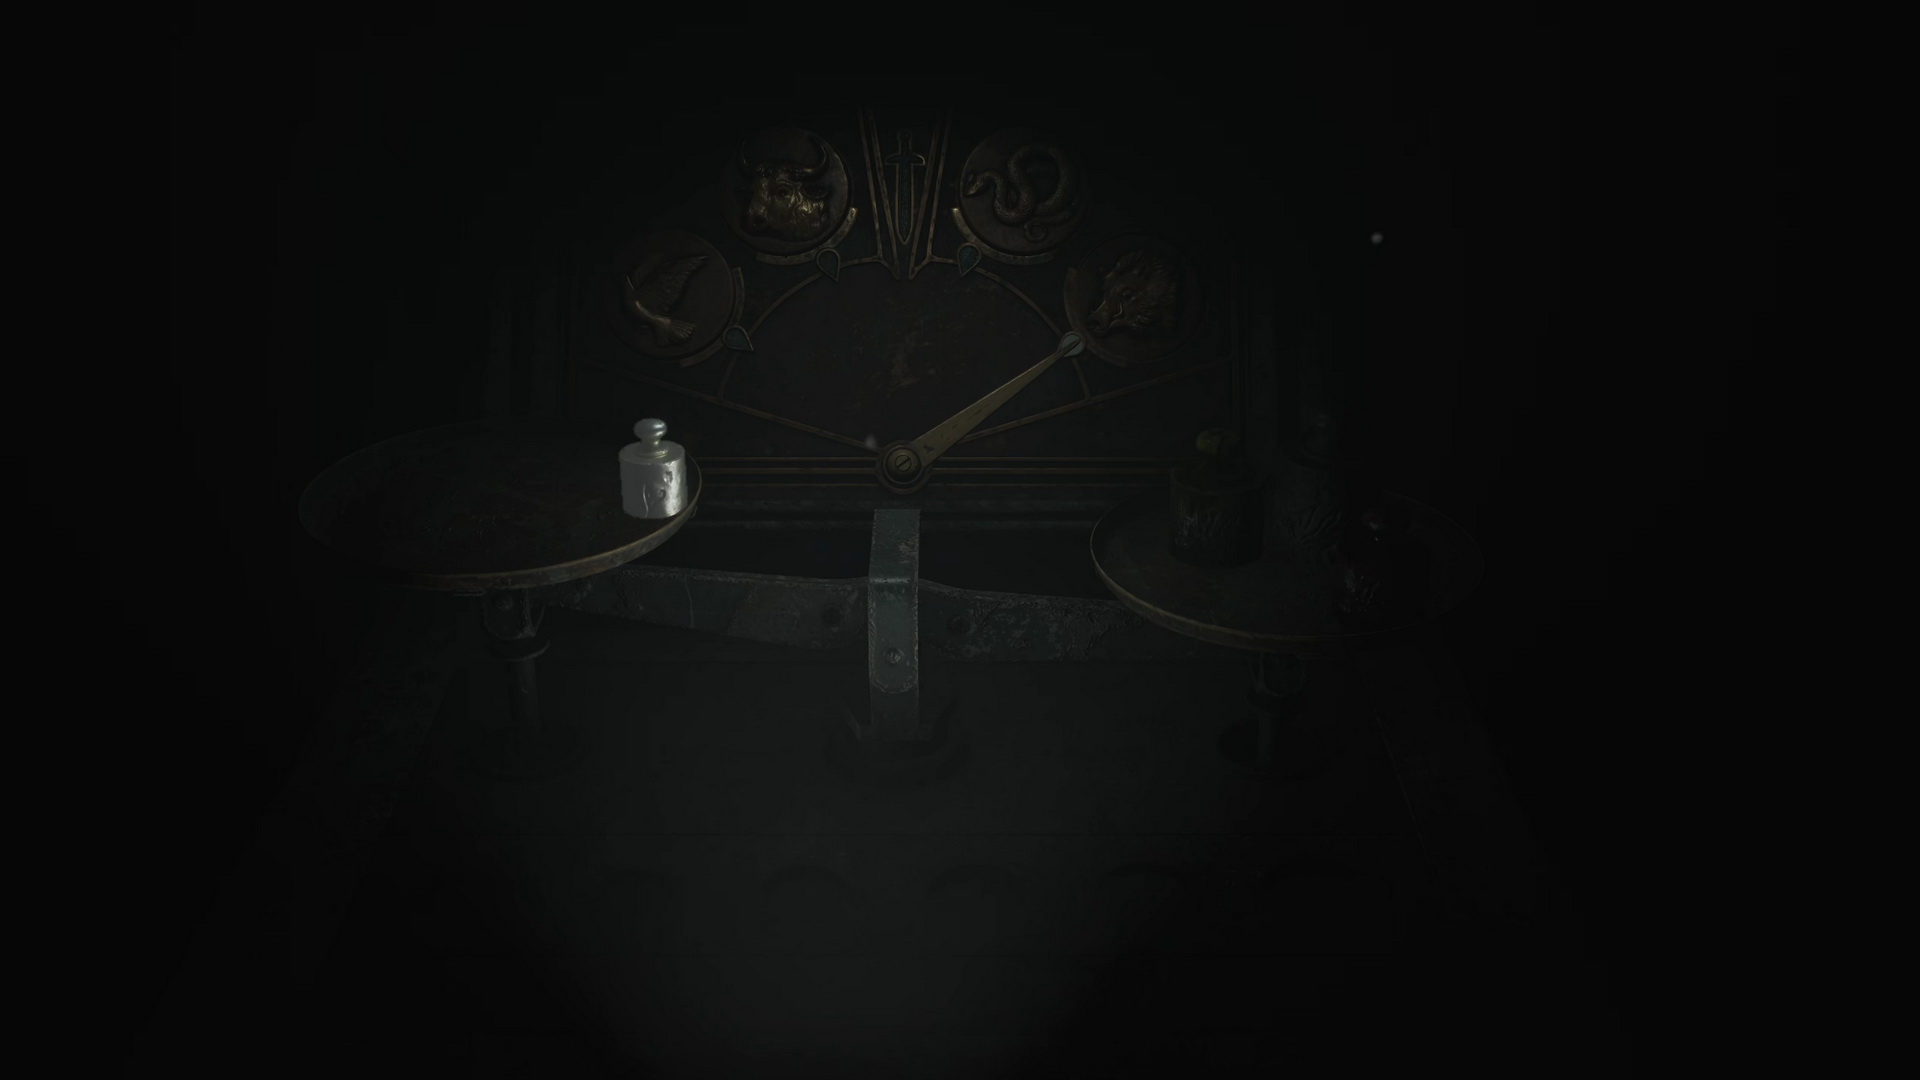
- Collect the Heavy Weight inside a hole in the wall in the Showers, 2F.
- Put the Starter Weight (1) on the left scale and the rest of the weights (4-5-6) on the right one to unlock the Eyeless Boar door.
|
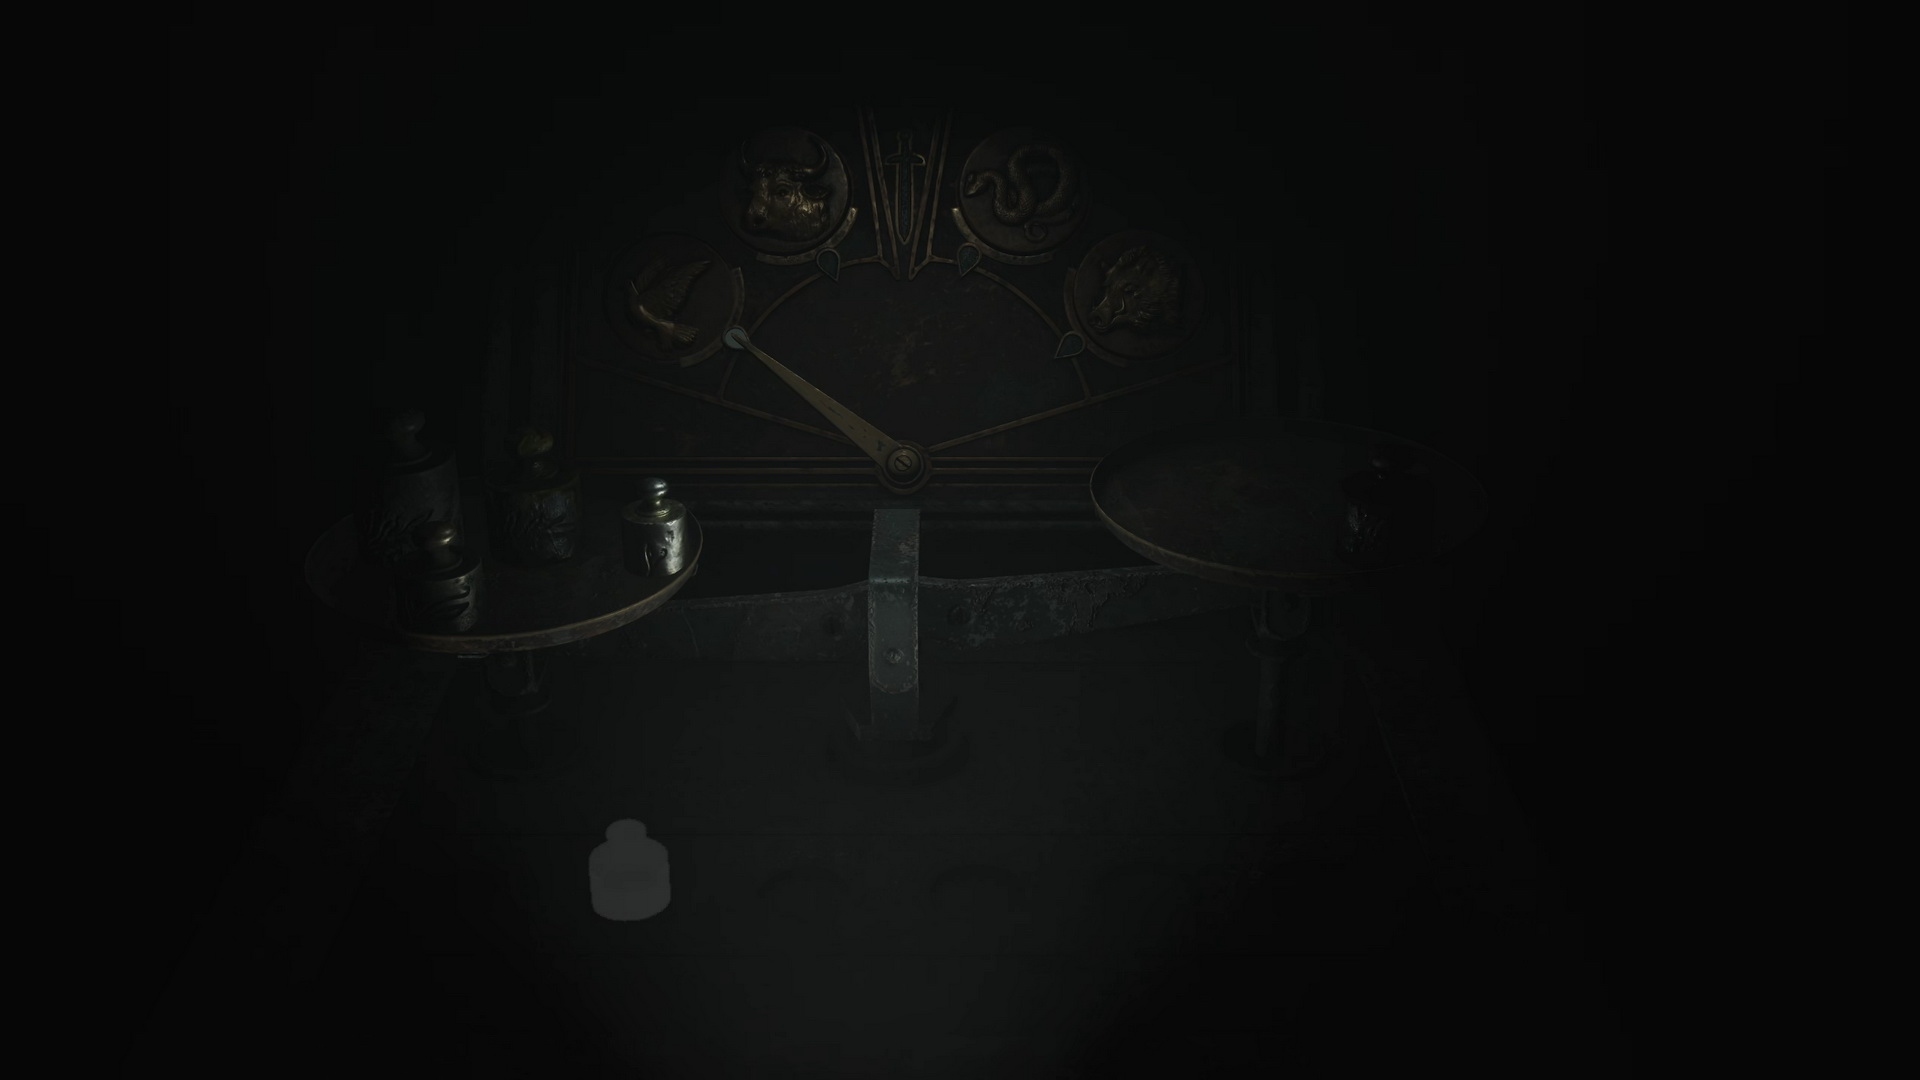
- Collect the Light Weight in 3F Warden's Office after interacting with a typewriter (press the Tab button four times).
- Put the Medium Weight (4) on the right scale and the rest of the weights (1-3-5-6) on the left one to unlock the Wingless Dove door.
|
- Collect the Lightest Weight in Cell F6 in the basement.
- Distribute the weights evenly to unlock the gallows puzzle – see the image:
- The Lightest (2), Light (3), Heavy (5) on the left scale;
- Starter (1), Medium (4) , The Heaviest (6) on the right one.
Complete puzzle solution
|
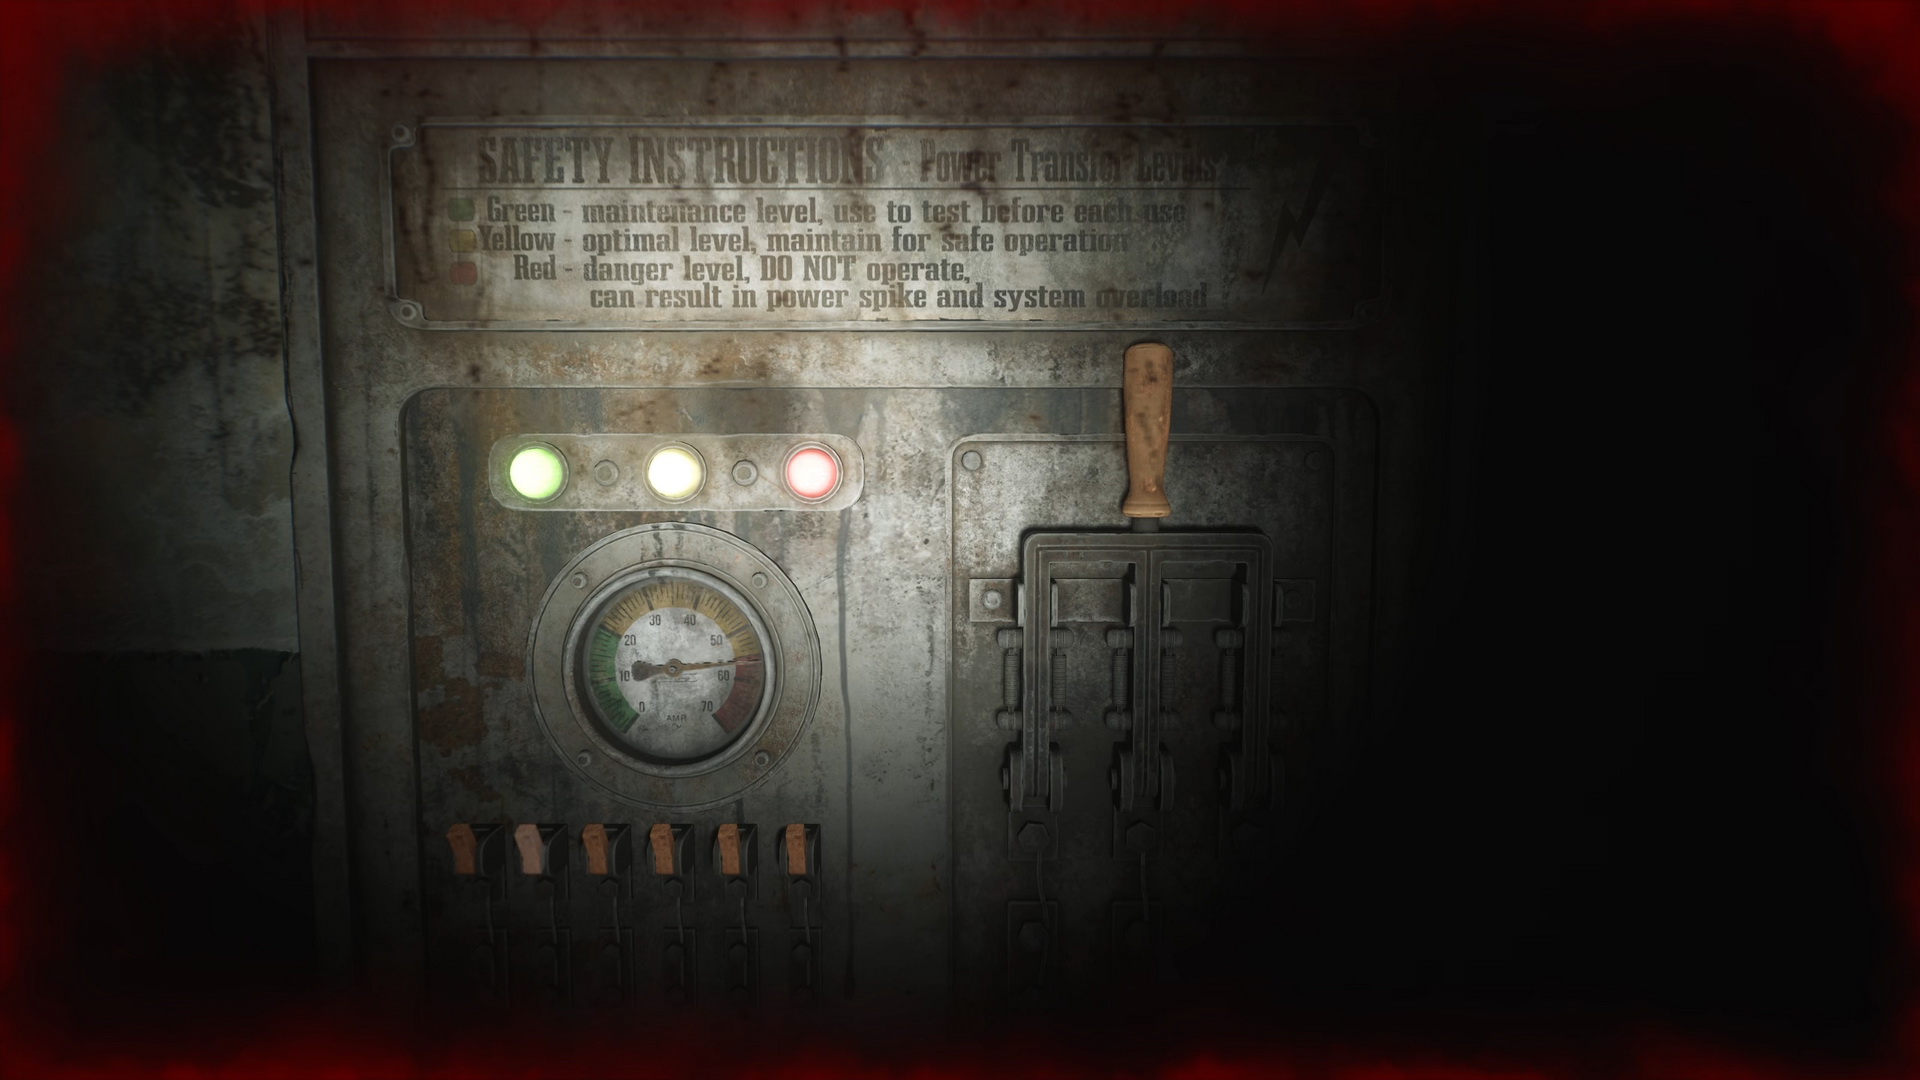
Witness Room Generator Puzzle
You need to flip all the switches up and push the dial into the red zone, causing an overload. To do so, flip the switches in this order:
Light: 4th - 5th - 2nd - 1st - 3rd
Standard: 6th - 4th - 5th - 1st - 3rd - 2nd
Hard: 4th - 5th - 2nd - 1st - 3rd - 6th - 7th
When all switches are up, and the dial is in the red zone, flip the breaker lever.
|
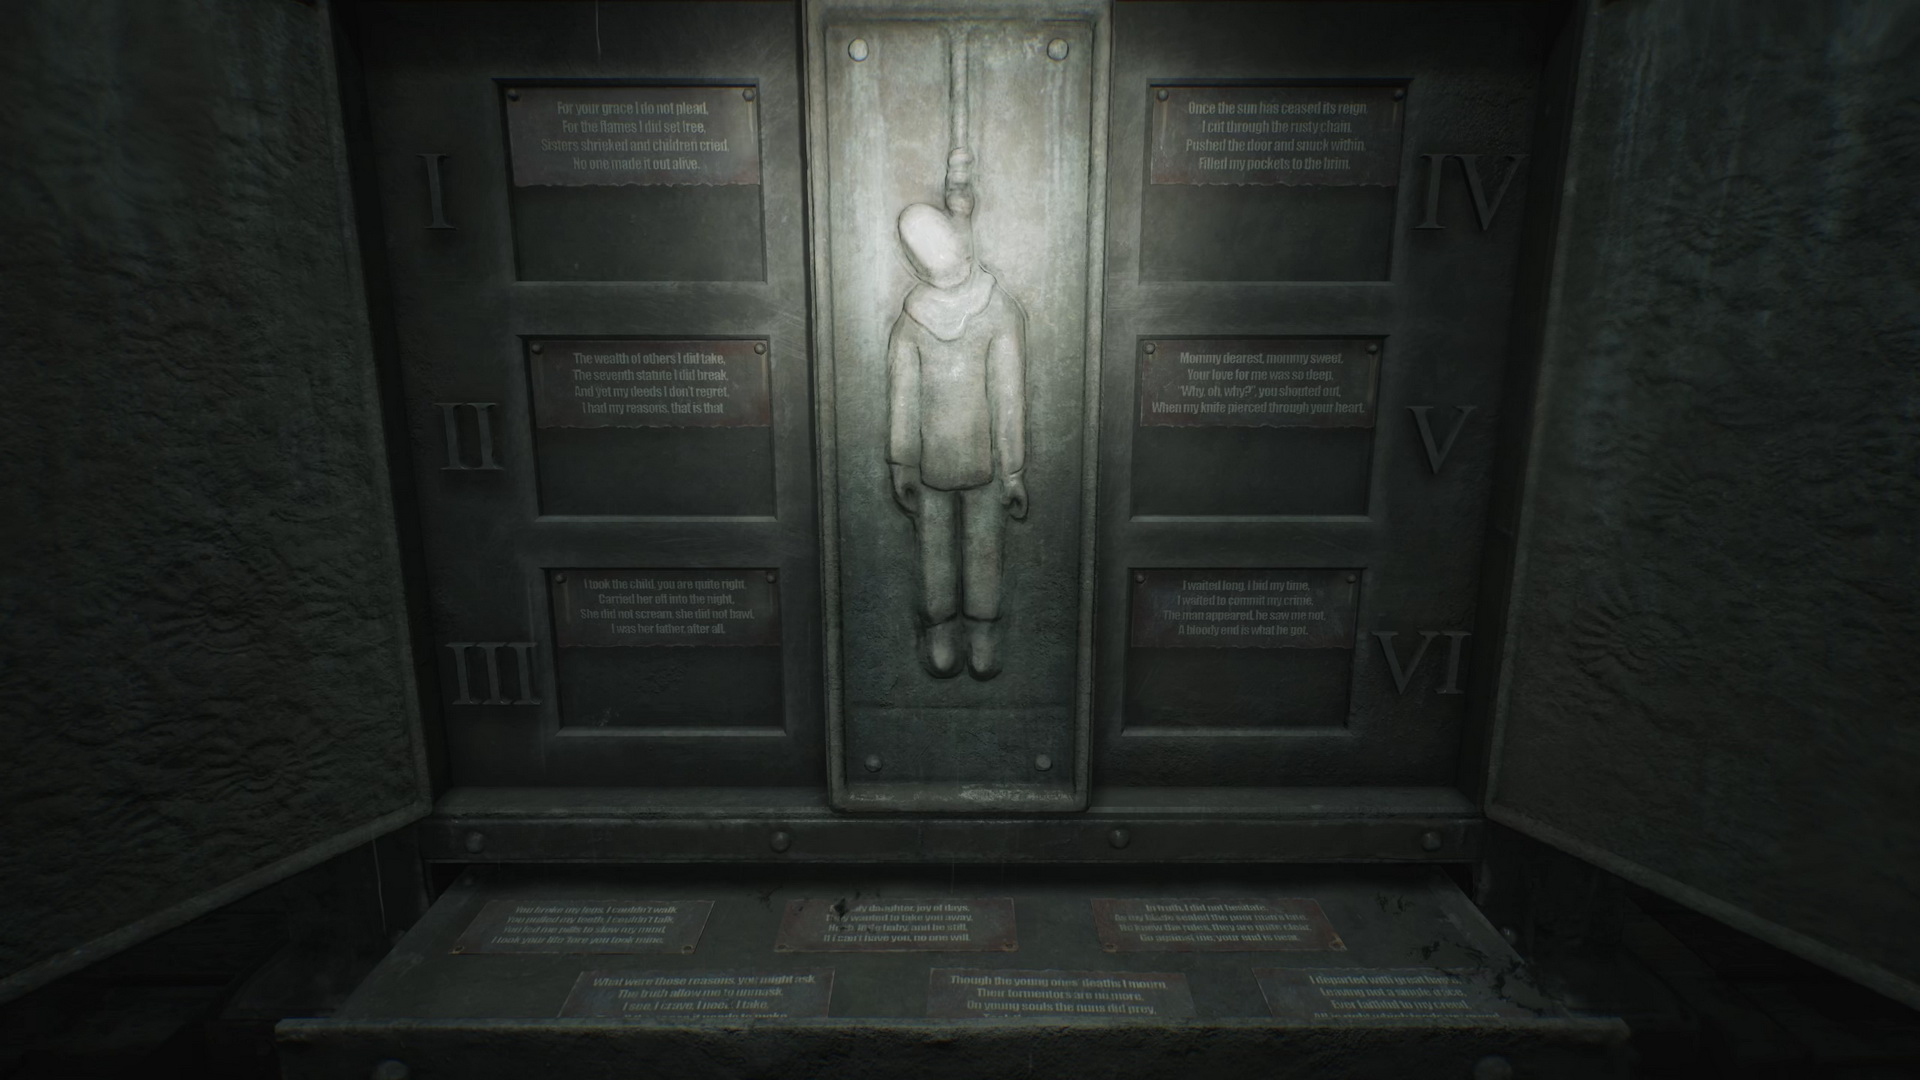
Gallows Puzzle
Match the two halves of the poems and determine an innocent person who committed their crime without malicious intent. After you do so, pull the corresponding rope with the same number. The answers are random and there are always two innocent person choices.
Complete puzzle solution
|
Here are all possible combinations of the "innocent" persons:
Light:
- I (Hallowed was the place / T'was the home of evil)
- II (This one took from others / Stealing to survive)
- III (This one, he did kidnap / Did it just to save her)
- IV (This one broke the lock / And steal he did a remedy)
- V (This one dared / A monster's life)
- VI (This one clenched his fist / Turned against his bully)
Standard:
- I (For your grace I do not plead / Though the young ones deaths I mourn)
- II (The wealth of others I did take / The reason is, I have to say)
- III (I took the child, you are quite right / Forgive me, child, for I have failed)
- IV (Once the sun has ceased its reigh / So, my guilt is plain to see)
- V (Mommy dearest, Mommy sweet / You broke my legs, I couldn't walk)
- VI ( I waited long, I bid my time / In truth, he was less man than beast)
Hard:
- I (Under veil of nightfall, in the ink of dusk / Death of the blameless, a damnable sin)
- II (In twilight's grasp, a thief emerges sly / With hands atremble, he seizes what he must)
- III (In shroud of twilight, a tale doth unfold / A cruel twist of fate, an outcome unsought)
- IV (In clandestine steps, darkness as his guide / Amidst the moon's glow, a desperate truth)
- V (With her senses failing, she looks, mouth agape / 'Twas a twisted fate that forced the man's hand)
- VI (In shadows cast, the hunter lies in wait / Desperation's grip suffocates the air)
If you make an incorrect guess, you will be dropped down to an area filled with monsters from which you must fight back. |
Labyrinth
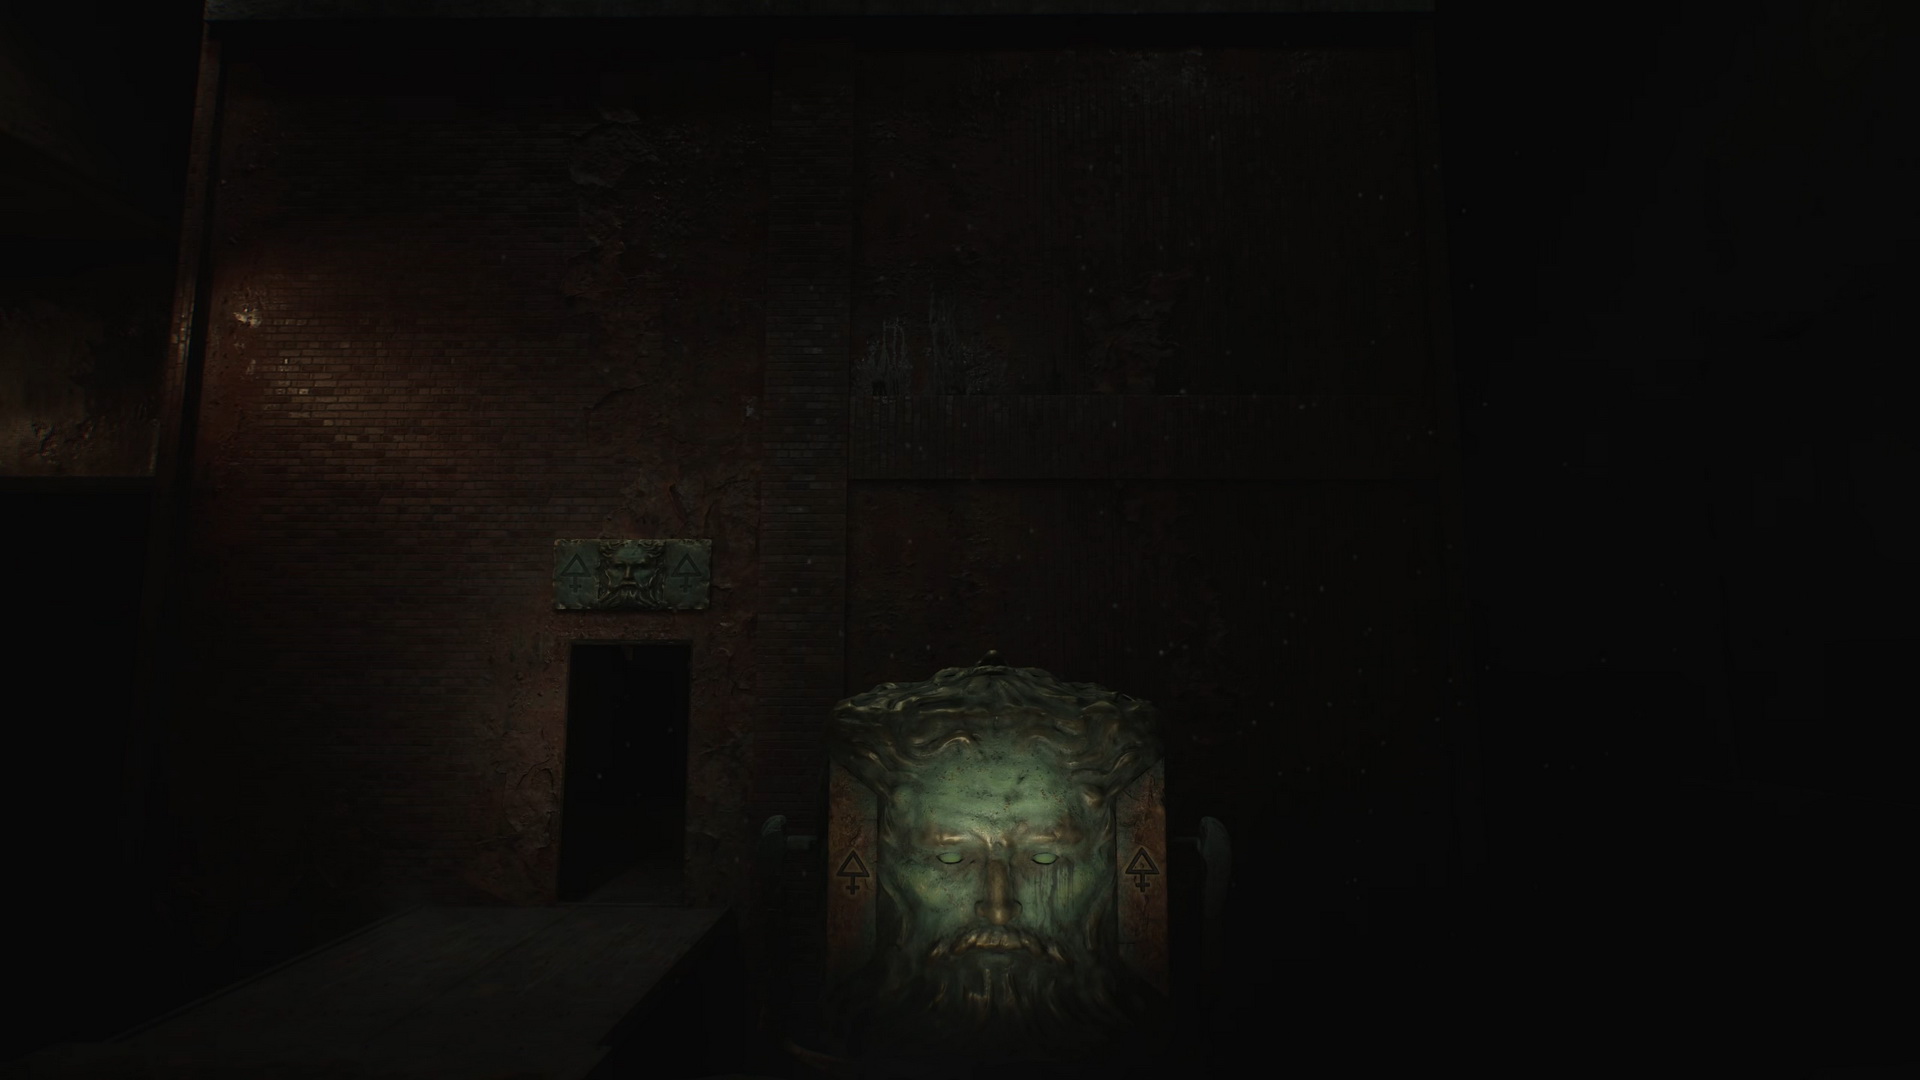
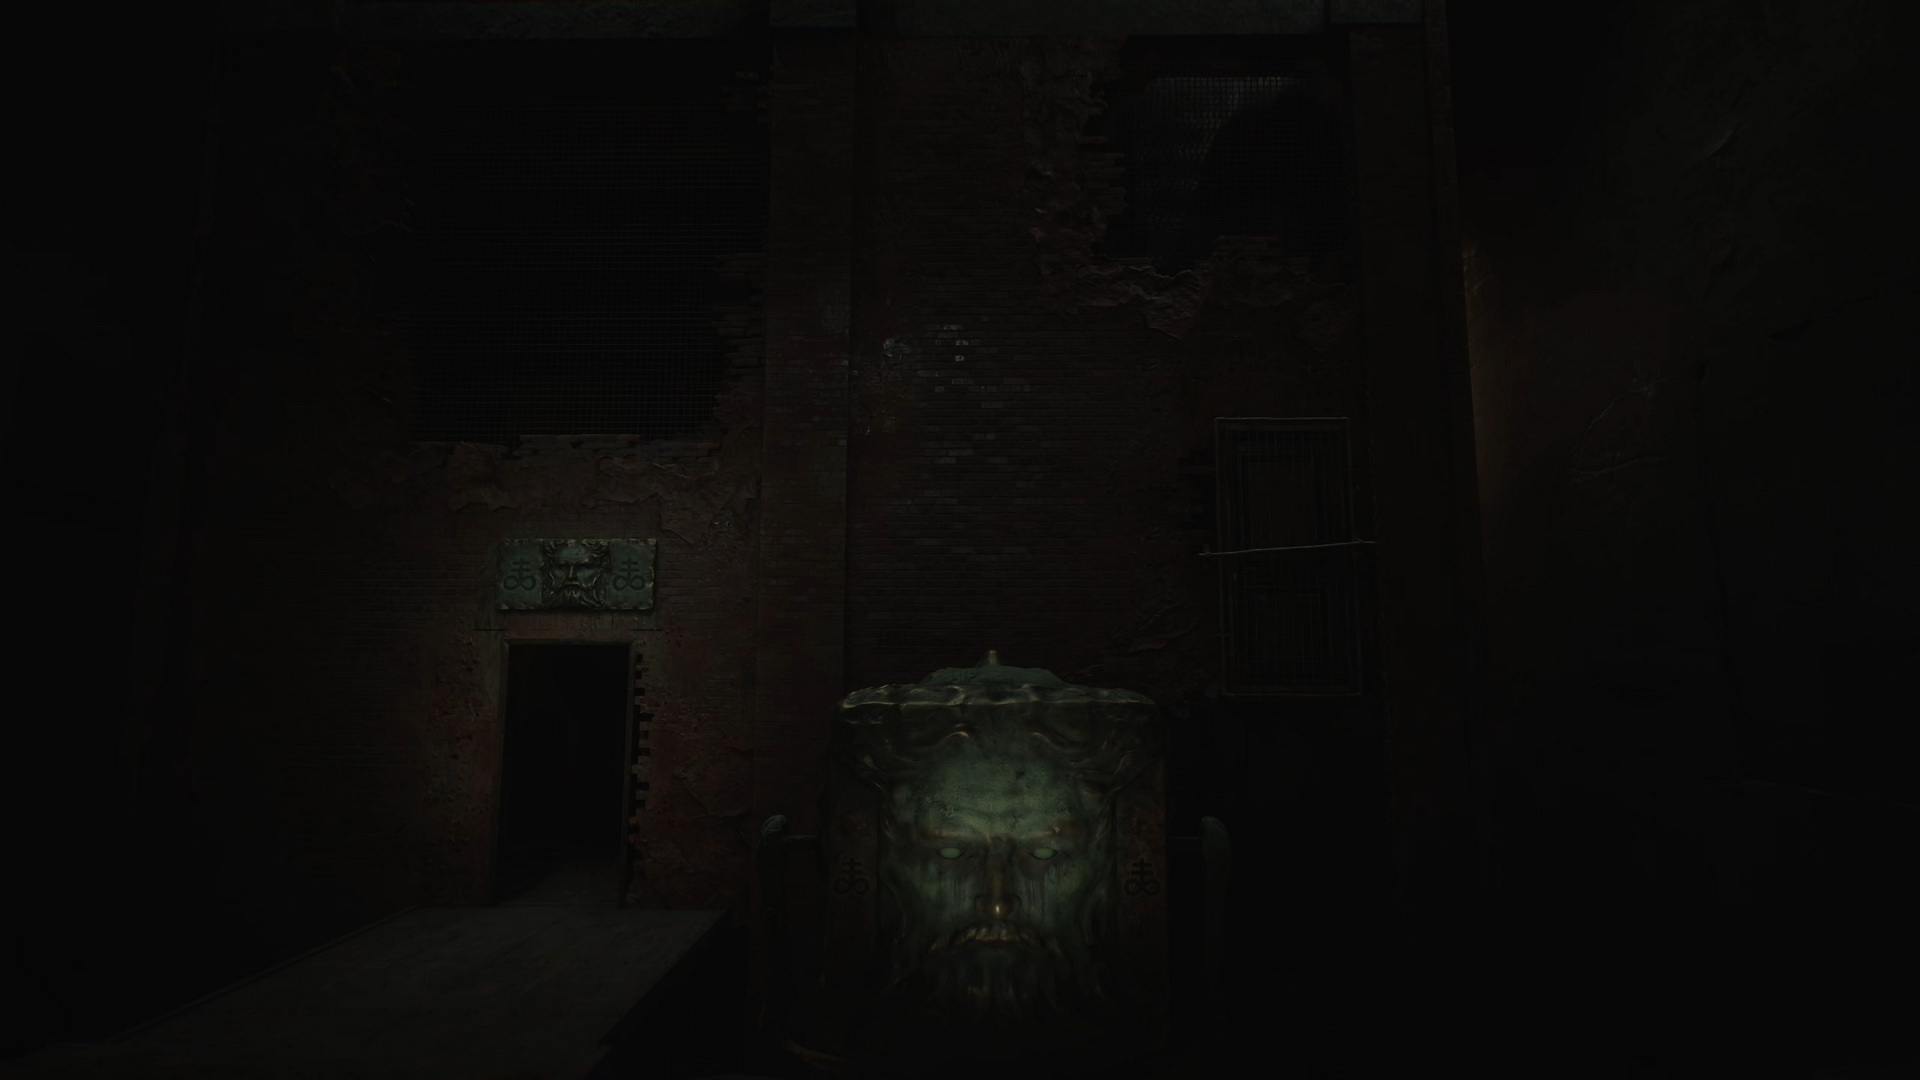
Rotating Cube Puzzle
Rotate the cube to match the symbols visible on the walls to access various Labyrinth areas: |
- Symbol of an upward-facing triangle with a cross at the bottom (Rotten Area).
|
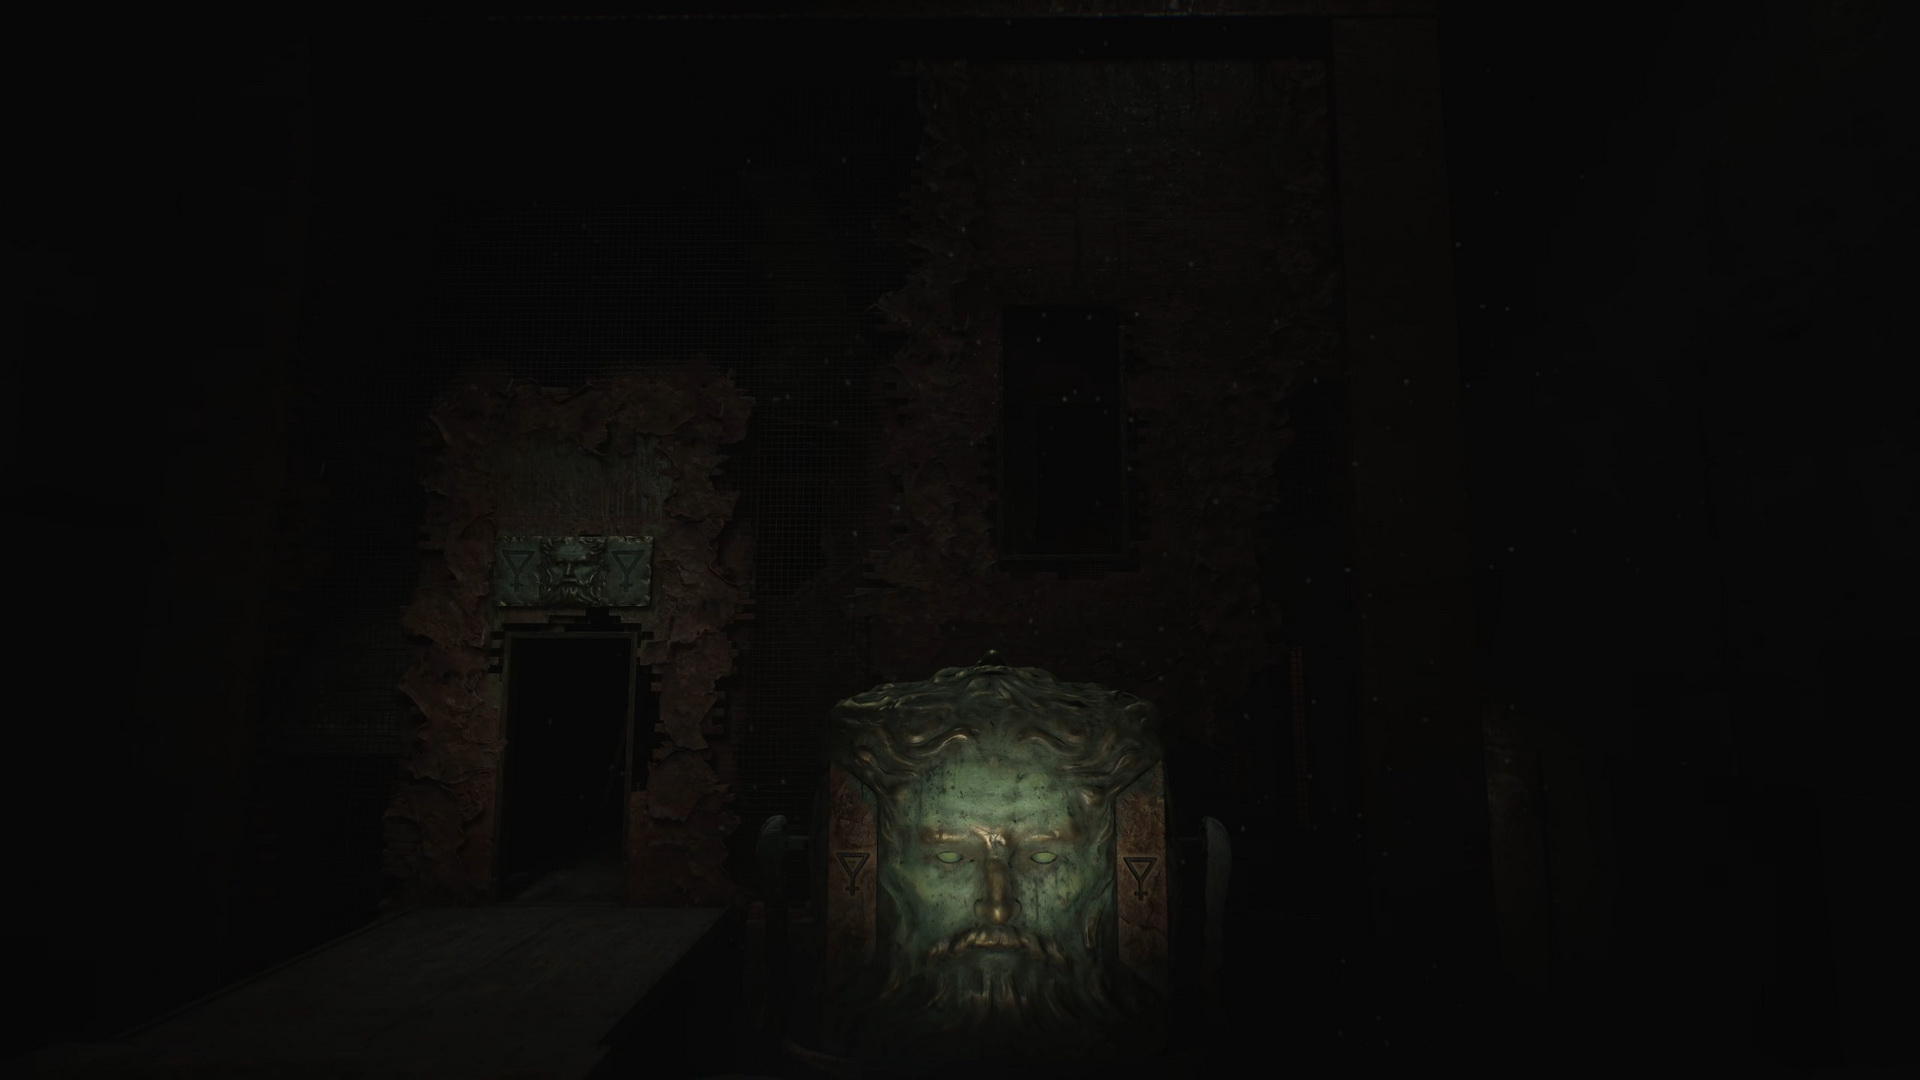
- Symbol of a double cross with two circles at the bottom (Desolate Area)
|
- Symbol of a downward-facing triangle with a cross at the bottom (Ruined Area).
|
Lakeview Hotel
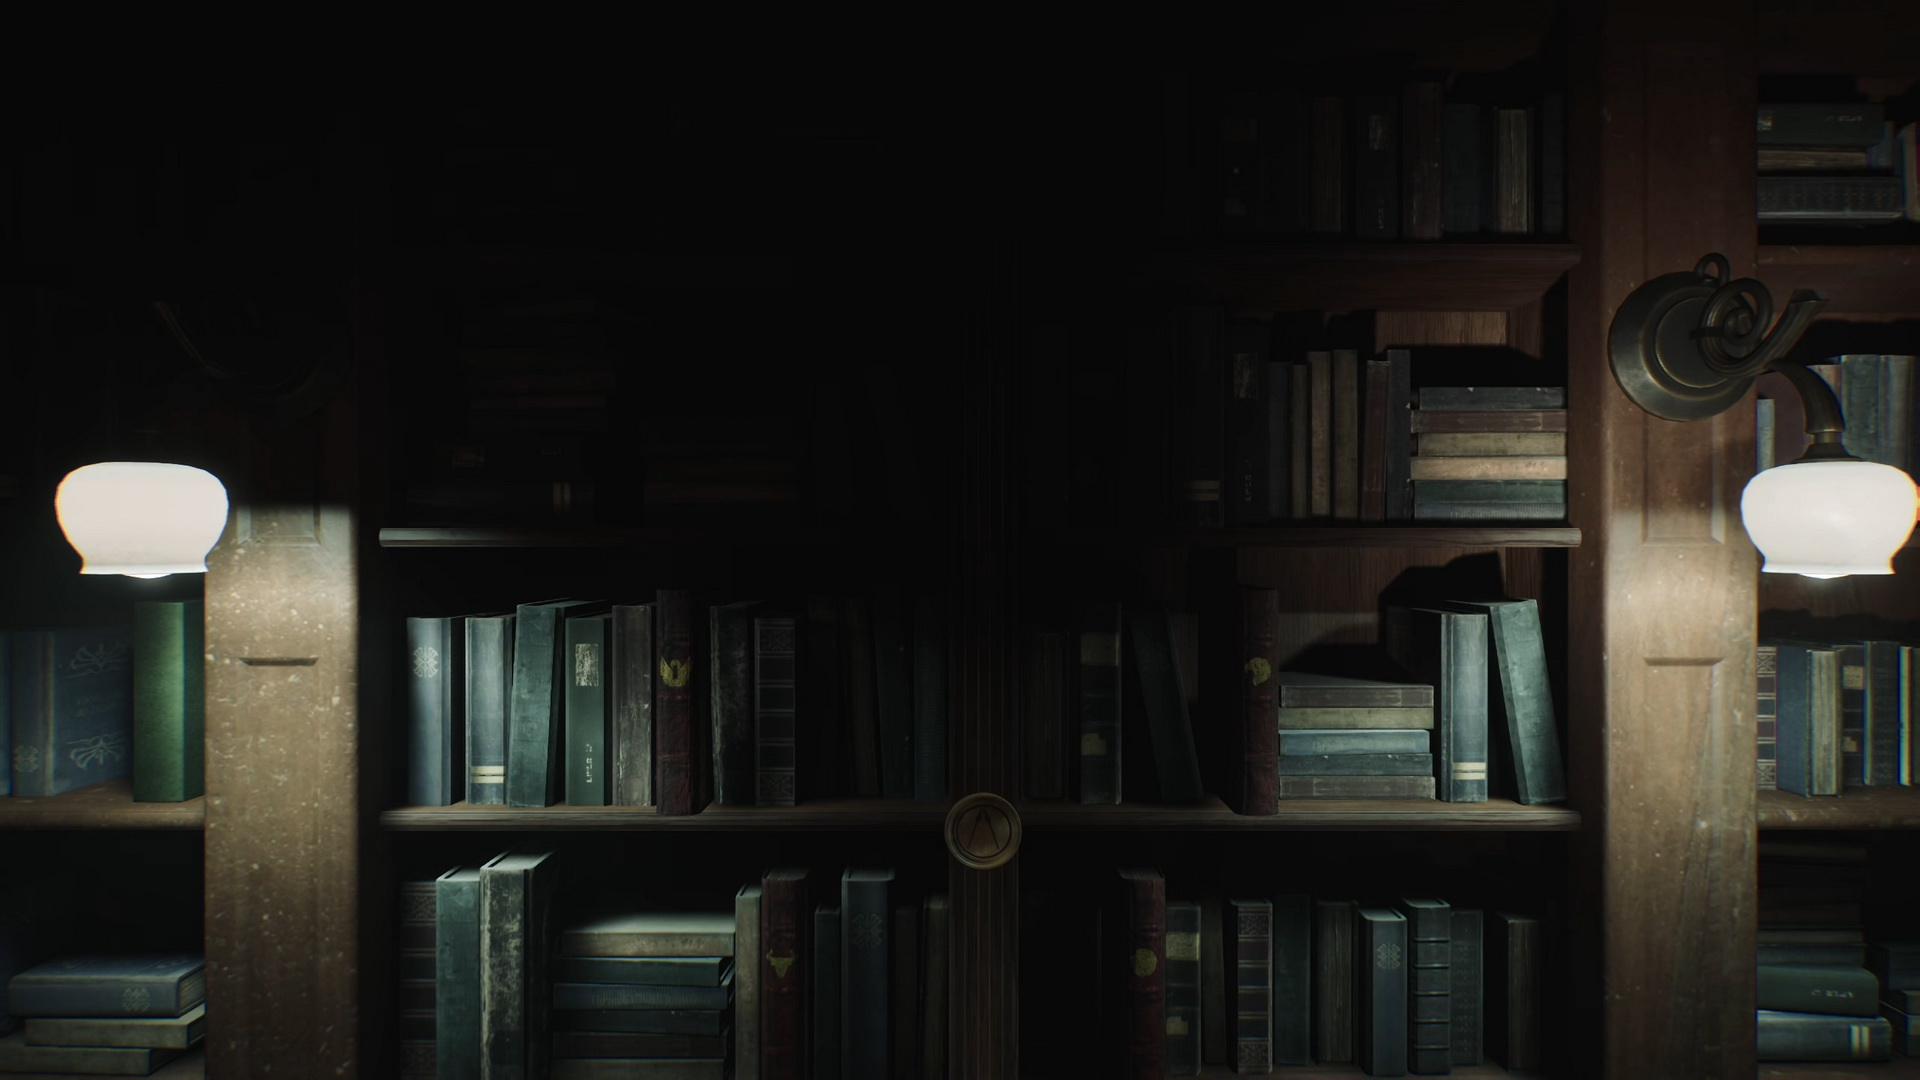
Reading Room Bookshelf Puzzle
Pick up the four books in the Reading Room and place them on the bookshelf so that their cover symbols would match the painting on the opposite side. Note that the spear symbol is upside-down, so the symbols should be rotated accordingly:
| Winged Man |
|
Eagle |
| |
△ |
|
| Bull |
|
Lion |
Complete puzzle solution
|
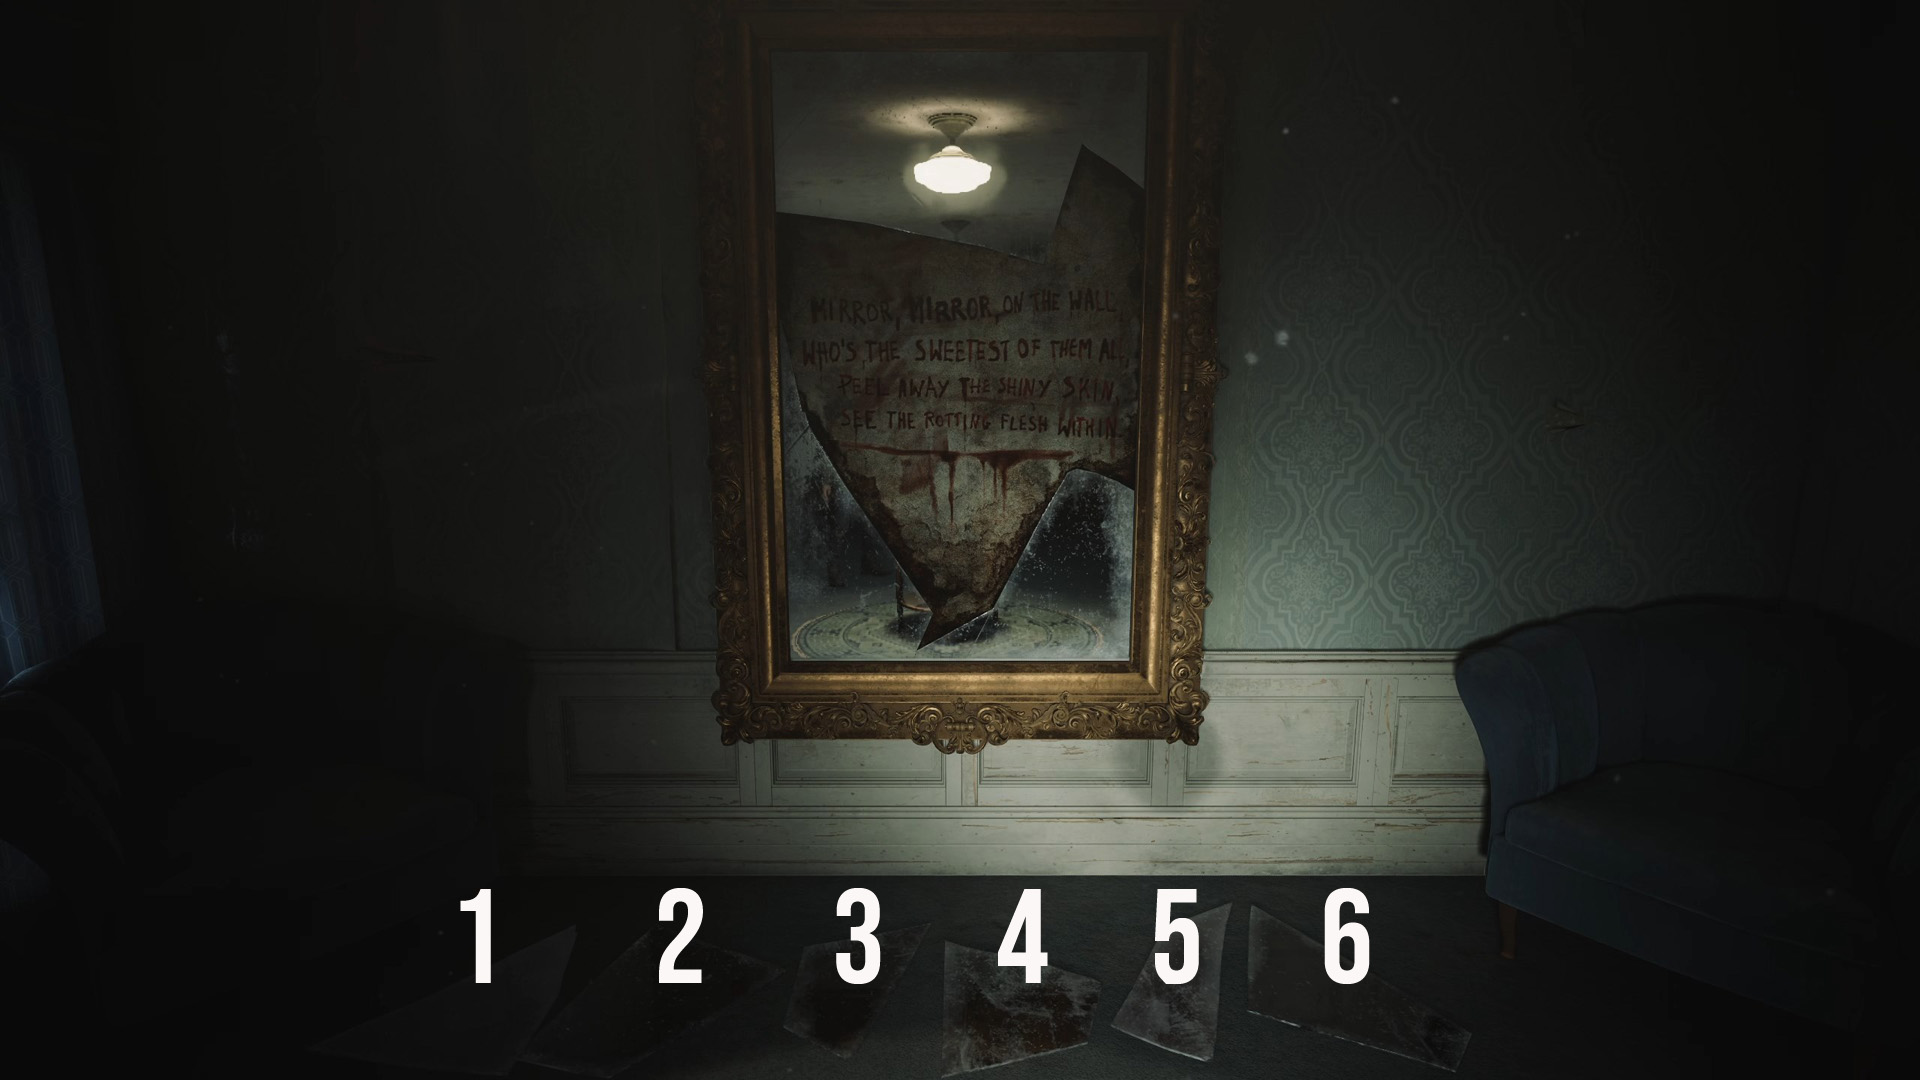
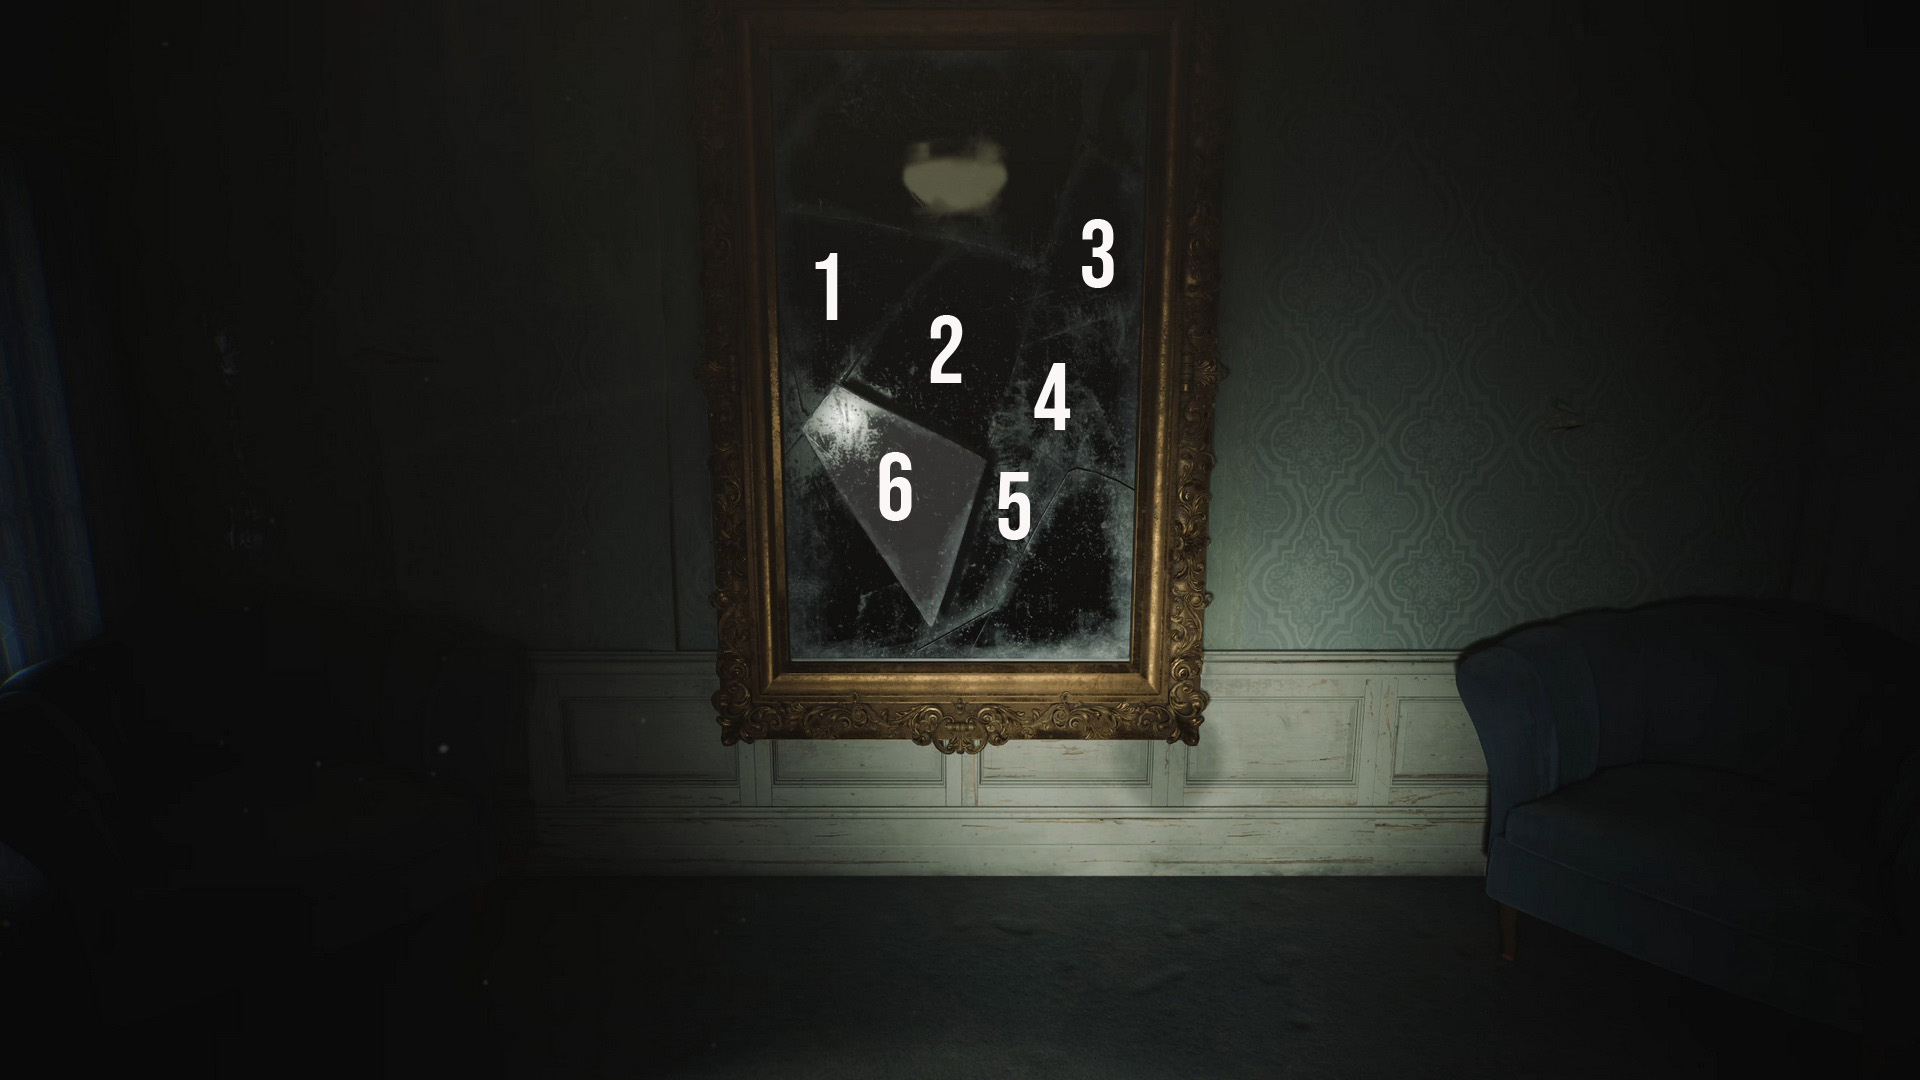
Room 202 Mirror Puzzle |
Collect the required items:
- Find either the Rotten Apple on a bench in the eastern part of the garden or the Ripe Apple on a small table in the back corner of the 2F Hall.
- The Mirror Shard is on the bed in Room 202.
|
Quick puzzle solution:
- Place either the Ripe Apple or the Rotten Apple on a round plate in front of the broken mirror (affects the ending).
- Place all the shards in the mirror until it is complete.
Your reward will be the Snow White Figurine that appears on the table in Room 201.
Complete puzzle solution
|
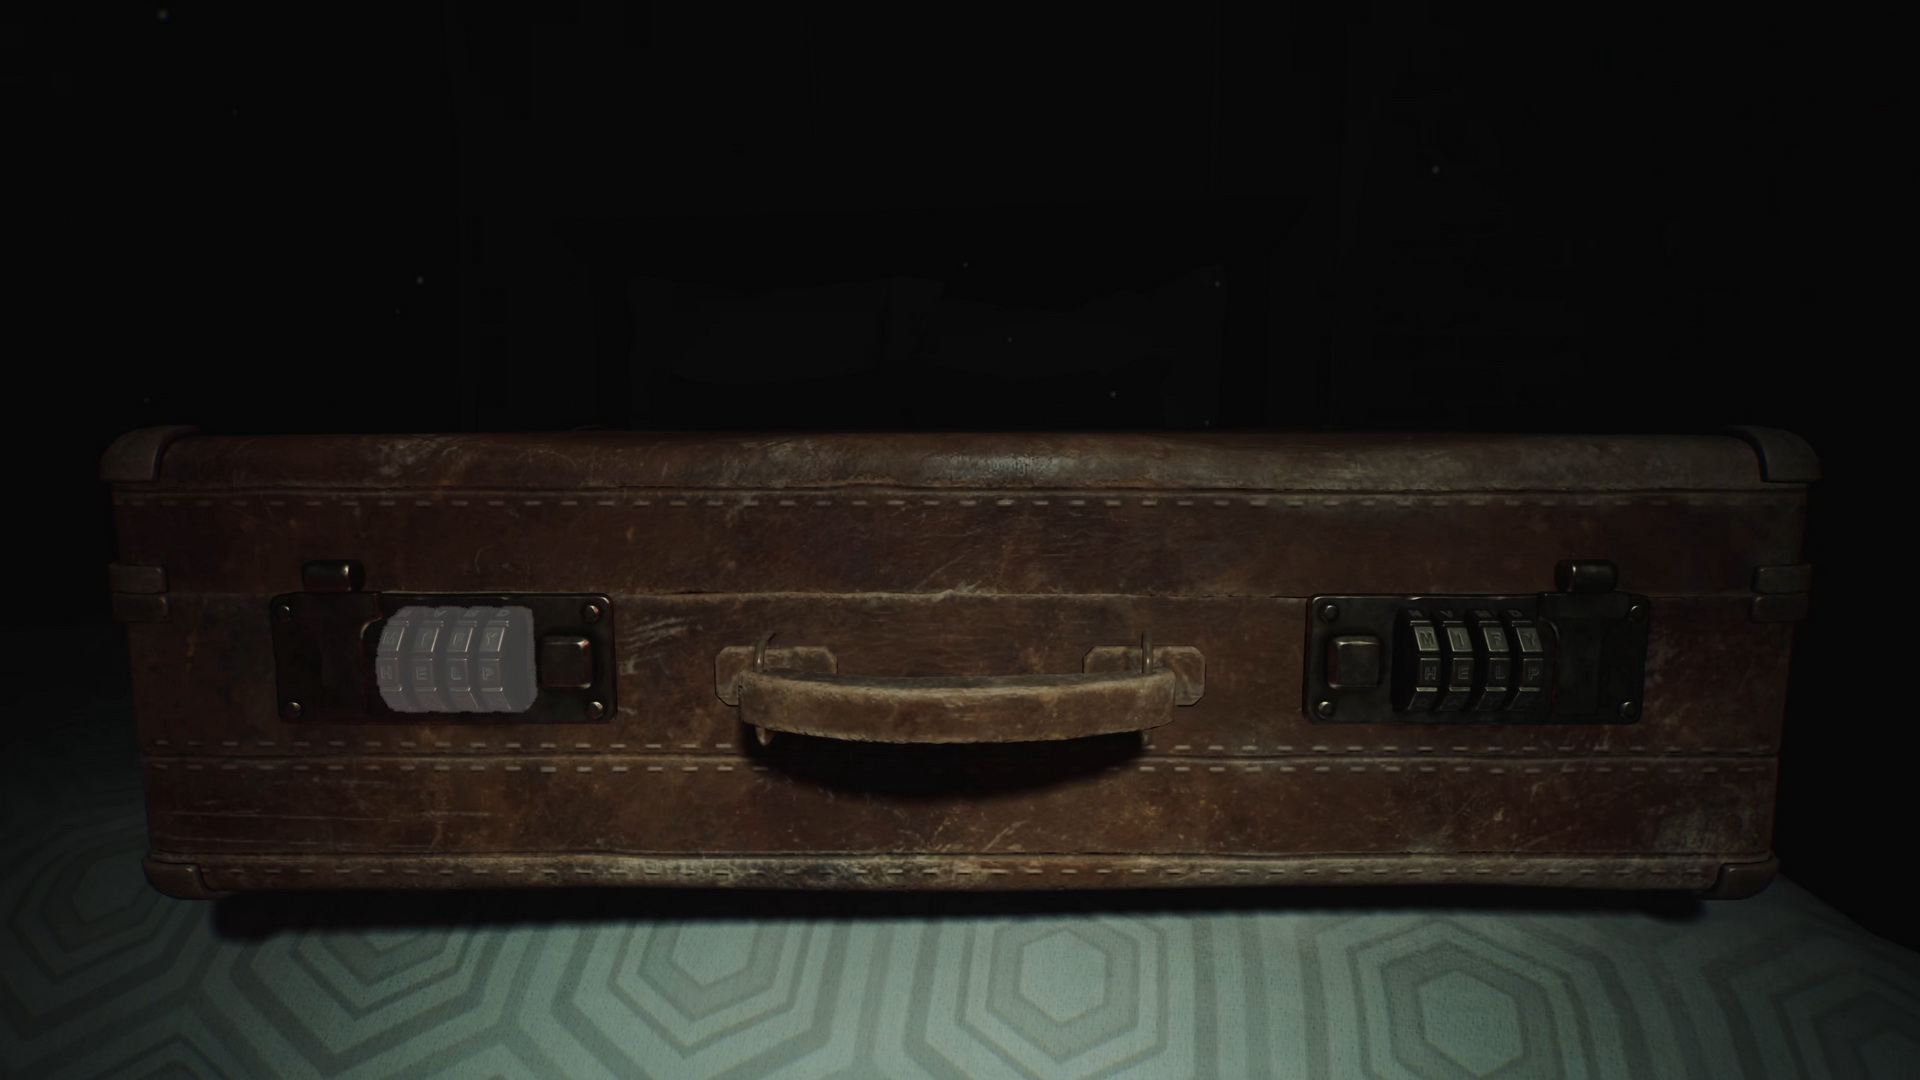
Room 205 Vanity Mirror Puzzle
Collect the required items (skippable):
- Find the Boltcutters on a shelf in the 3F Utility Room.
- Shoot the glass roof from the balcony of Room 217 to obtain the Can Opener from the Lake Shore restaurant on the first floor when it falls (on light difficulty, it will drop itself when you enter the balcony).
- Find the Light Bulb attached to the fish statue in the gated garden area (use the Boltcutters to get in).
- Find the Paint Can in Room 318 after the fight with Mandarin in the Conference Room.
- Combine the Can Opener and the Paint Can to open the can.
- Combine the Open Paint Can and the Light Bulb to get a Red Light Bulb.
|
Quick puzzle solution:
- Remove the broken light bulb from the vanity mirror.
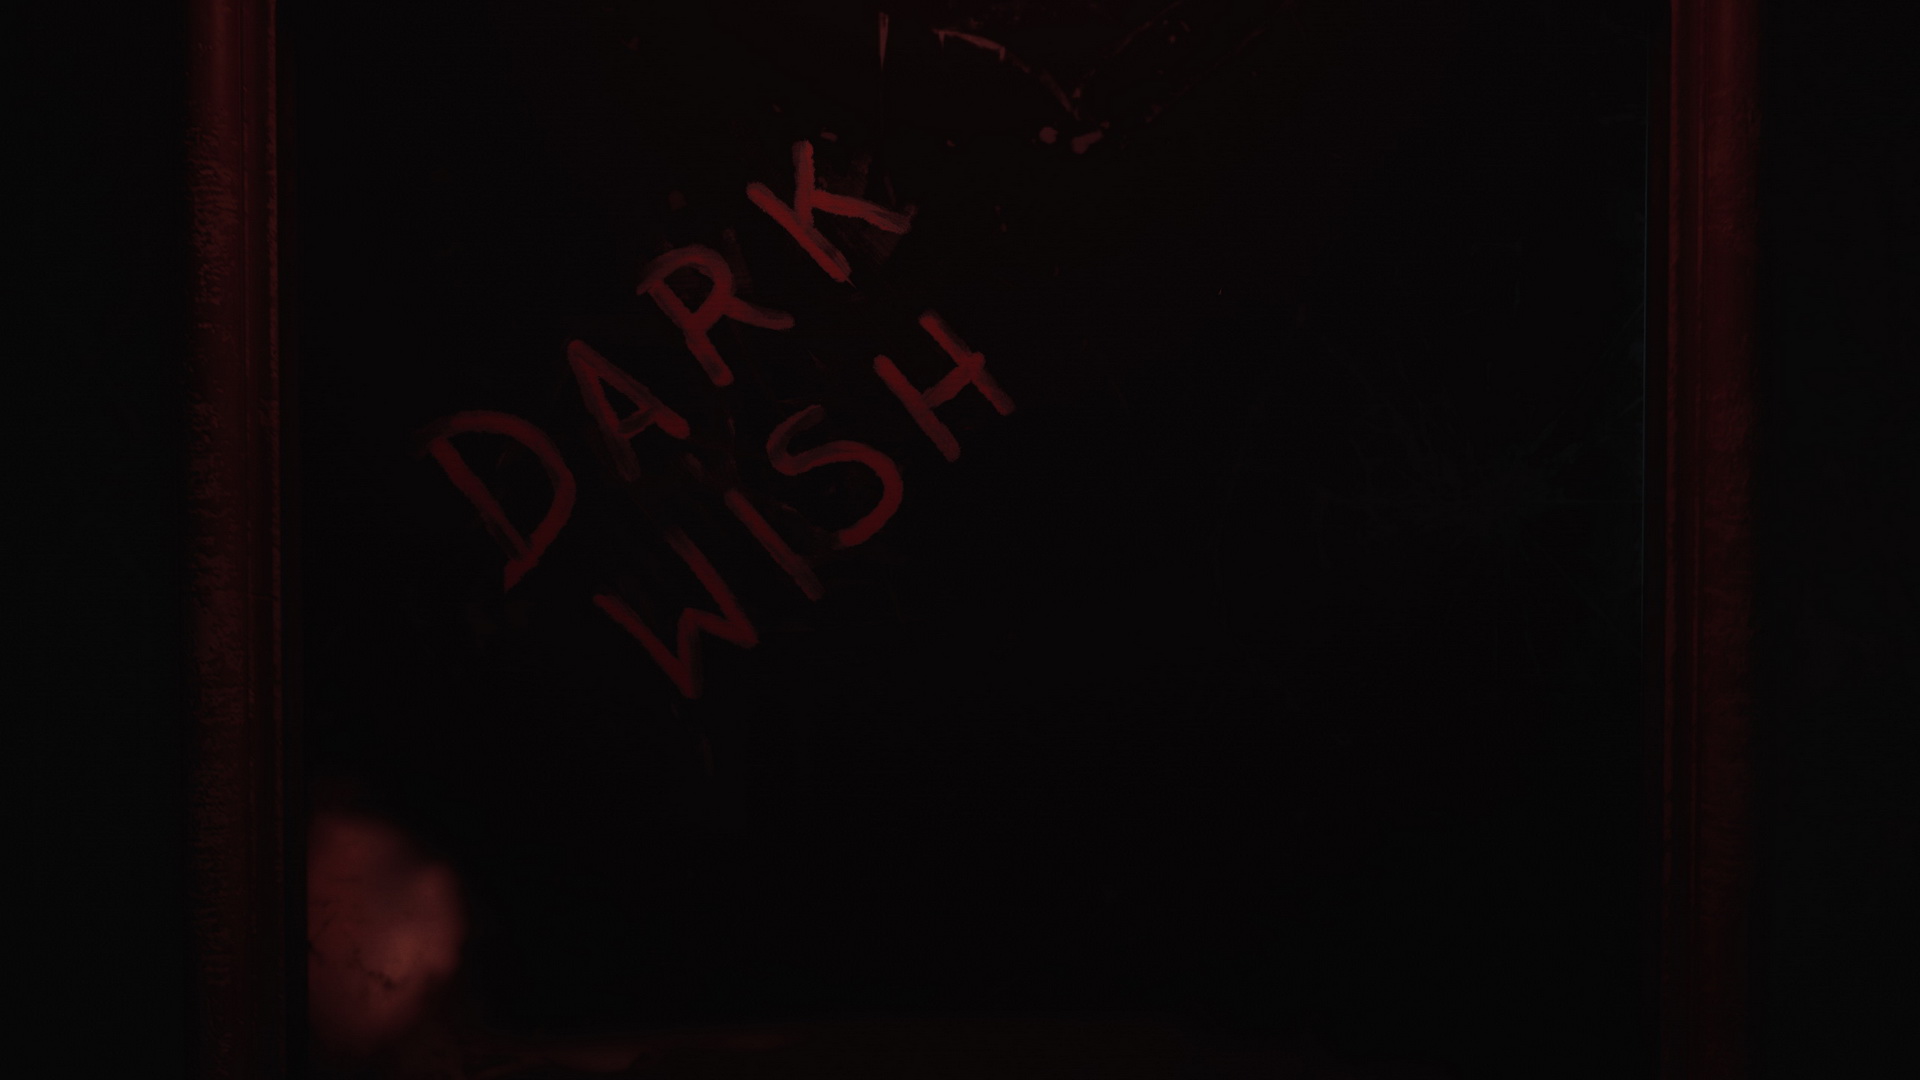
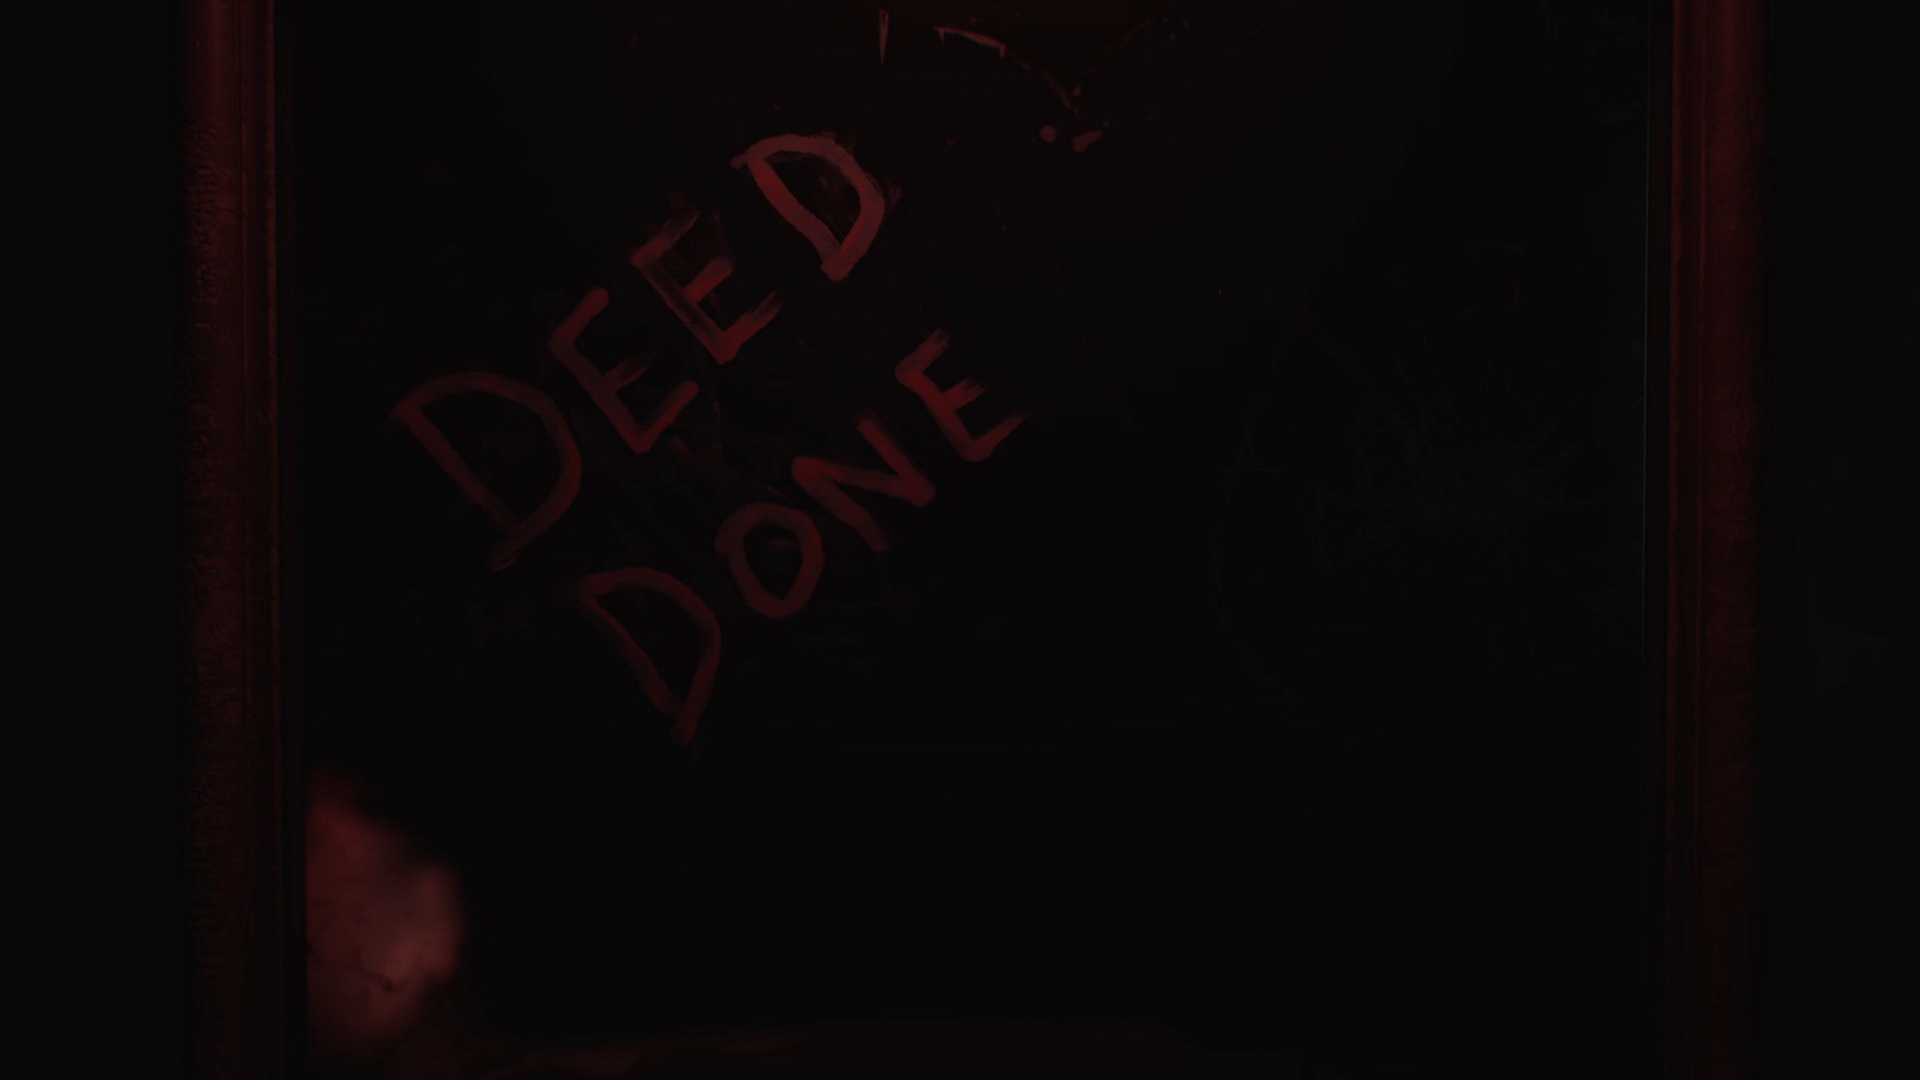
- Insert the Red Light Bulb into the vanity mirror to reveal the hidden message.
|
- Enter the message as a code for the briefcase.
Light: DARK WISH
Standard: DEED DONE
Hard: LOVE LUST
Complete puzzle solution
|
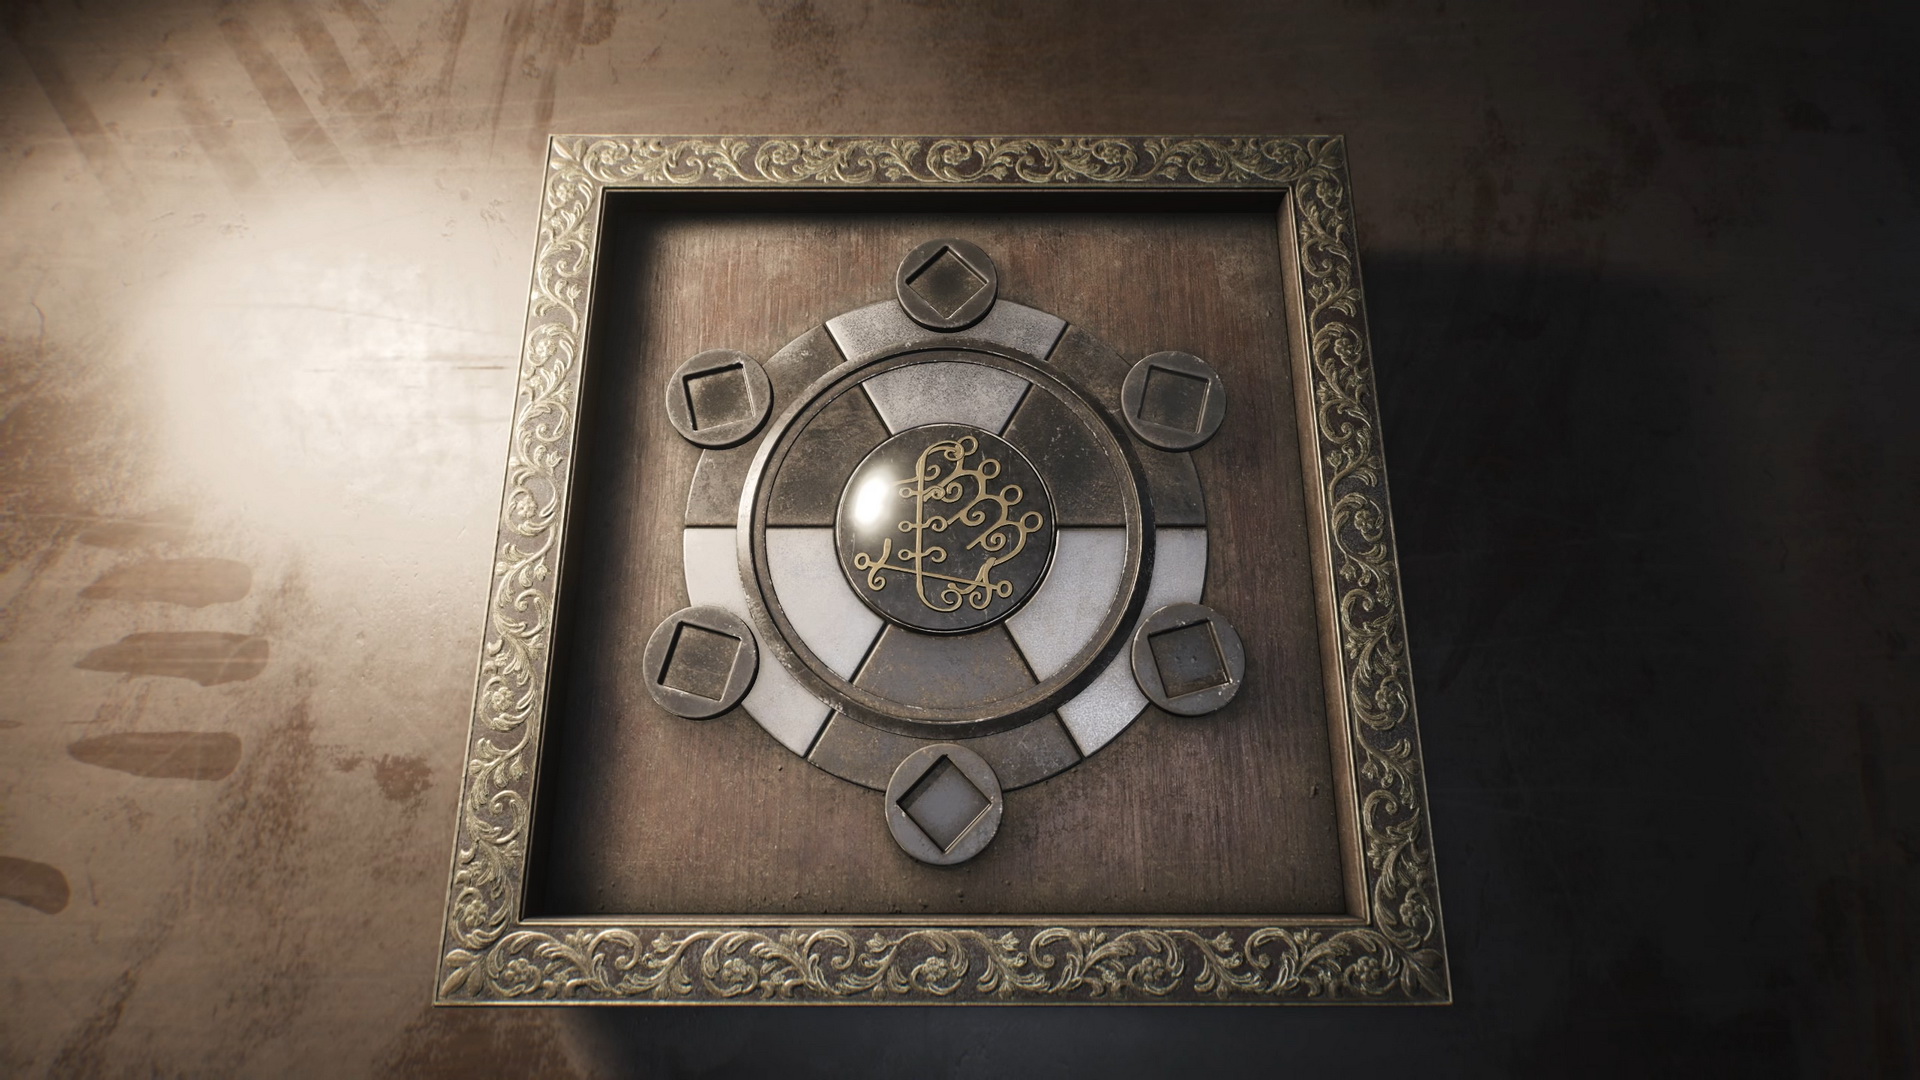
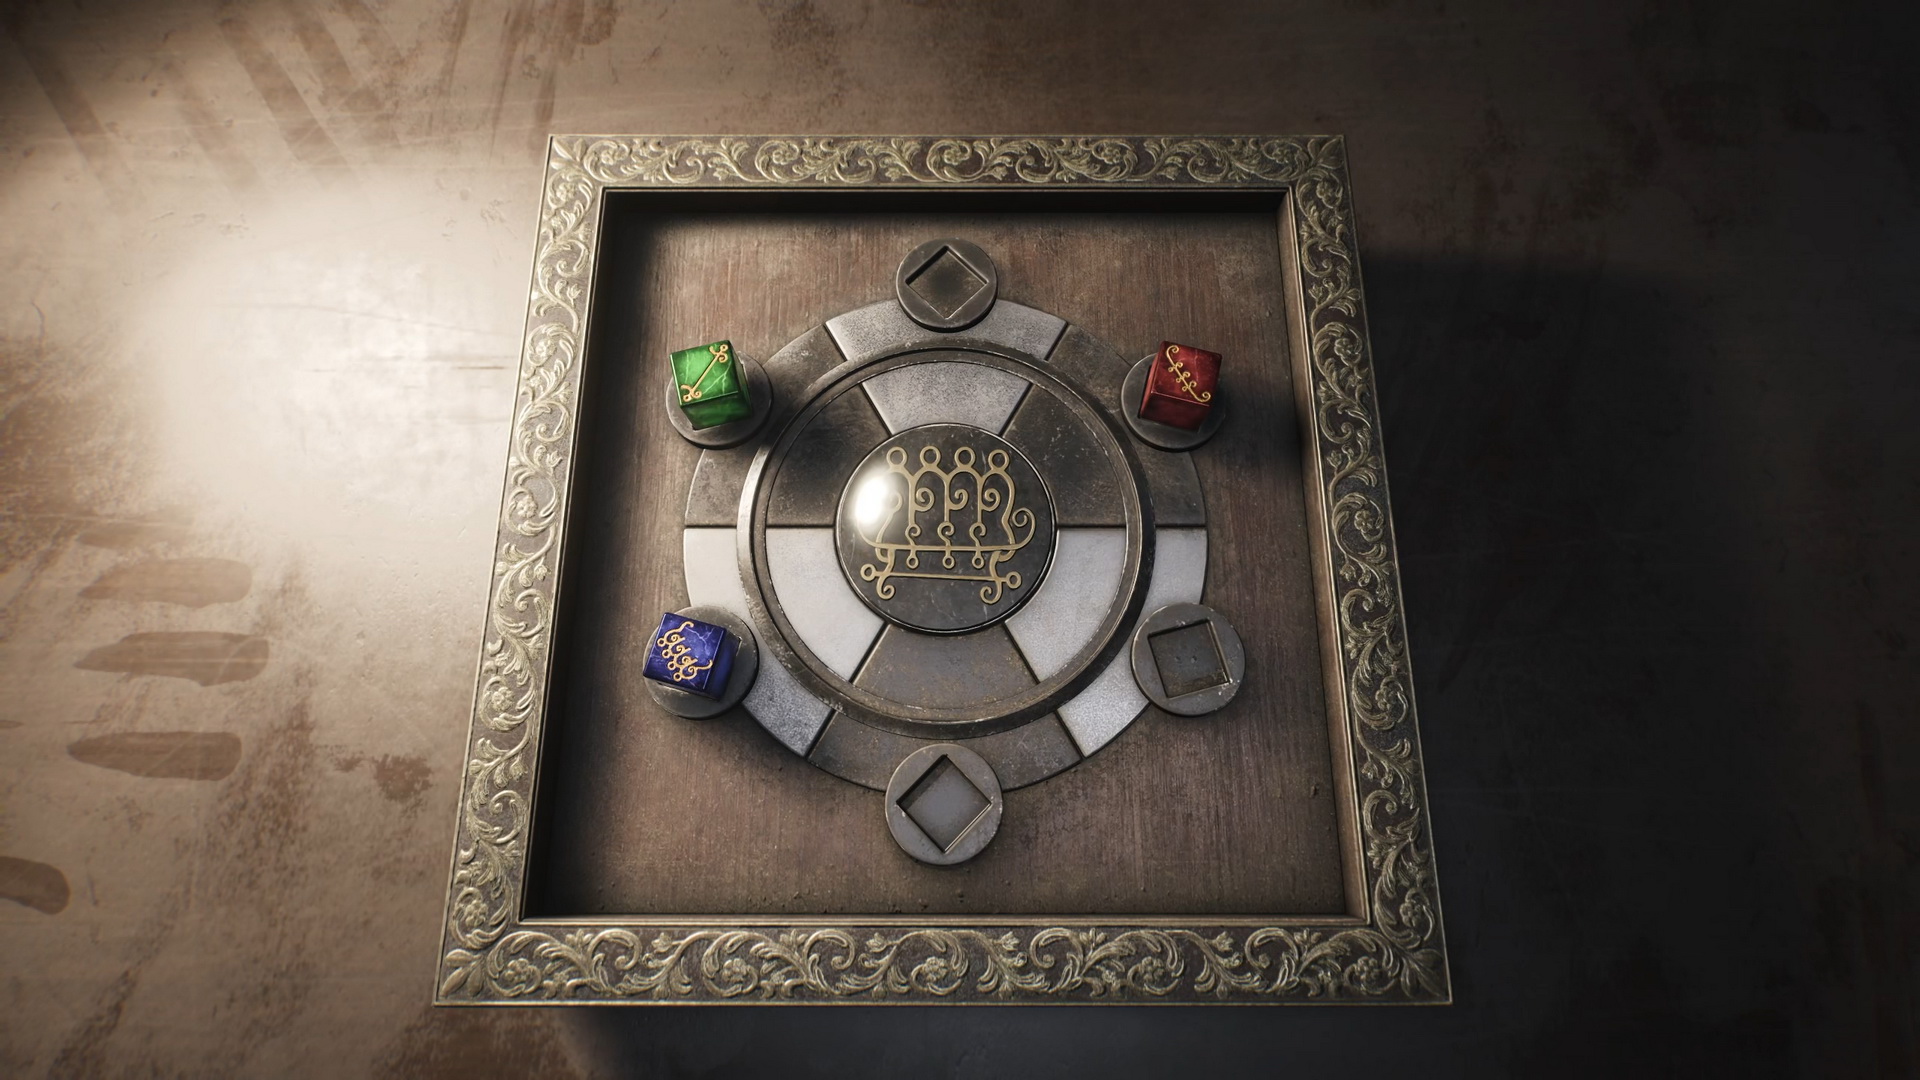
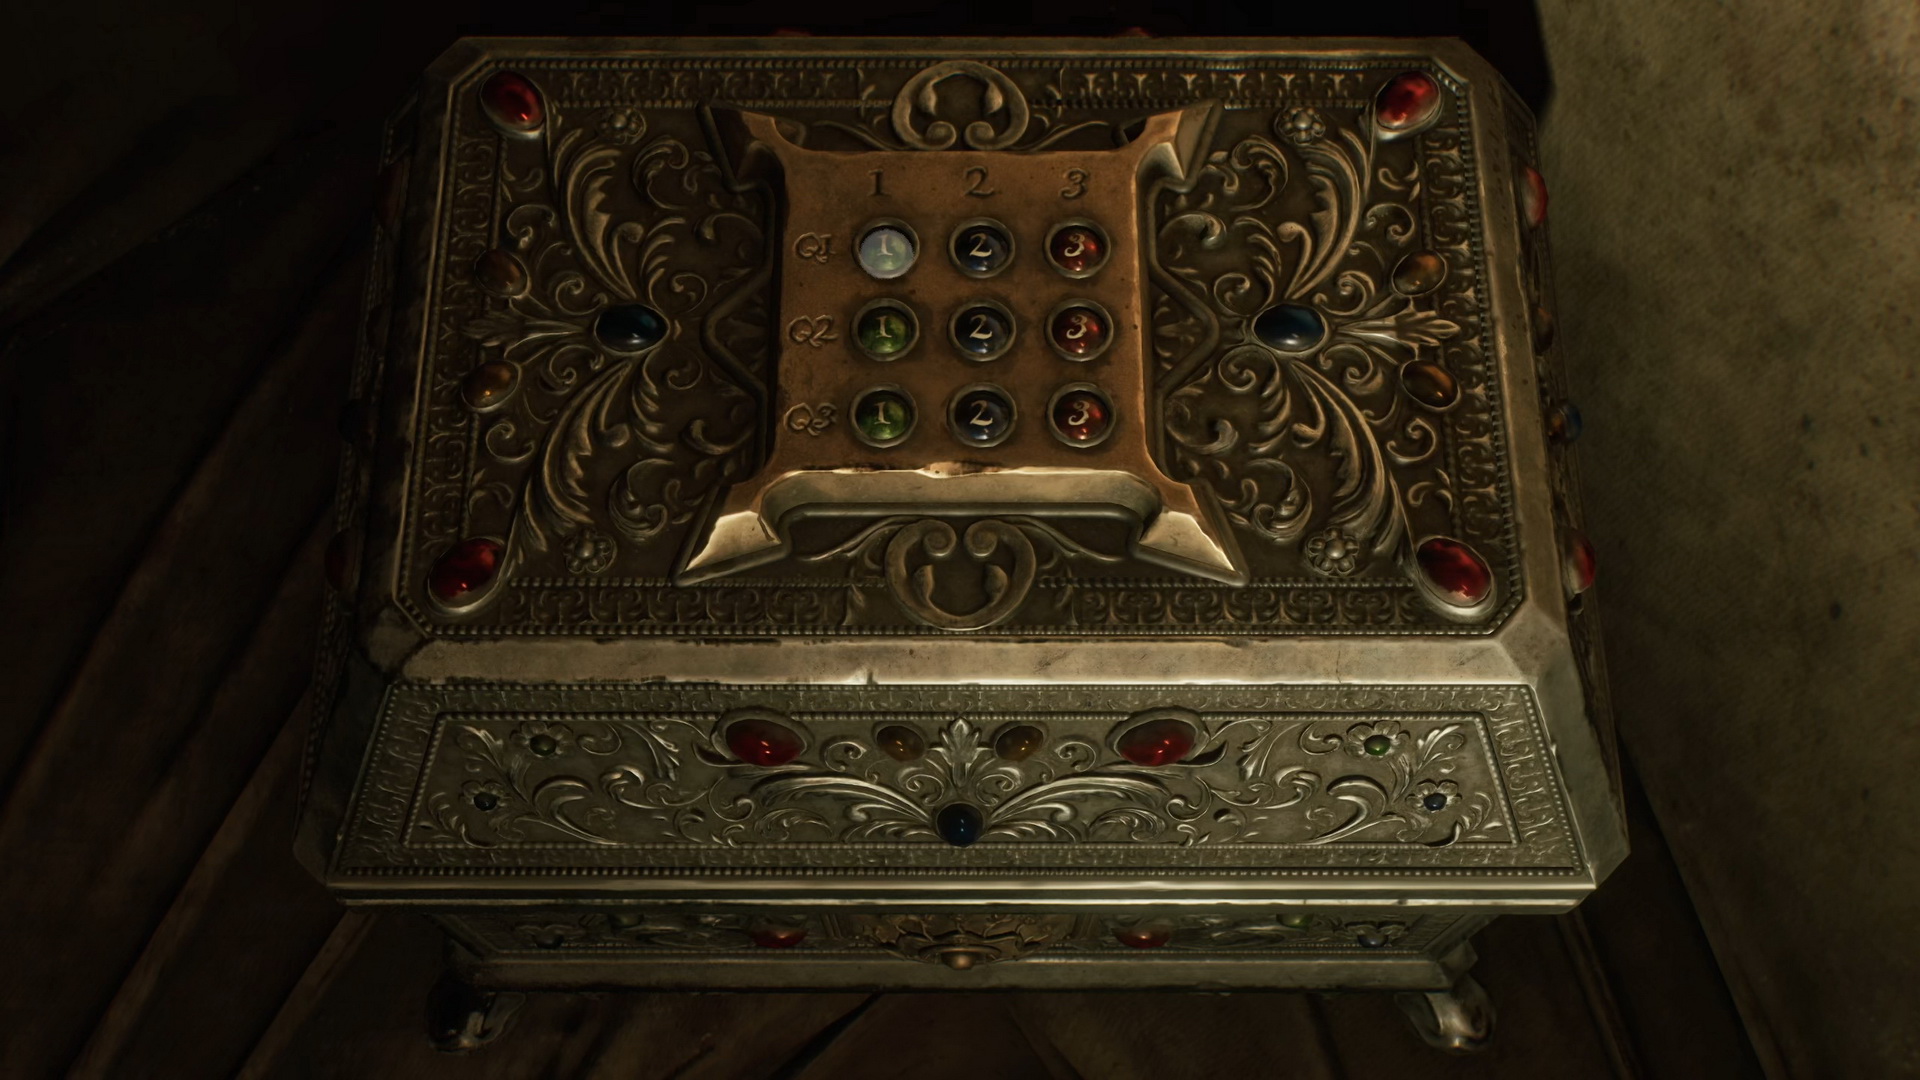
Gem Box Puzzle
Collect the three gemstones (you can skip collecting them and solving the puzzle as the code for the Break Room safe is always the same):
- Blue Gemstone is in an open freezer in the Freezer Room.
- Green Gemstone is on a counter in the Kitchen (accessed through the vent to the Cafeteria).
- Red Gemstone is in a decorative box in the Manager’s Room (push the wardrobe in the TV Room for access).
|
Place the gemstones in the corresponding slots to adjust the image in the center to match the painting in the Manager's Office:
- Blue Gemstone - lower left slot.
- Green Gemstone - upper left slot.
- Red Gemstone - upper right slot.
Inside the gem box you will find a paper with a number that is the code for the Break Room safe. The safe code is always 7414.
Complete puzzle solution
|
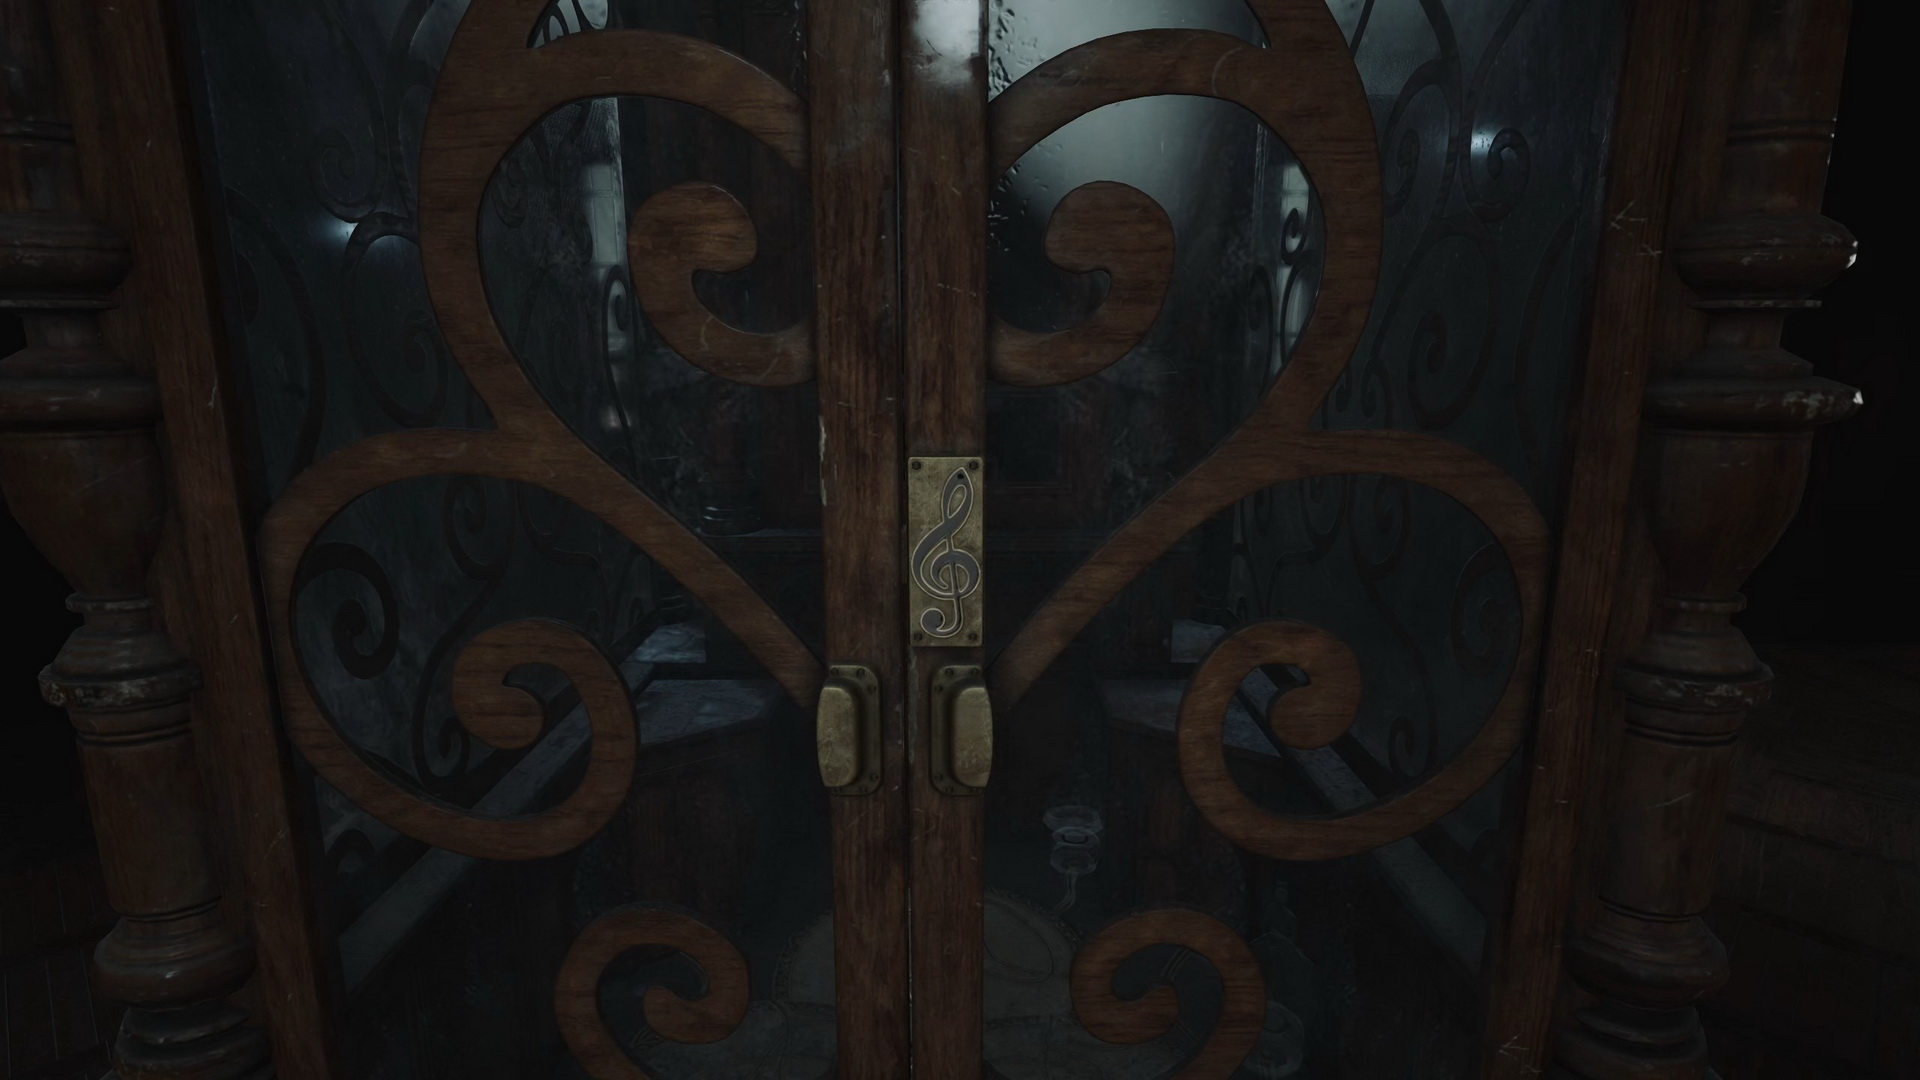
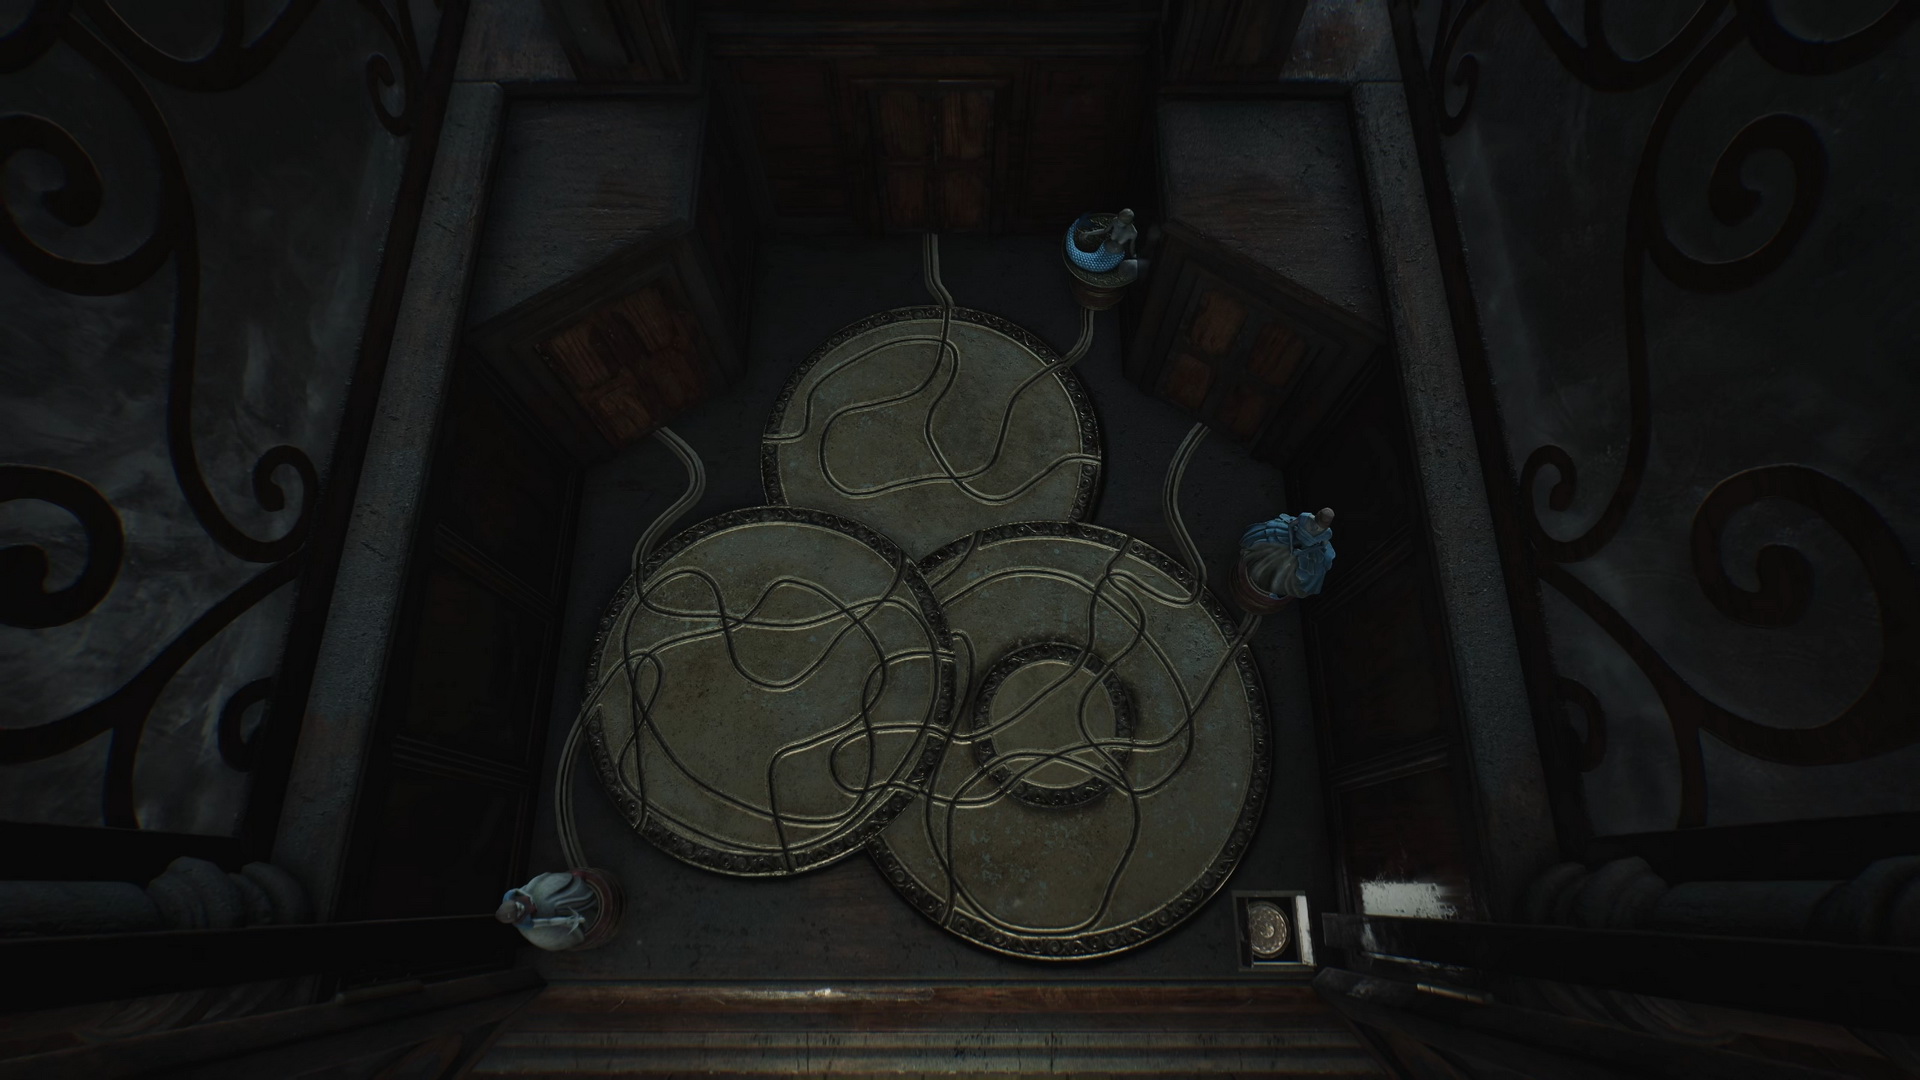
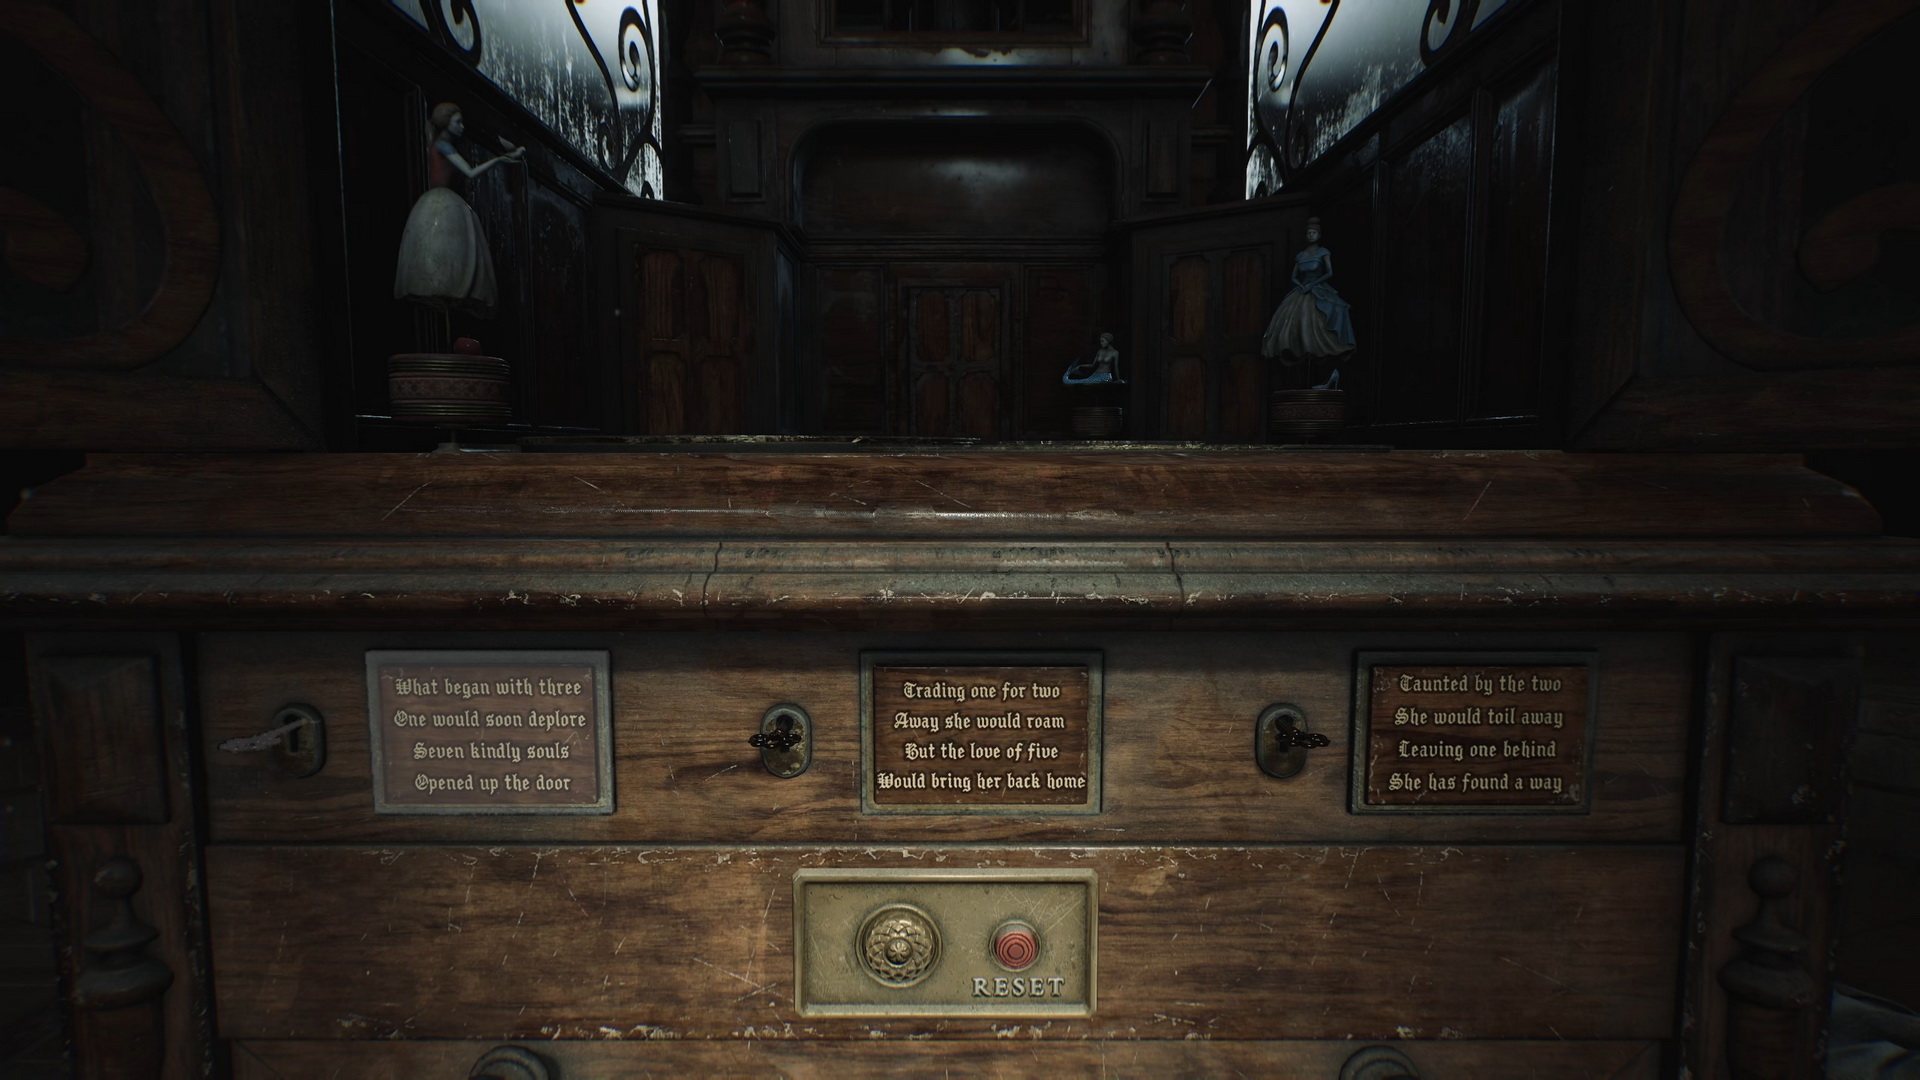
Music Box Puzzle
Collect the three figurines:
- The Snow White Figurine is found on the table in Room 201 after solving the Mirror Puzzle in Room 202.
- The Cinderella Figurine is locked inside the fireplace in the Conference Room on the third floor.
- The Little Mermaid Figurine is in front of the jukebox in the Venus Tears Bar in the basement.
|
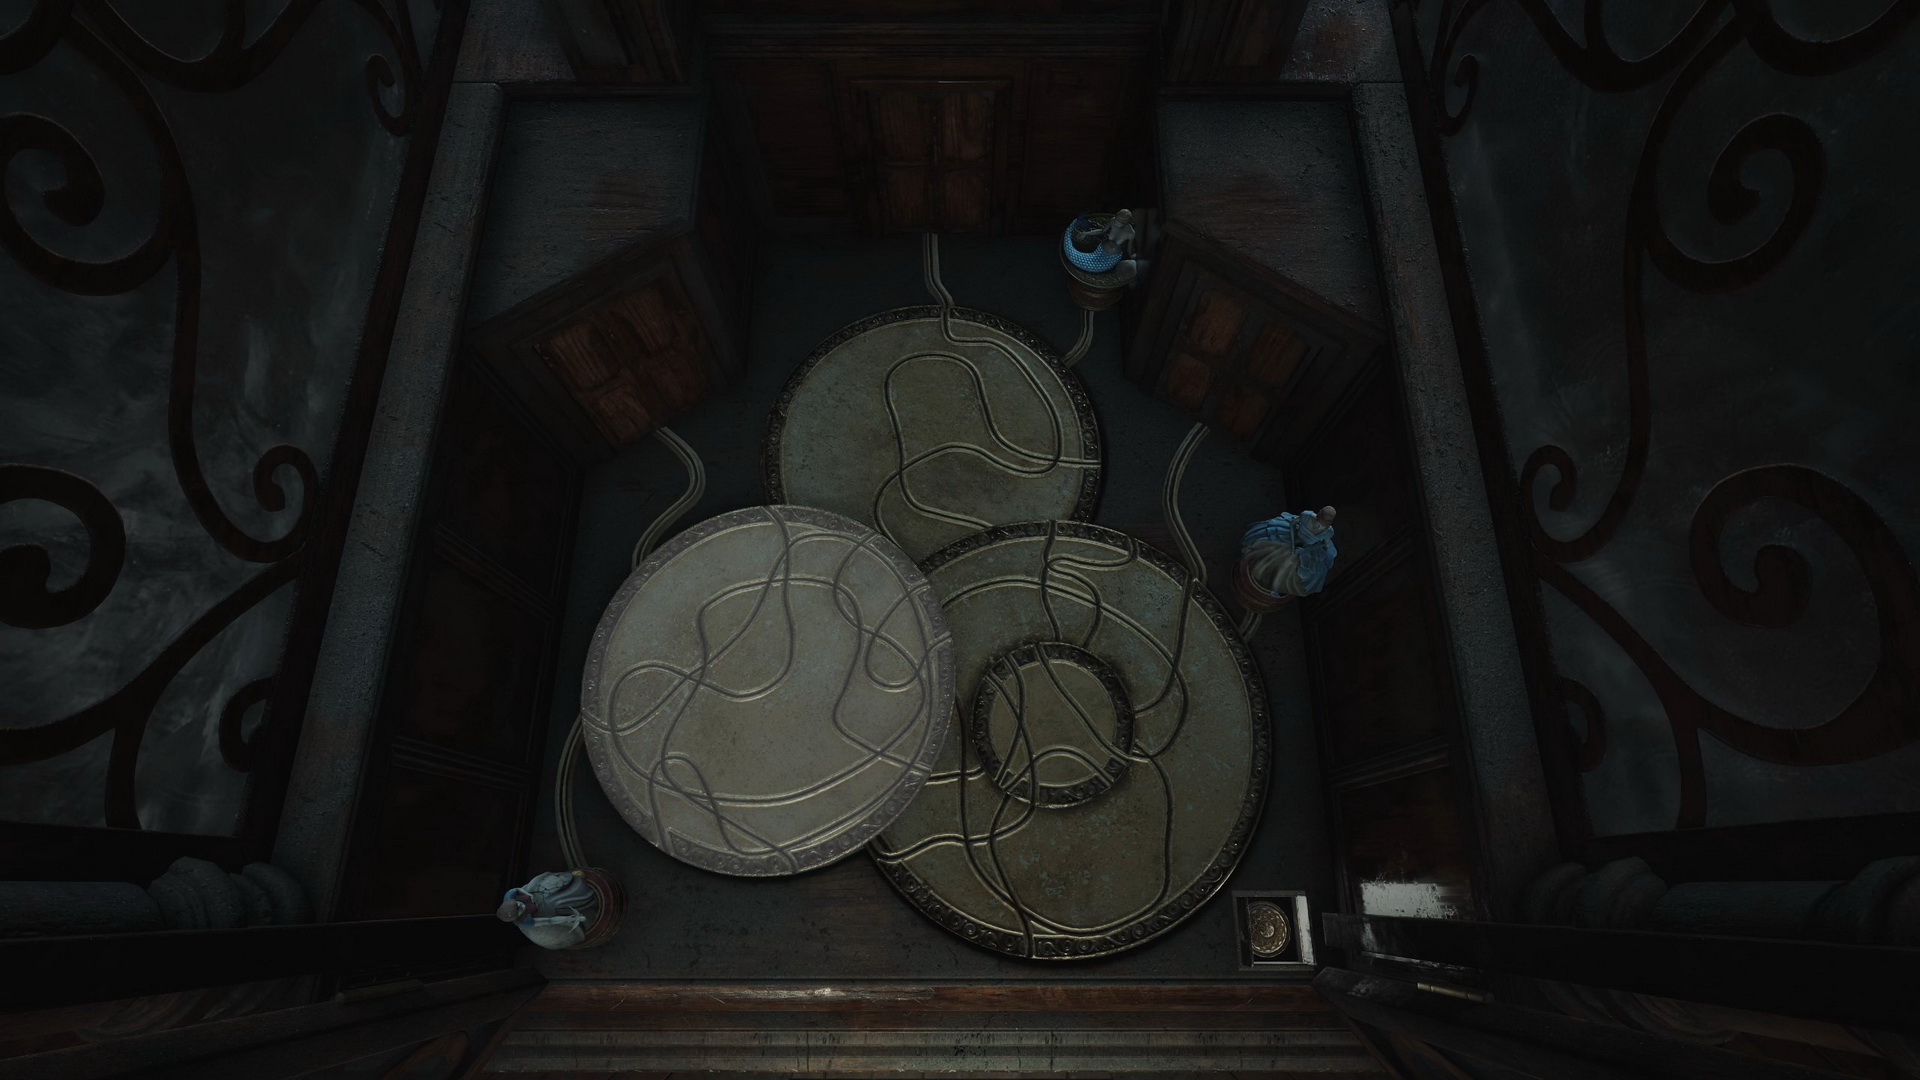
Quick puzzle solution:
- Place the figurines into the corresponding slots:
- Snow White Figurine – left slot
- Cinderella Figurine – right slot
- The Little Mermaid Figurine – top slot
|
- Spin the four circular plates to form uninterrupted tracks for the figurines and press the button in the bottom right corner for a test.
|
- Turn each key a certain number of times per hints in the poems and then press the gold button below:
Light: 7 - 2 - 1
Standard: 7 - 5 - 1
Hard: 1 - 1 - 1
Complete puzzle solution
|

