Lakeview Hotel
Welcome to the eleventh chapter of the complete walkthrough guide for Silent Hill 2 Remake (2024) covering Lakeview Hotel. Use the key summary below for short, spoiler-free directions and the complete walkthrough section for in-depth guidelines with extra explanations. This walkthrough also includes complete maps with all items and monsters marked for easy reference.
Legend
1 Auto Parts key – key items
2 Radio – equipment
Health Drink – supplies
Map of Silent Hill – maps
Save Point – save points
Flower Shop Message – collectibles: memos, strange photos and glimpses of the past
NG+ – New Game+ items, memos and actions
Contents
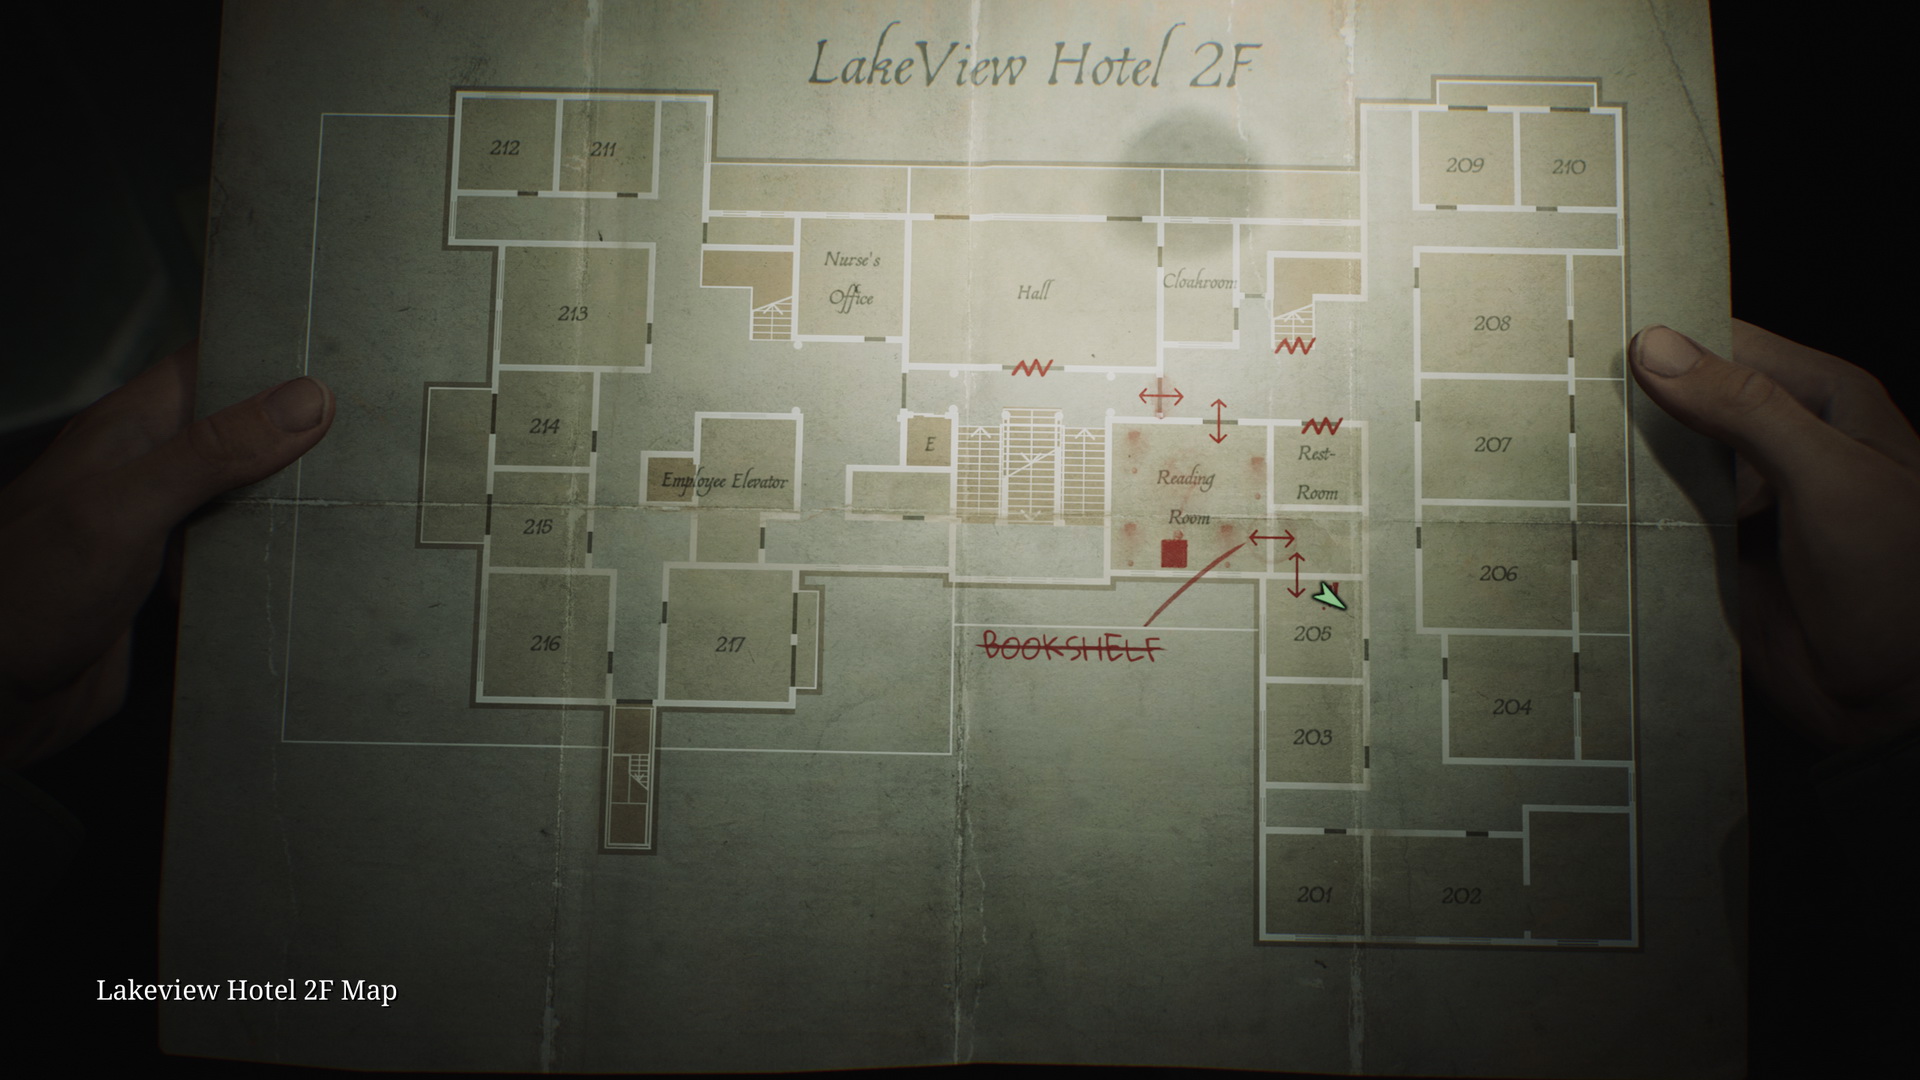
Complete Maps |

|
Collectibles count:
- 10 memos
- 2 strange photos
- 3 glimpses of the past
Key Summary
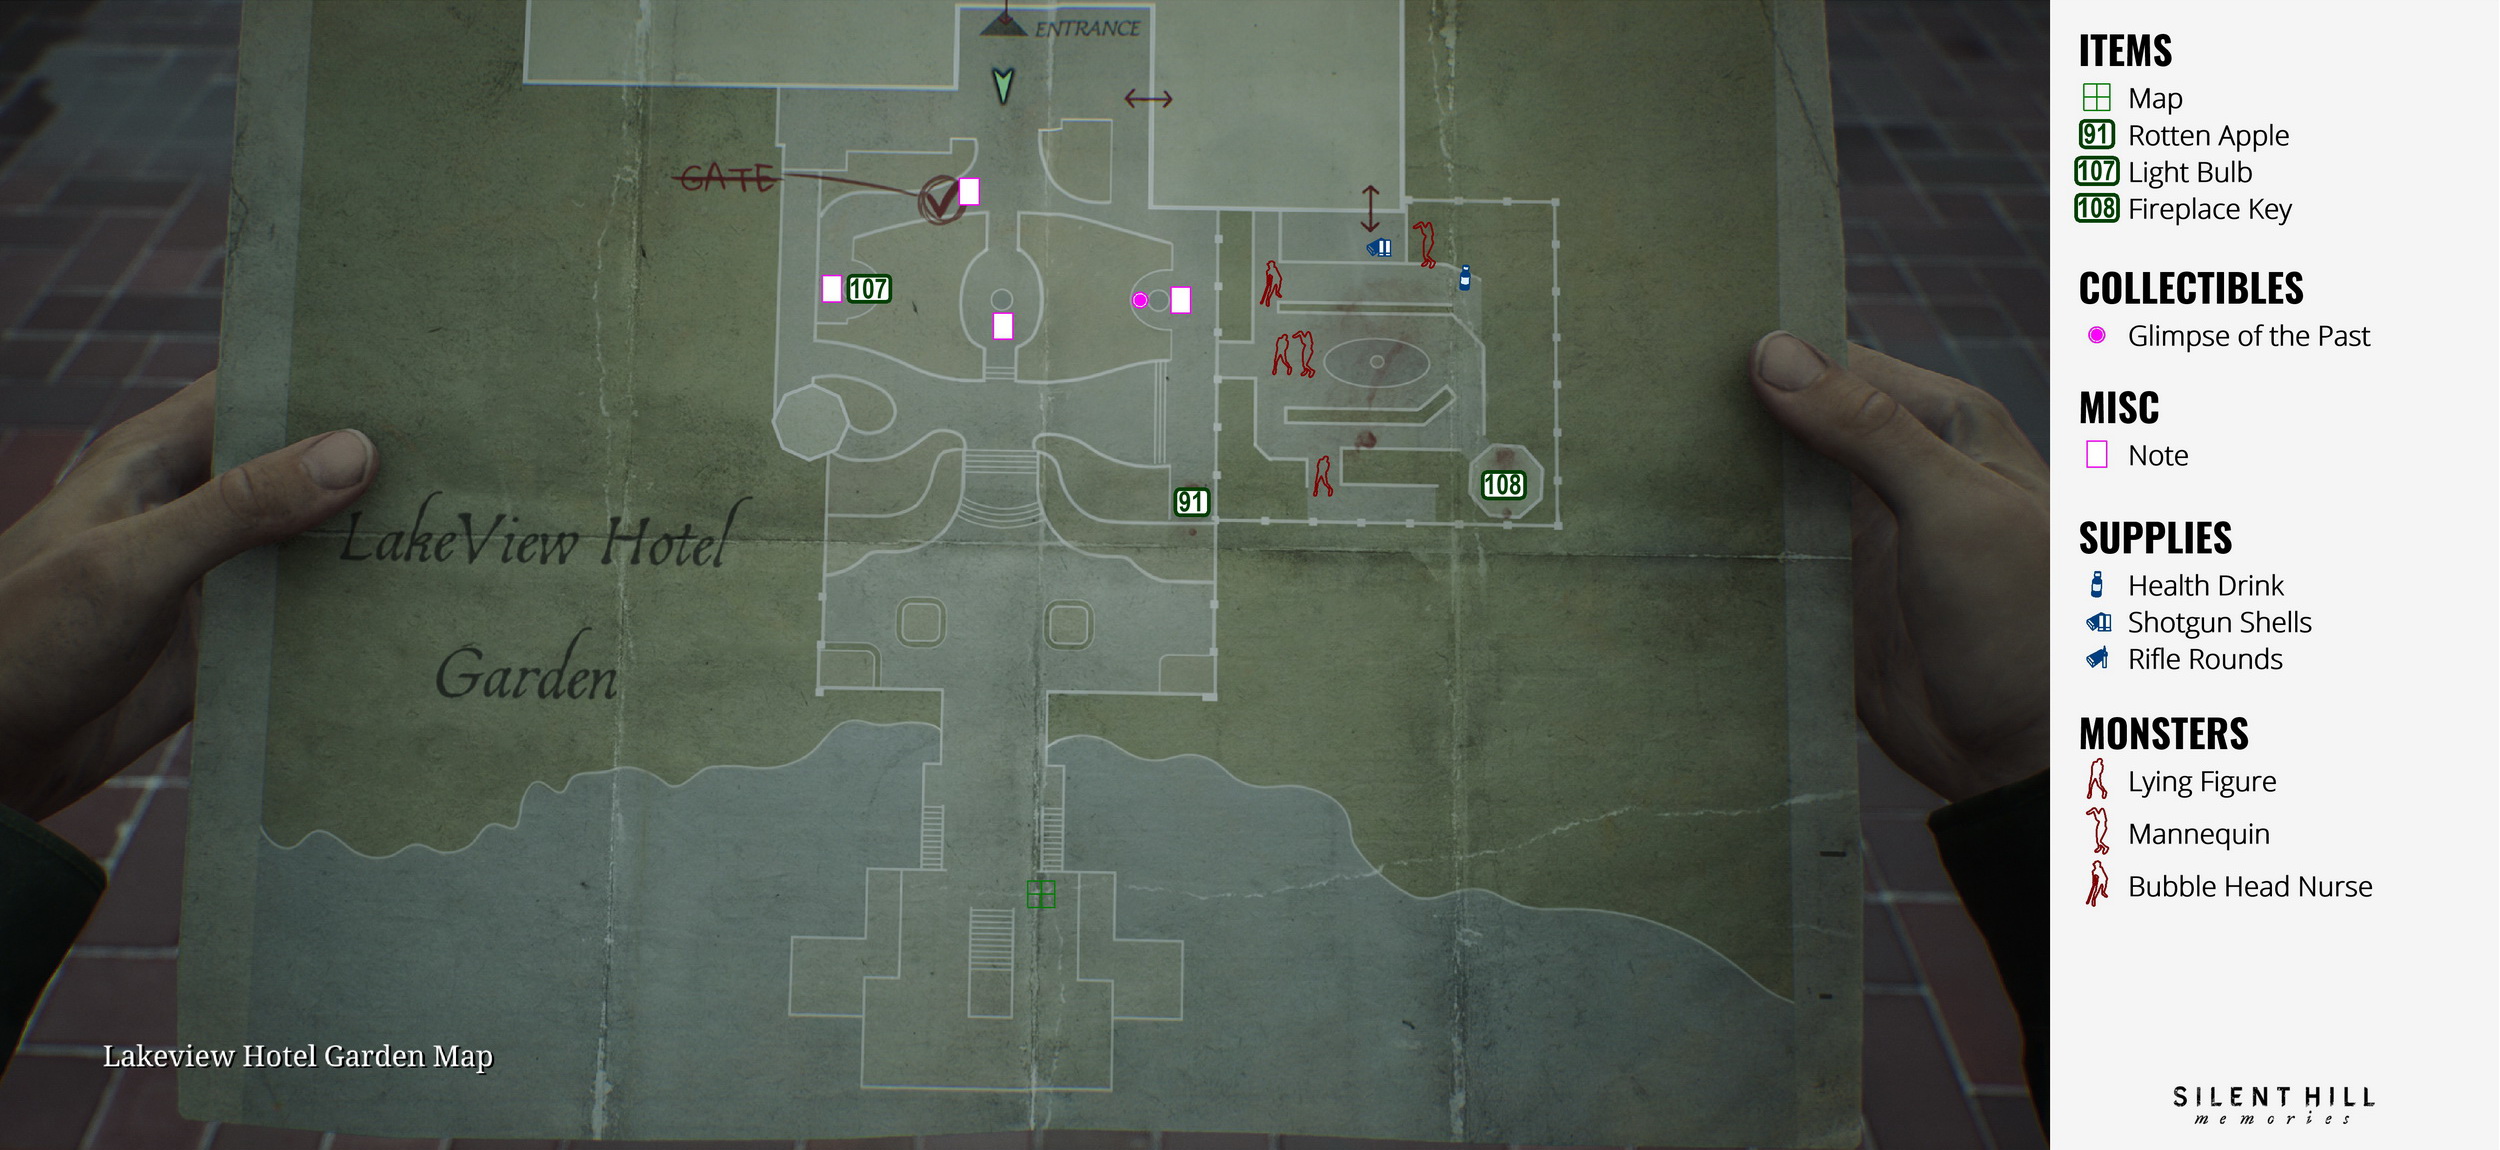
Garden
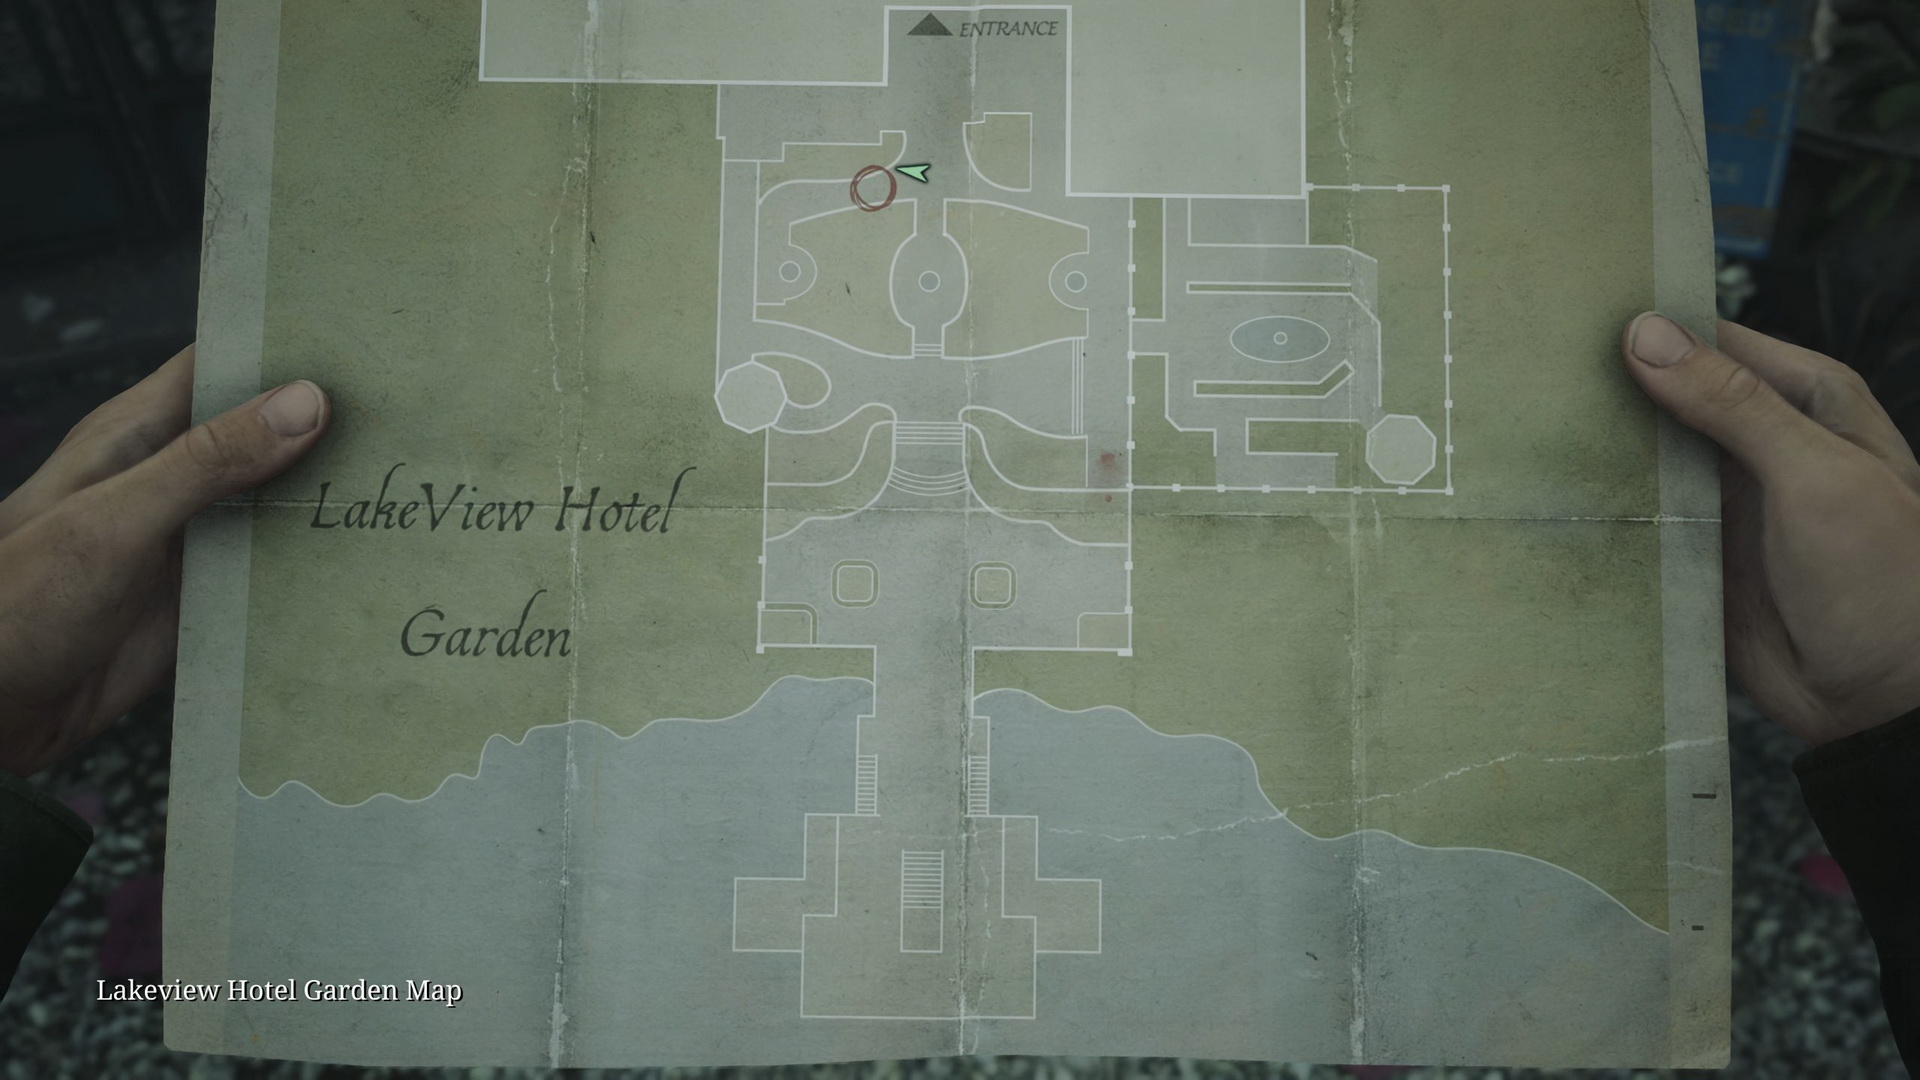
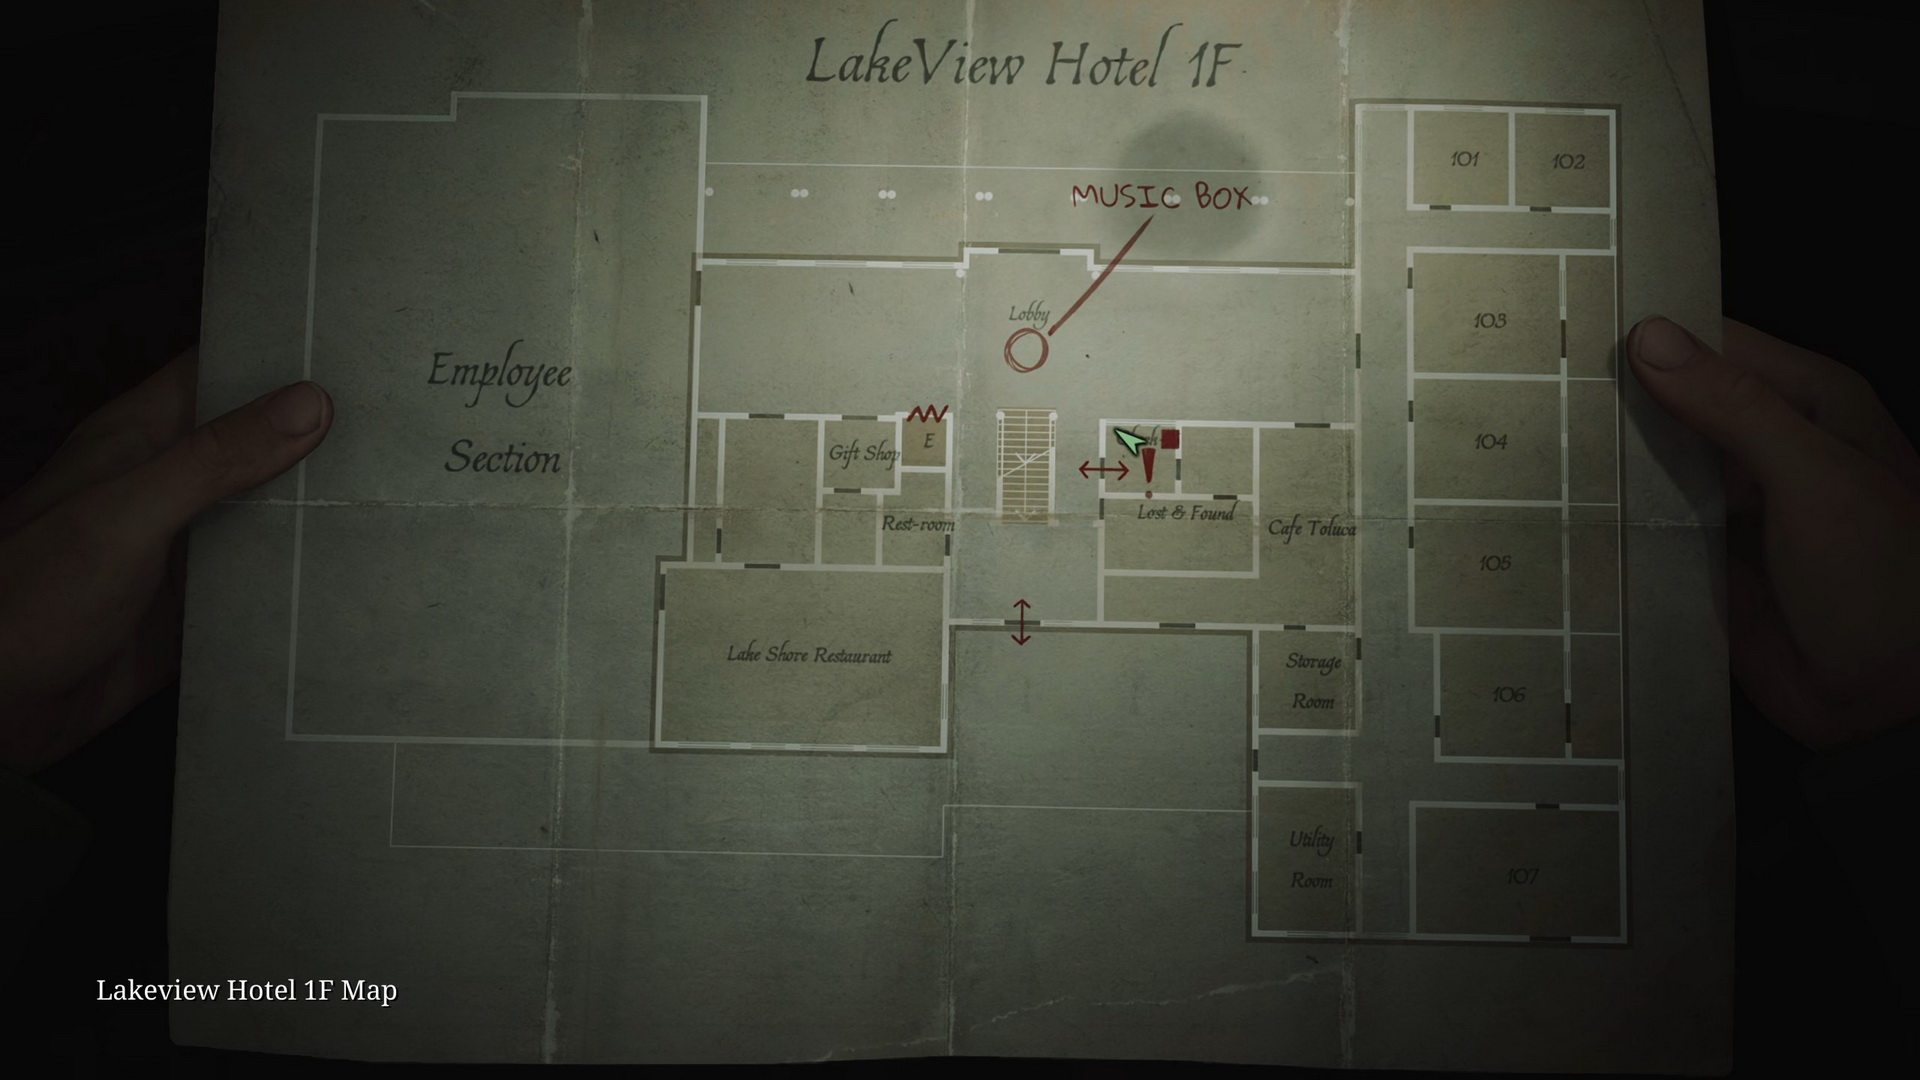
- Collect the Lakeview Hotel Garden Map from the wall stand ahead.
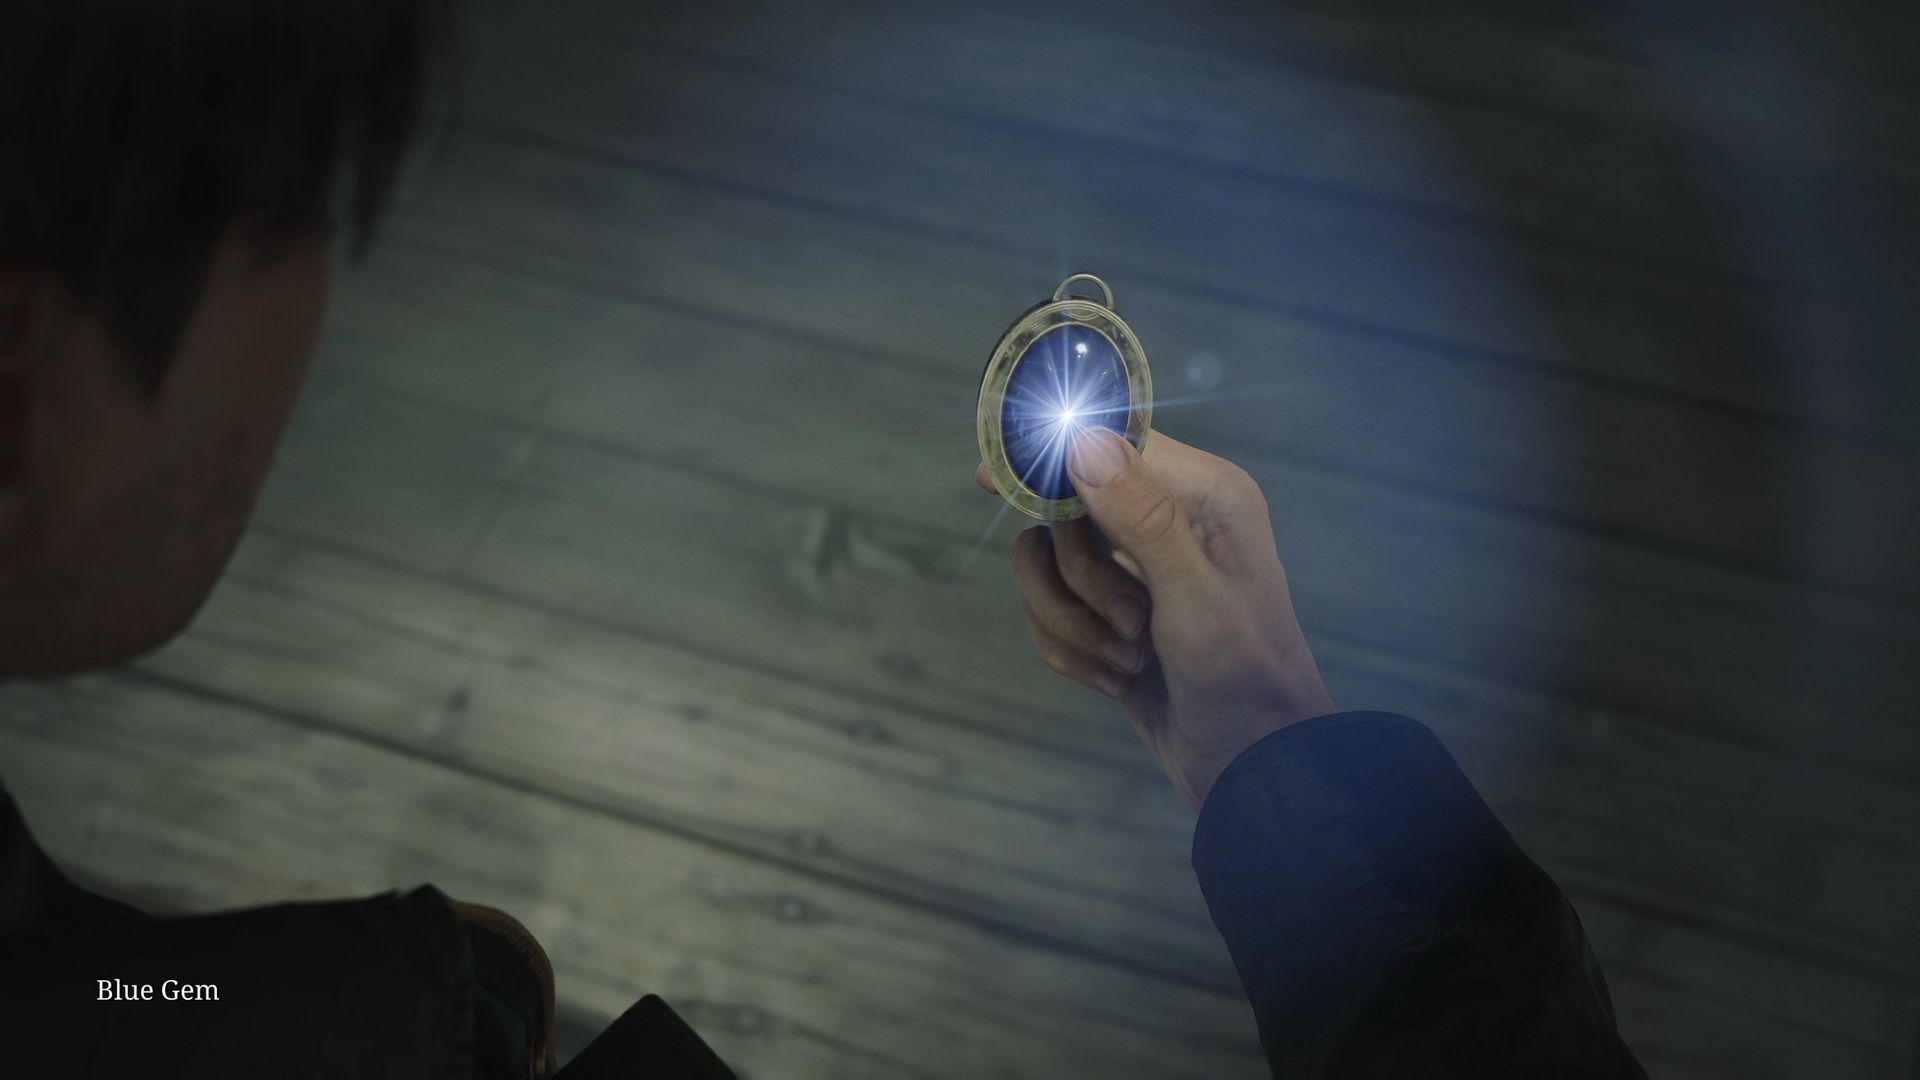
- NG+ Use the Blue Gem for the third time for the UFO ending as soon as you get off the boat.
- 91 Rotten Apple is on a bench in the eastern part of the garden (skippable as you only need one of the two apples).
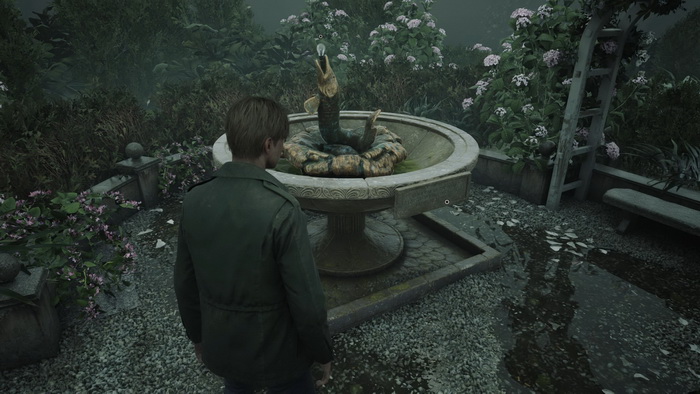
- Glimpse of the Past #23. Inspect a music box inside the basin of the east fountain.
- Enter the hotel.
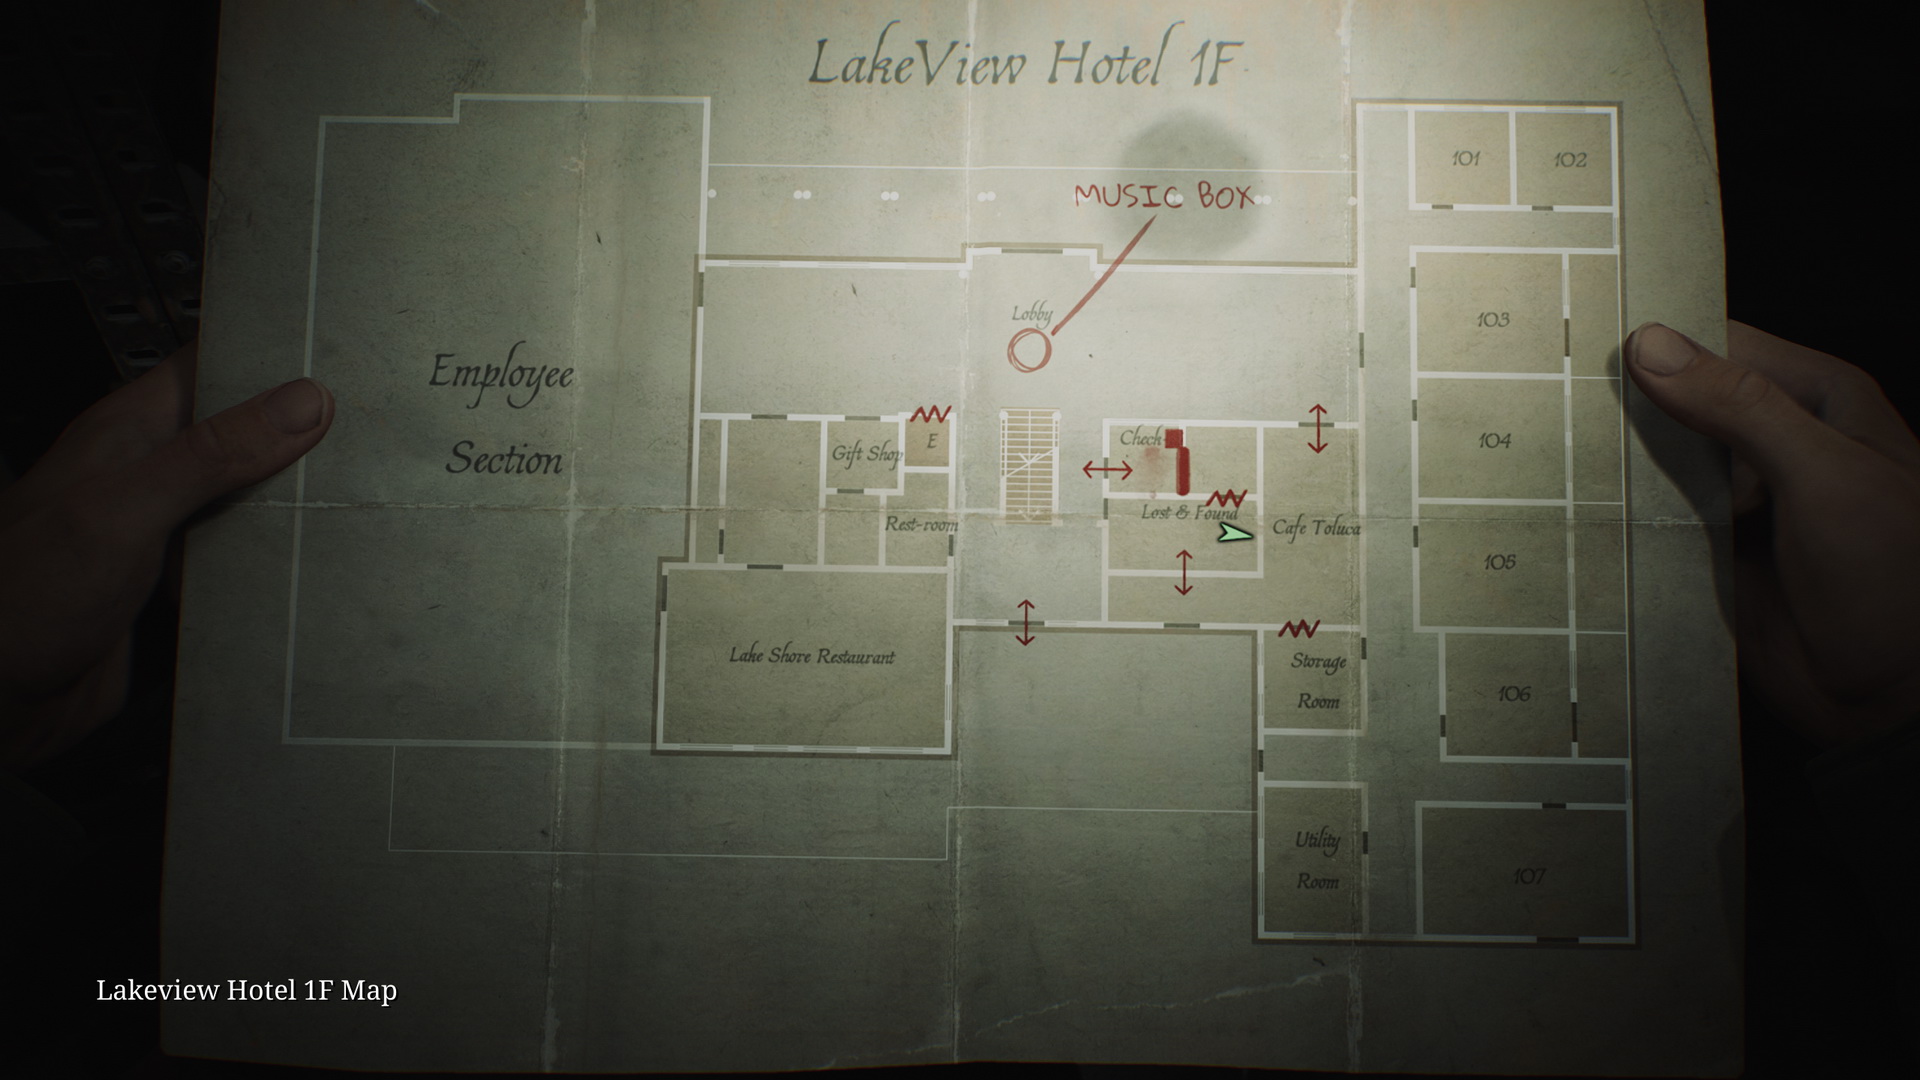
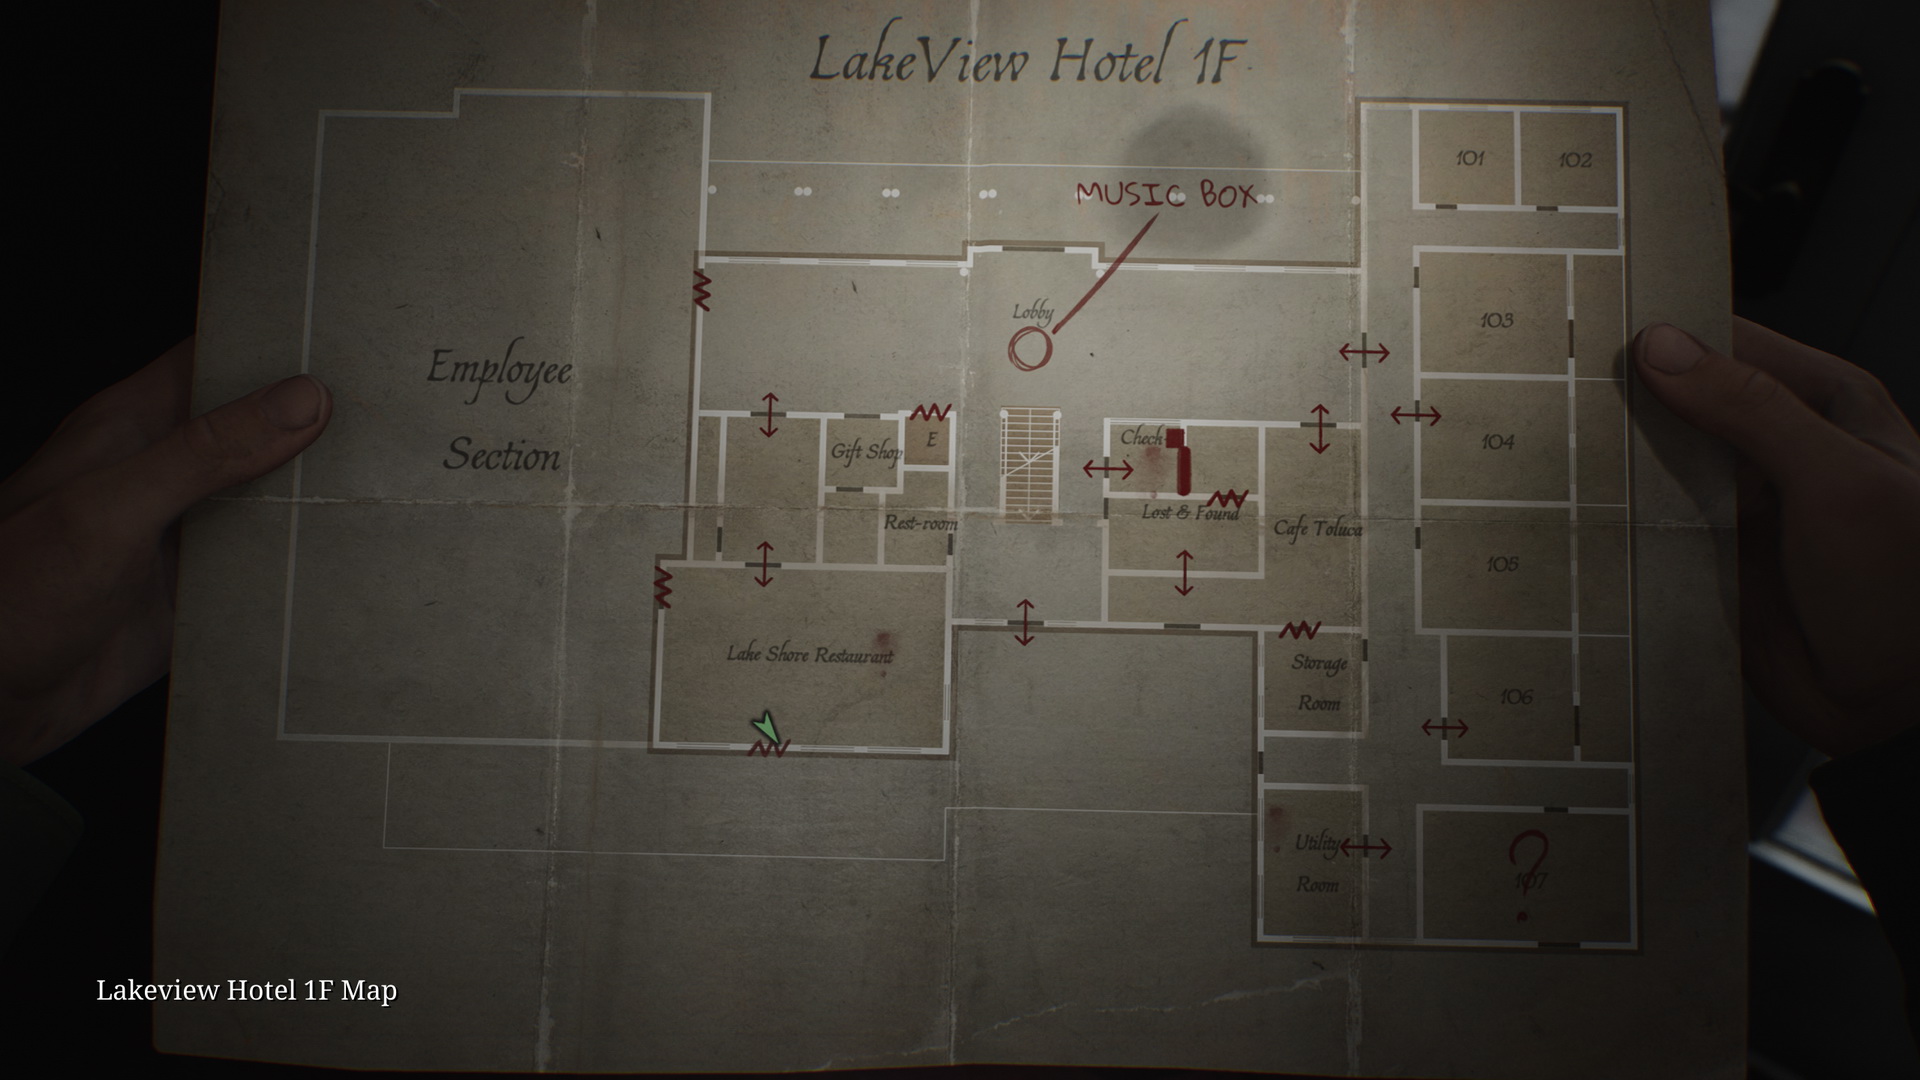
First Floor
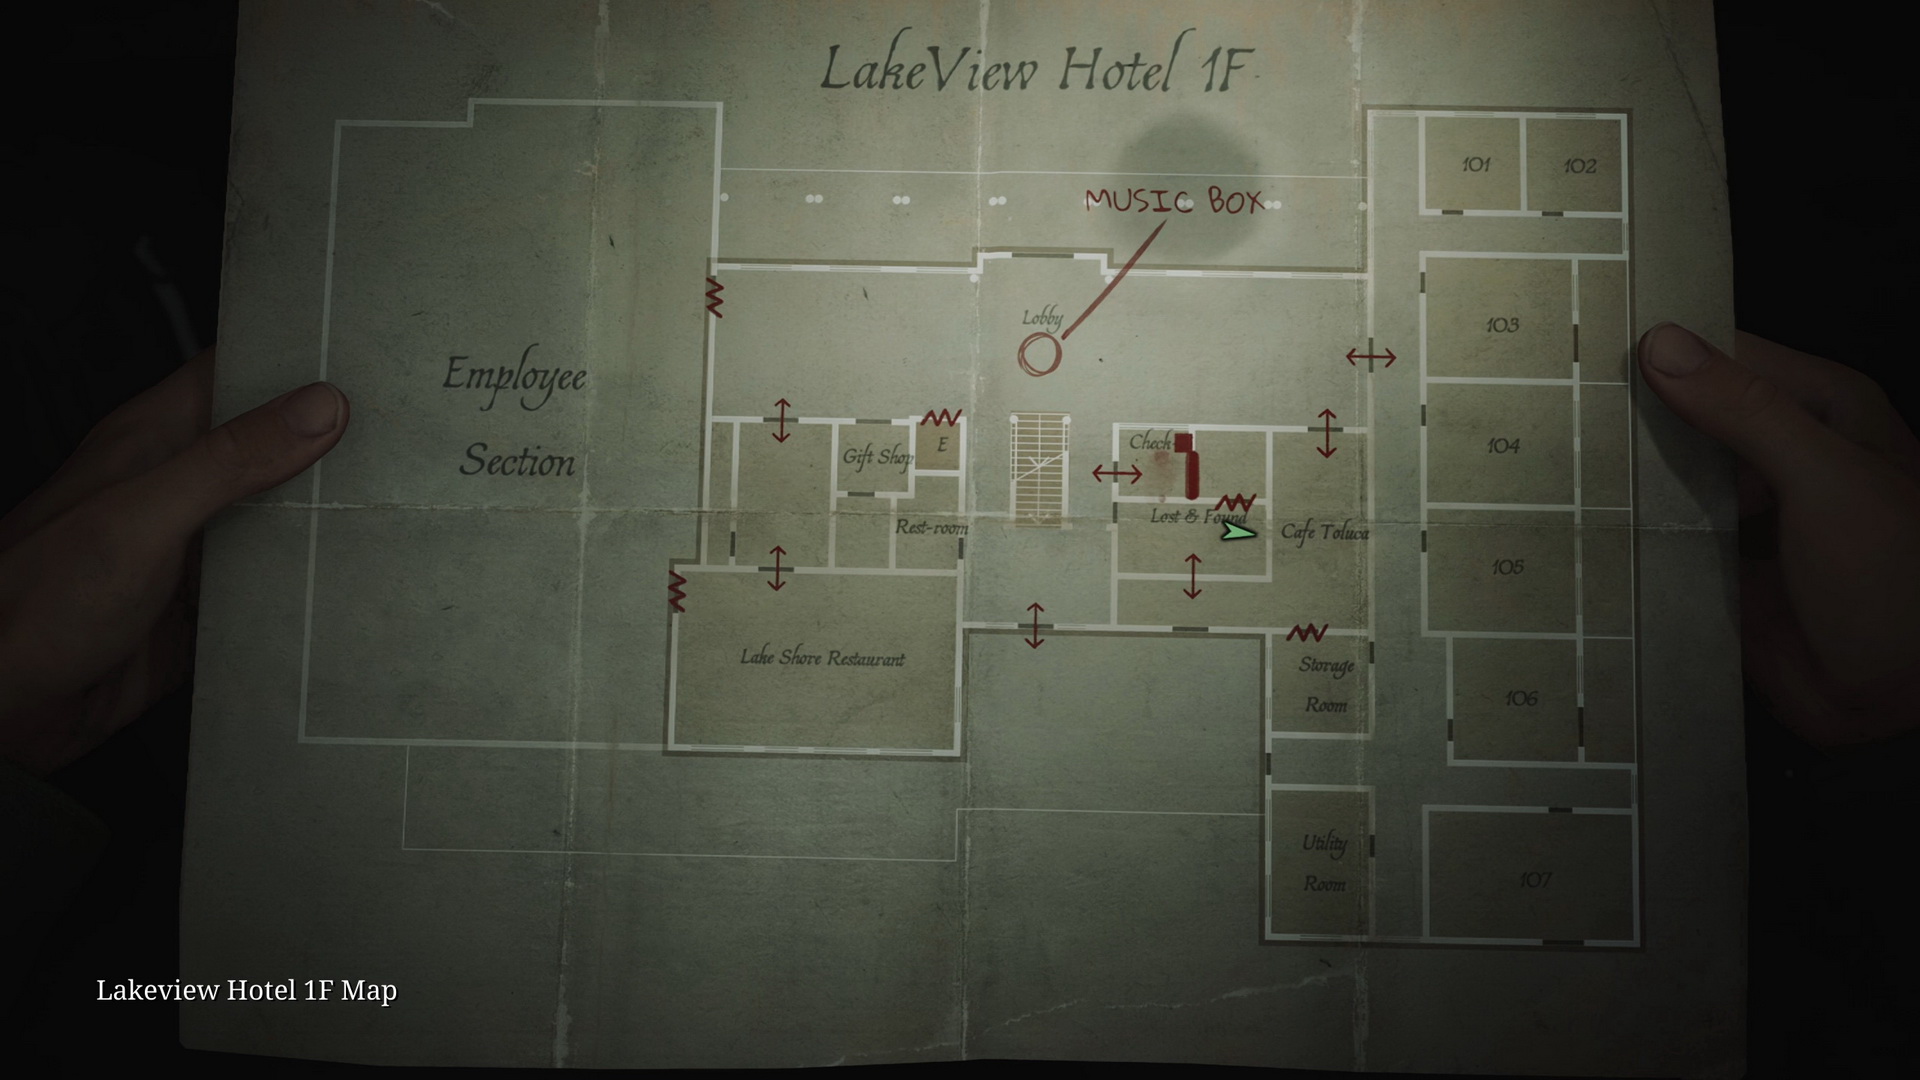
- Collect the Lakeview Hotel Maps from the board on the right.
- Go to the reception to find a Save Point.
- Memo #58: Receptionist Memo. On the counter of the reception desk.
- 92 Room 312 Key and 93 Ornamental Key are in the reception desk's key cabinet.
- Find the music box in the Lobby and unlock it using the Ornamental Key.
- 94 Key to Hotel Room 102 (skippable) is behind the bar in Cafe Toluca.
- Memo #59: Lost & Found Note. Inside Lost & Found on a shelf. Break the wall in Cafe Toluca to get inside.
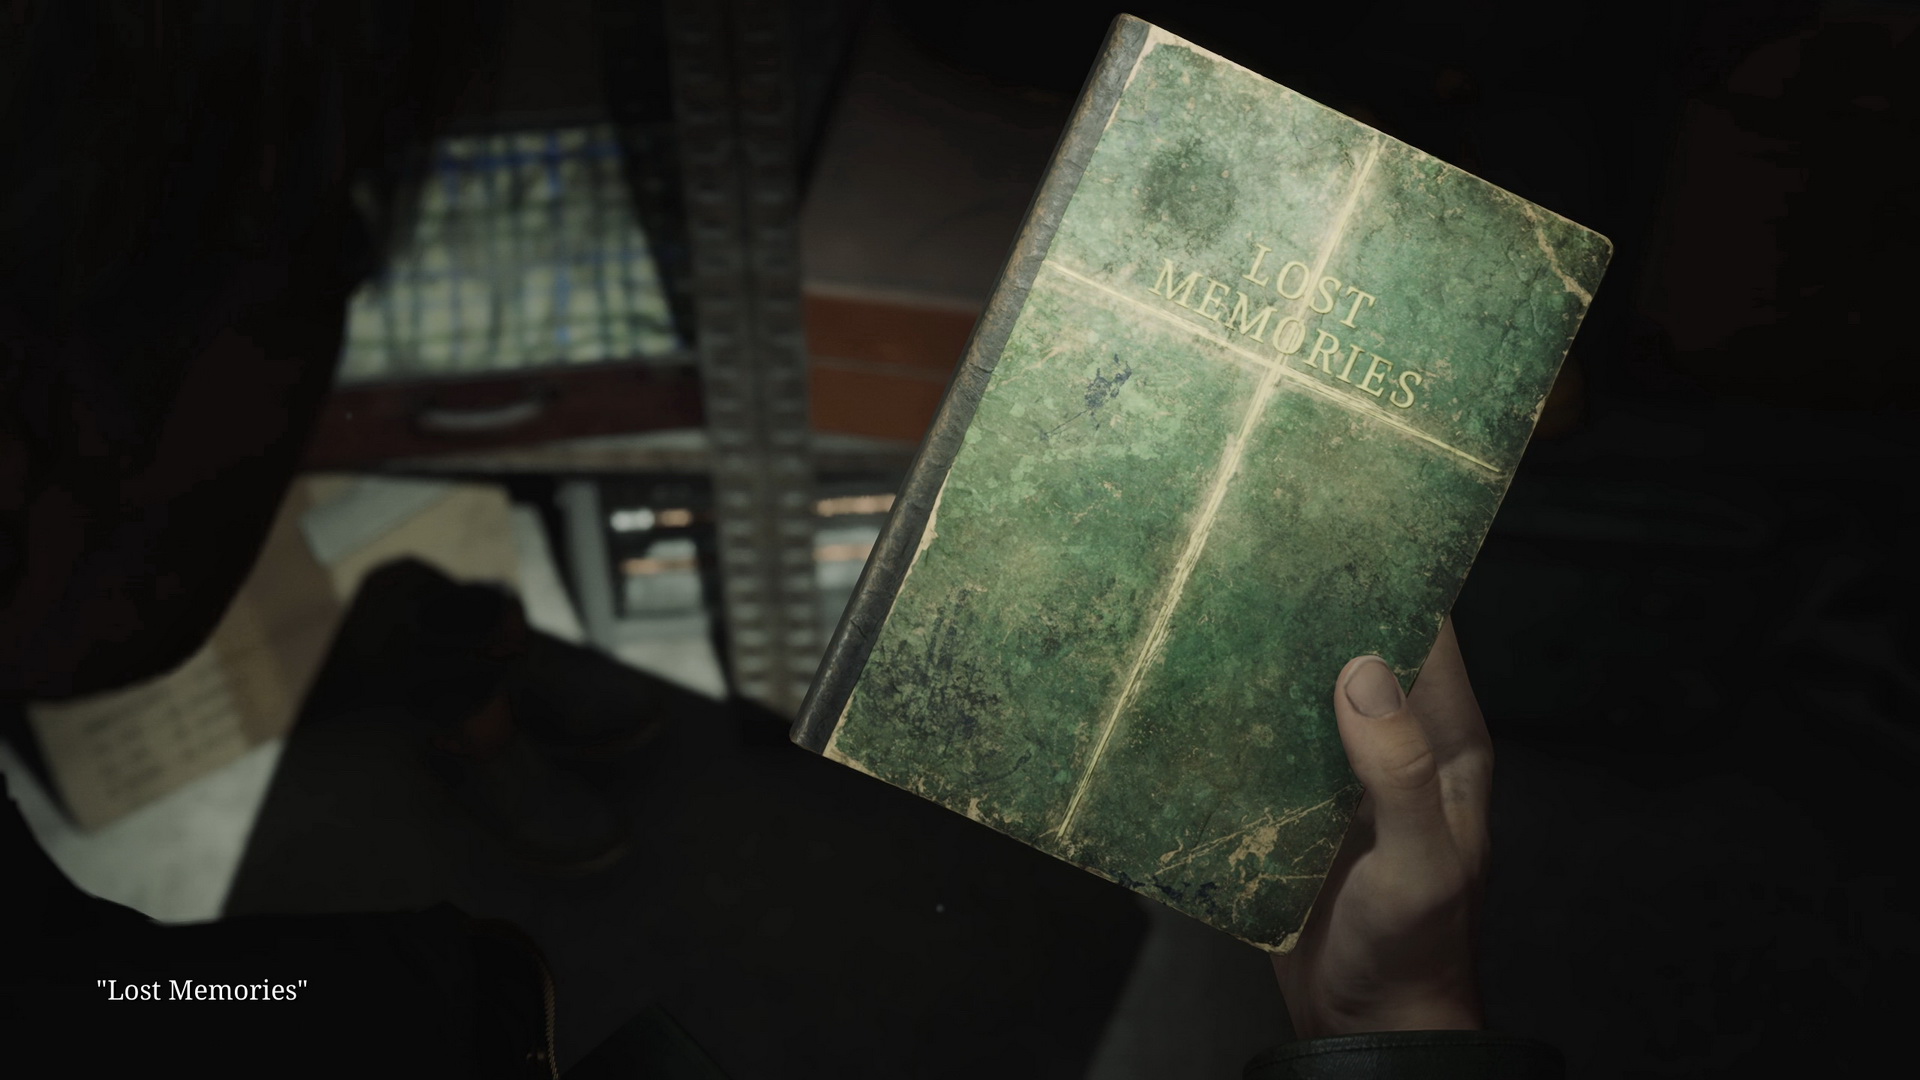
- NG+ E11 “Lost Memories”. Replaces the Lost & Found Note during New Game+.
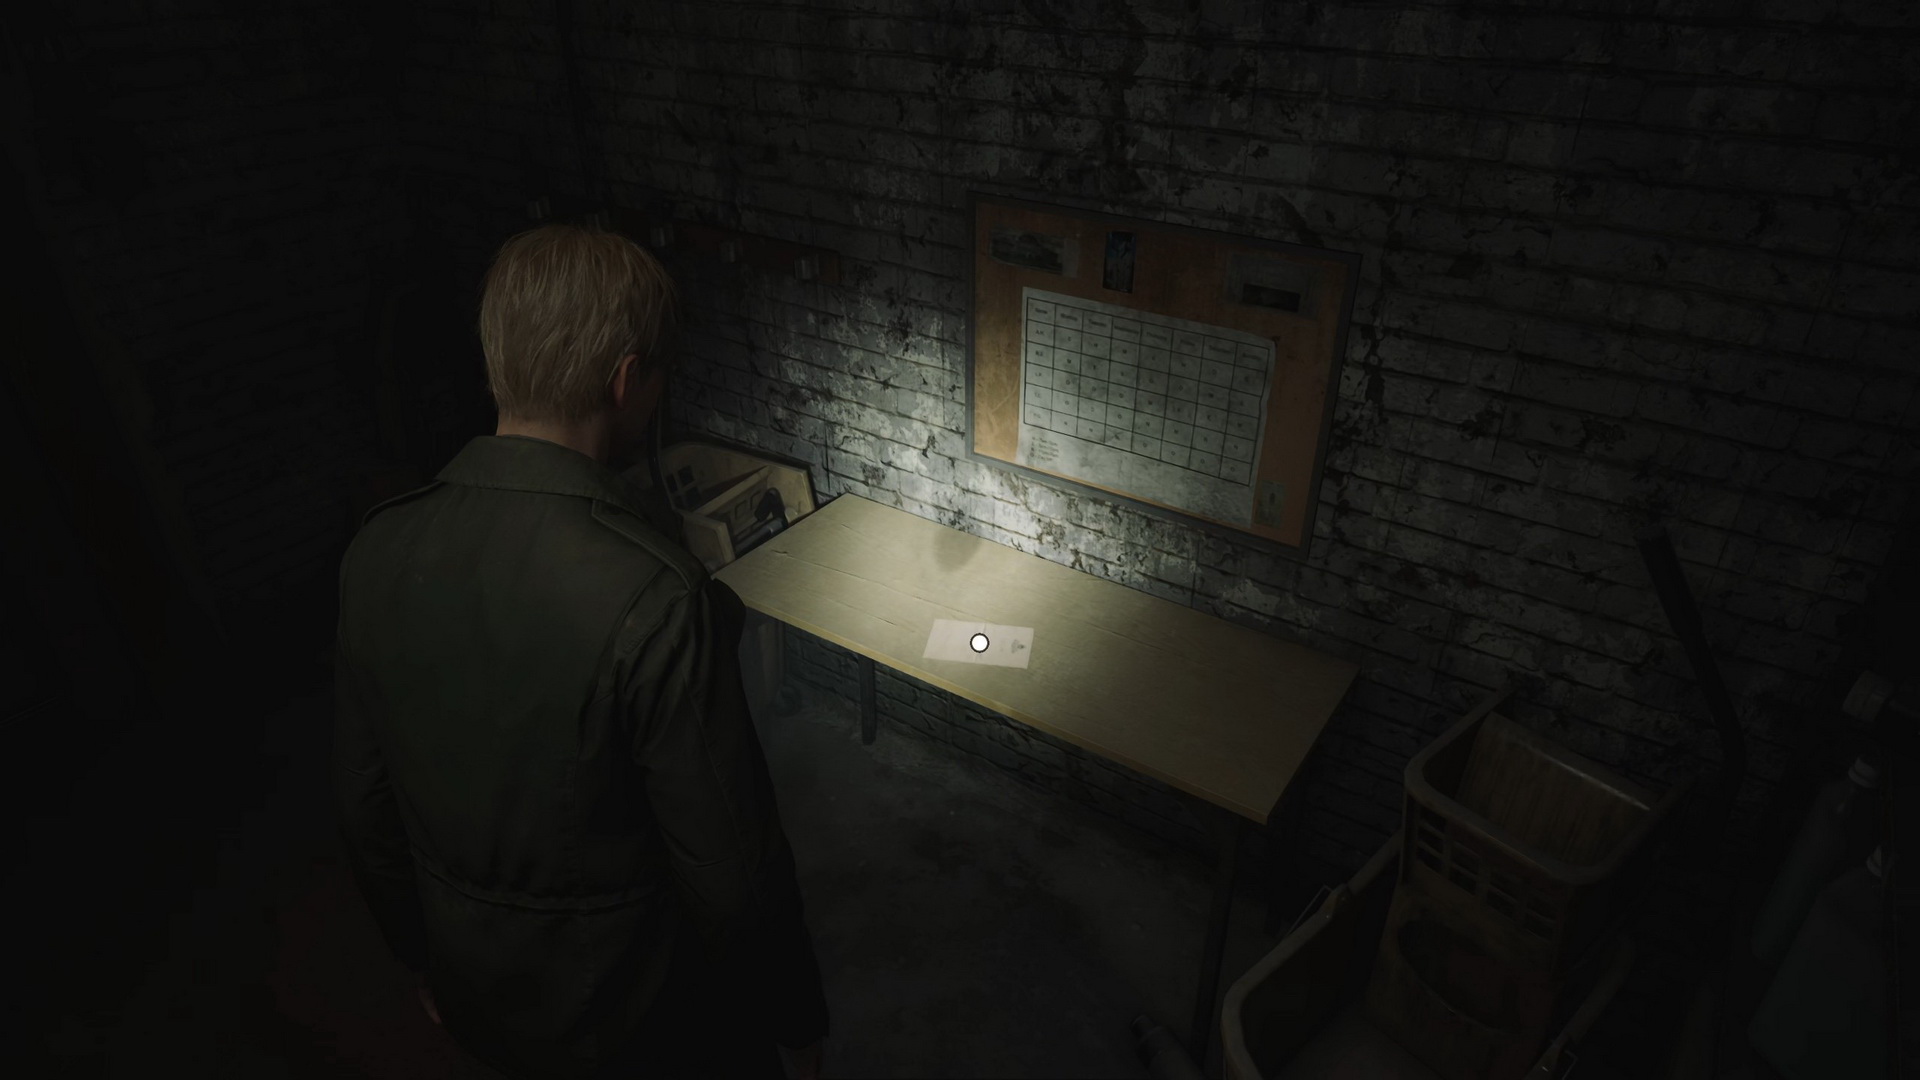
- Memo #60: Cleaning Staff Memo #1. Go to the basement and find this on a table in the Utility Room.
- Proceed to the Lake Shore Restaurant.
- Memo #61: Laura’s Letter. Automatically received during the cutscene.
- Go to the east wing of the floor.
- Strange Photo #23: “aftermath…”. In Room 104, inside the nightstand.
- 95 Sunrise Wing Key is on a desk in the Utility Room.
- Go upstairs to the second floor.
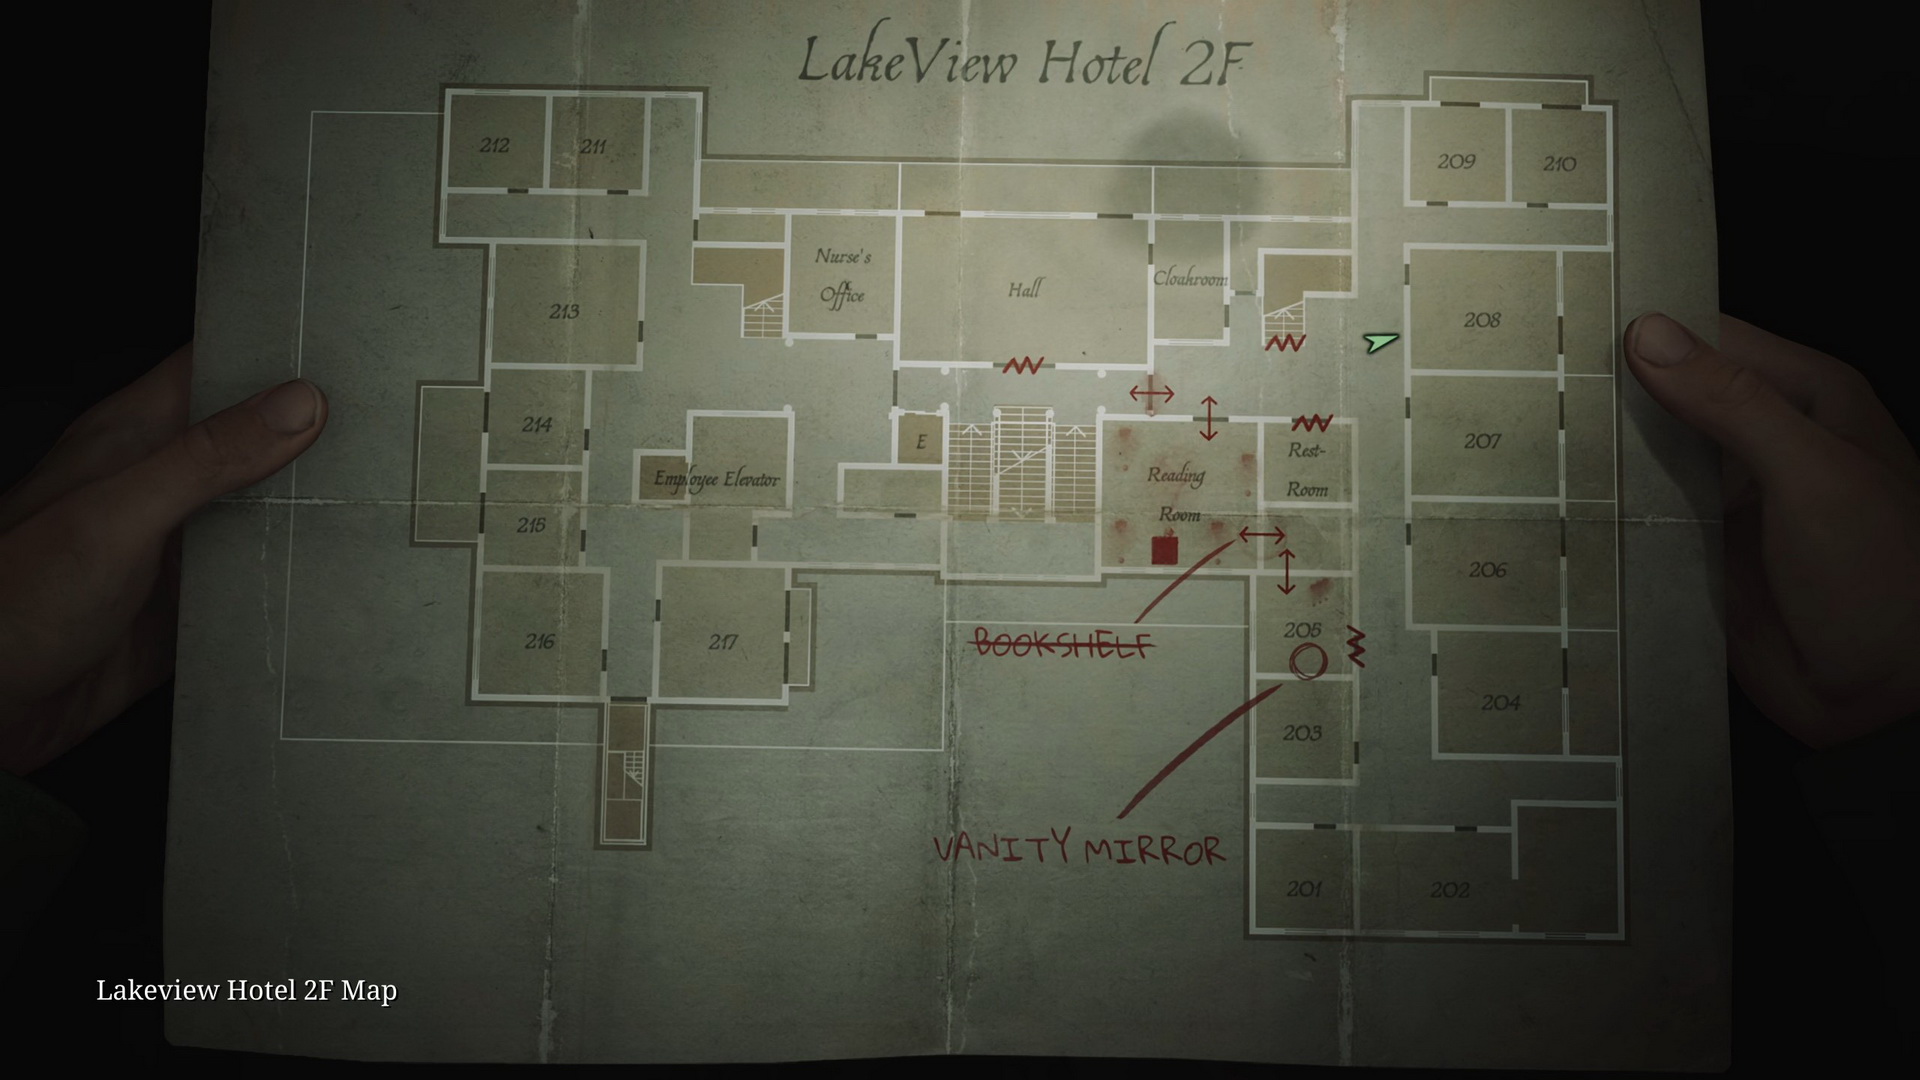
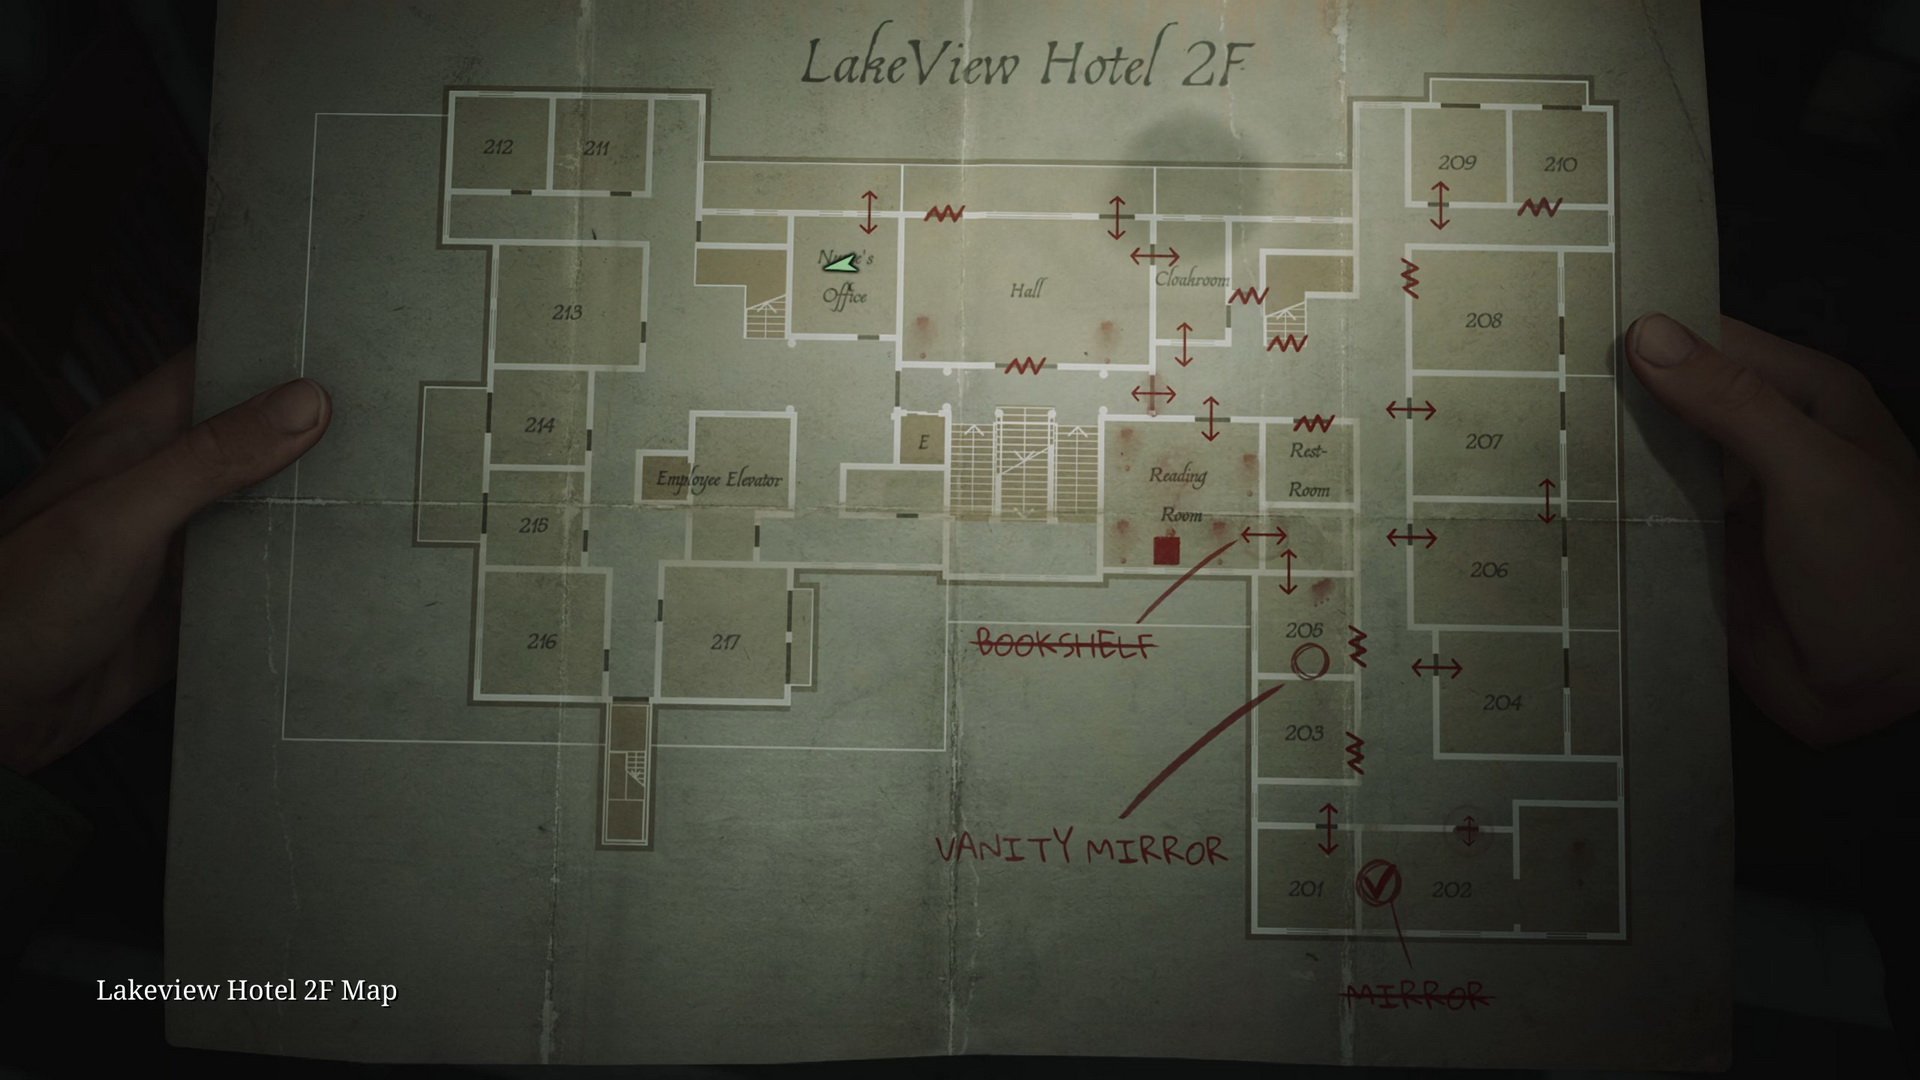
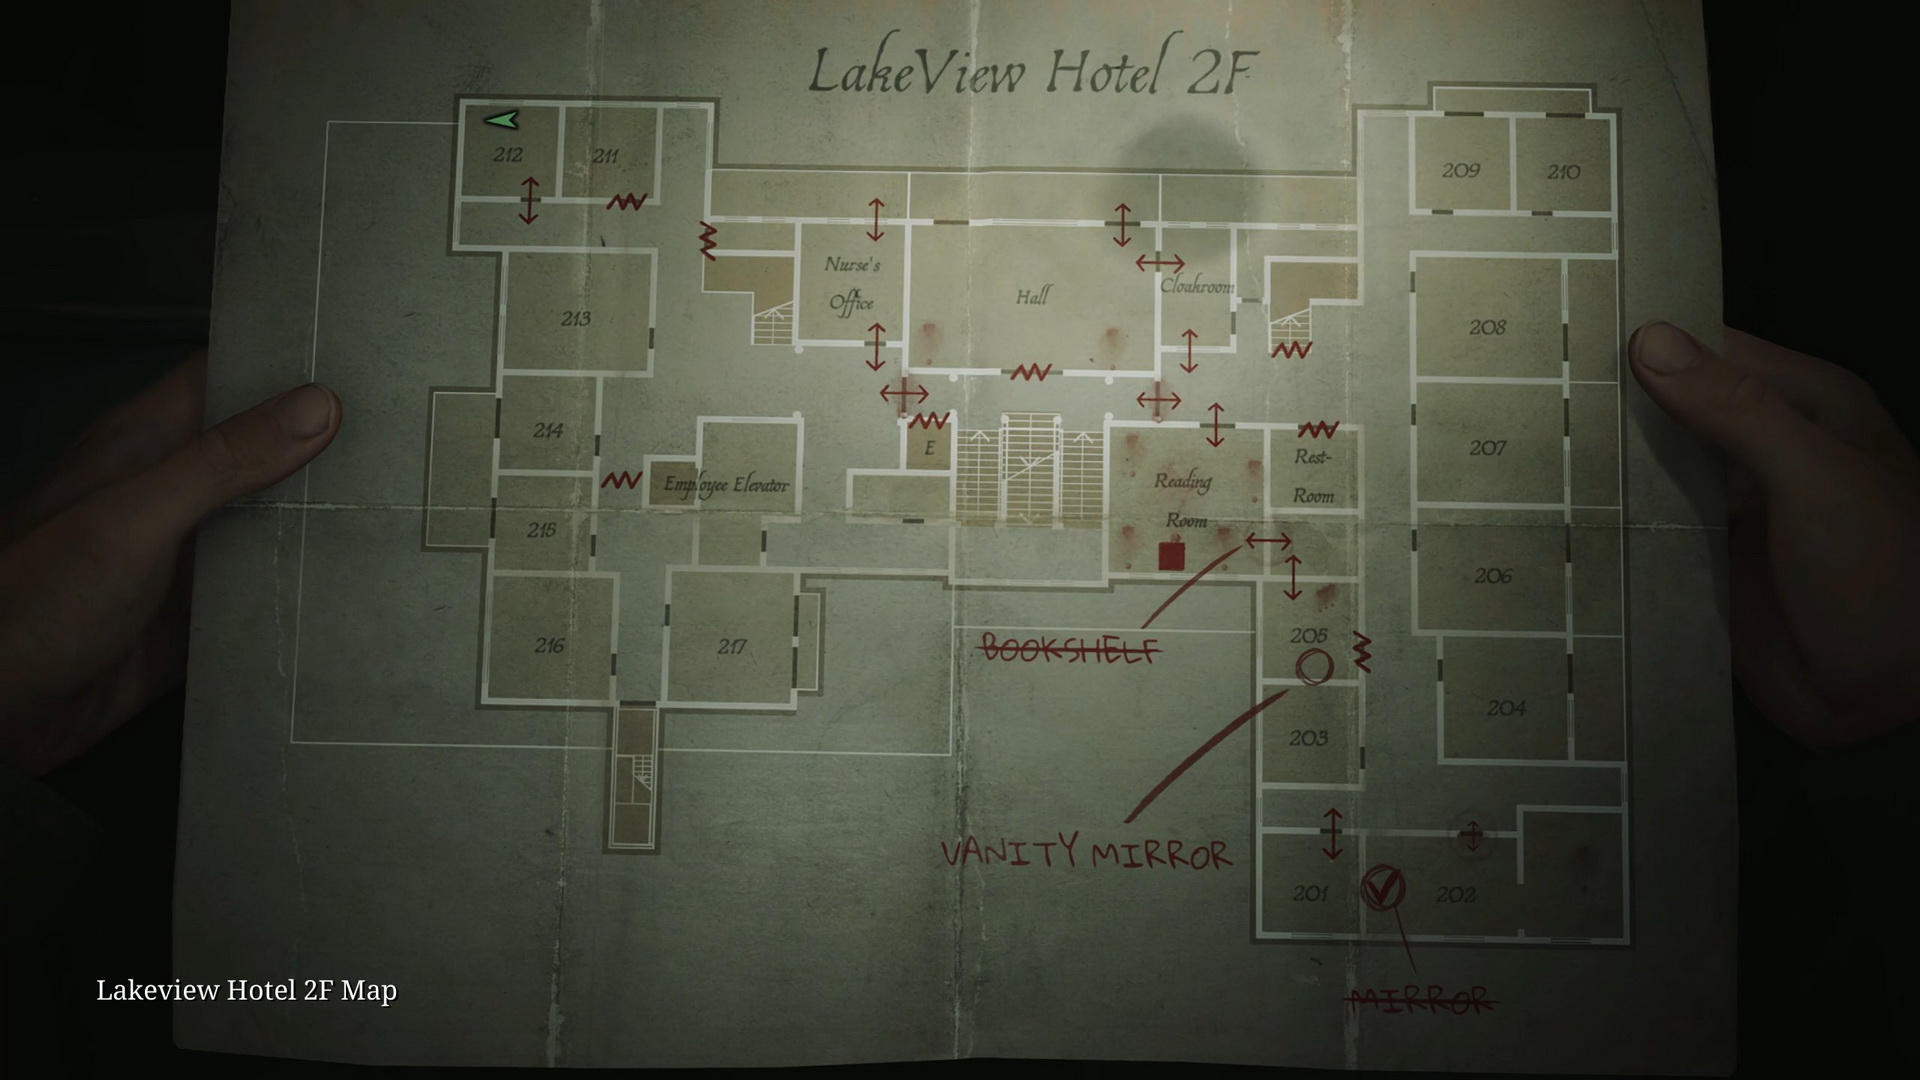
Second Floor
- Unlock the door of the Sunrise Wing and proceed to the Reading Room. There's a Save Point here.
- 96 "The One Who Soared", 97 "Stalwart to the End", 98 "Pride Before the Fall" and 99 "Revelations: A New Understanding". Four books are found around the Reading Room.
- Place the four books collected in the reading room on the bookshelf so that their cover symbols would match the painting on the opposite side. Note that the spear symbol is upside-down, so the symbols should be rotated accordingly:
Winged Man Eagle ◯ Bull Lion
- Enter Room 205 to find a mirror with a broken light bulb and three photos.
- Memos #62-#64: Photos. In Room 205, on and around the bed.
- Go to the Hall through the Cloakroom.
- 100 Key to Hotel Room 202 is found on a couch in the Hall.
- 101 Ripe Apple is on a small table in the back corner of the Hall (skippable as you only need one of the two apples).
- Go to Room 202.
- 102 Mirror Shard is on the bed in Room 202.
- Proceed to solve the mirror puzzle in Room 202:
- Place either the Ripe Apple or the Rotten Apple on a round plate in front of the broken mirror (affects the ending).
- Place all the shards in the mirror until it is complete.
- 103 Snow White Figurine appears on the table in Room 201 after completing the mirror puzzle.
- Go to the Sunset Wing through the balcony of the Hall and Nurse's Office.
- Glimpse of the Past #24. In Room 212, examine a suitcase on the floor.
- Go upstairs to the third floor.
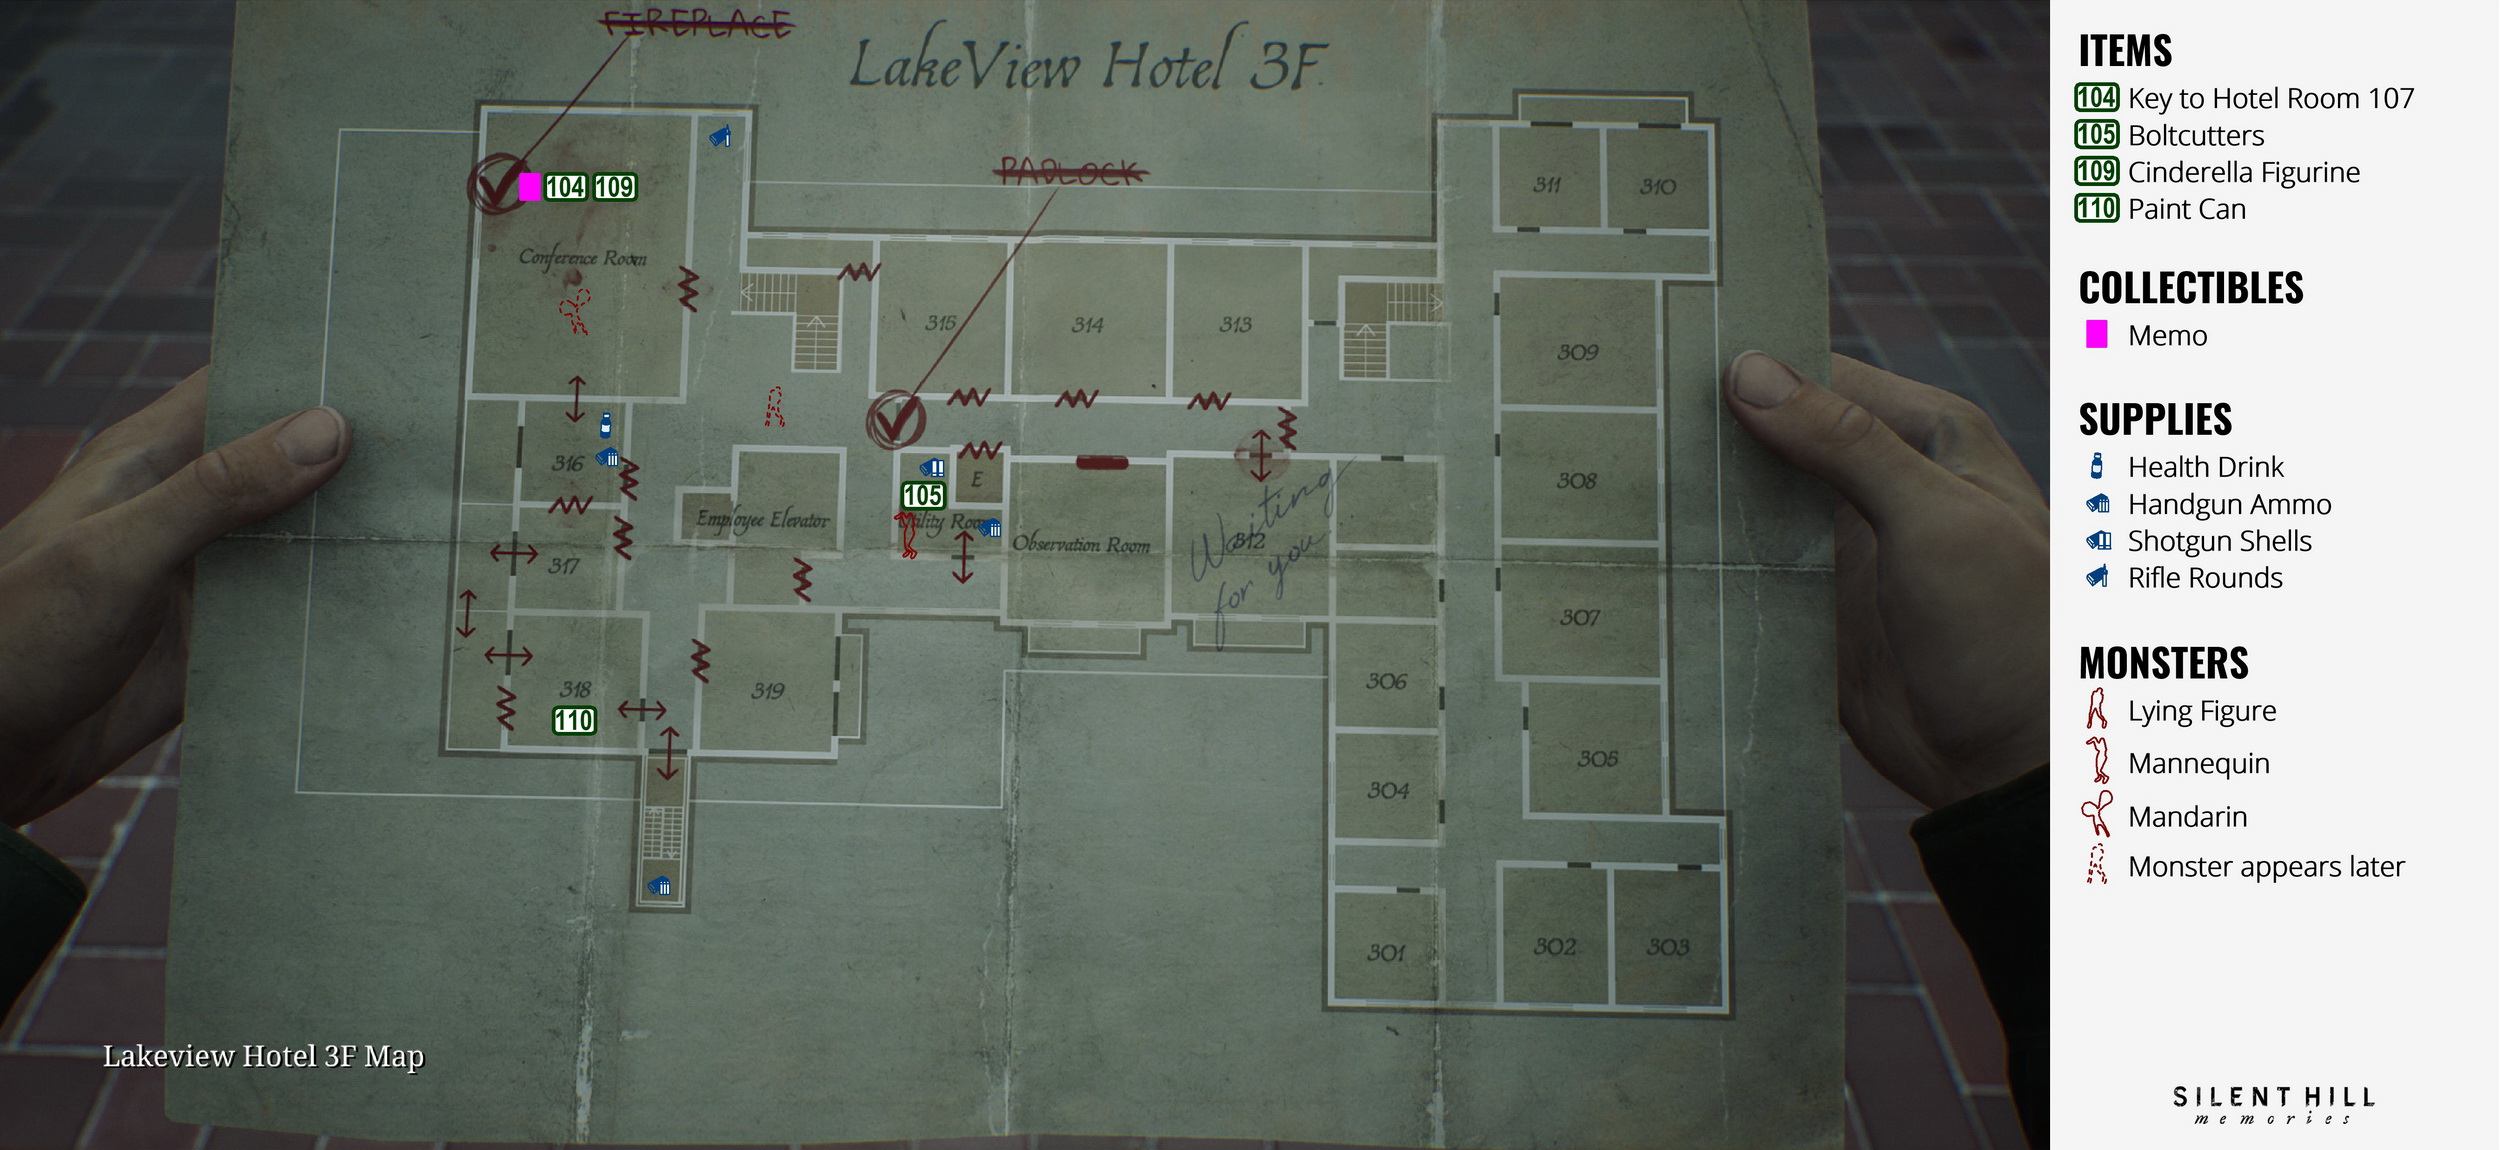
Third Floor
- Memo #65: Cleaning Staff Note #2 and 104 Key to Hotel Room 107 are attached to the fireplace in the Conference Room.
- Note: You don't need to collect the items required for the vanity mirror puzzle, as the code message will always be the same.
- 105 Boltcutters (skippable) are on a shelf in the Utility Room.
- Use the emergency exit to go down to the second floor.
Second Floor
- Go to the balcony of Room 217 and shoot the cracked skylight glass under the red book (on light difficulty, it will drop itself when you enter the balcony).
- Return to the first floor through Rooms 215 and 214.
First Floor
- 106 Can Opener (skippable). Go to the restaurant and check the fallen book to find it inside.
- Exit to the Garden and use the Boltcutters to open the locked gate.
- 107 Light Bulb (skippable) is on the fish statue in the fountain.
- Return to the hotel and enter Room 107.
- Memo #66: Cleaning Staff Note #3. On a table inside Room 107.
- Proceed into the garden.
- 108 Fireplace Key is in the pavillion at the back of the garden.
- Return to the Conference Room on the third floor.
Third Floor
- 109 Cinderella Figurine. Use the key on the fireplace.
- After the fight with Mandarin, push the wardrobe and break the wall into Room 317. Go to Room 318 via the balcony.
- 110 Paint Can (skippable) is on the coffee table in Room 318.
- 111 Open Paint Can. Combine the Paint Can with the Can Opener.
- 112 Red Light Bulb. Combine the Open Paint Can with the Light Bulb.
- Go downstairs to the Reading Room.
Second Floor
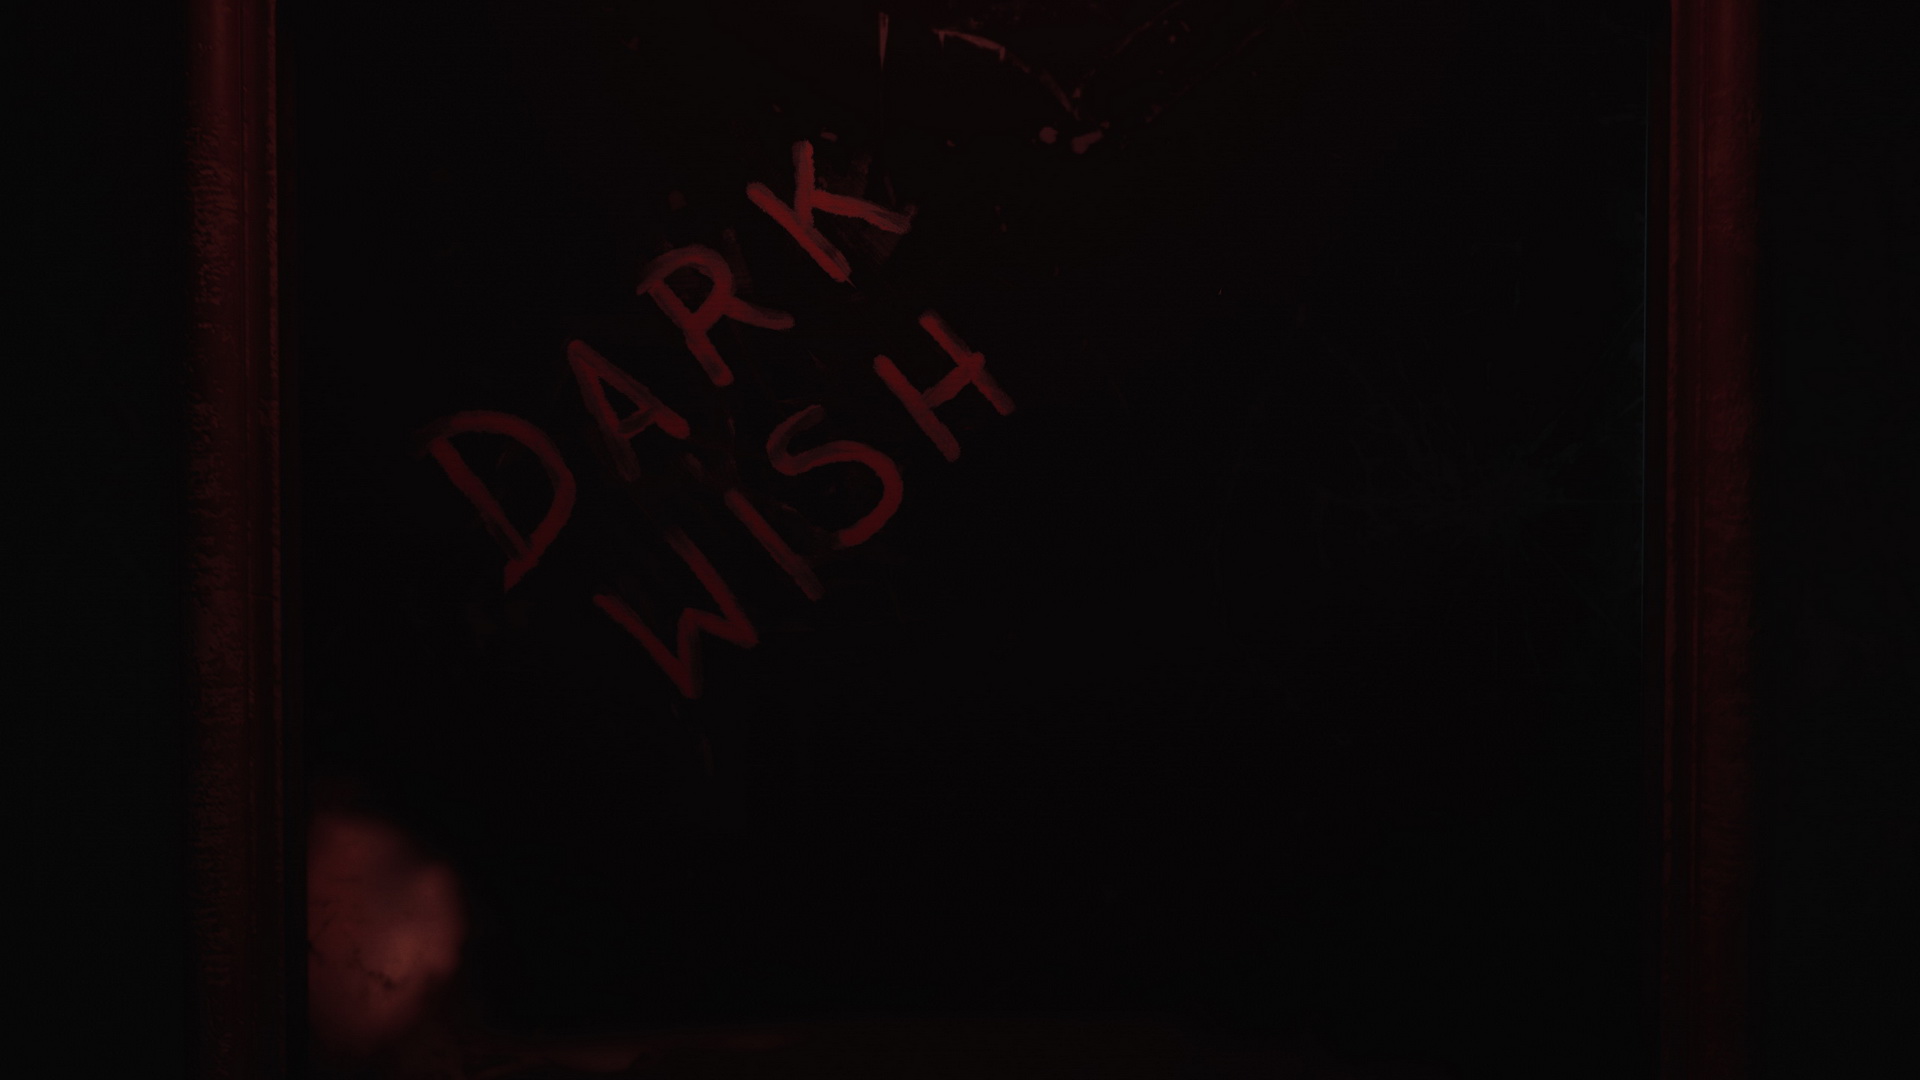
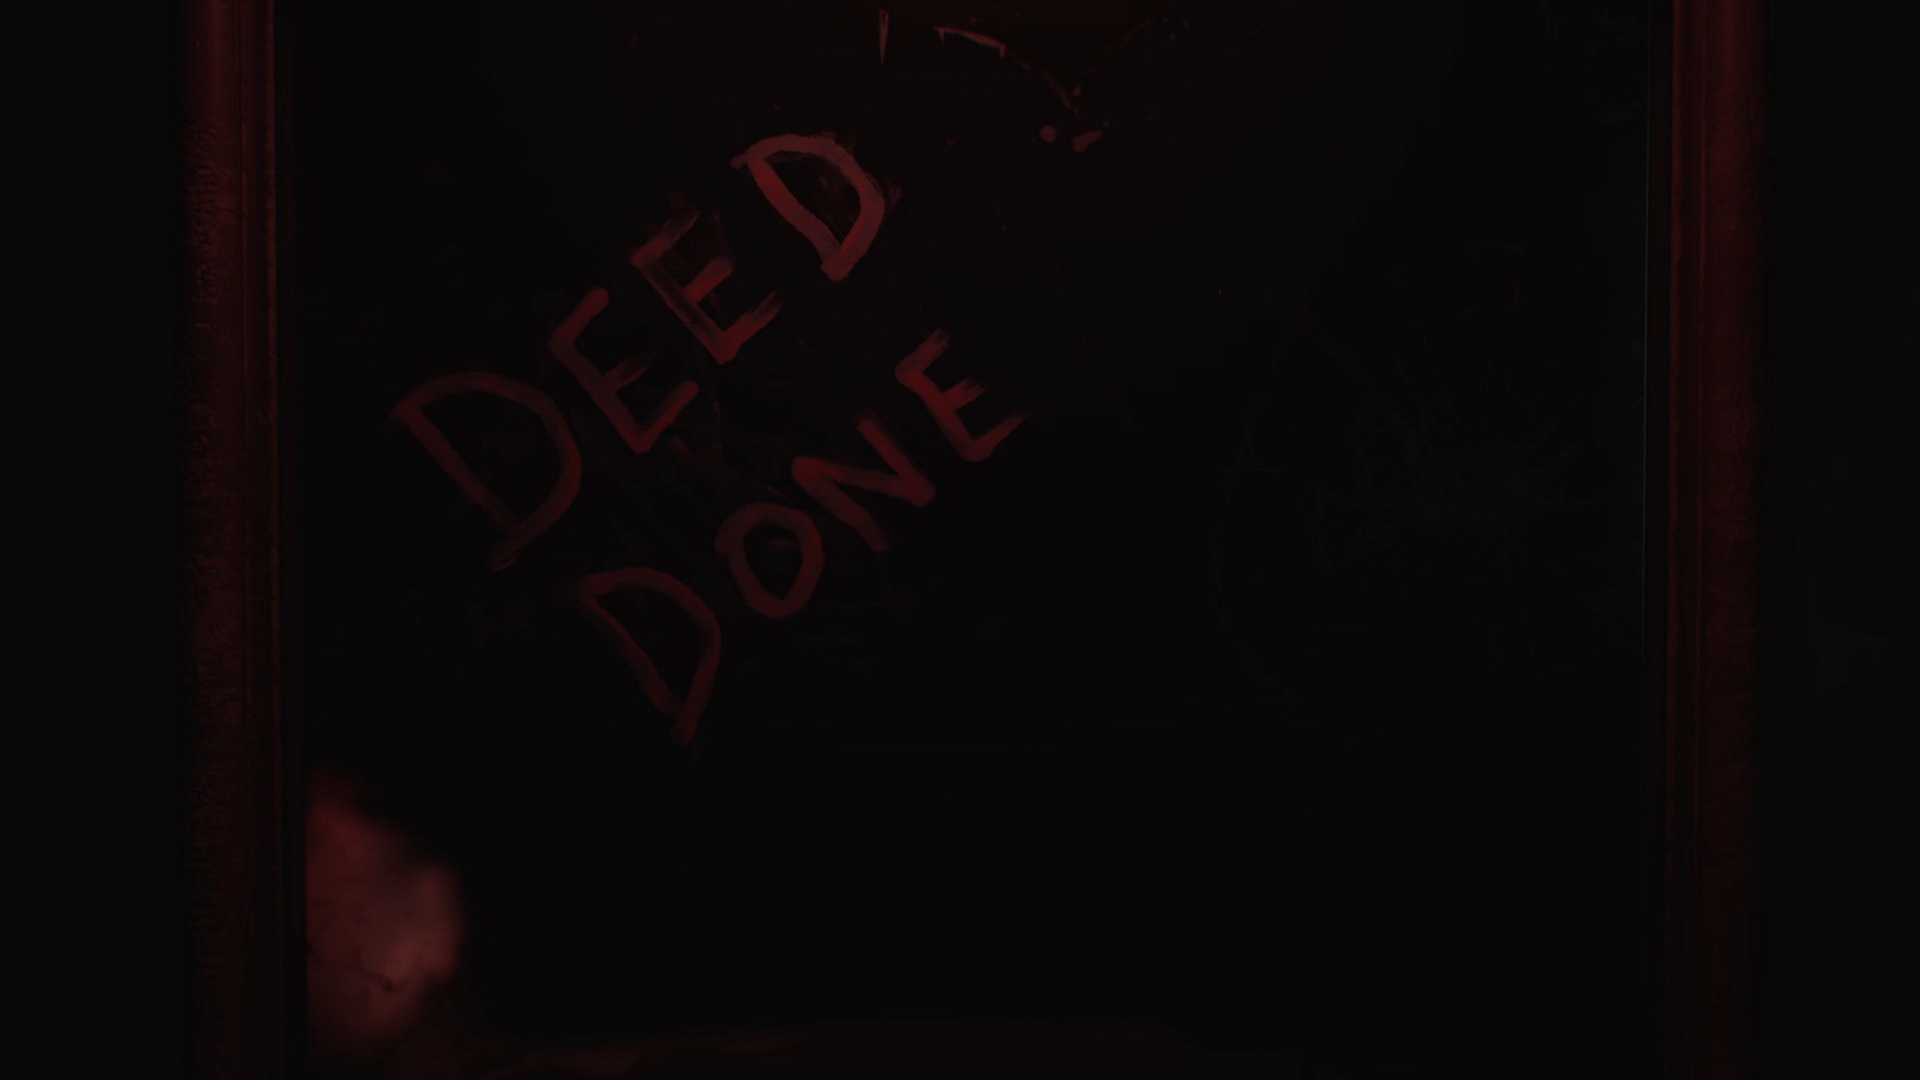
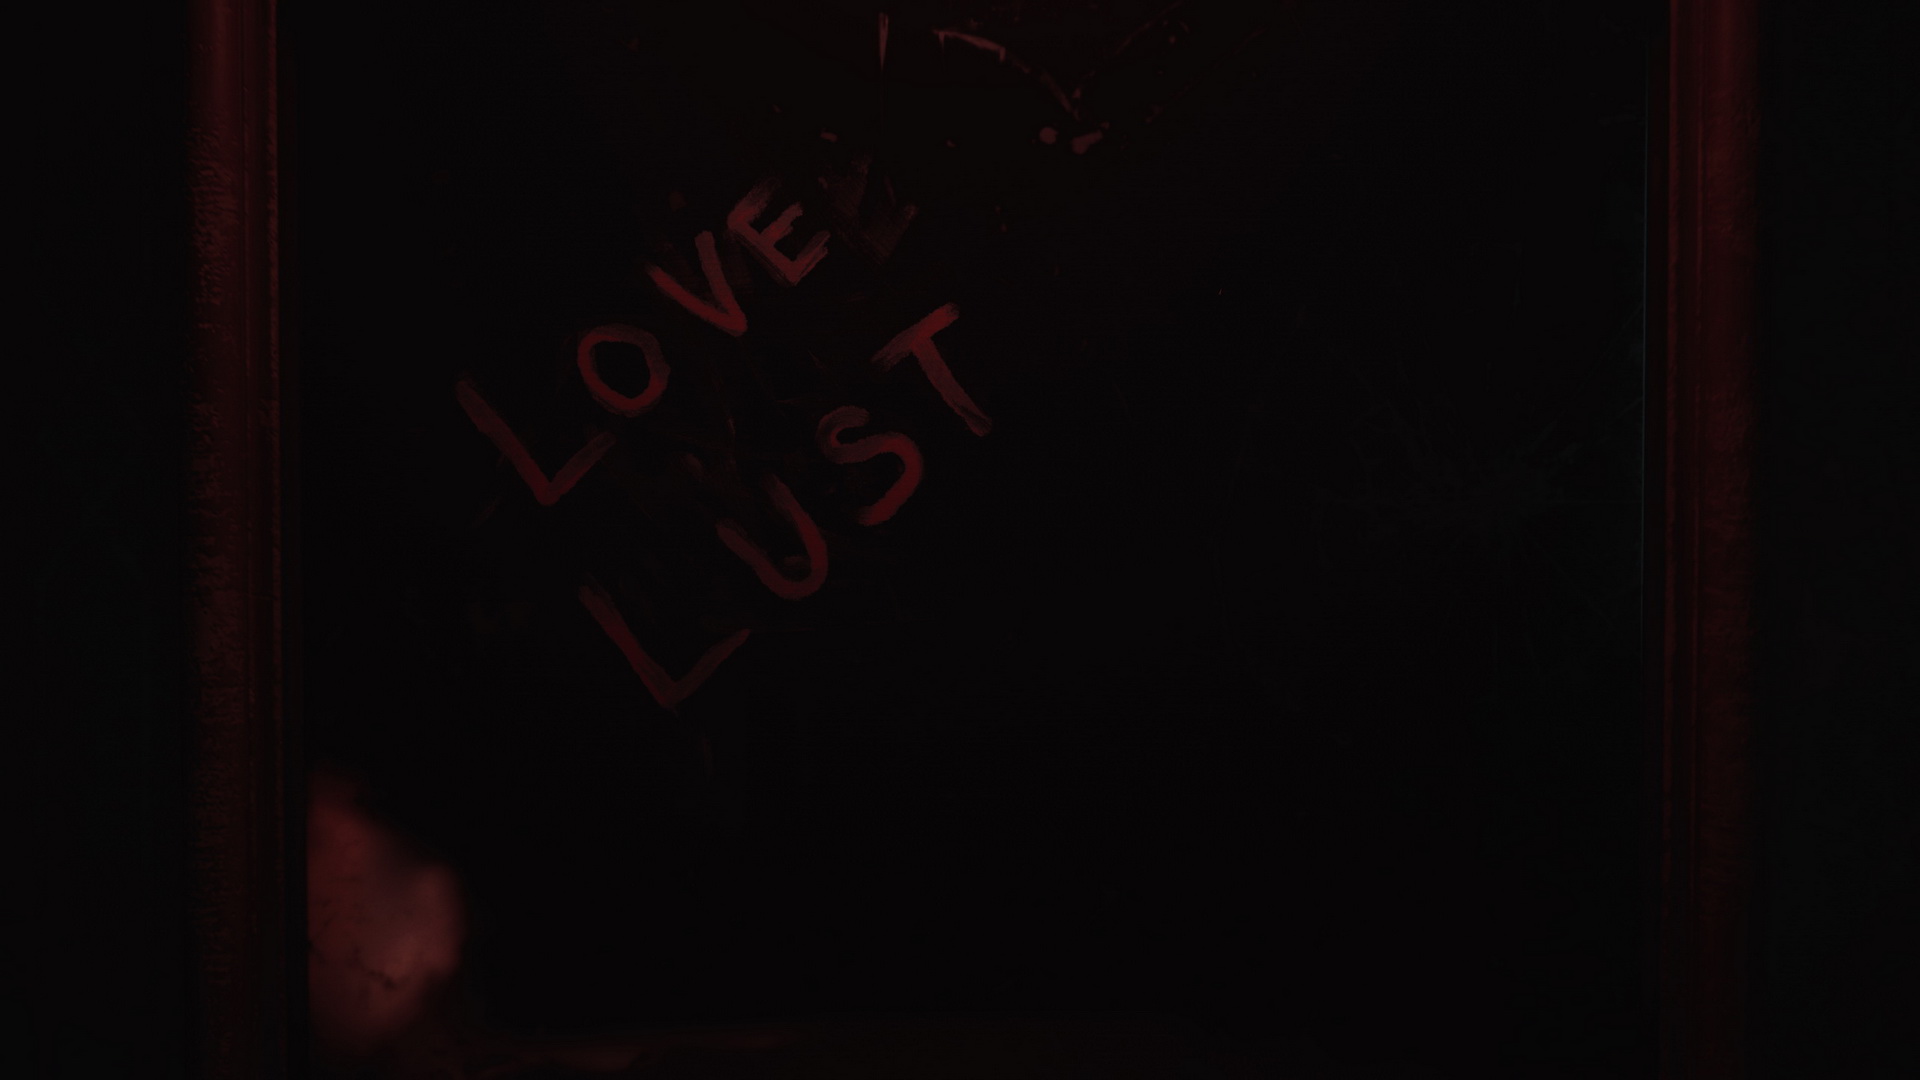
- Enter Room 205 to solve the vanity mirror puzzle. Insert the Red Light Bulb into the vanity mirror to reveal the message:
- Light: DARK WISH
- Standard: DEED DONE
- Hard: LOVE LUST
- 113 Employee Elevator Key. Enter the code into the briefcase on the bed to get the key.
- Go to the Employee Elevator in the Sunset Wing. There's a Save Point in the room.
- Stash all your items in the cabinet in the room to use the elevator. You can keep the personal items.
- Go to the first floor.
First Floor
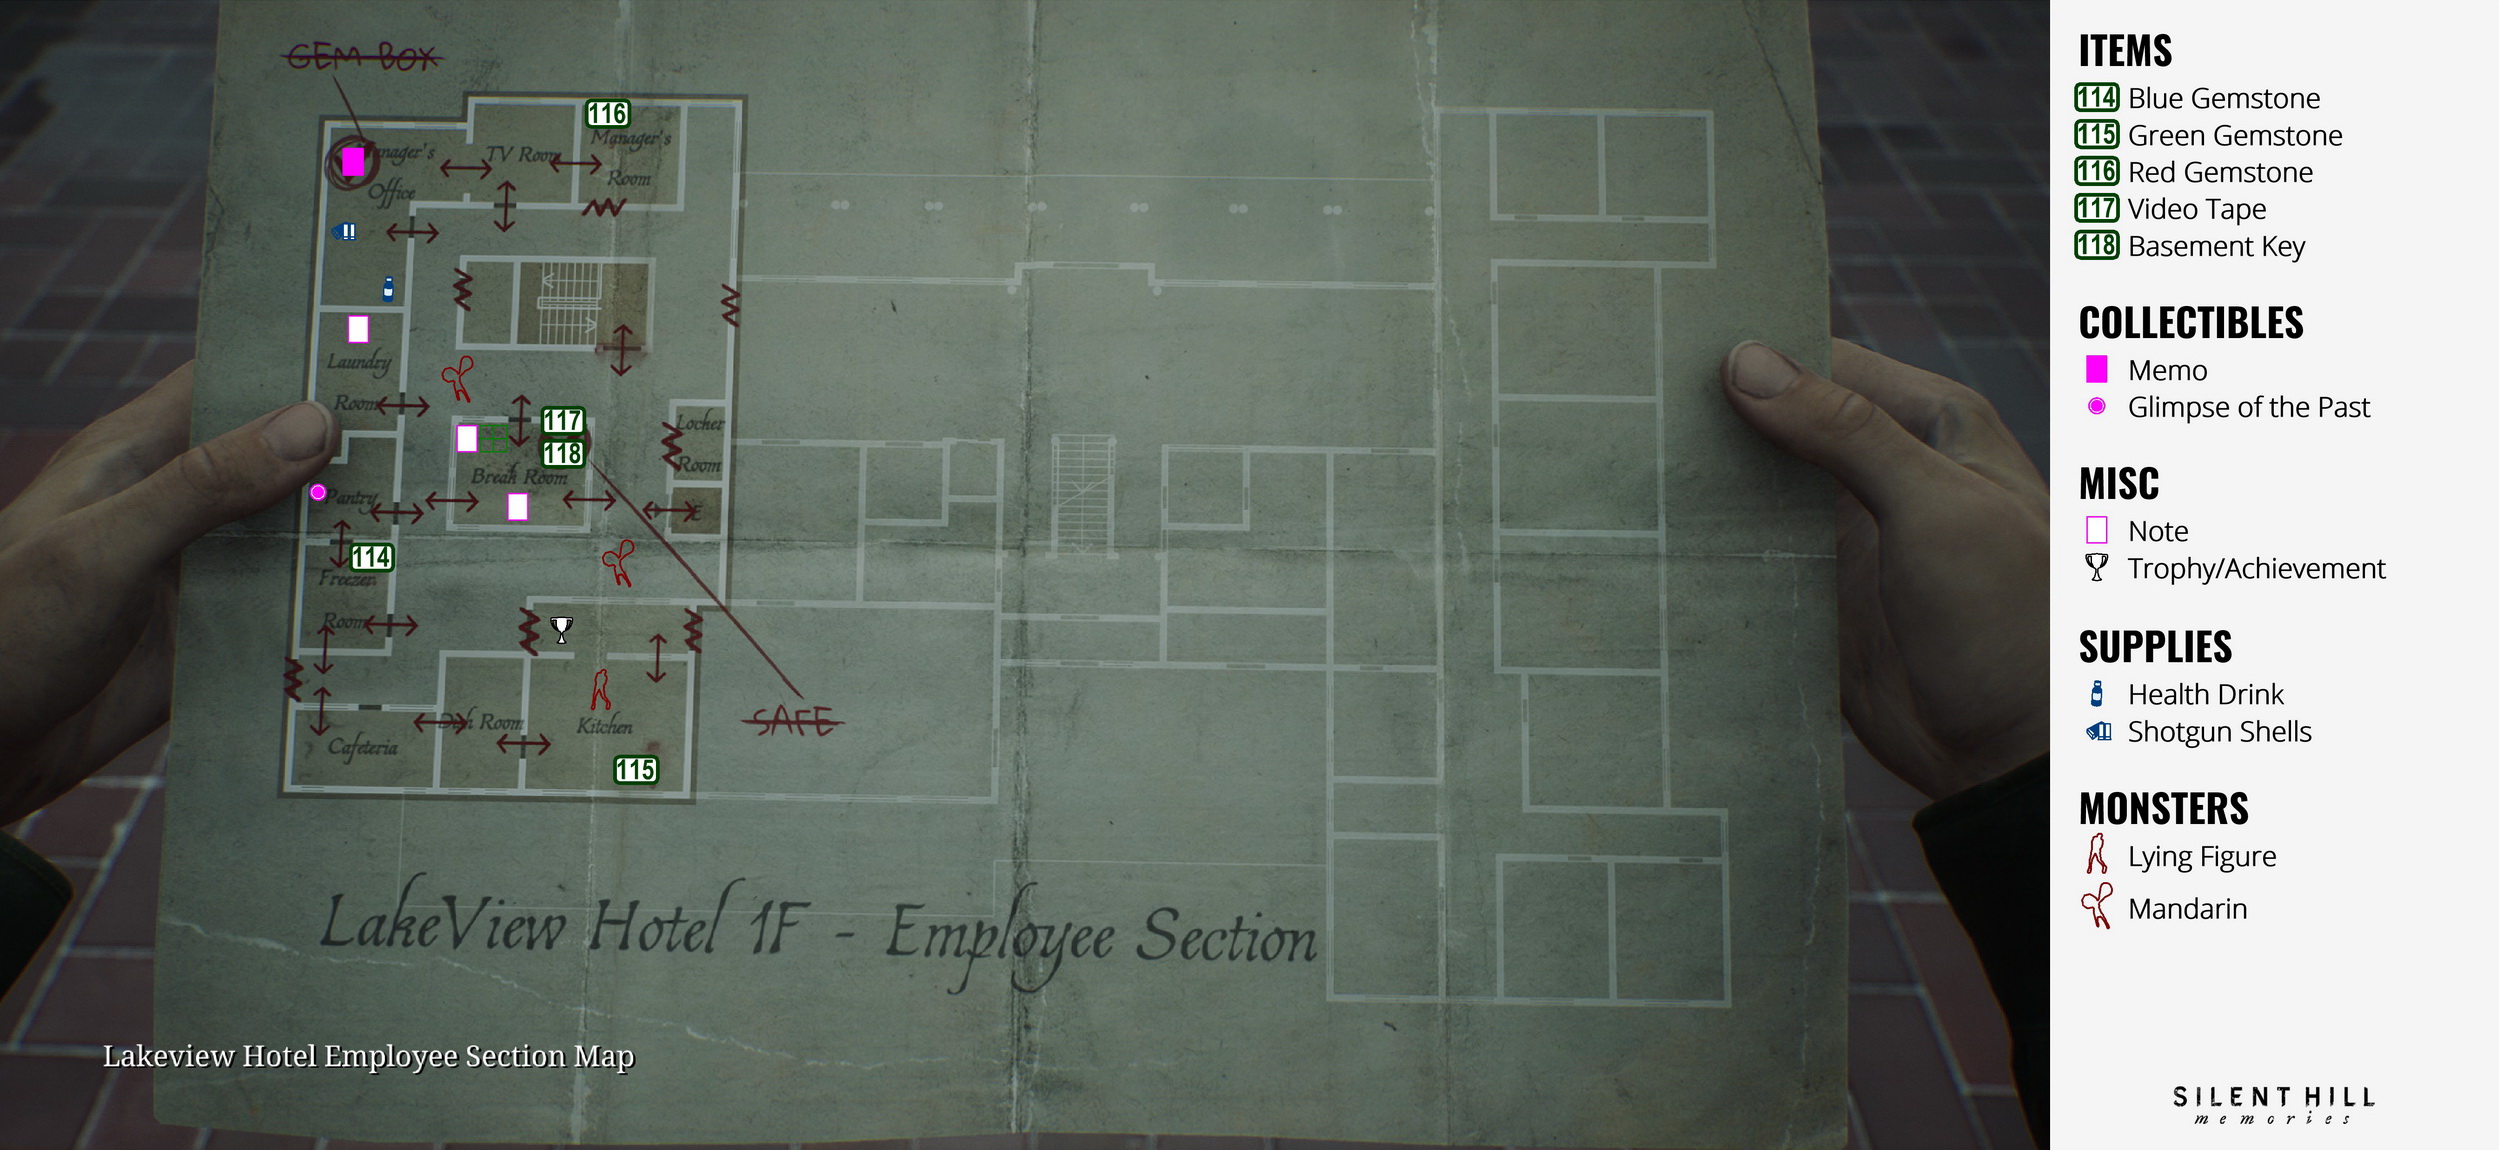
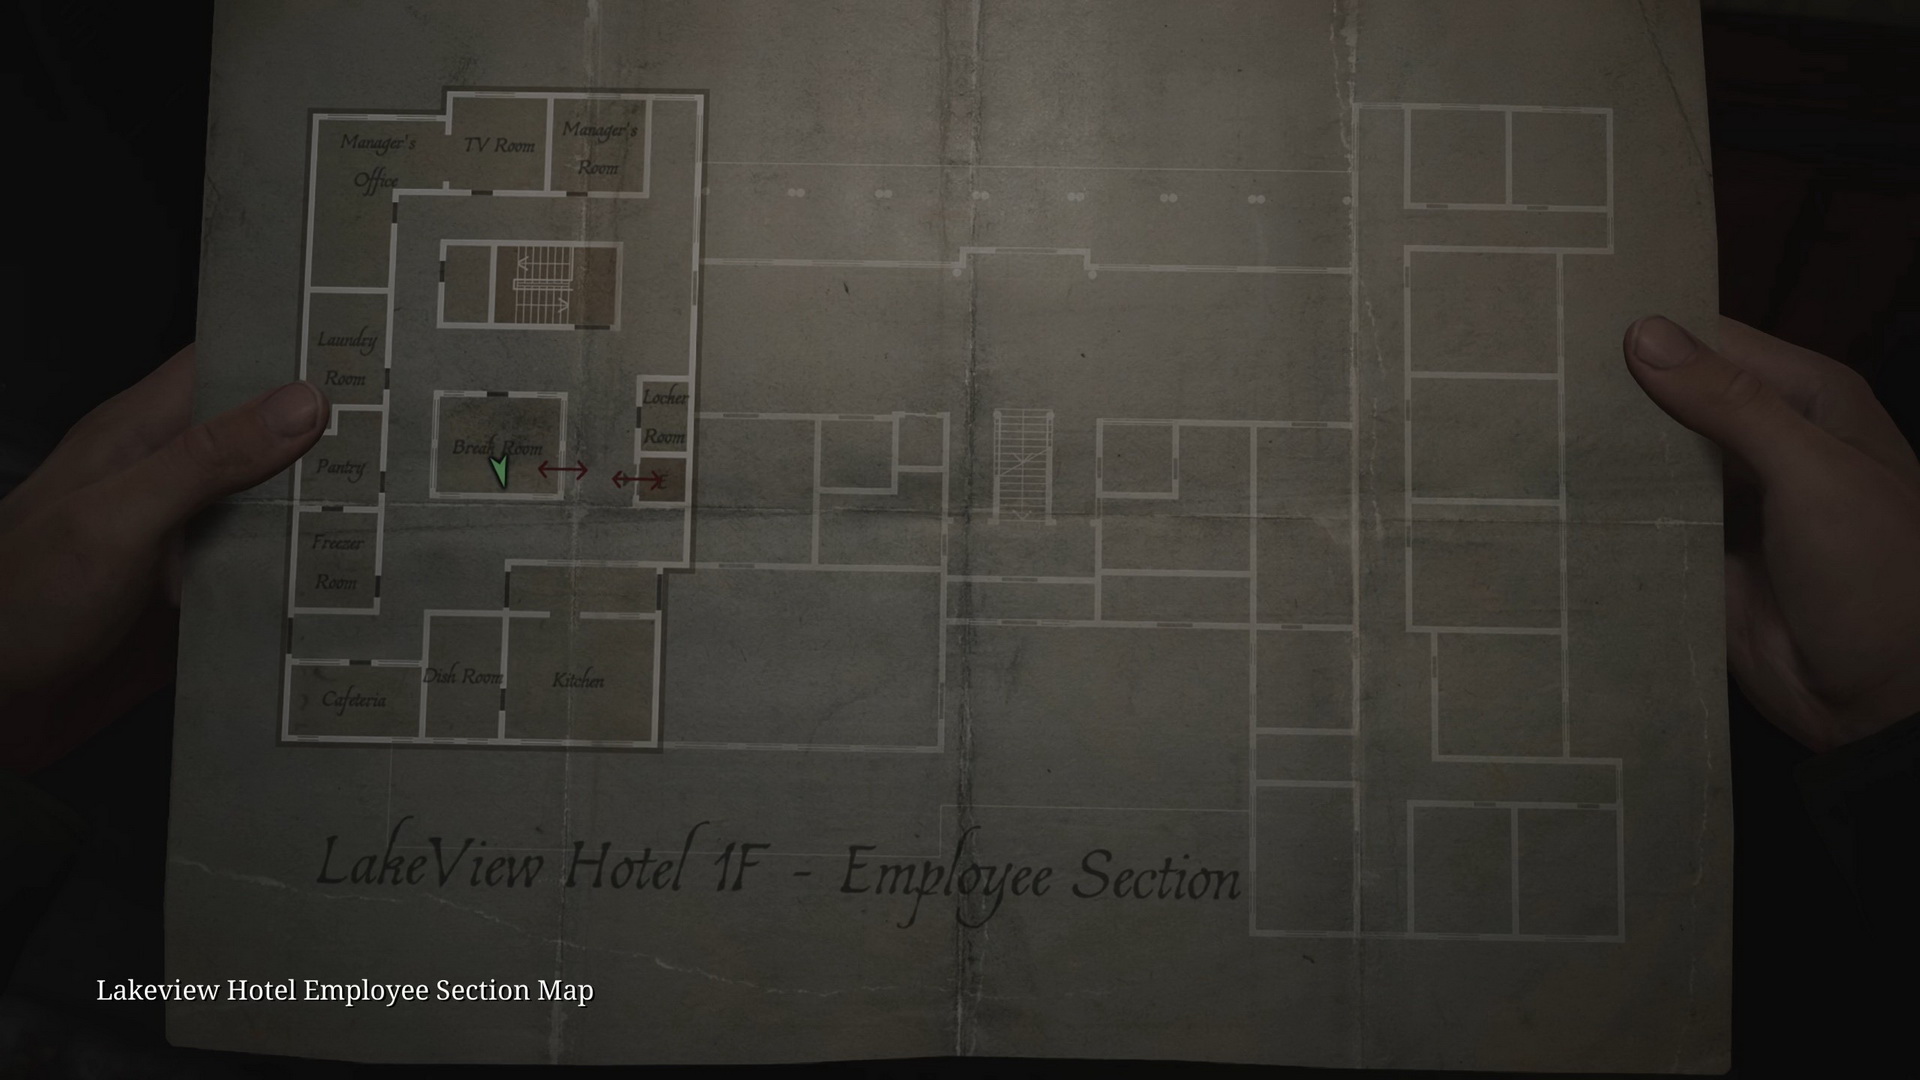
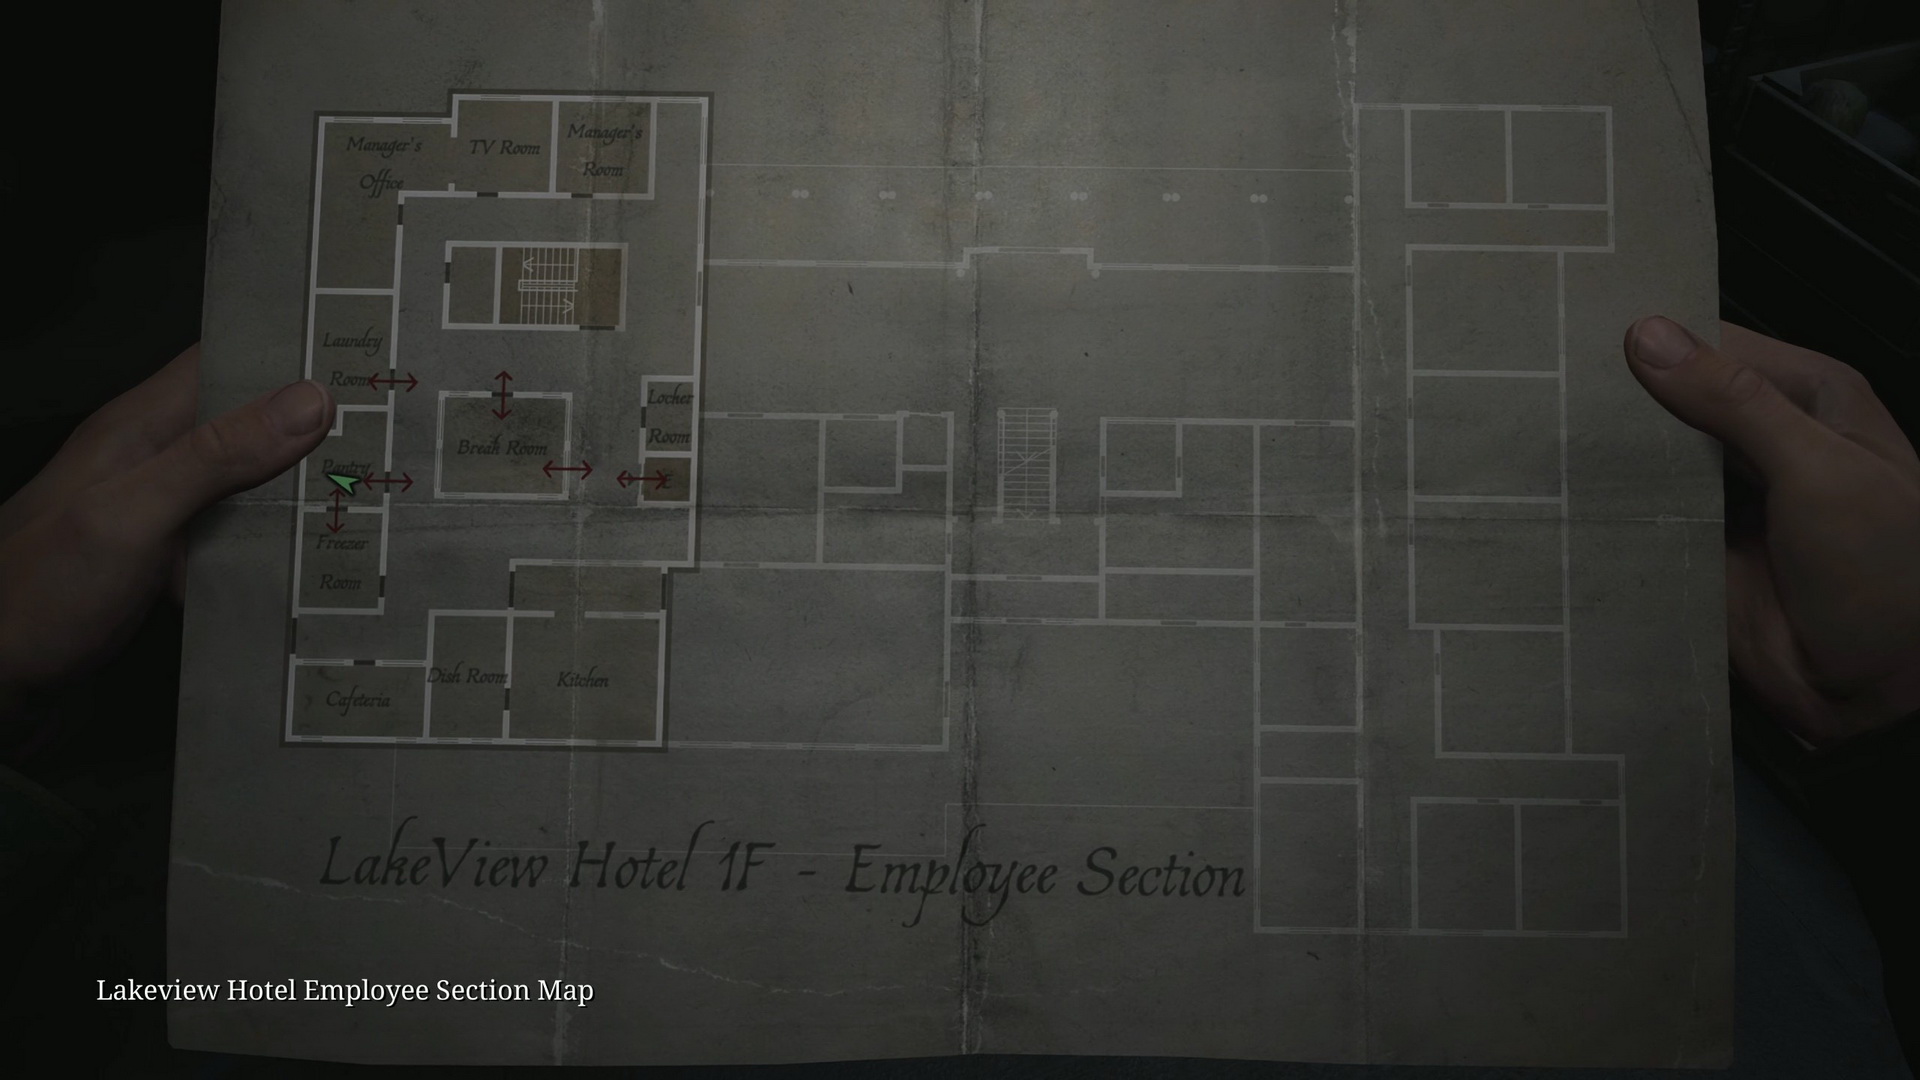
- Take the Lakeview Hotel Employee Section Maps from the wall in the Break Room.
- Glimpse of the Past #25. On a shelf in the Pantry.
- Note: You can skip collecting the gemstones and solving the gem box puzzle, as the Break Room safe code will always be the same.
- 114 Blue Gemstone (skippable) is in an open freezer in the Freezer Room.
- 115 Green Gemstone (skippable) is on a counter in the Kitchen (accessed through the vent to the Cafeteria).
- Trophy/achievement: It’s Bread. Examine the bread trays in the Kitchen.
- Go to the Manager's Office.
- 116 Red Gemstone (skippable) is in a decorative box in the Manager’s Room (push the wardrobe in the TV Room for access).
- Return to the Manager's Office and solve the gem box puzzle:
- Place the gemstones in the corresponding slots to adjust the image in the center to match the painting in the same room:
- Blue gemstone - bottom left slot.
- Green gemstone - top left slot.
- Red gemstone - top right slot.
- Memo #67: Keypad Numbers Memo. Received after solving the puzzle.
- 117 Video Tape and 118 Basement Key. Return to the Break Room and open the safe using the code 7414.
- Use the key to unlock the stairs and go down to the basement.
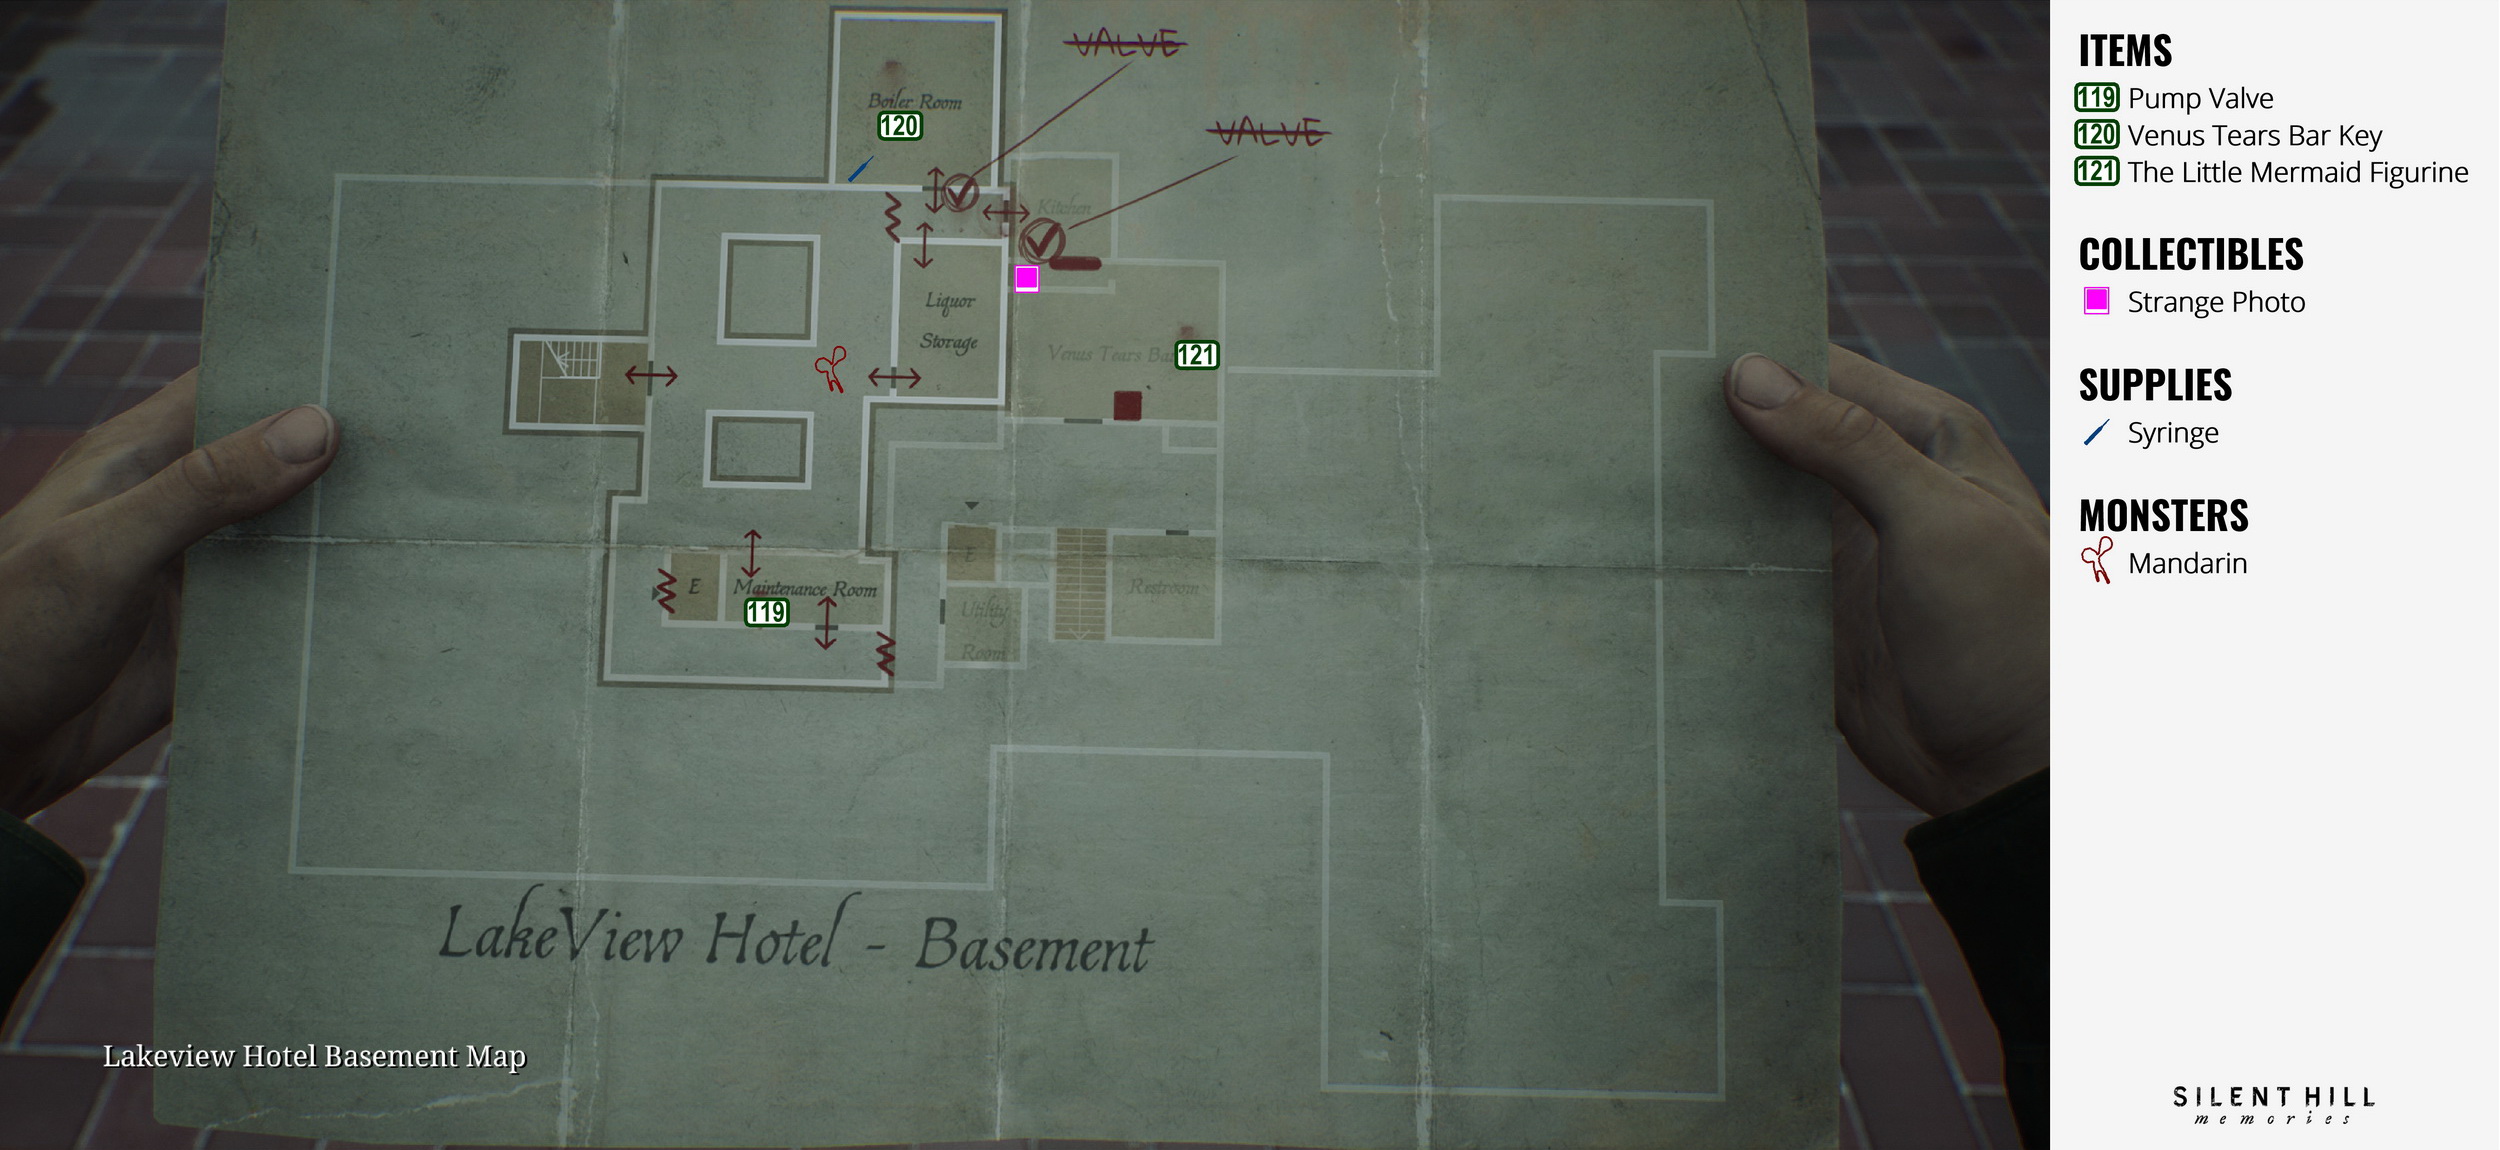
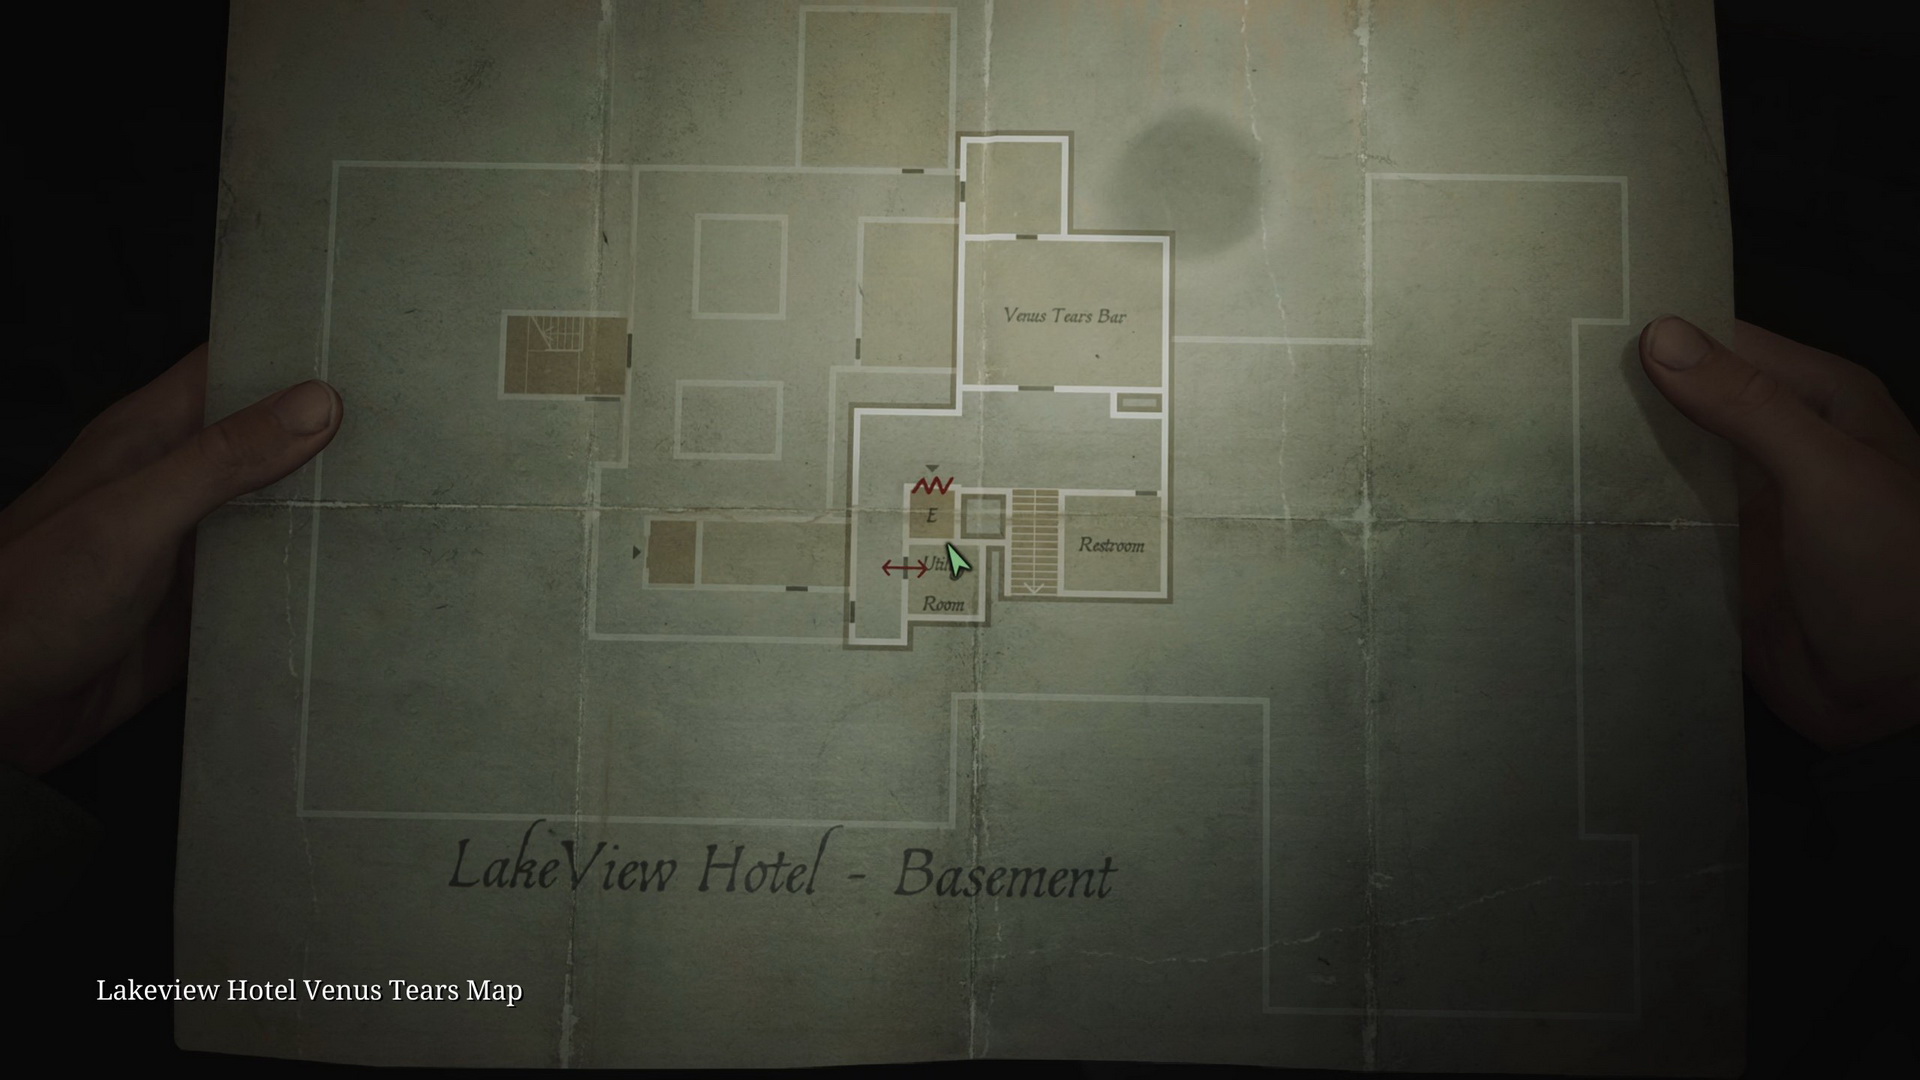
Basement
- 119 Pump Valve is on a work bench in the Maintenance Room.
- Use the Pump Valve to access the Boiler Room.
- 120 Venus Tears Bar Key is attached to a red pipe.
- Take the Pump Valve and use it again in the bar's Kitchen.
- Strange Photo #24: "Better leave…". Venus Tears Bar, on a shelf with bottles behind the bar.
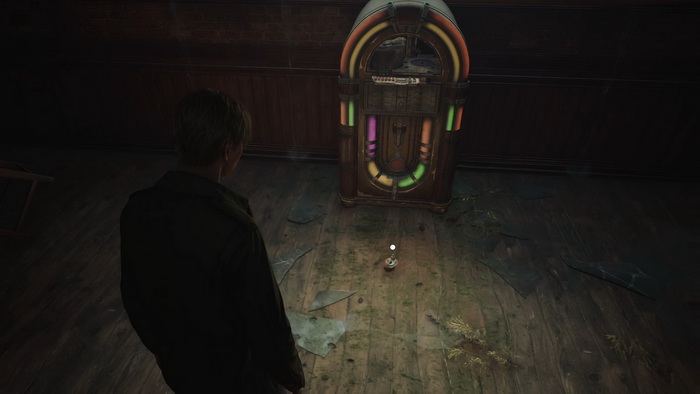
- 121 The Little Mermaid Figurine is in front of the jukebox in the bar.
- There's also a Save Point in the Venus Tears Bar.
- Return to the Employee Elevator room on the second floor to retrieve all your items.
- Go to the music box in the main lobby on the first floor to solve the puzzle.
First Floor
- Place the figurines into the corresponding slots:
- Snow White – left.
- Little Mermaid – top.
- Cinderella – right.
- Align the four circular plates to form uninterrupted paths and press the button in the bottom right corner for a test.
- Turn each key a certain number of times and then press the gold button below:
- Light: 7 - 2 - 1
- Standard: 7 - 5 - 1
- Hard: 1 - 1 - 1
- 122 3F Corridor Key. You will receive the key after solving the puzzle.
- Go to the third floor.
Third Floor
- Unlock the gate to the third-floor corridor
- NG+. Use the Dog Key to enter the Observation Room and immediately get the "Dog" ending.
- Enter Room 312 and use the Video Tape on a cassette player for a cutscene.
- NG+. Use the Blue Gem for the final time in Room 312; you will immediately get the "UFO" ending.
- NG+. If you have the White Claudia in your inventory, using the Video Tape will immediately get you the "Bliss" ending.
Complete Walkthrough
Garden
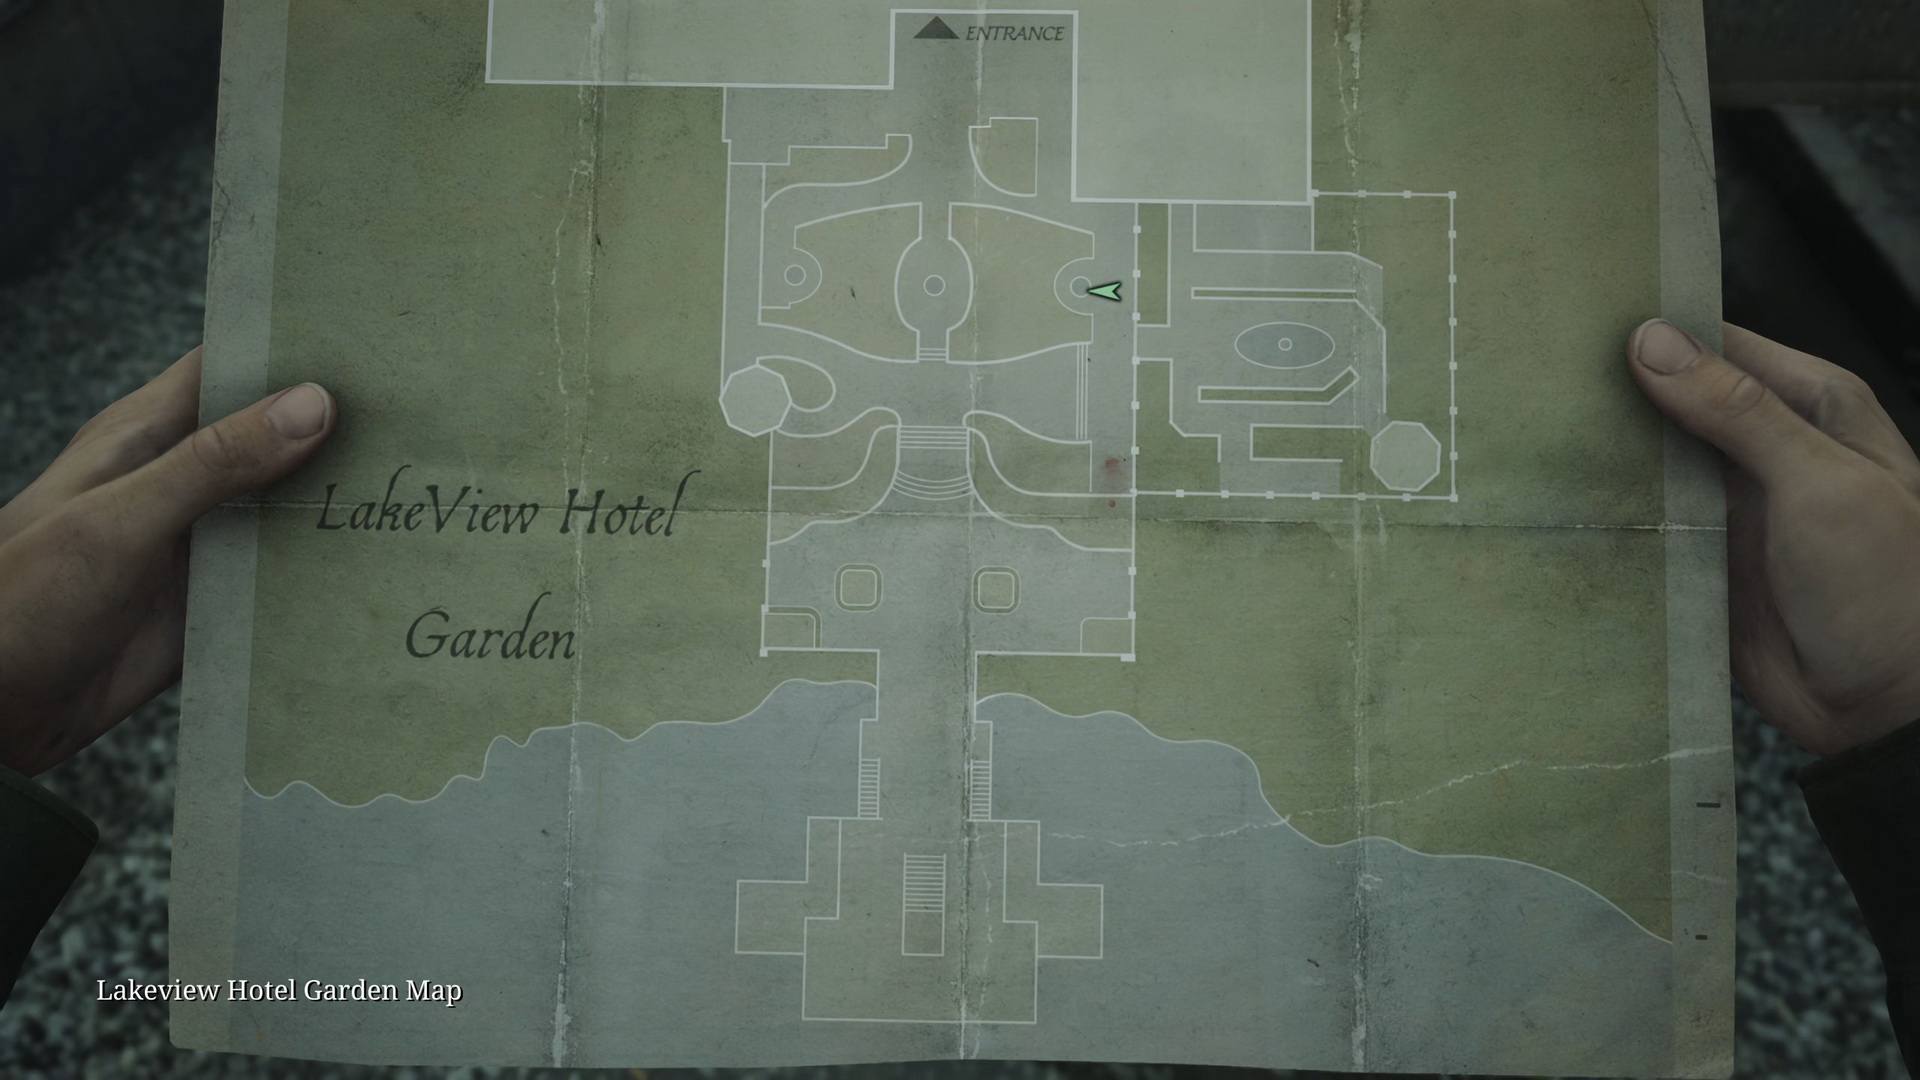
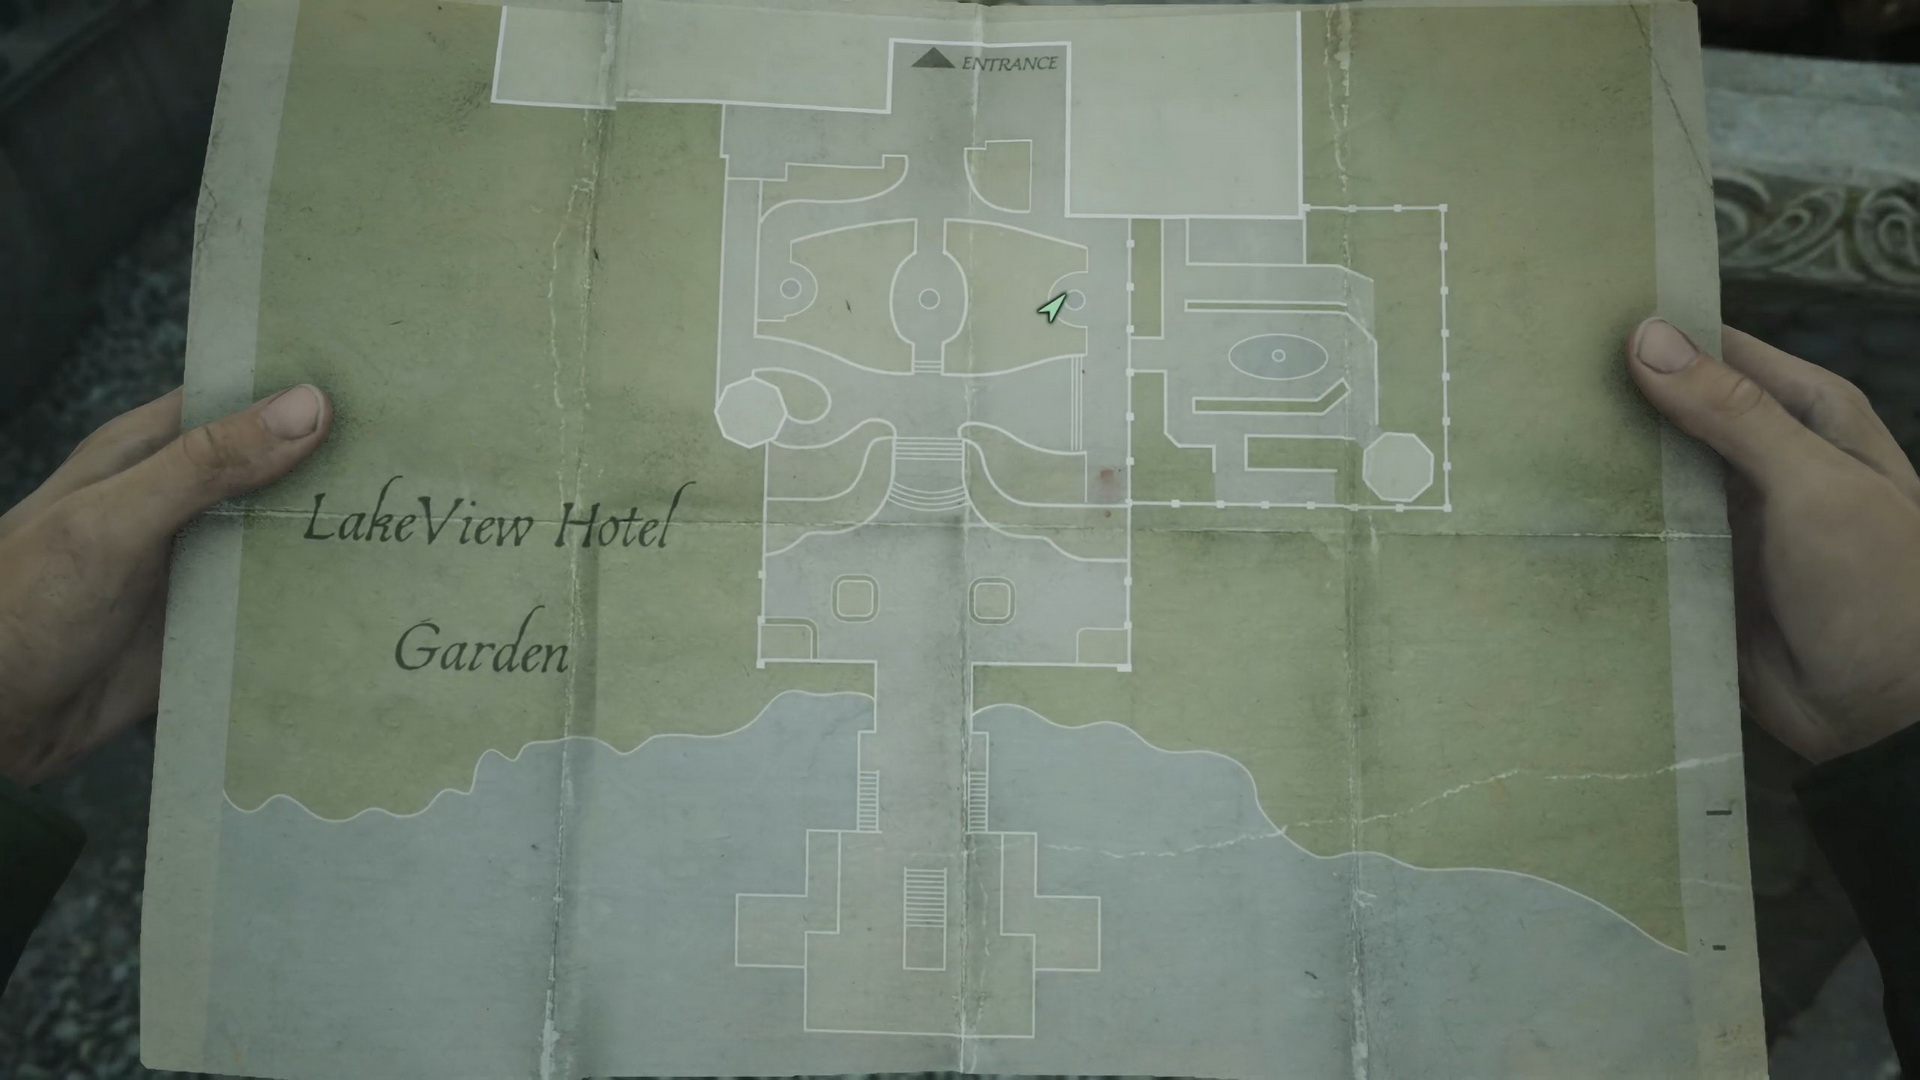
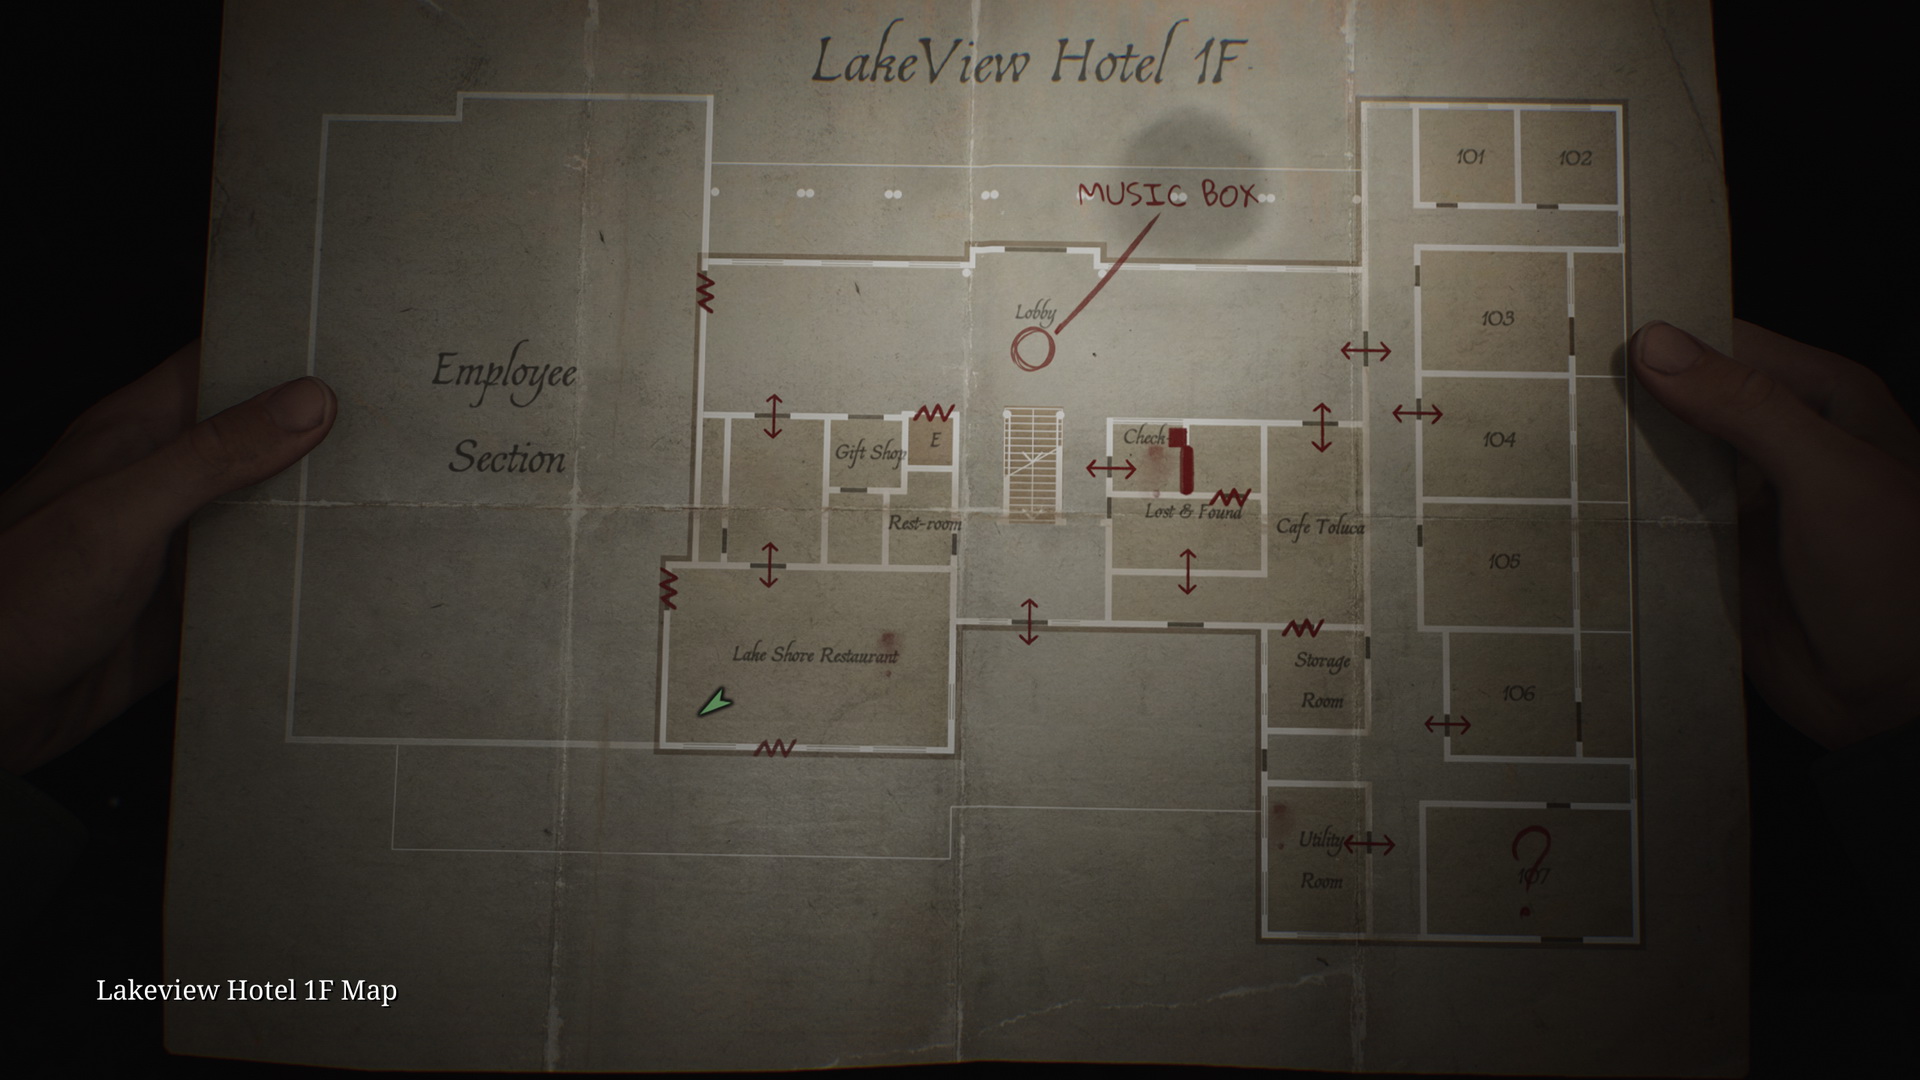
Take the Lakeview Hotel Garden Map from the wall stand ahead.
New Game+: Using the Blue Gem |
Proceed upstairs through the pier and enter the hotel garden. In the eastern part of the garden, you can find a 91 Rotten Apple on a bench.
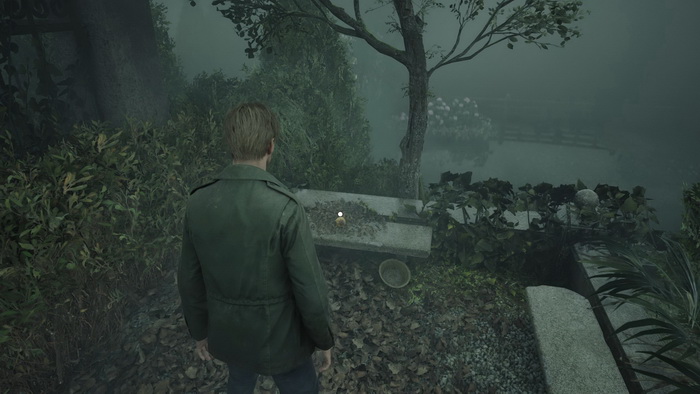
Note: This is one of the two apples needed for the puzzle later. You only need one of the apples of your choice, so you don't need to pick up both.
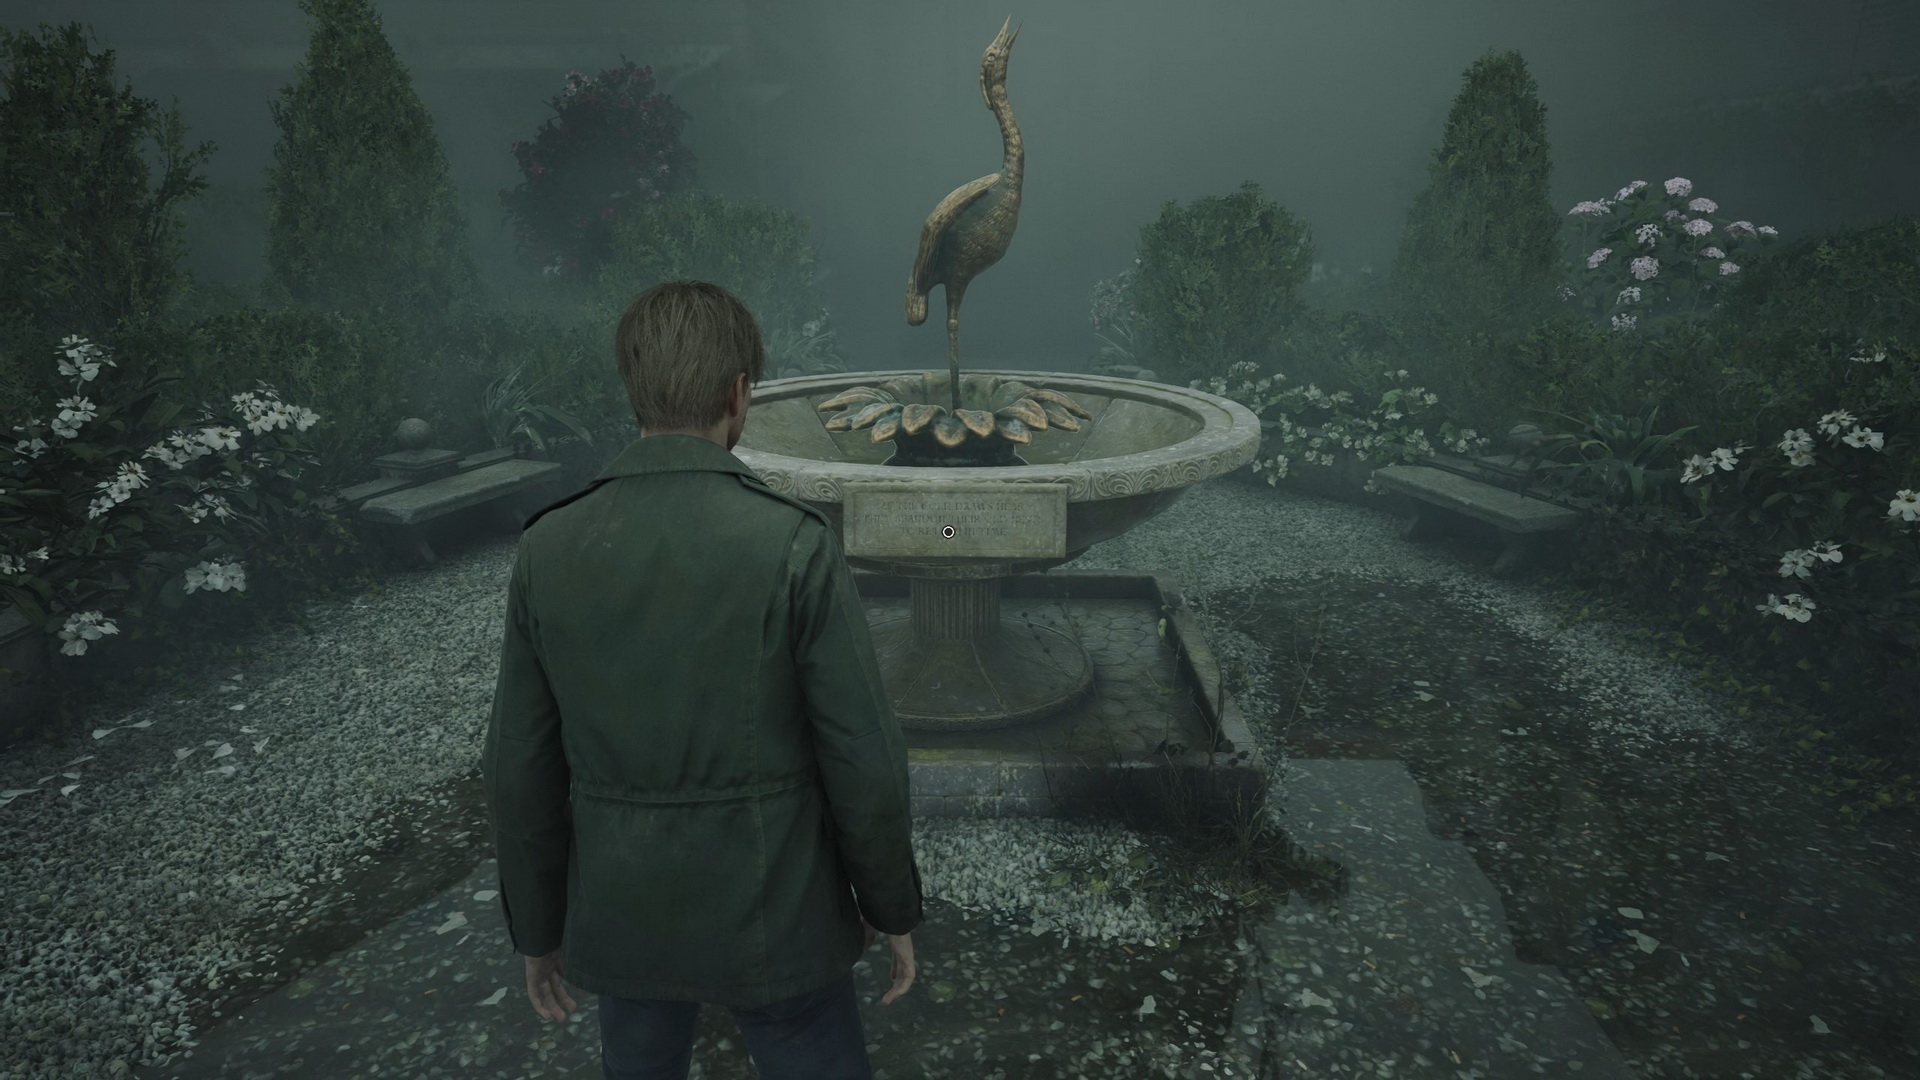
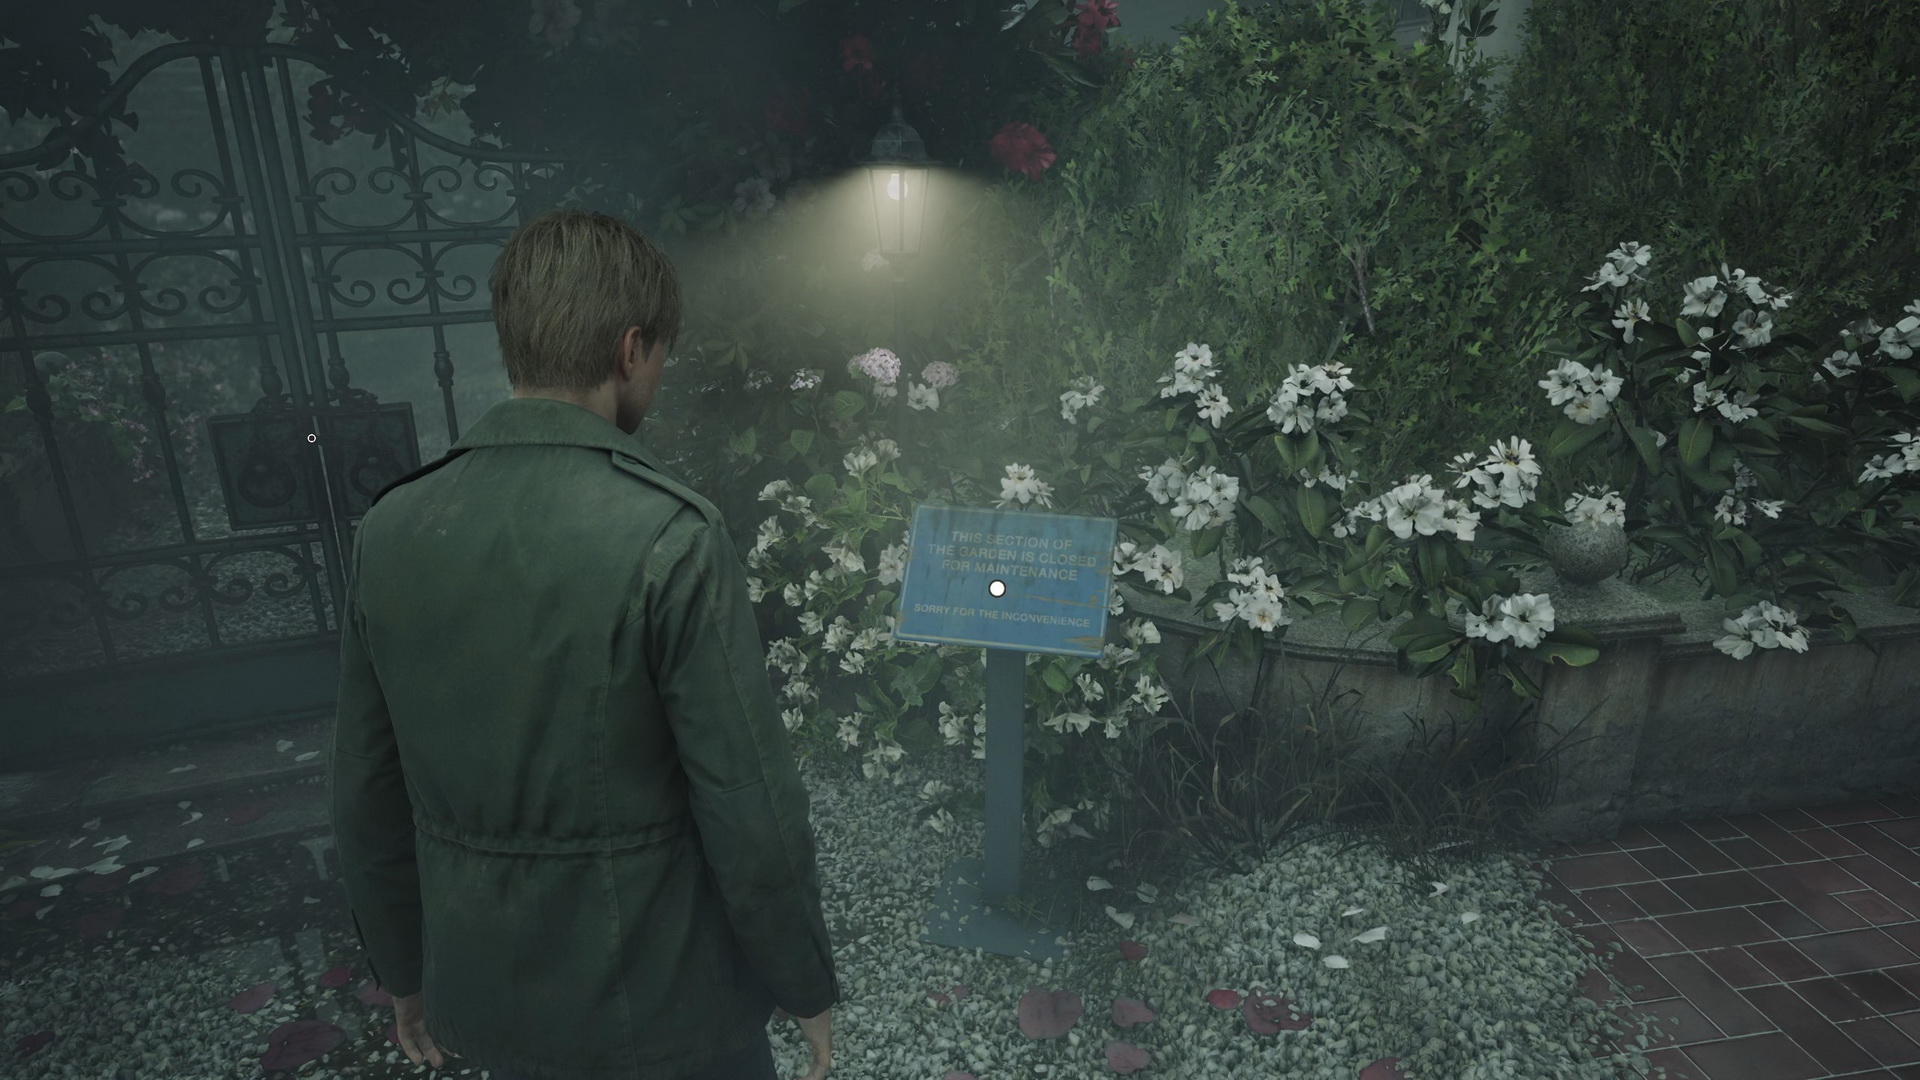
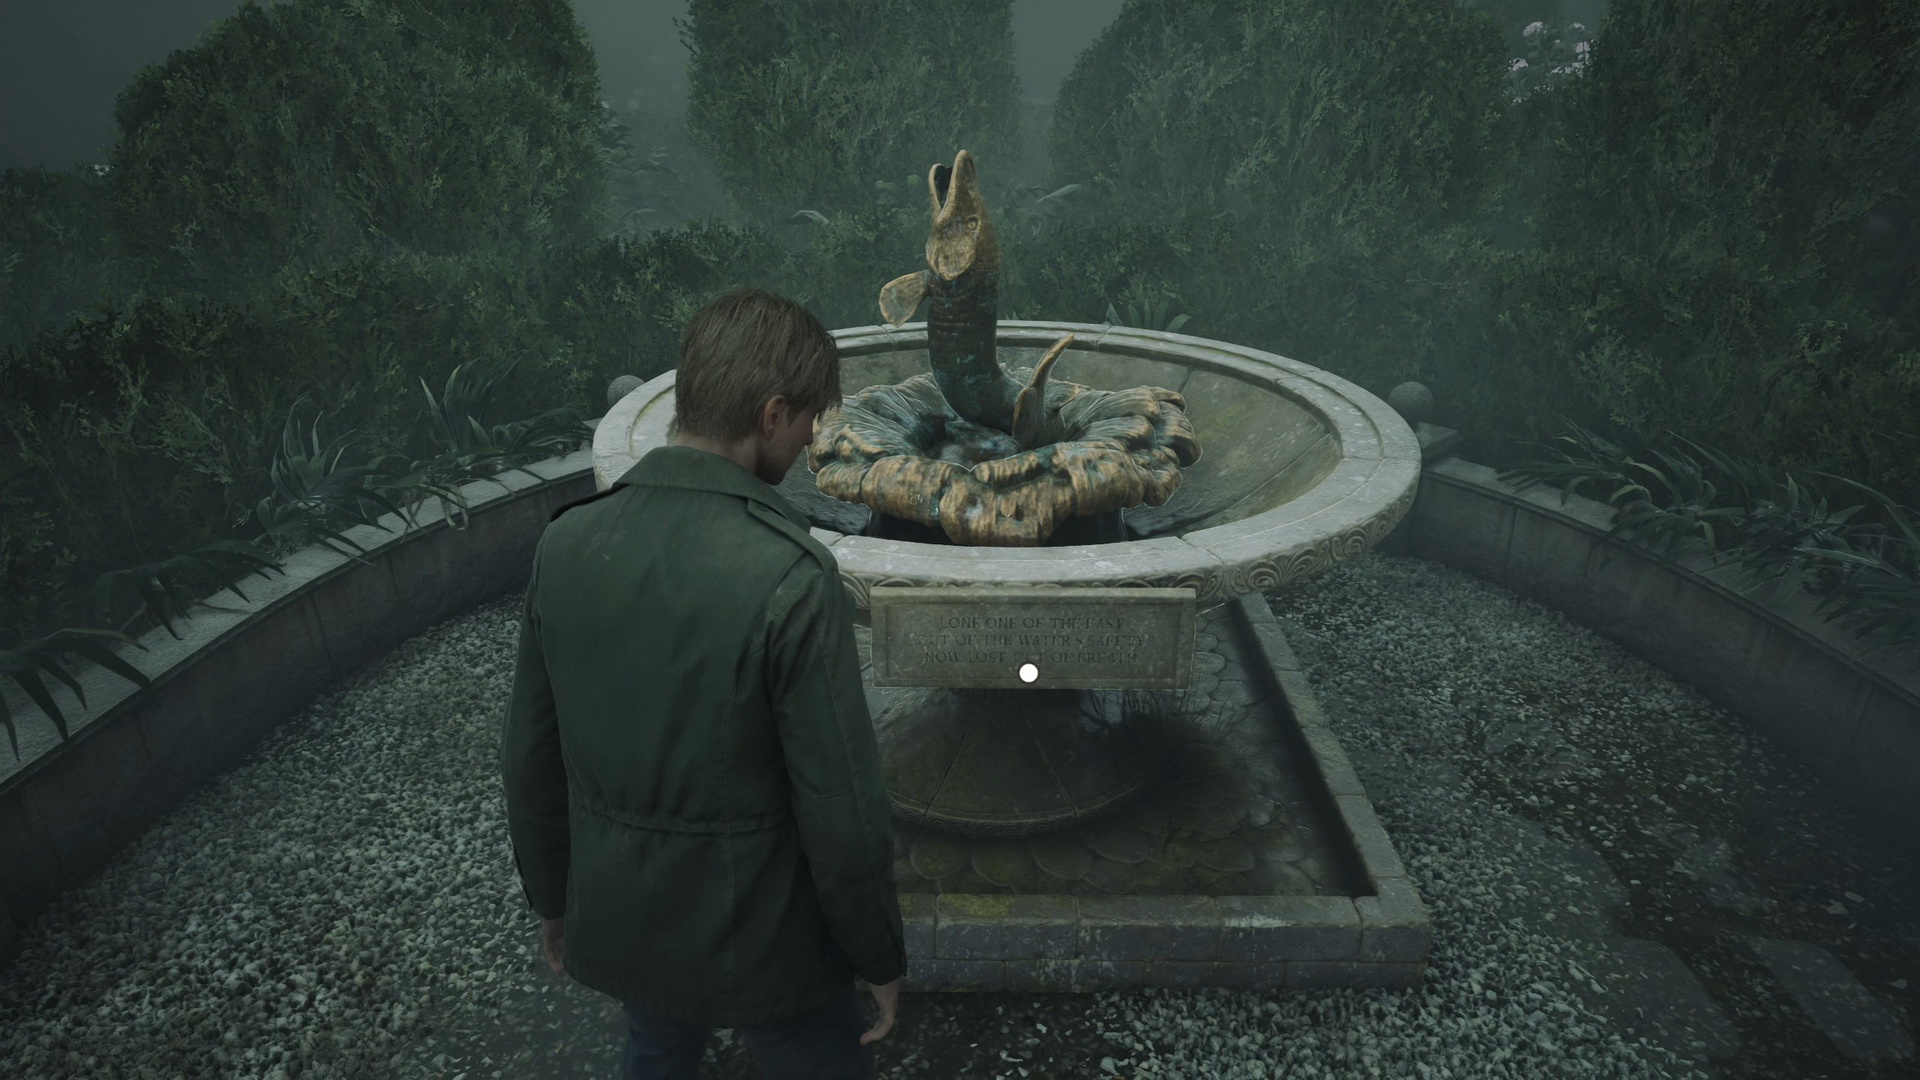
On your way to the hotel, you can inspect the inscription plates on two fountains and find a locked gate to the western section of the garden.
 |
 |
 |
 |
 |
 |
Also, for Glimpse of the Past #23, inspect a music box inside the basin of the eastern fountain.
 |
 |
Enter the hotel.
Exploring the First Floor
Collect the Lakeview Hotel Maps from the board on the right.
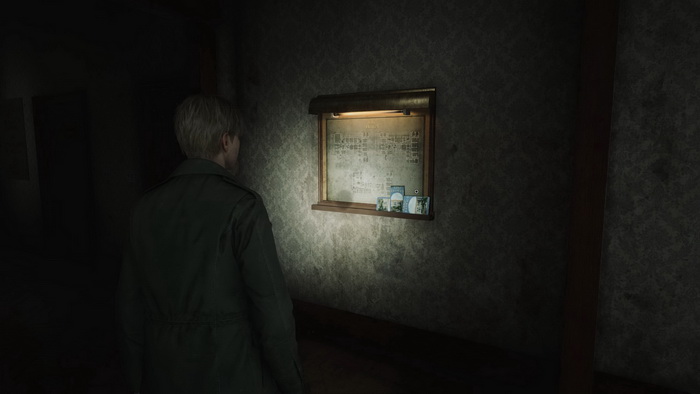
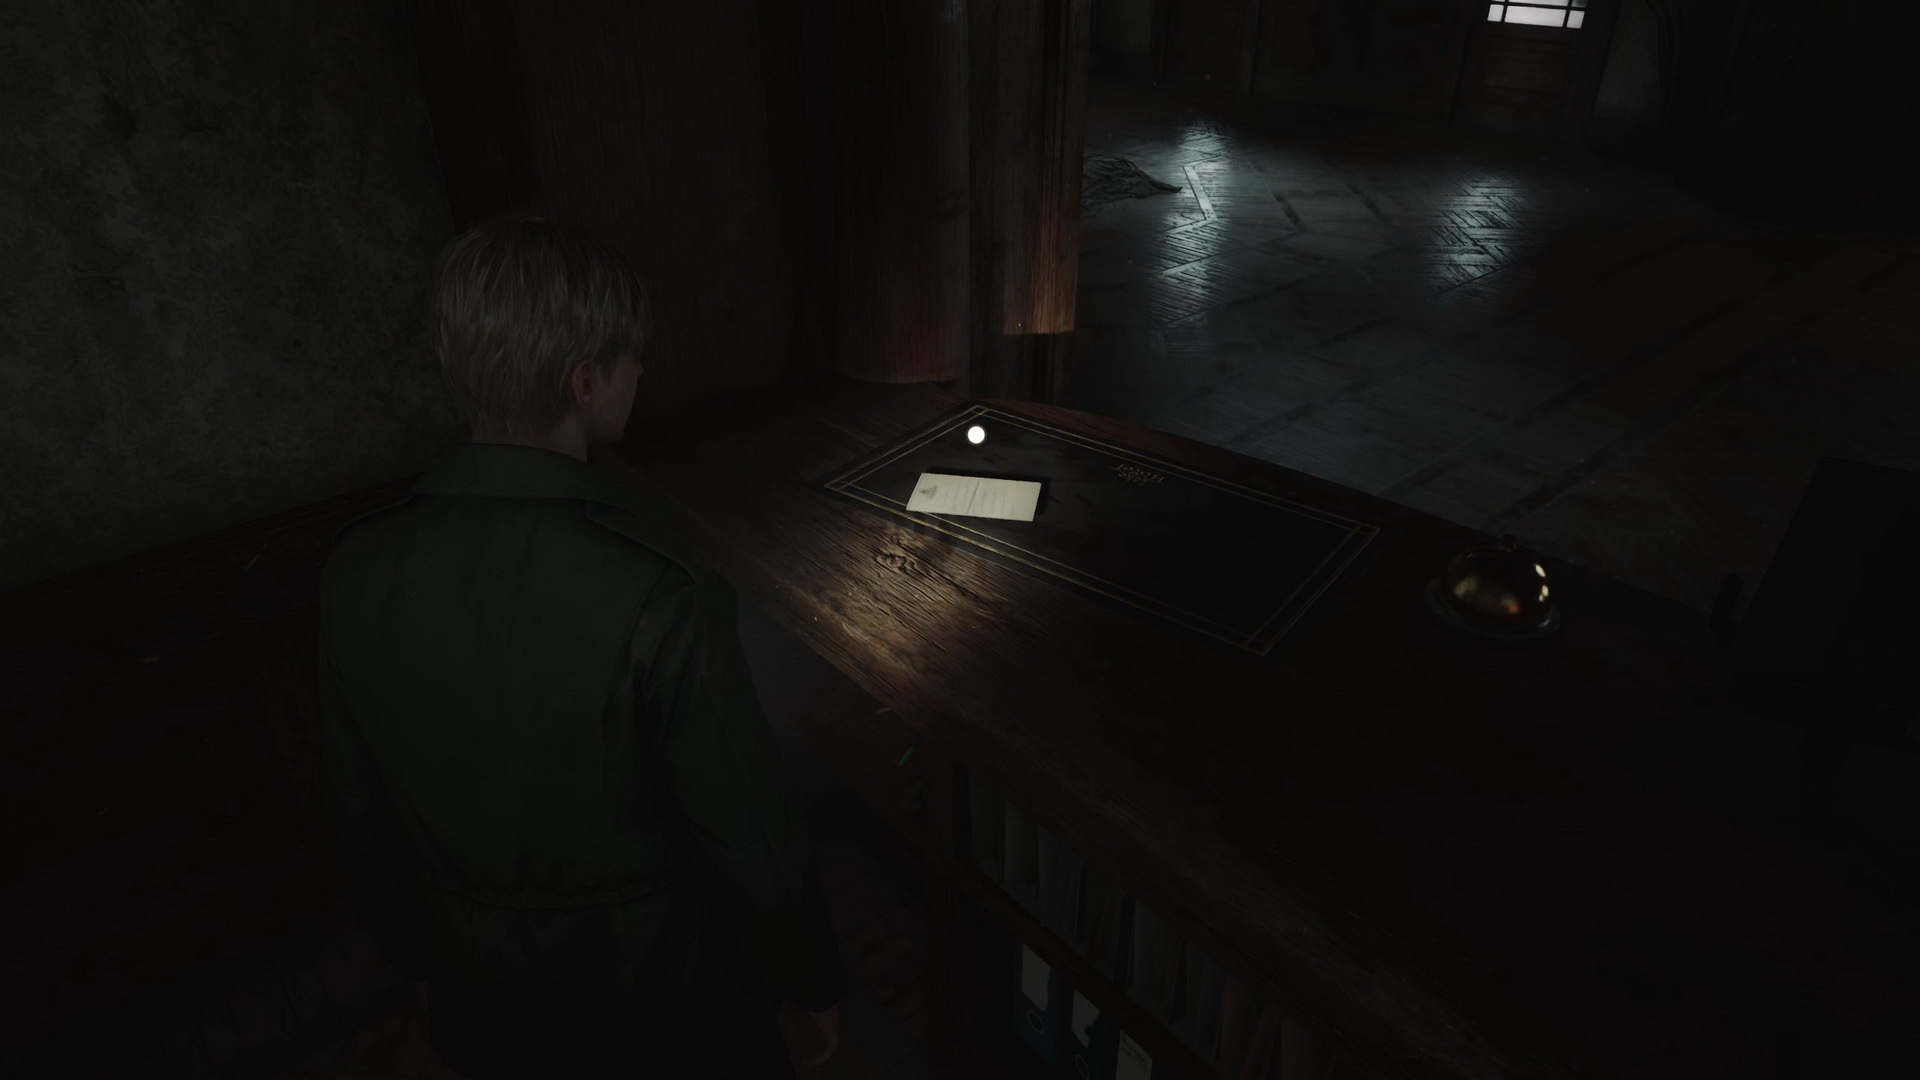
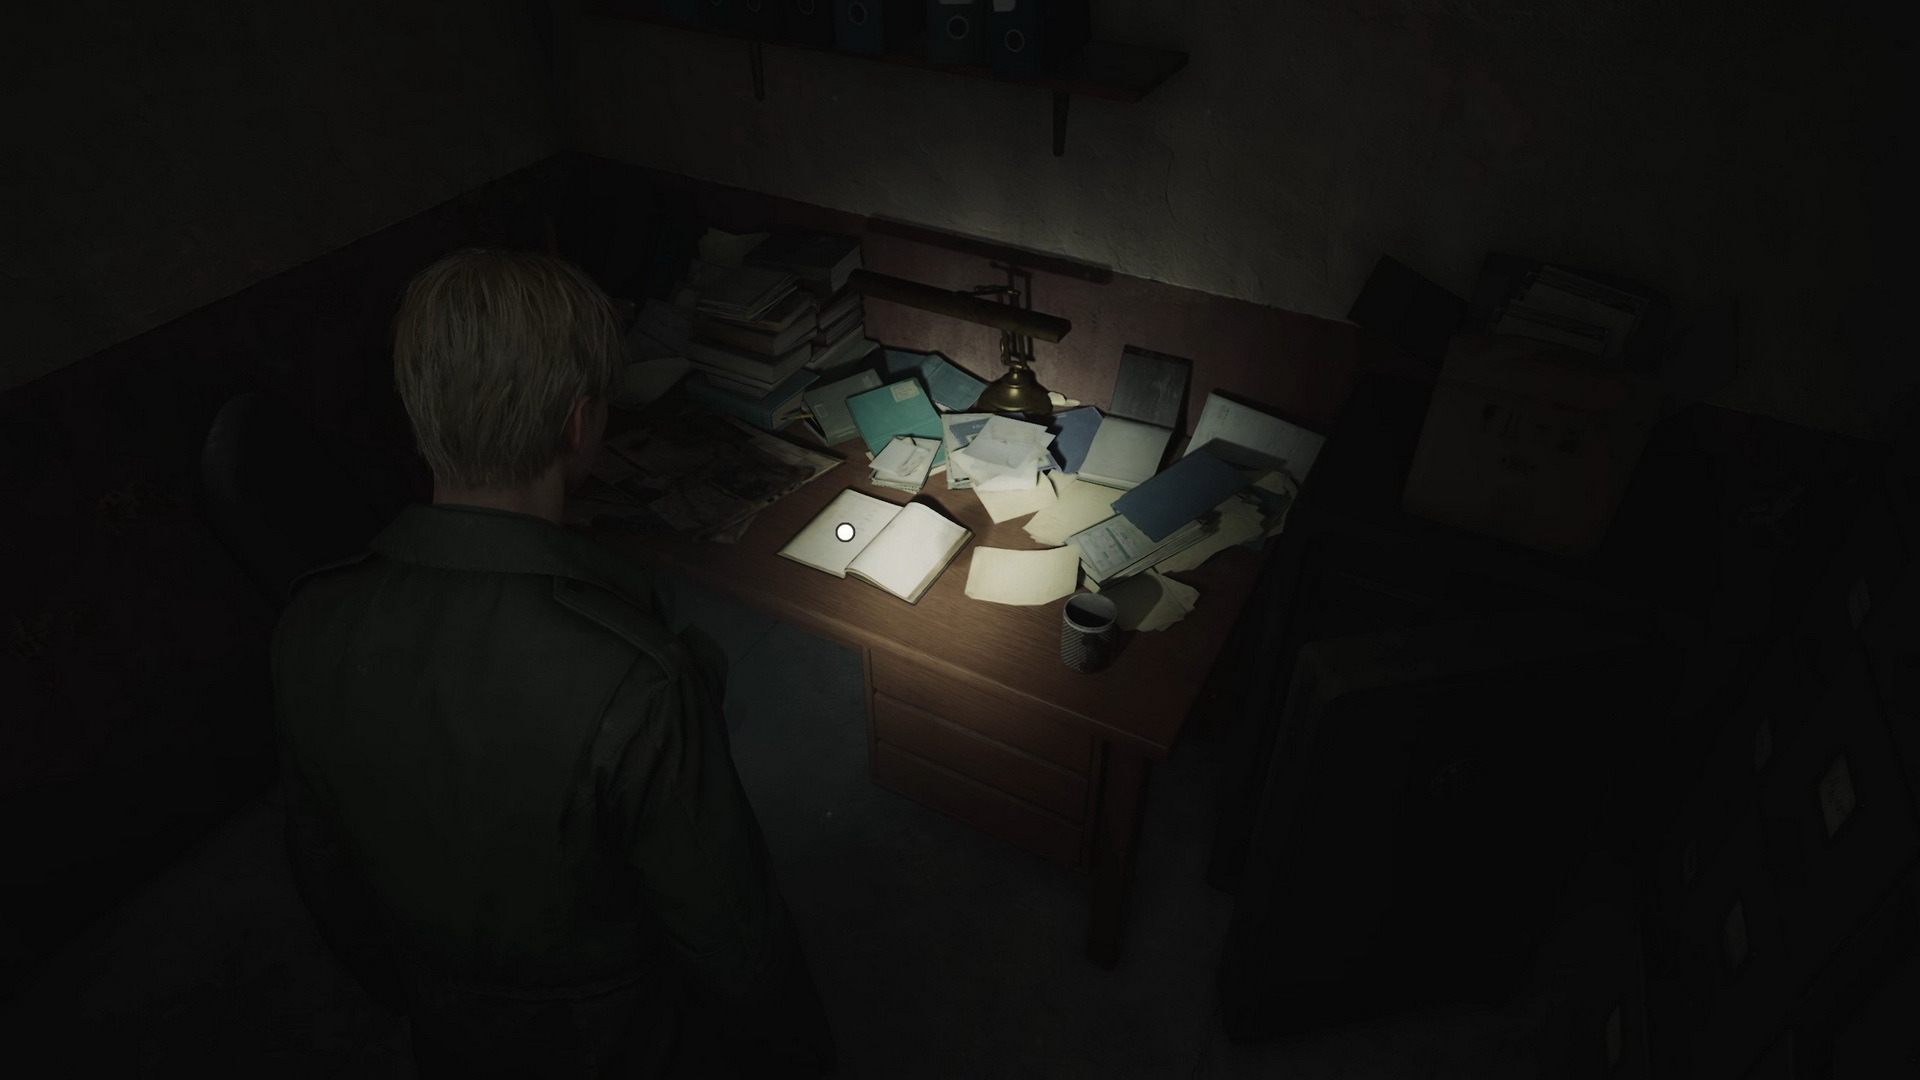
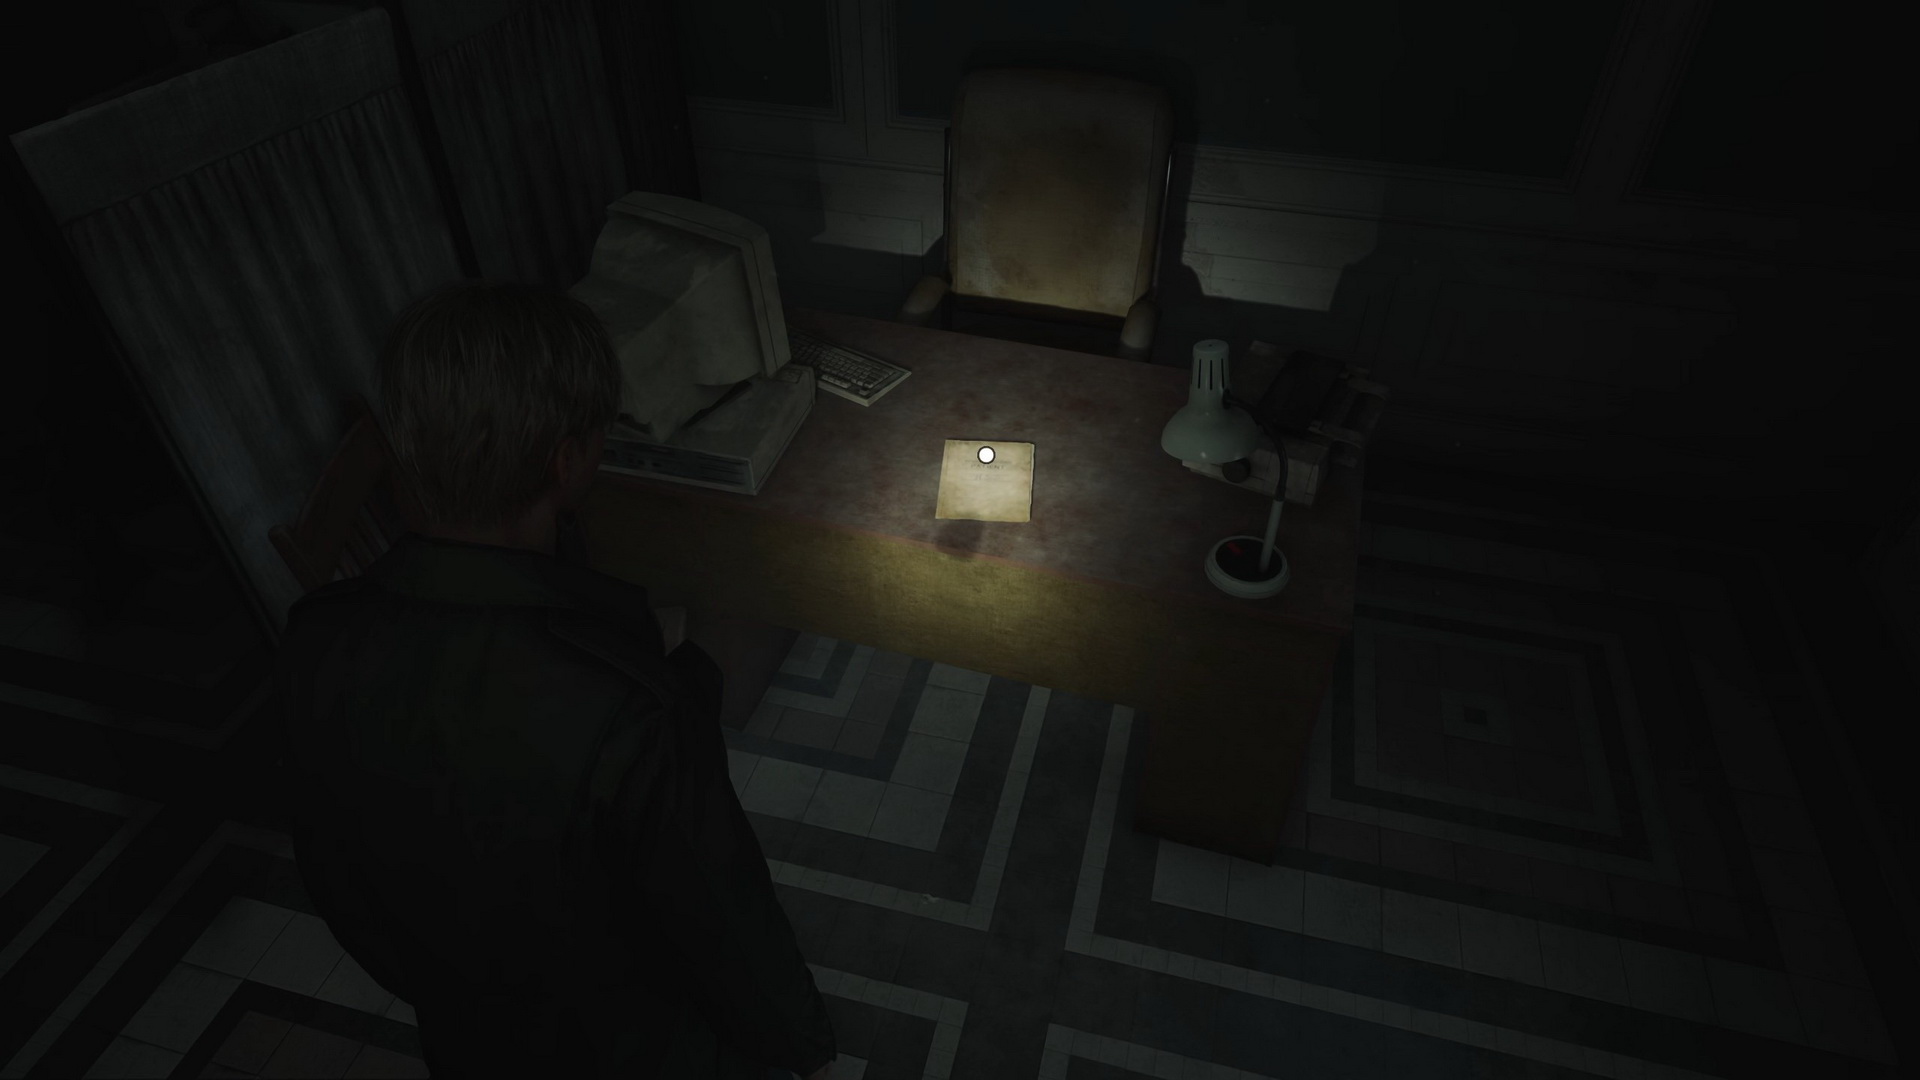
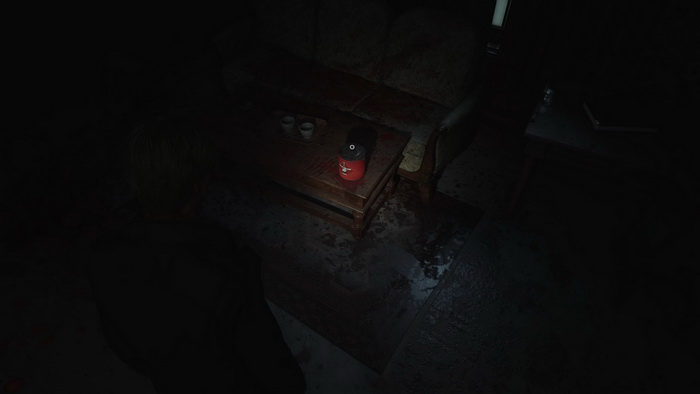
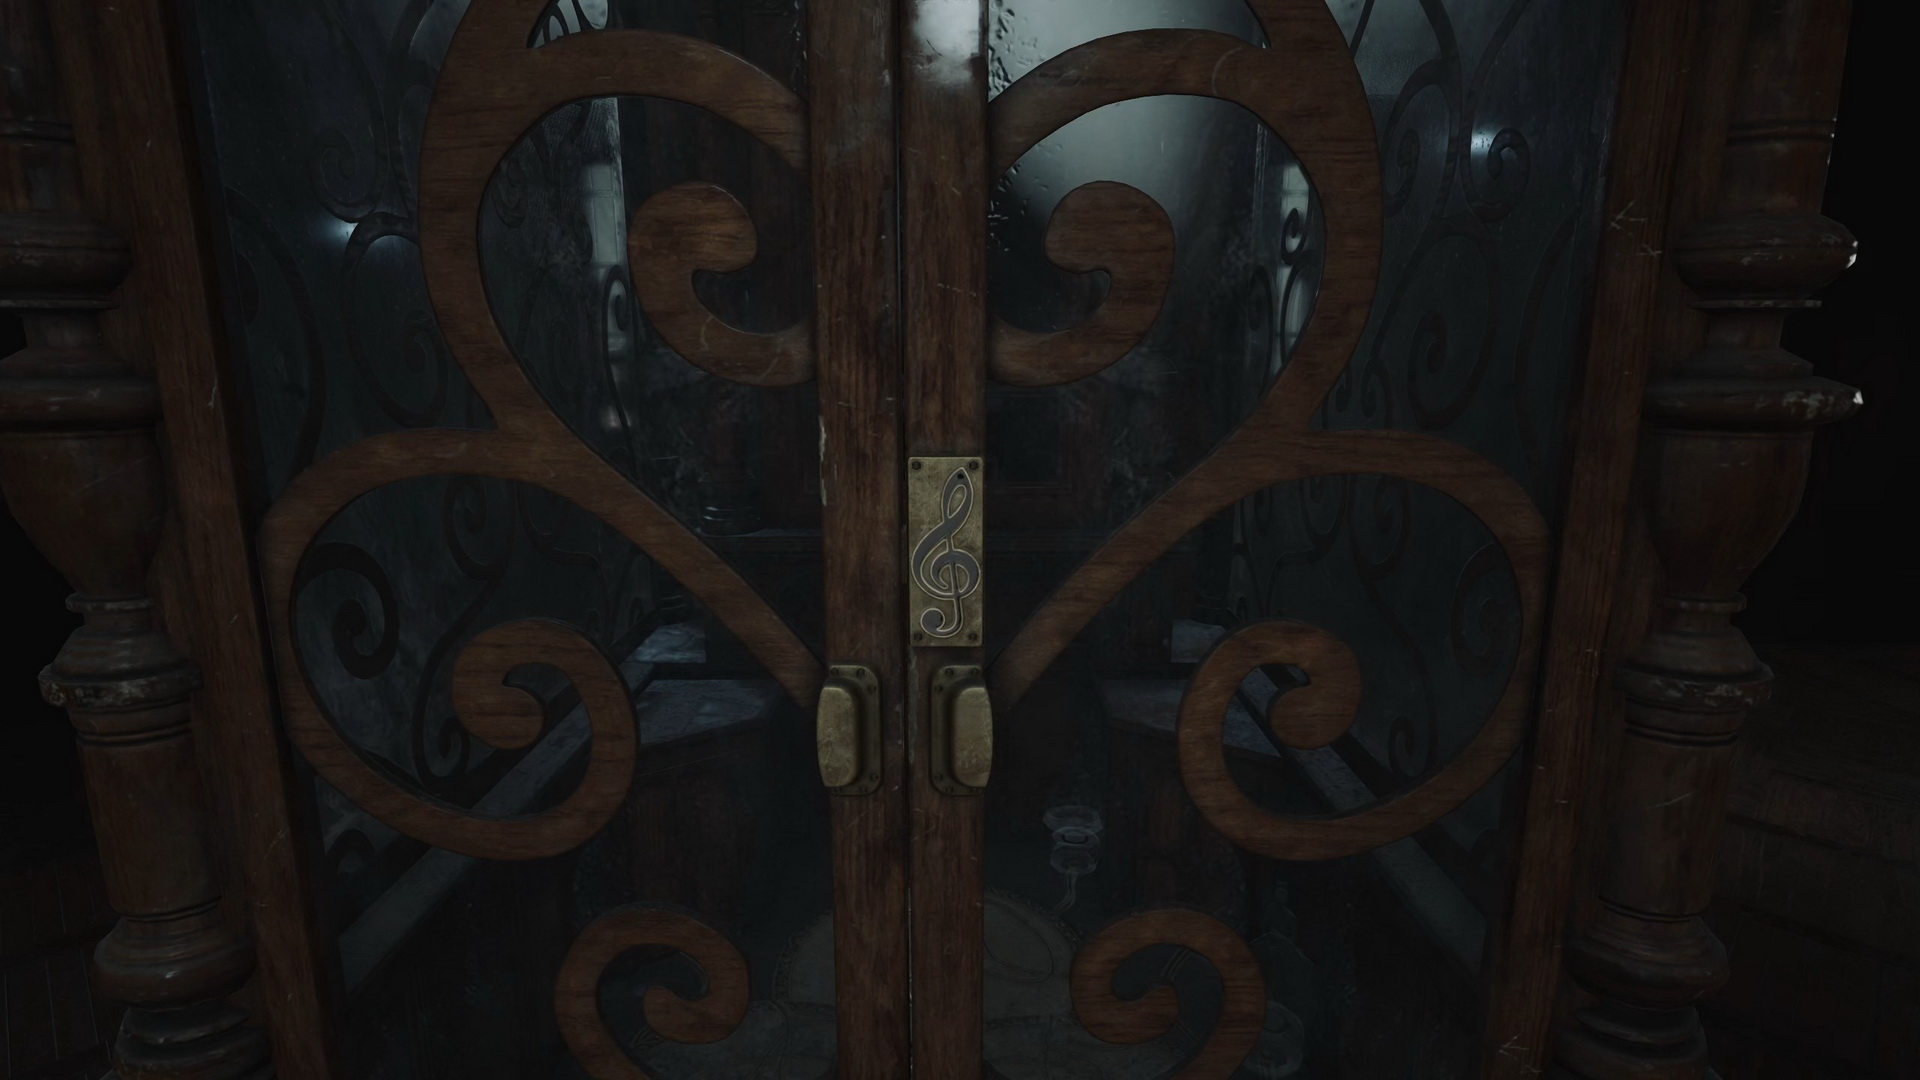
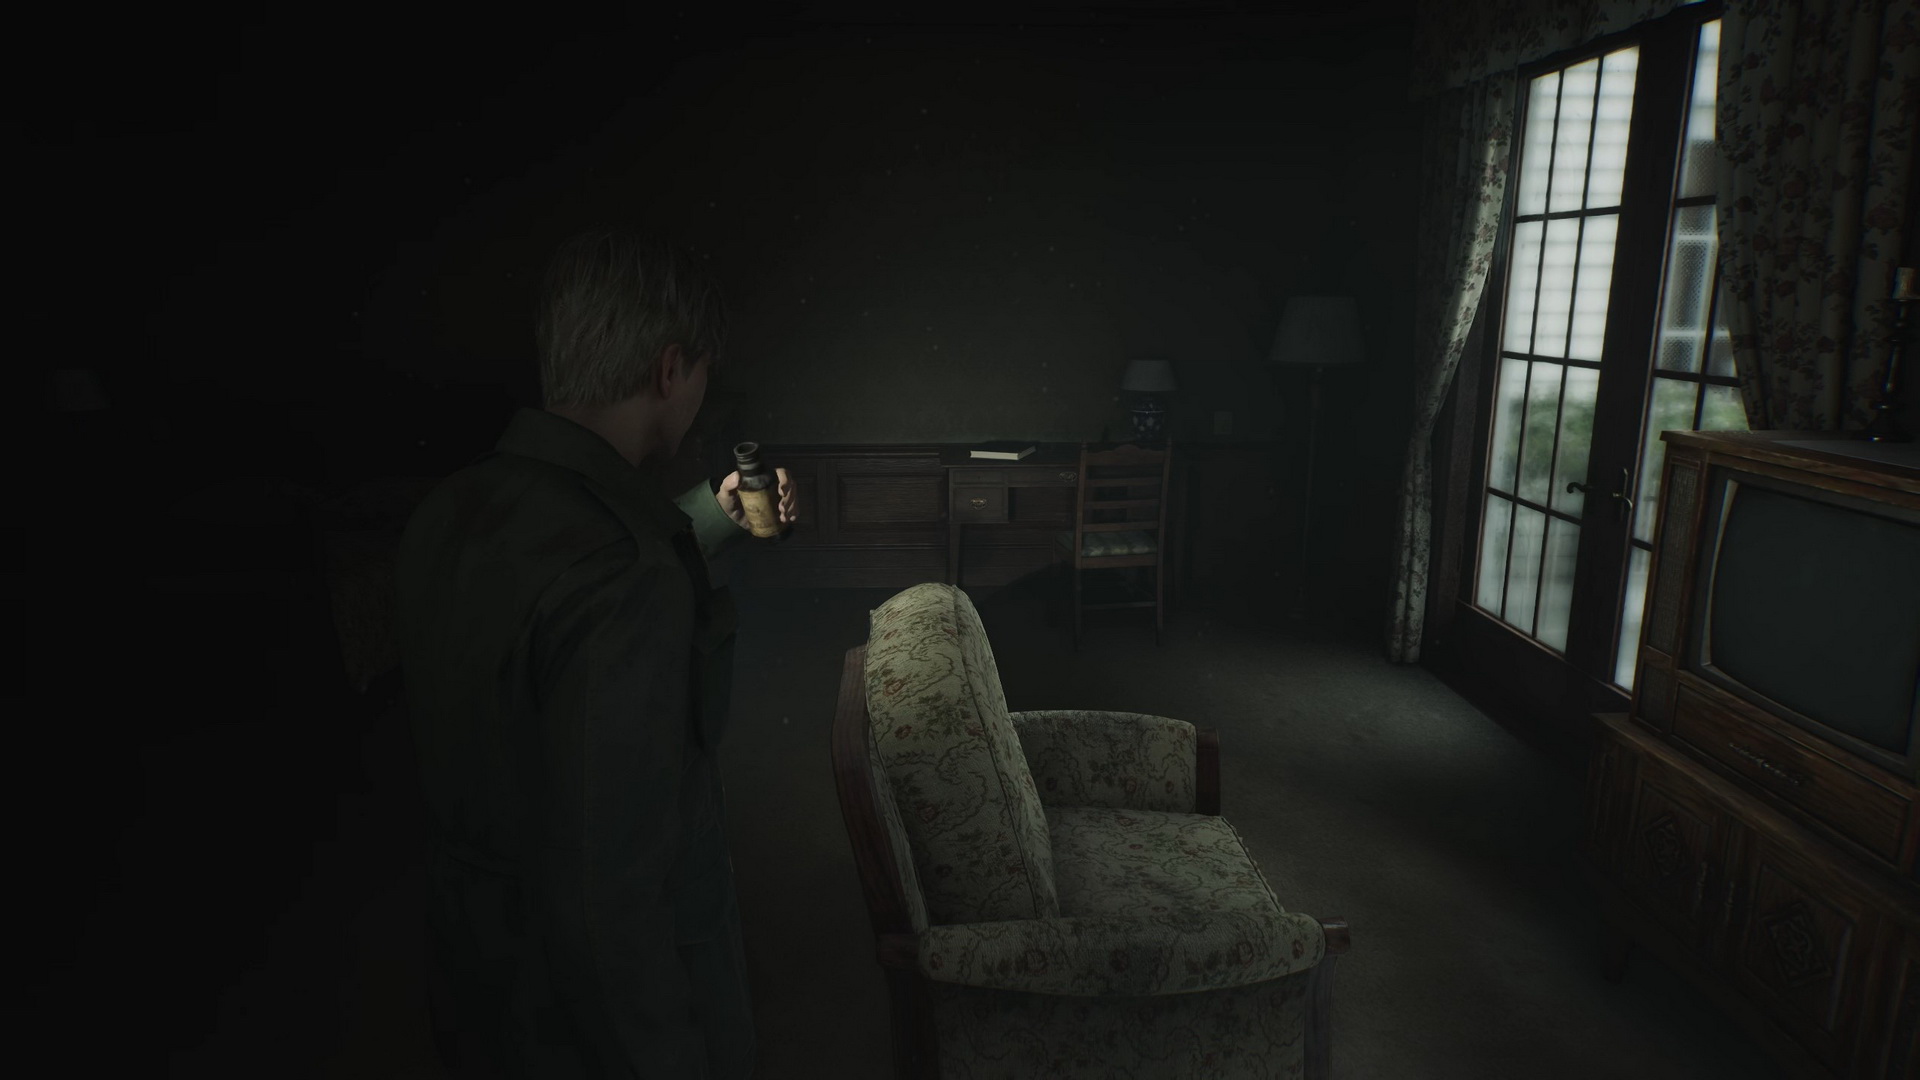
Proceed to the Lobby, where you will find a locked music box. You must return to it later to solve a puzzle, but not before you collect the three required music box figurines. Go to the reception to find a Save Point and Memo #58: Receptionist Memo on the reception desk counter.
 |
 |
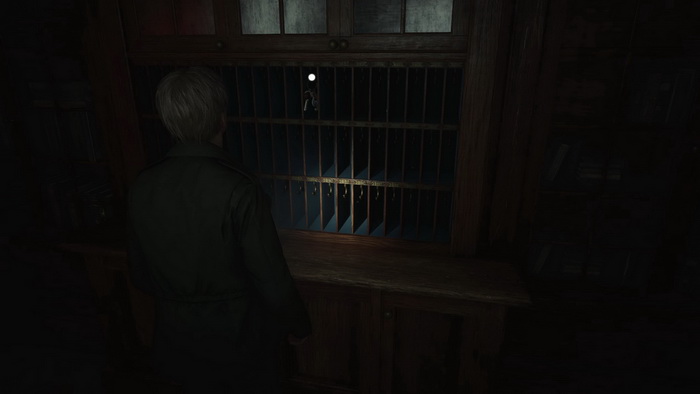
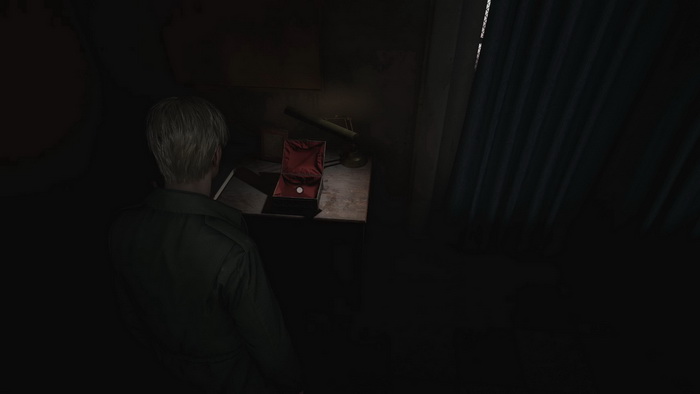
Turn around and collect 92 Room 312 Key and 93 Ornamental Key from the key cabinet.
In New Game+, you will find a hotel registry on a desk inside the nearby room with the last code hint for the "Stillness" ending.
 |
 |
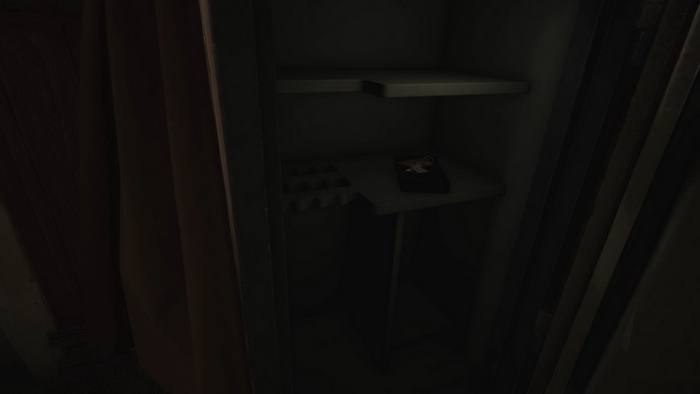
Visit Cafe Toluca to find a Health Drink on one of the tables and the 94 Key to Hotel Room 102 (not mandatory for game progress). Go south and break a wall to enter the Lost & Found storage. You will find Memo #59: Lost & Found Note on a shelf.
 |
 |
There's also Handgun Ammo on another shelf.
New Game+ Item: “Lost Memories” |
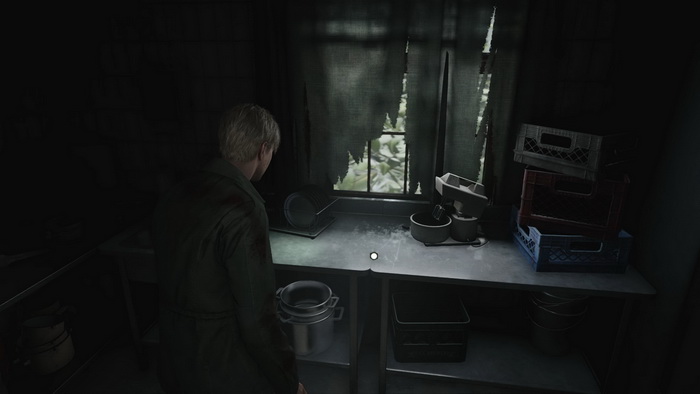
Exit through the door and take the stairs to the basement. Enter the Utility Room to find Memo #60: Cleaning Staff Memo #1 on a table.
 |
 |
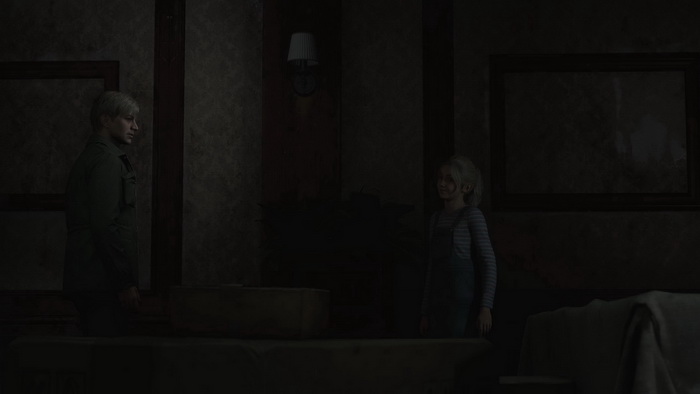
Proceed to the Lake Shore Restaurant in the western portion of the floor. James will run into Laura and receive Memo #61: Laura’s Letter during the cutscene.
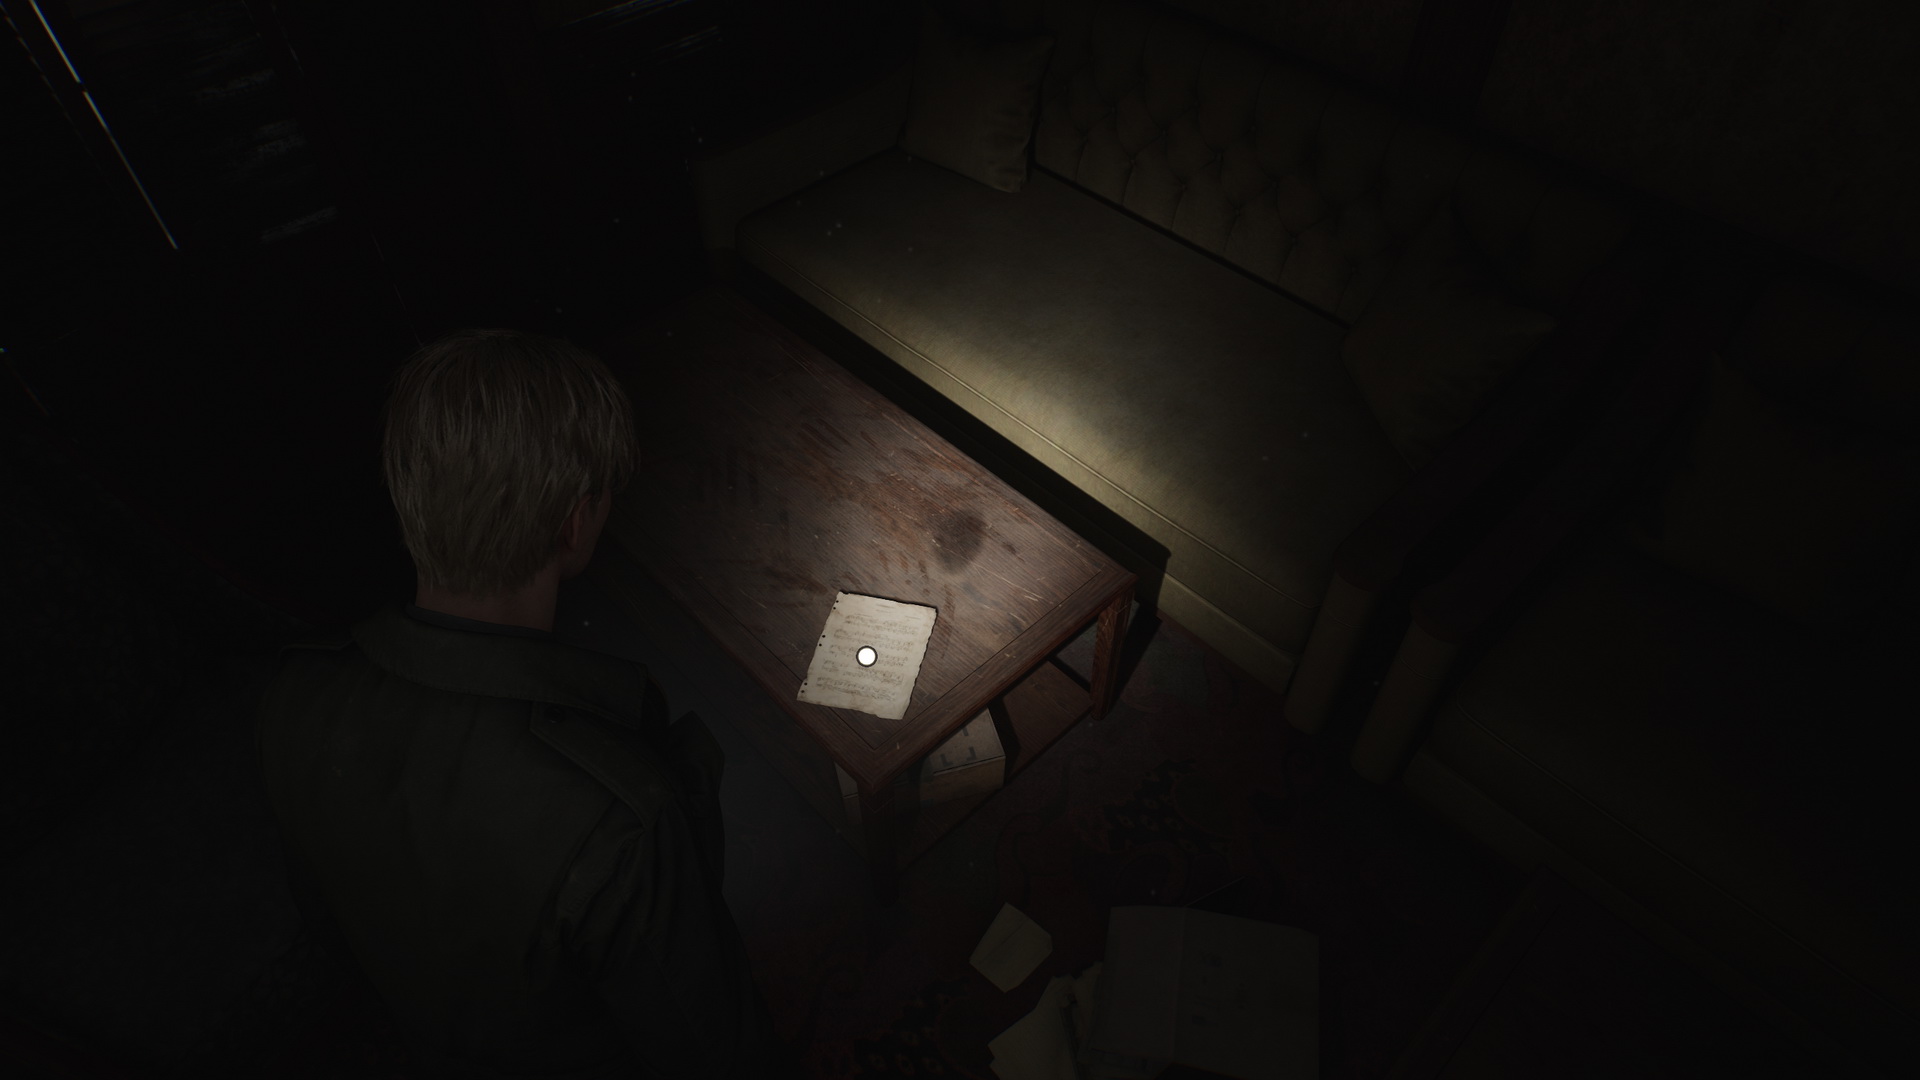
You can check another Laura's drawing on the restaurant's window and a music sheet on the table before going after her.
 |
 |
 |
 |
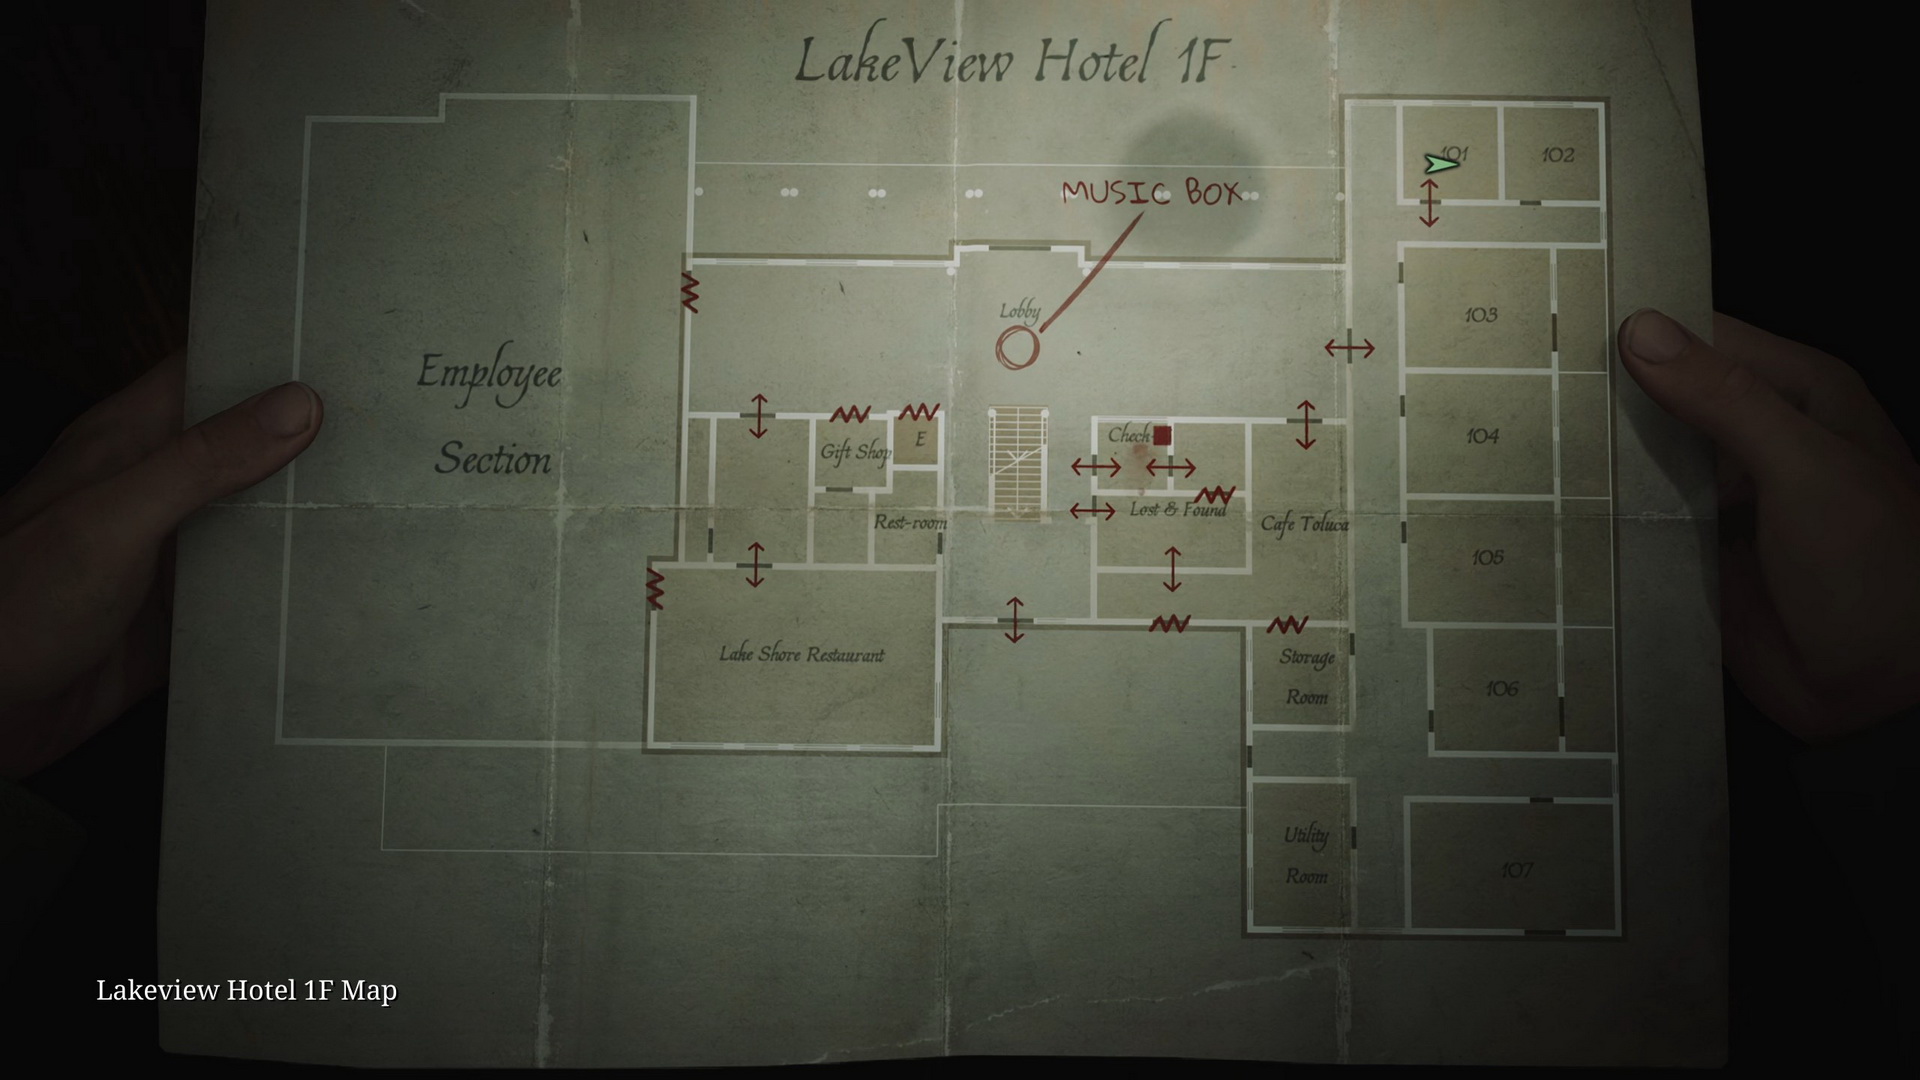
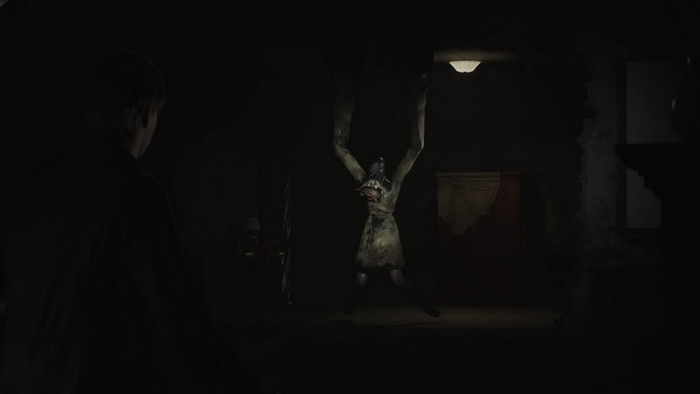
Laura will disappear in the east wing of the floor that is now accessible. Monsters will start appearing here in the corridor: a couple of Lying Figures and three Mannequins. You can collect the Handgun Ammo in the drawer at the end of the north corridor. Room 101 has a funeral invitation lying on a bed.
 |
 |
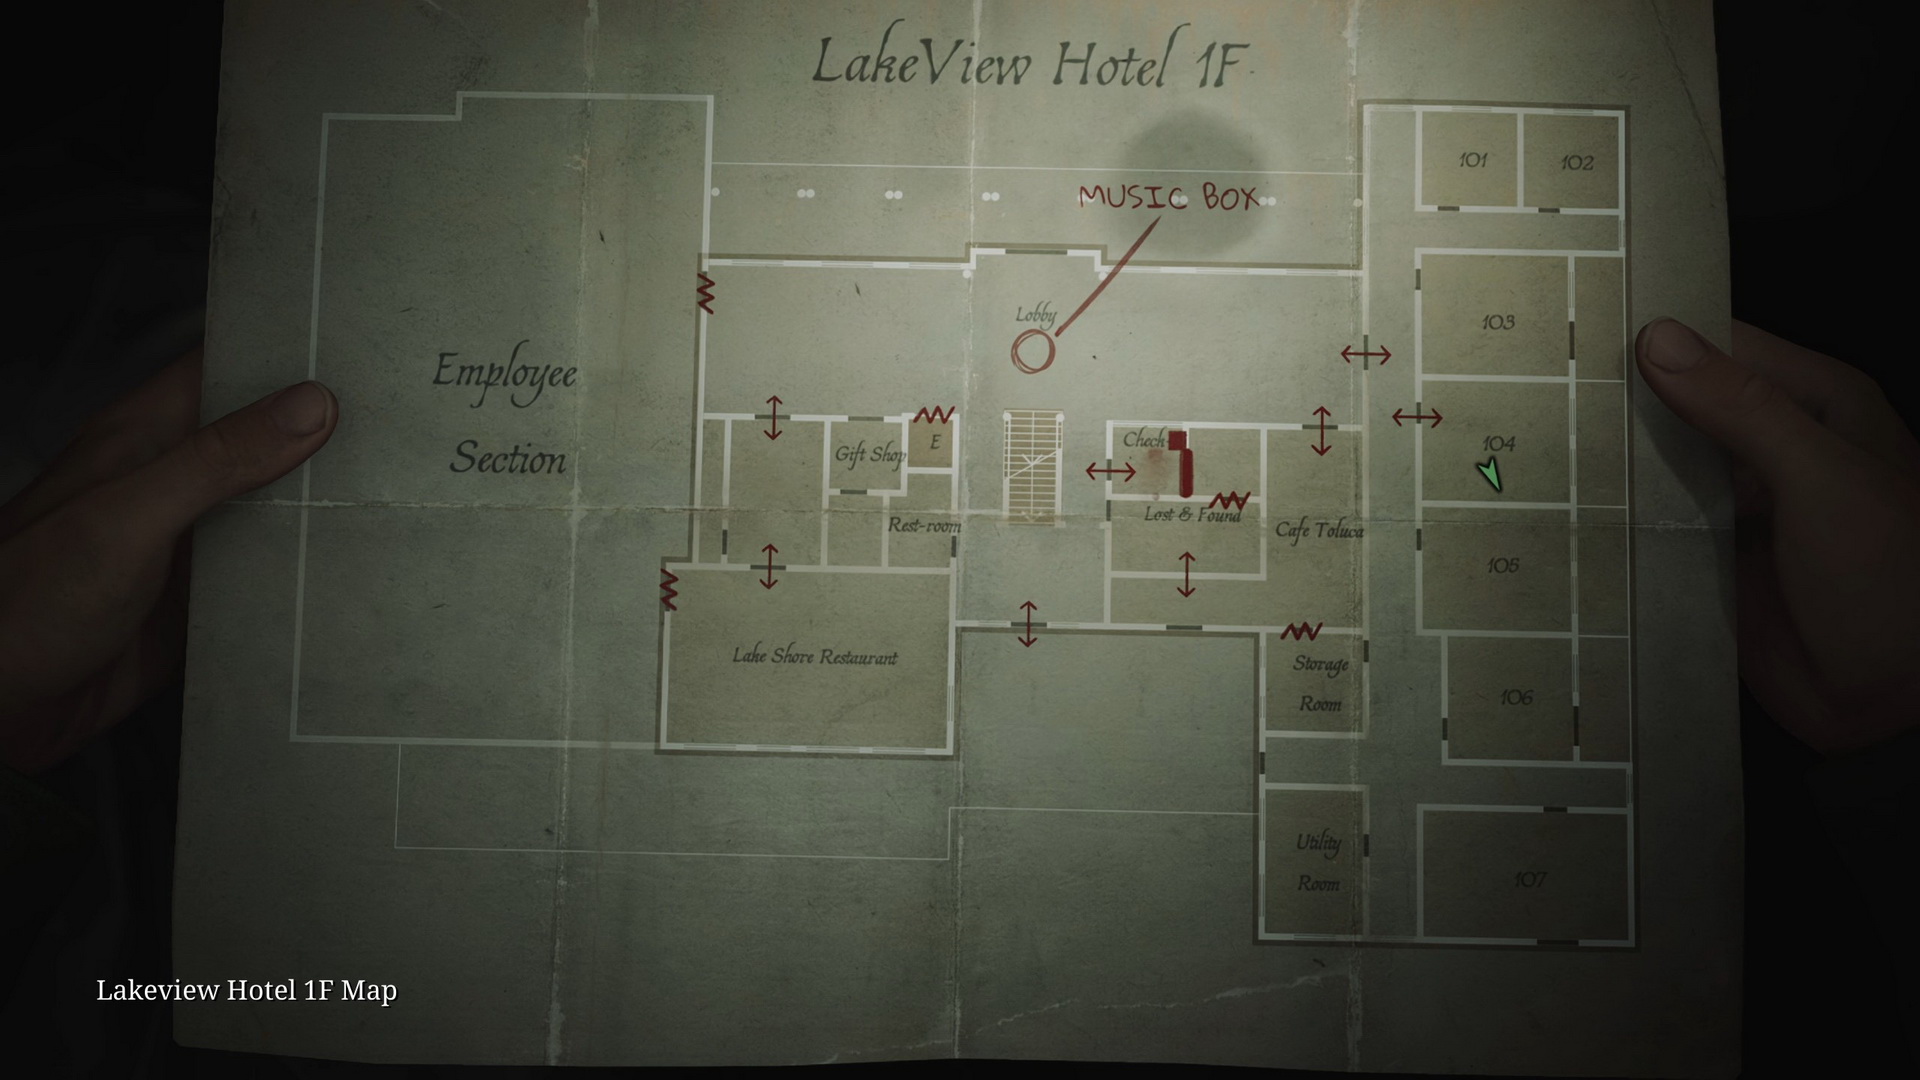
Room 102, unlocked with a key from the cafe, has a Health Drink on a chair next to a teddy bear, Rifle Rounds on a bed and a Syringe in a first-aid kit. You can enter Room 103 using a vent opening across the corridor. Inside the room, there's a Health Drink inside the nightstand. You can then exit to the terrace and proceed to Room 106. Handgun Ammo is in the nightstand in this room. Shotgun Shells can be found in the dresser in the corridor next to the Room 106 entrance. Enter Room 104 to find Rifle Rounds in the bathroom cabinet and Strange Photo #23: "aftermath…" inside the right nightstand.
 |
 |
Room 107 is locked. Enter the Utility Room at the southern end. A message is on the blackboard.
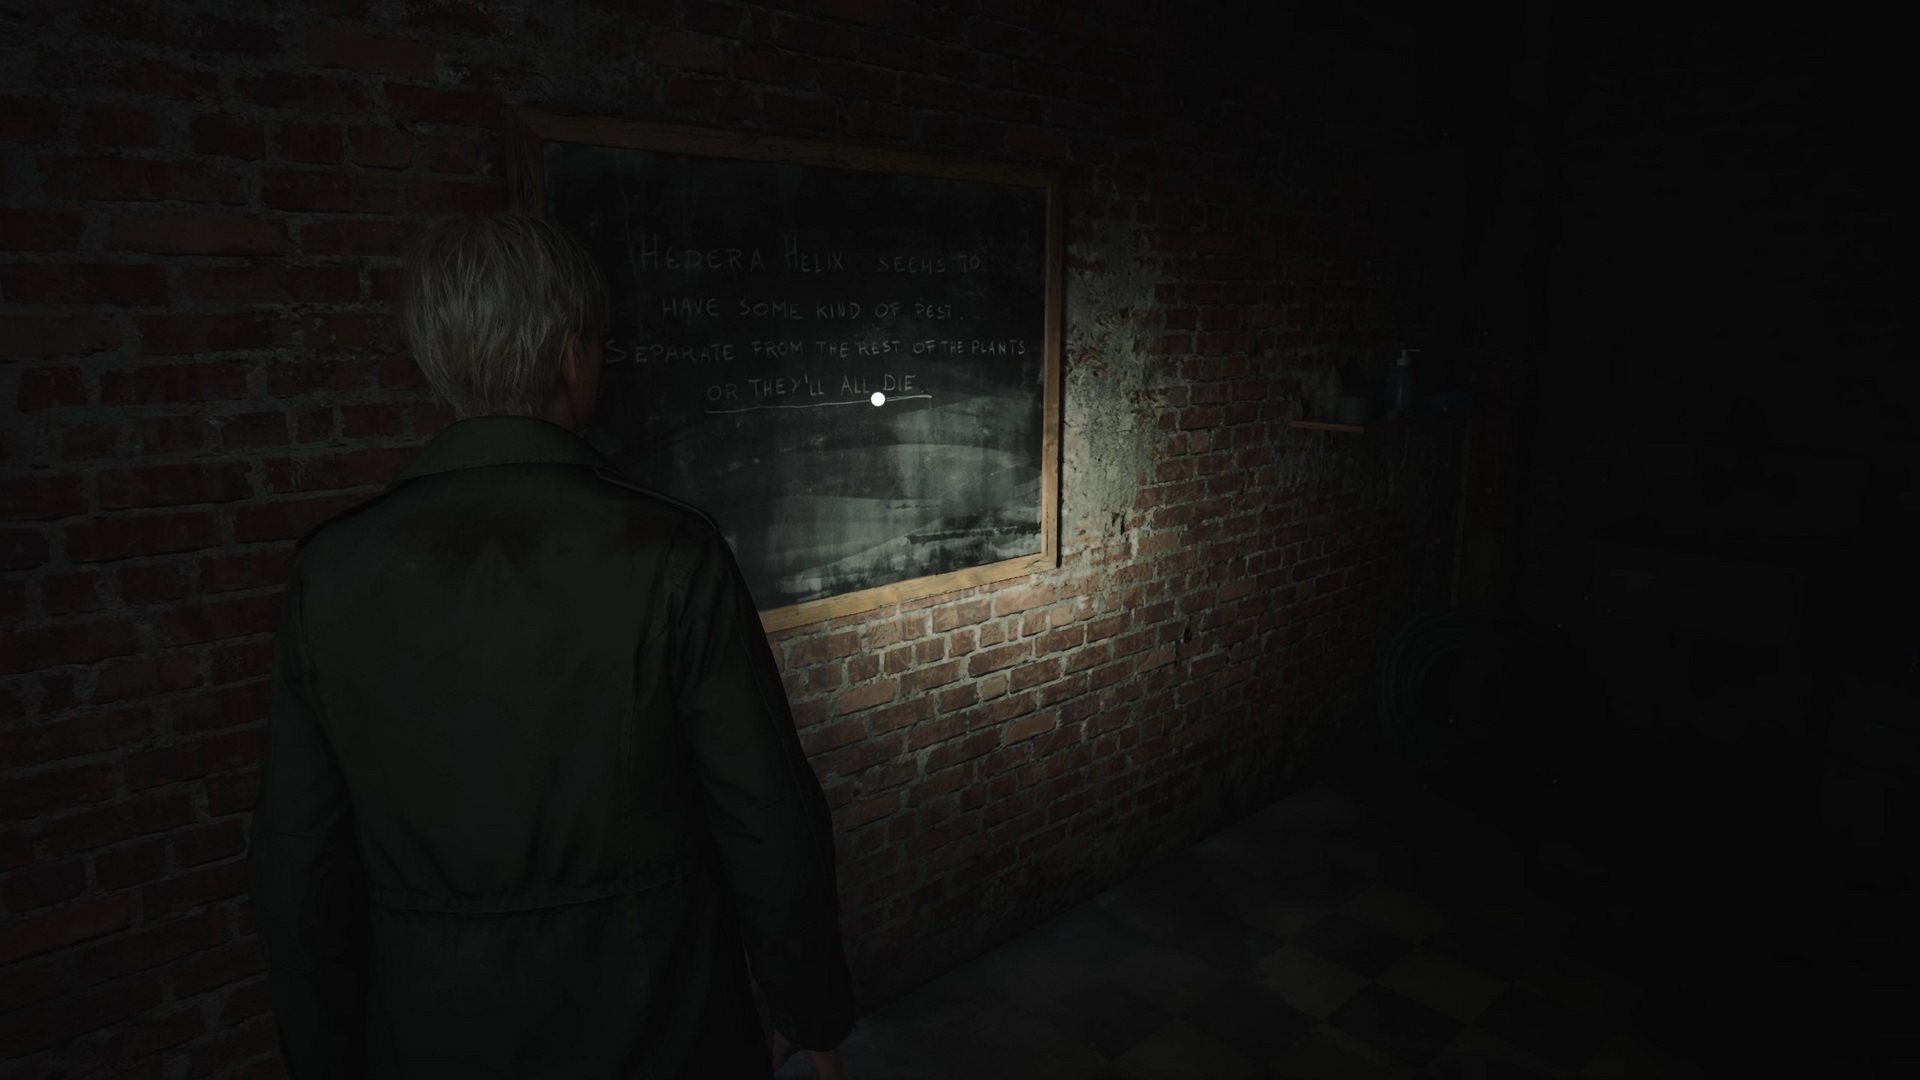 |
 |
Take the 95 Sunrise Wing Key from a desk.
There's also Handgun Ammo in the planter. Exit the room and return to the main lobby. Go upstairs to the second floor.
Exploring the Second Floor: First Figurine
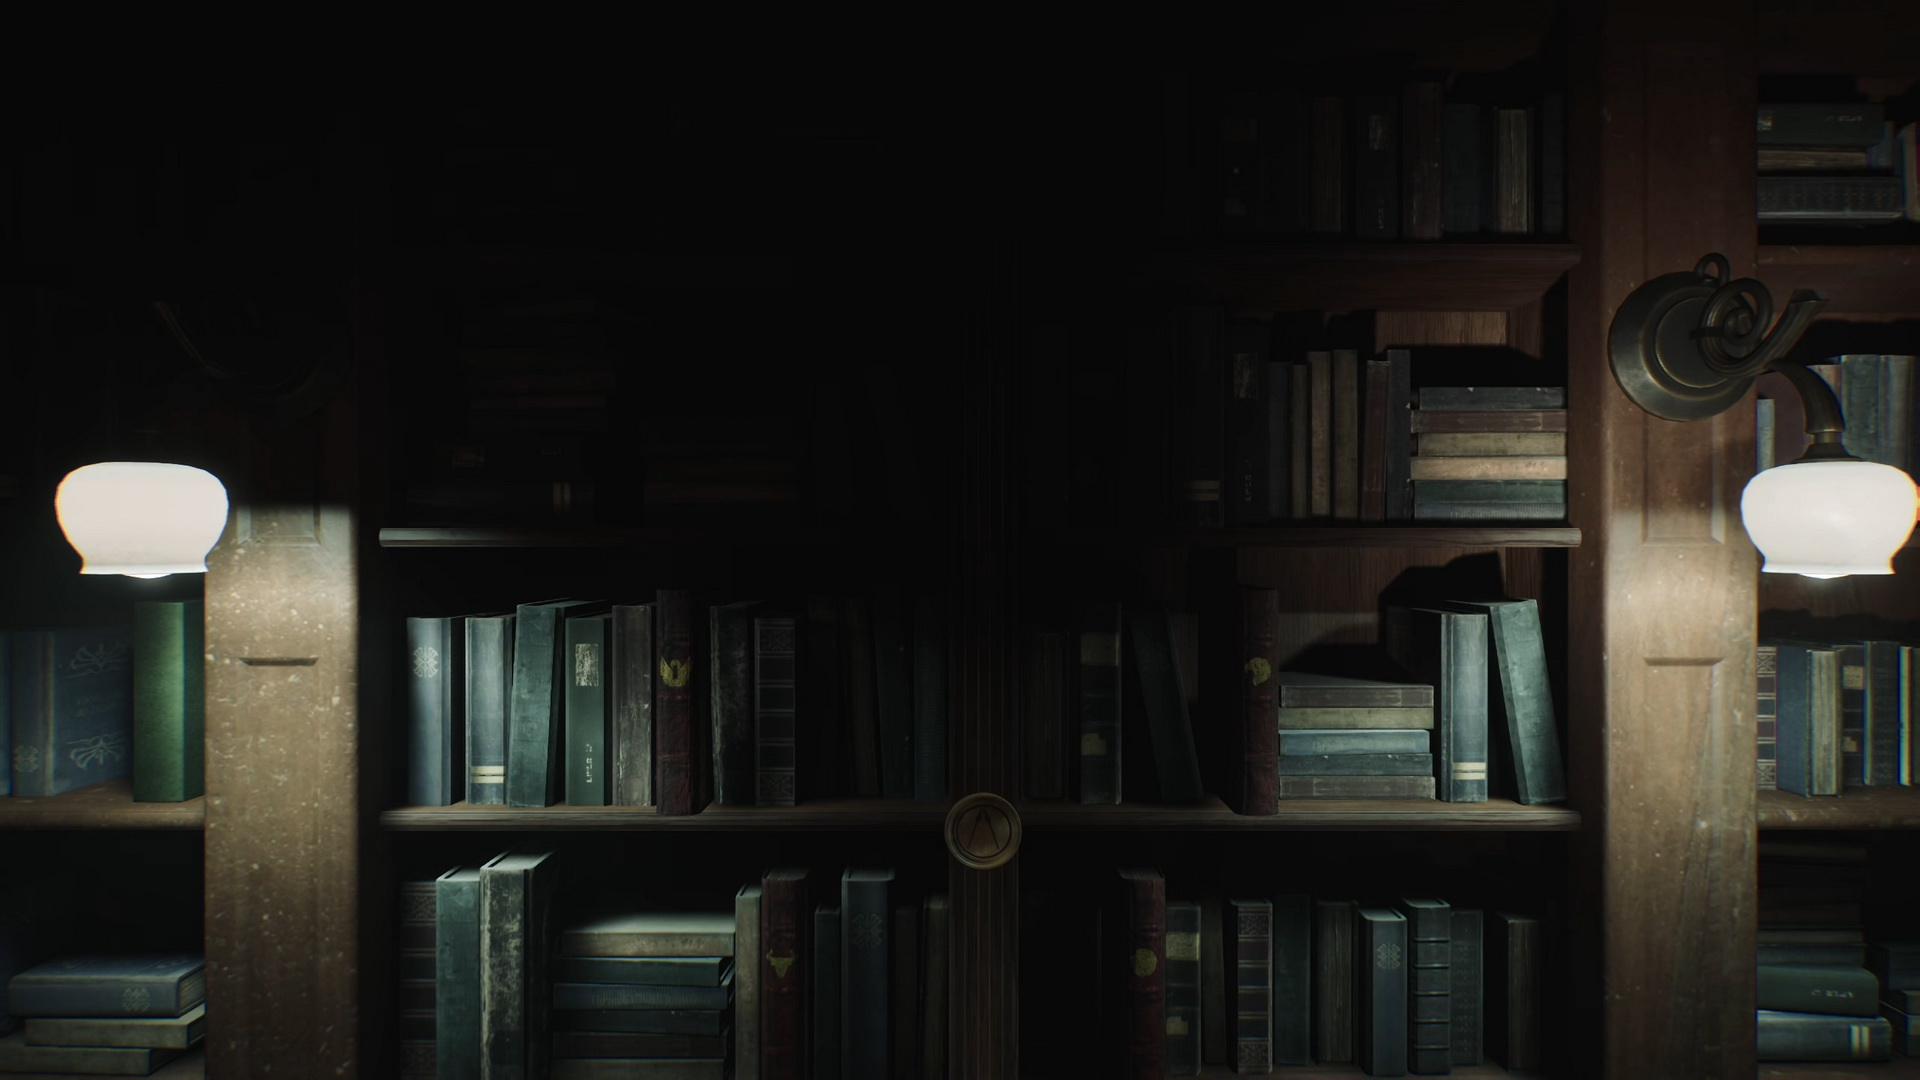
Unlock the door of the Sunrise Wing (to the right) and proceed to the Reading Room. Inside, you will find a Save Point. Collect four books scattered around the room:
- 96 "The One Who Soared" is on the desk to the right of the save point.
- 97 "Stalwart to the End" is on the coffee table next to the sofa and armchairs.
- 98 "Pride Before the Fall" is on the bookcase shelf.
- 99 "Revelations: A New Understanding" is on the desk to the left of the save point.
Now, approach the bookshelf to solve a puzzle.
Puzzle: Reading Room Bookshelf
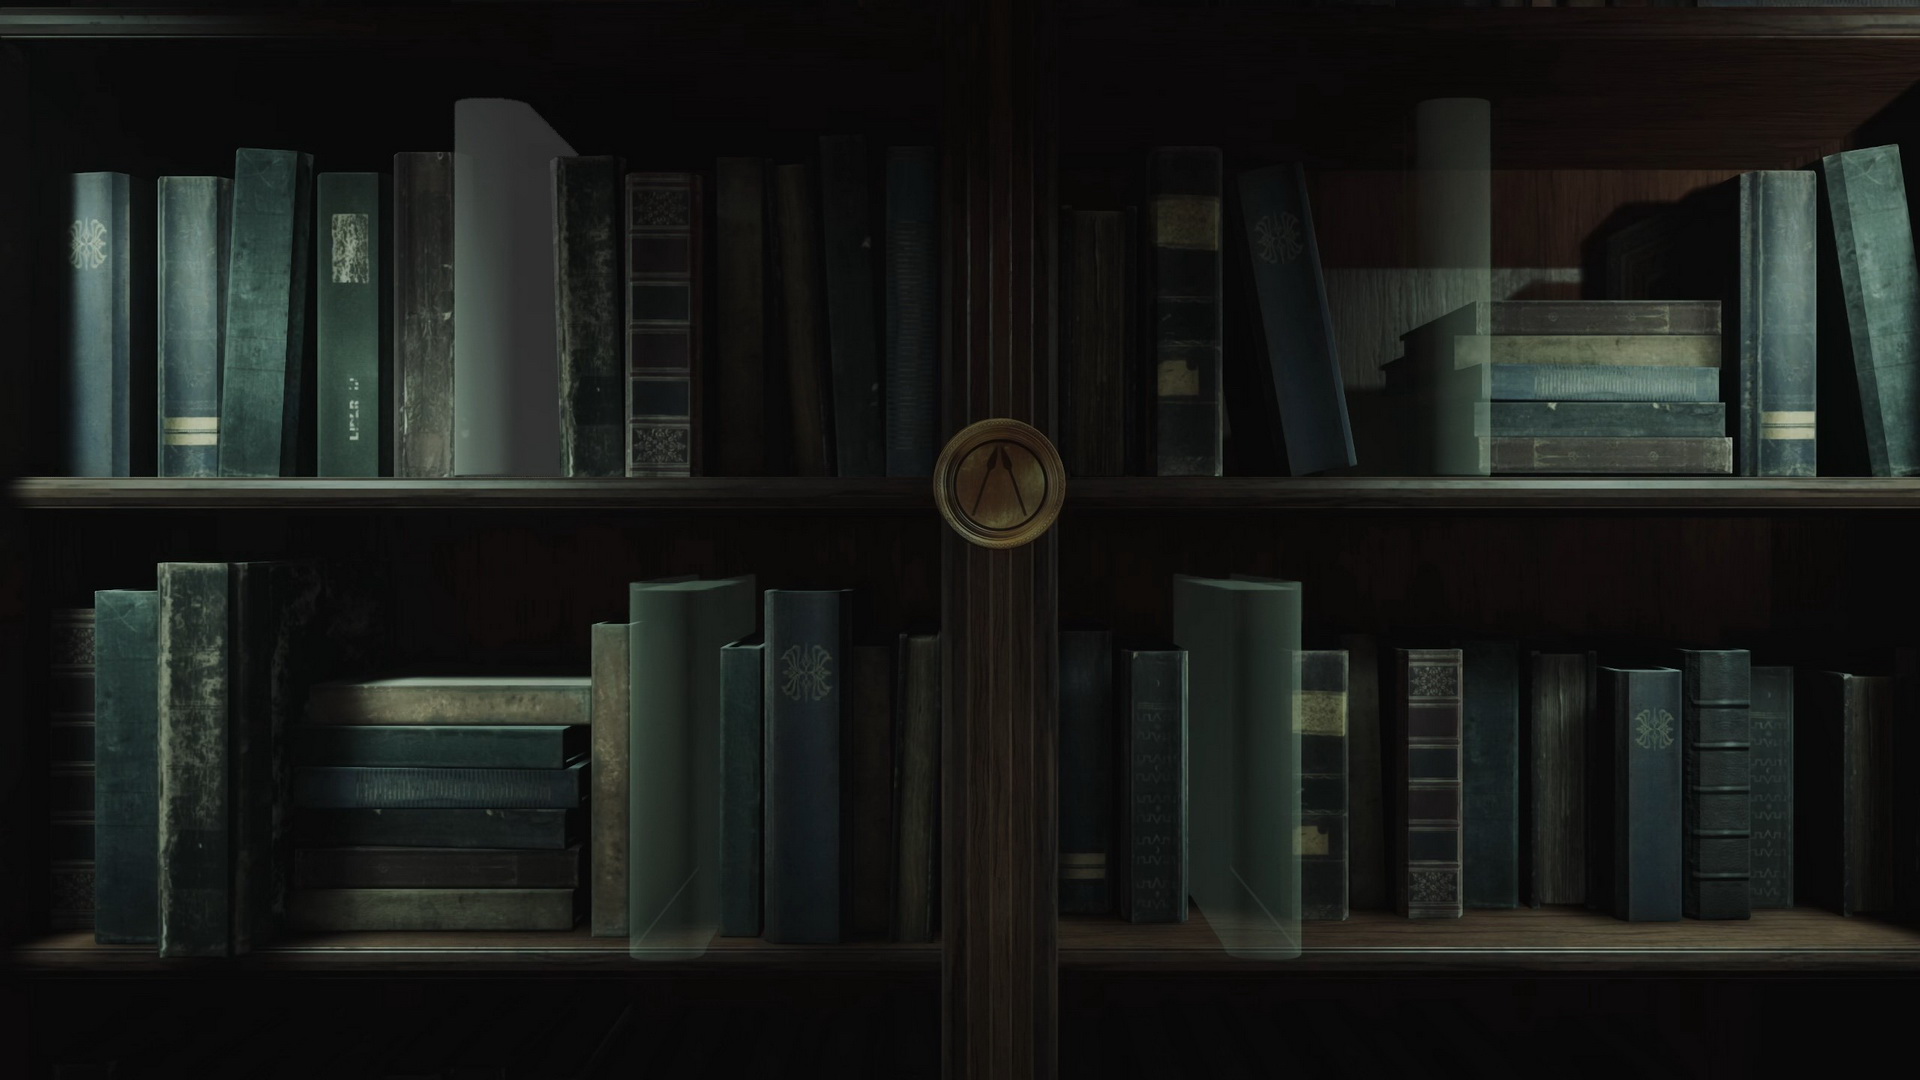
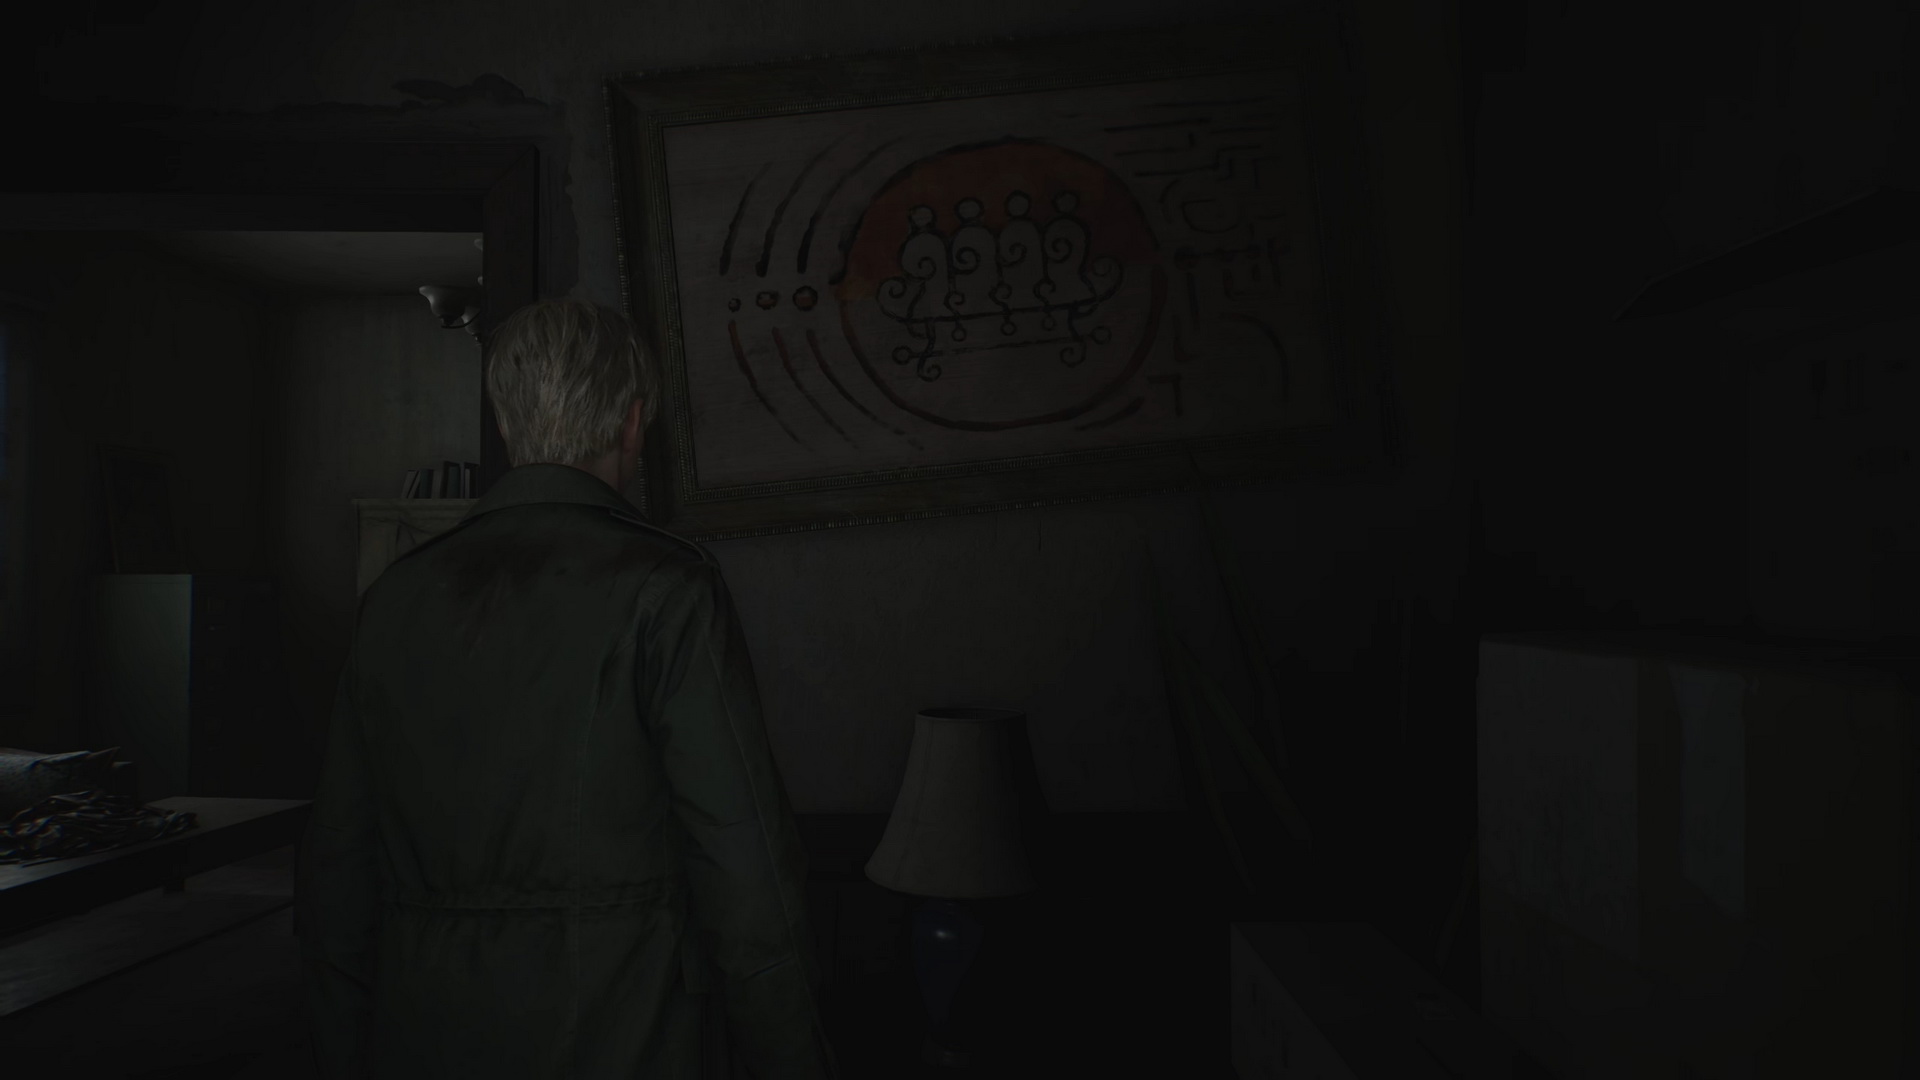
The bookshelf has four empty spots. Inspect a painting on the other wall in the Reading Room to learn how to place the books correctly.
In the center, you can see a wounded man pierced by two spears. Around him are a lion, a bull, a eagle and a winged man. When you place books onto the shelf, you will see that they also have a similar symbol on their spines:
- "The One Who Soared" – Eagle
- "Stalwart to the End" – Bull
- "Pride Before the Fall" – Lion
- "Revelations: A New Understanding" – Winged Man
You must match the symbols with the animals and the man depicted in the painting.
| Lion | Bull | |
| ▽ | ||
| Eagle | Winged Man |
Note that the spear symbol on the button in the center of the shelf is upside-down, so the symbols should be rotated accordingly:
| Winged Man | Eagle | |
| △ | ||
| Bull | Lion |
Place the books in the following spots:
- "Revelations: A New Understanding" – top left
- "The One Who Soared" – top right
- "Stalwart to the End" – bottom left
- "Pride Before the Fall" – bottom right
When you place all the books correctly, the bookshelf will open, revealing a secret room behind.
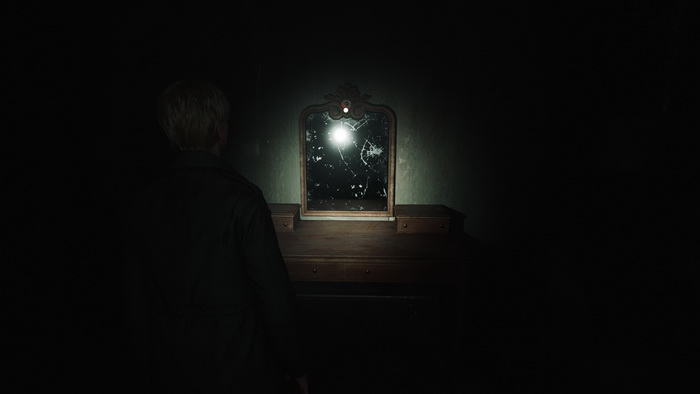
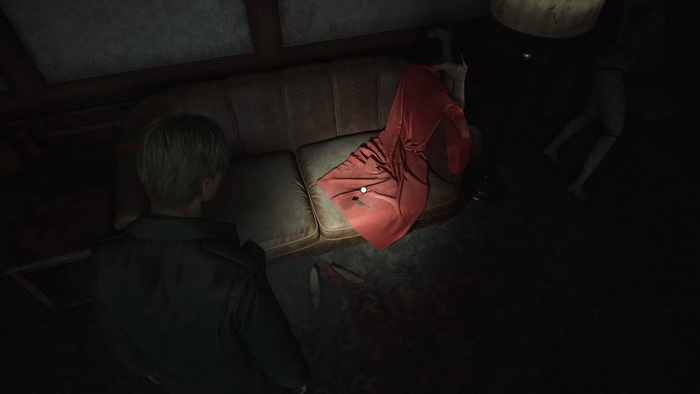
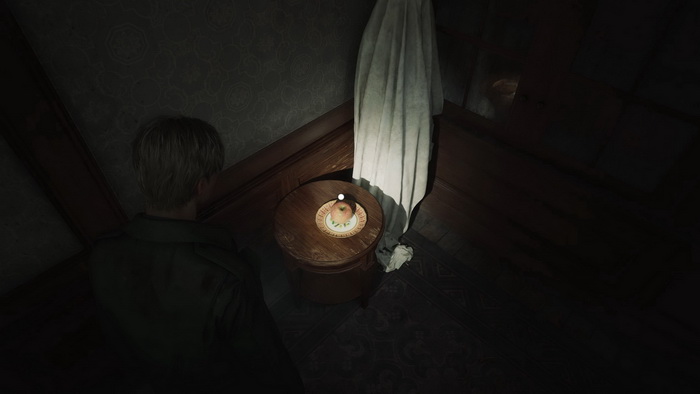
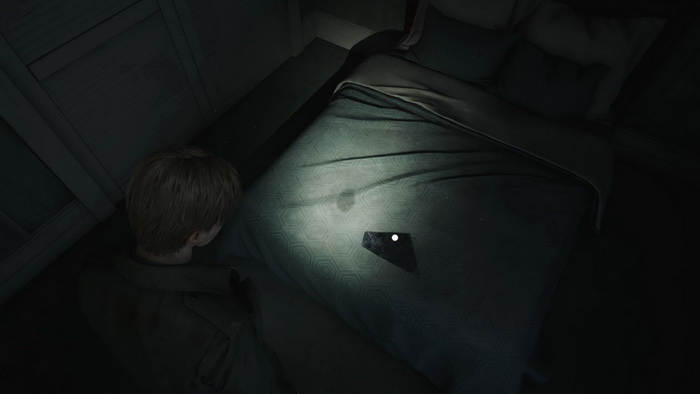
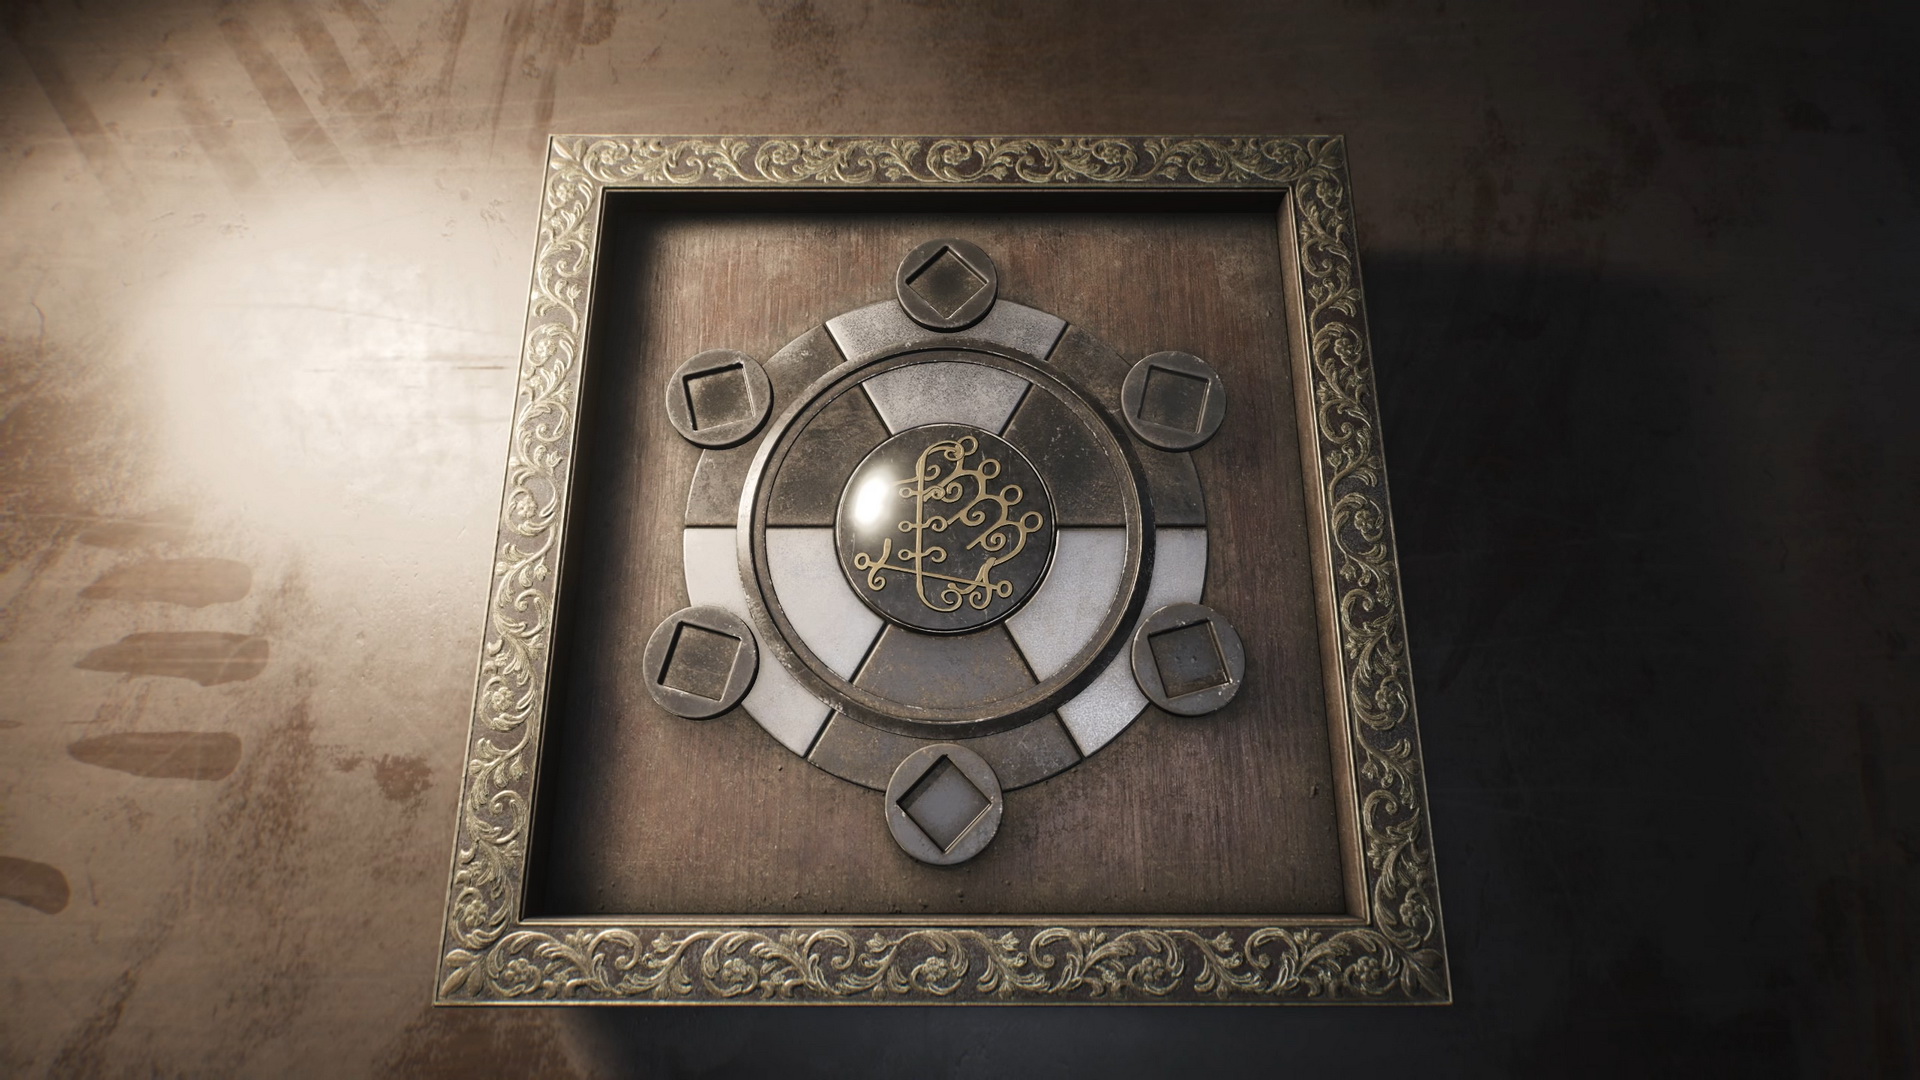
Enter Room 205 behind the bookshelf. Inside, you will find a mirror with a broken light bulb. You can remove the bulb, but you don't have a replacement yet.
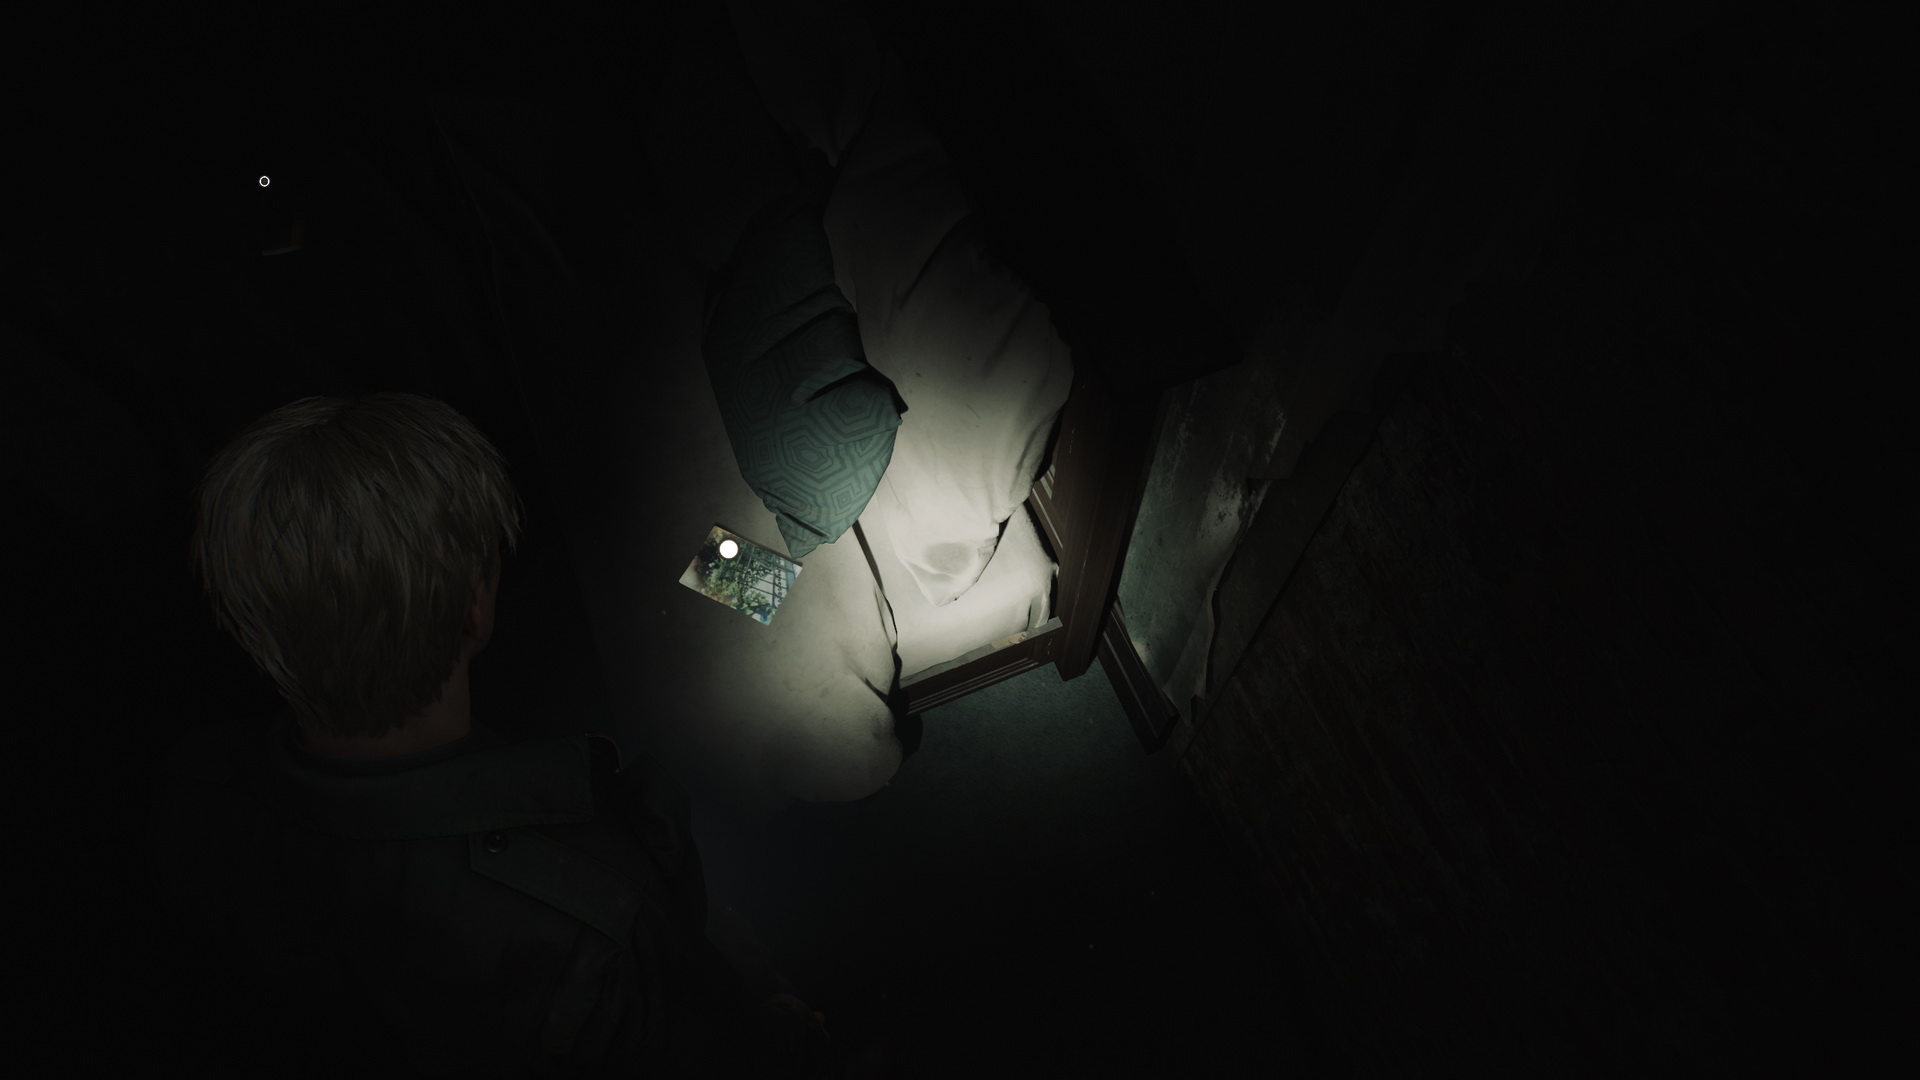
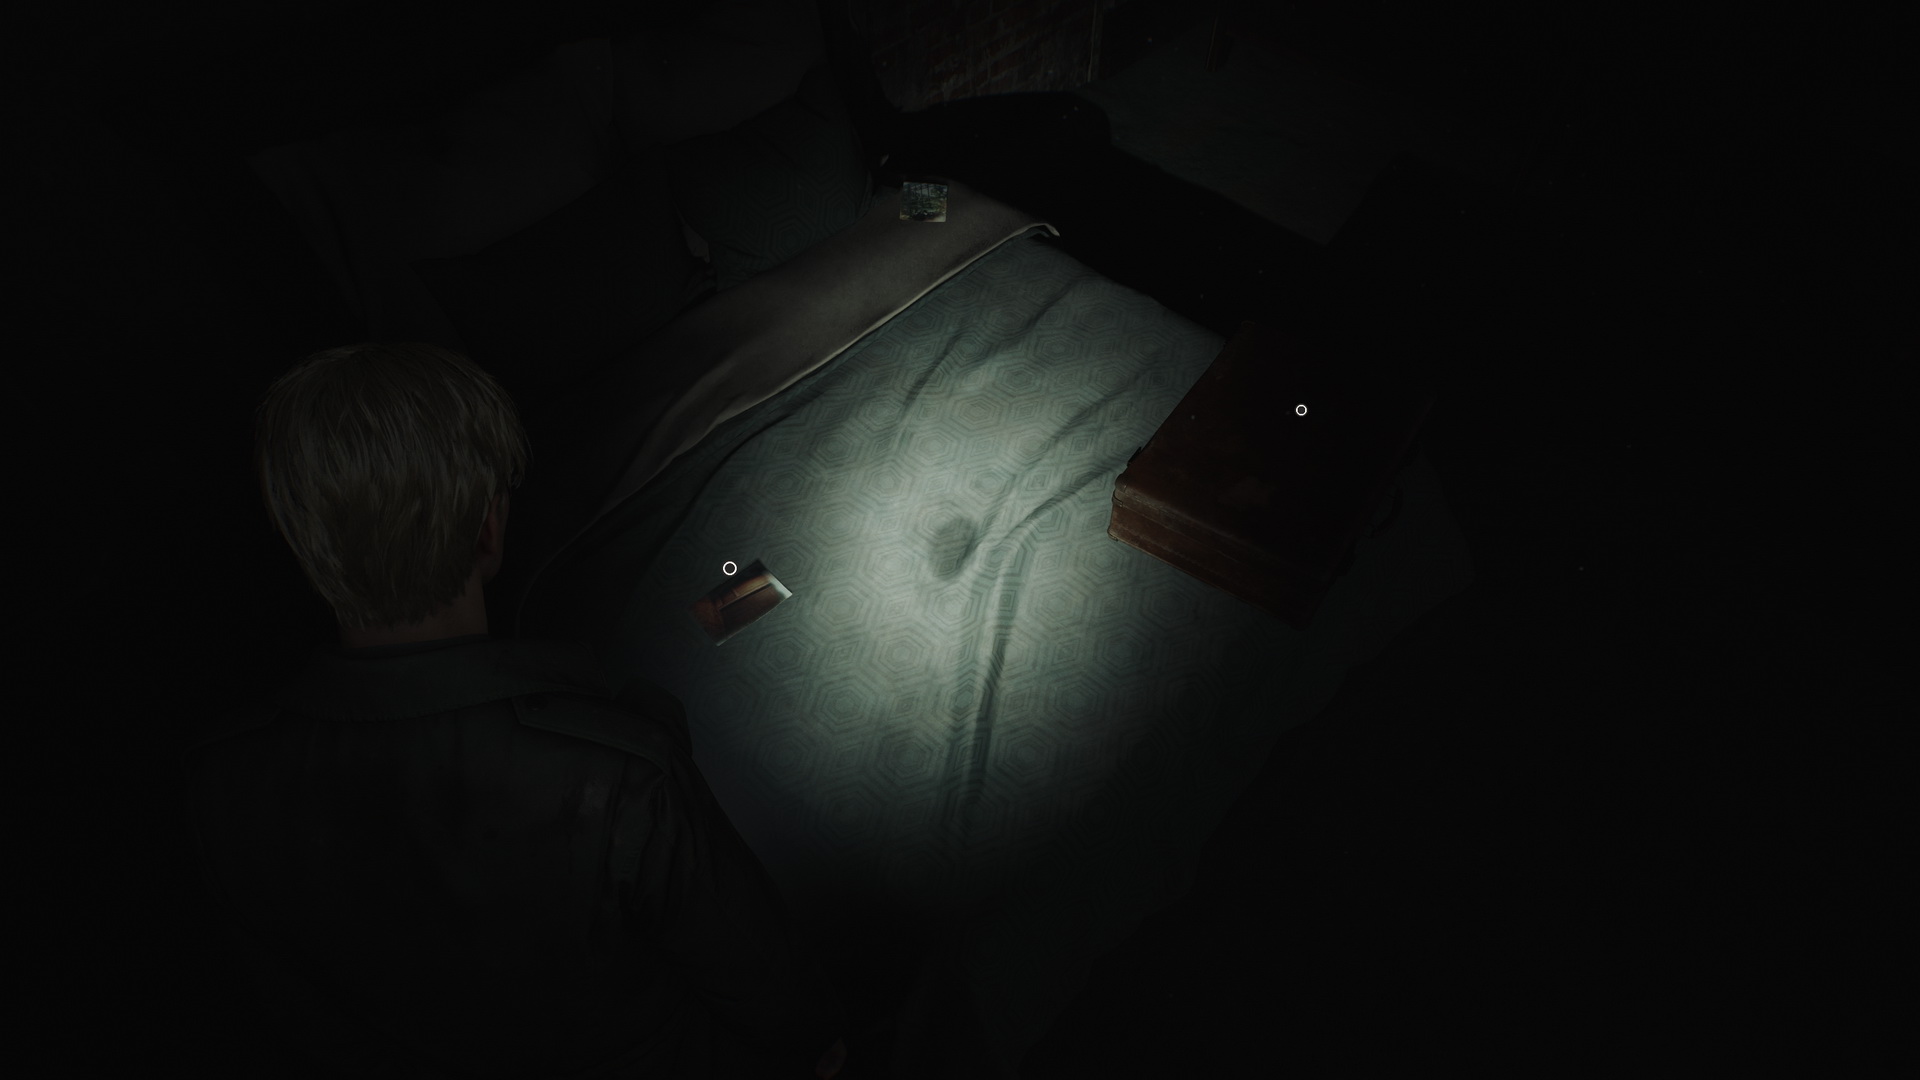
Also, there is a locked briefcase on the bed and Memos #62–#64: Photos on and around the bed.
 |
 |
 |
 |
 |
 |
These photos provide clues to locate specific items required to solve the vanity mirror puzzle and learn the code phrase to unlock the briefcase. Depending on the riddle's difficulty, the photos will be less or more obscure.
Note: You can skip collecting all these items and unlocking the briefcase, as the code phrases are always the same. If you choose to do so, see the puzzle solution.
Return to the corridor and hop over the counter into the Cloakroom. Unlock the door and enter the Hall. On the balcony to the right, you can collect Handgun Ammo from the window sill. You will find 100 Key to Hotel Room 202 on a couch across the room.
Proceed through the room and watch for a couple of Mannequins hiding between the dummies. You will find a 101 Ripe Apple on a small table in the southwestern corner of the room.
Note: This is one of the two apples needed for the puzzle later. You only need one of the apples of your choice, so you don't need to pick up both.
Return to the Sunrise Wing. In the corridor, you can inspect a poster next to Room 208.
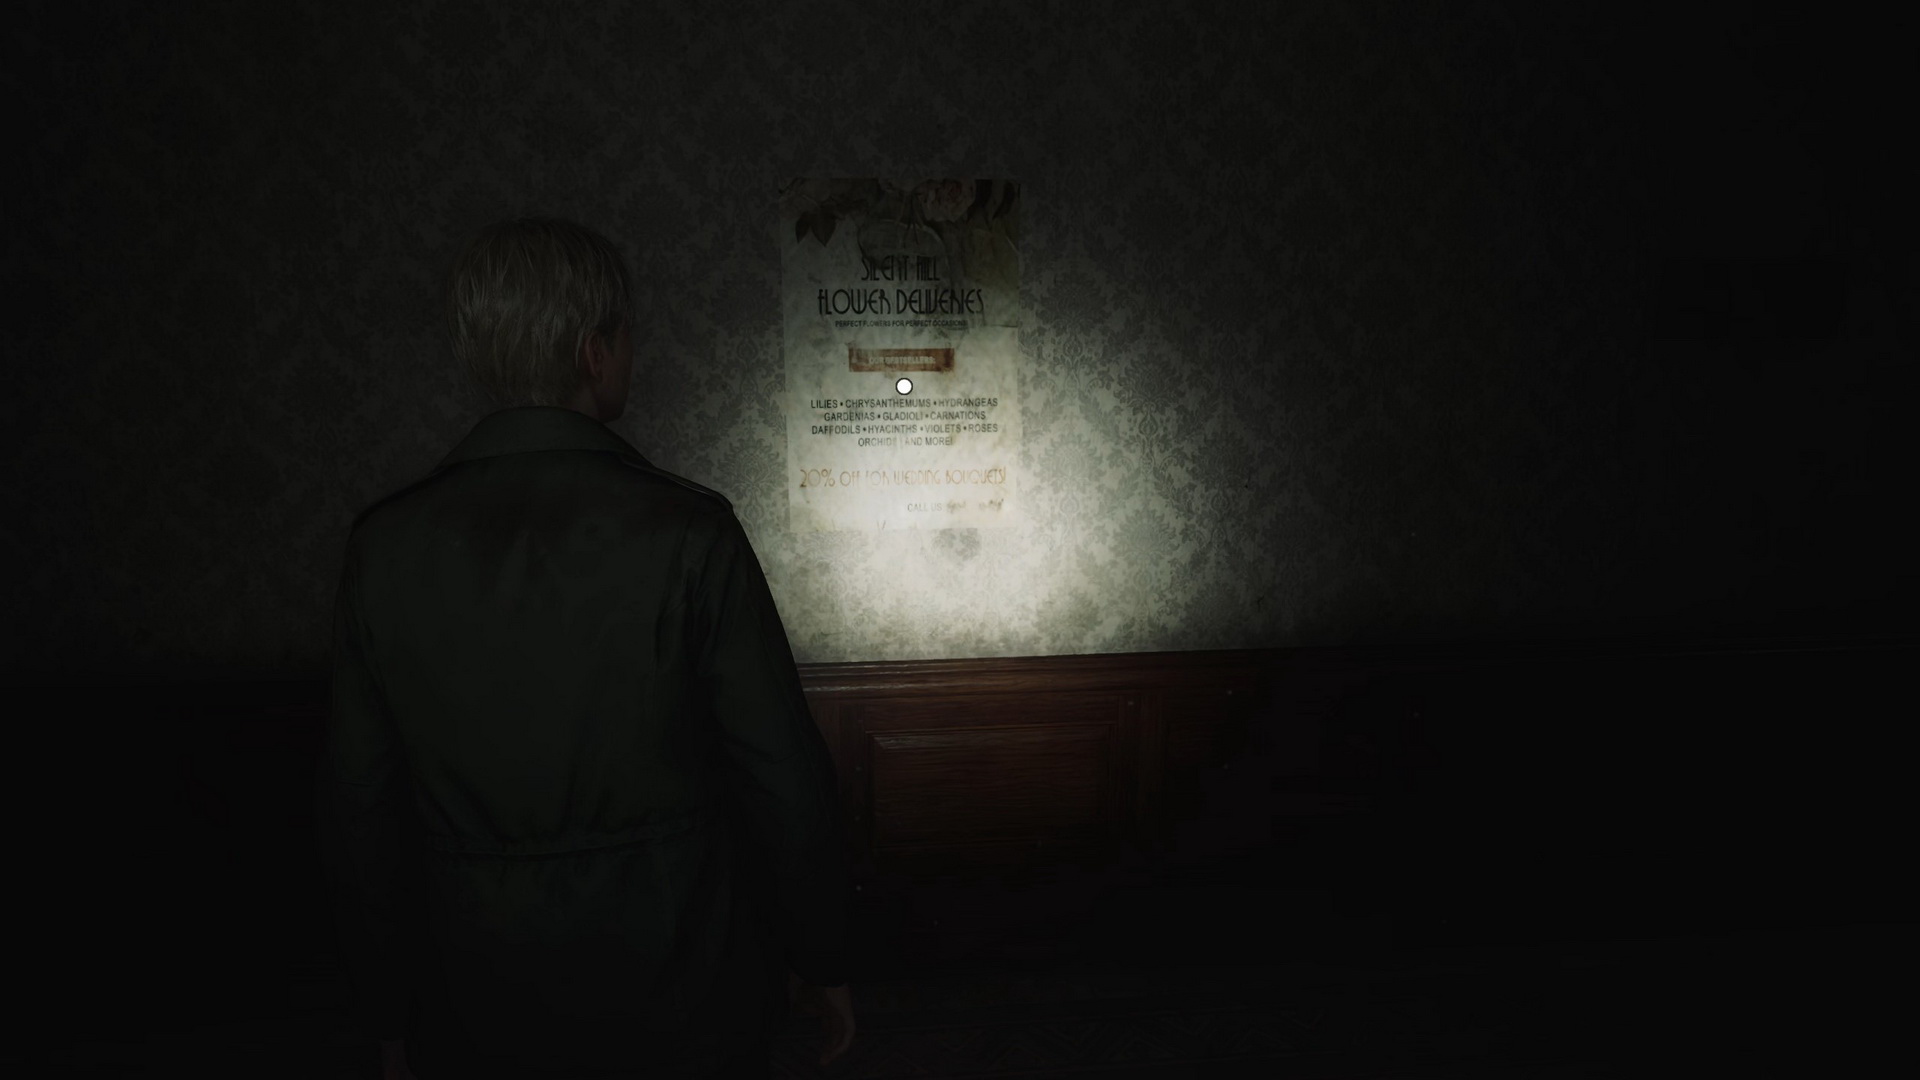 |
 |
In Room 209, you will find a hiding Mannequin and Handgun Ammo on a desk. A couple of Lying Figures are lurking in the southern part of the corridor. Another Lying Figure and a Mannequin are in Room 206. You can then crawl to Room 207 to collect Rifle Rounds from the nightstand. Room 204 has another Handgun Ammo on a coffee table and a Health Drink in the left nightstand. More Handgun Ammo is in the drawer at the end of the east corridor.
Go to Room 202 and collect a 102 Mirror Shard from the bed.
Return to the living room to solve a puzzle.
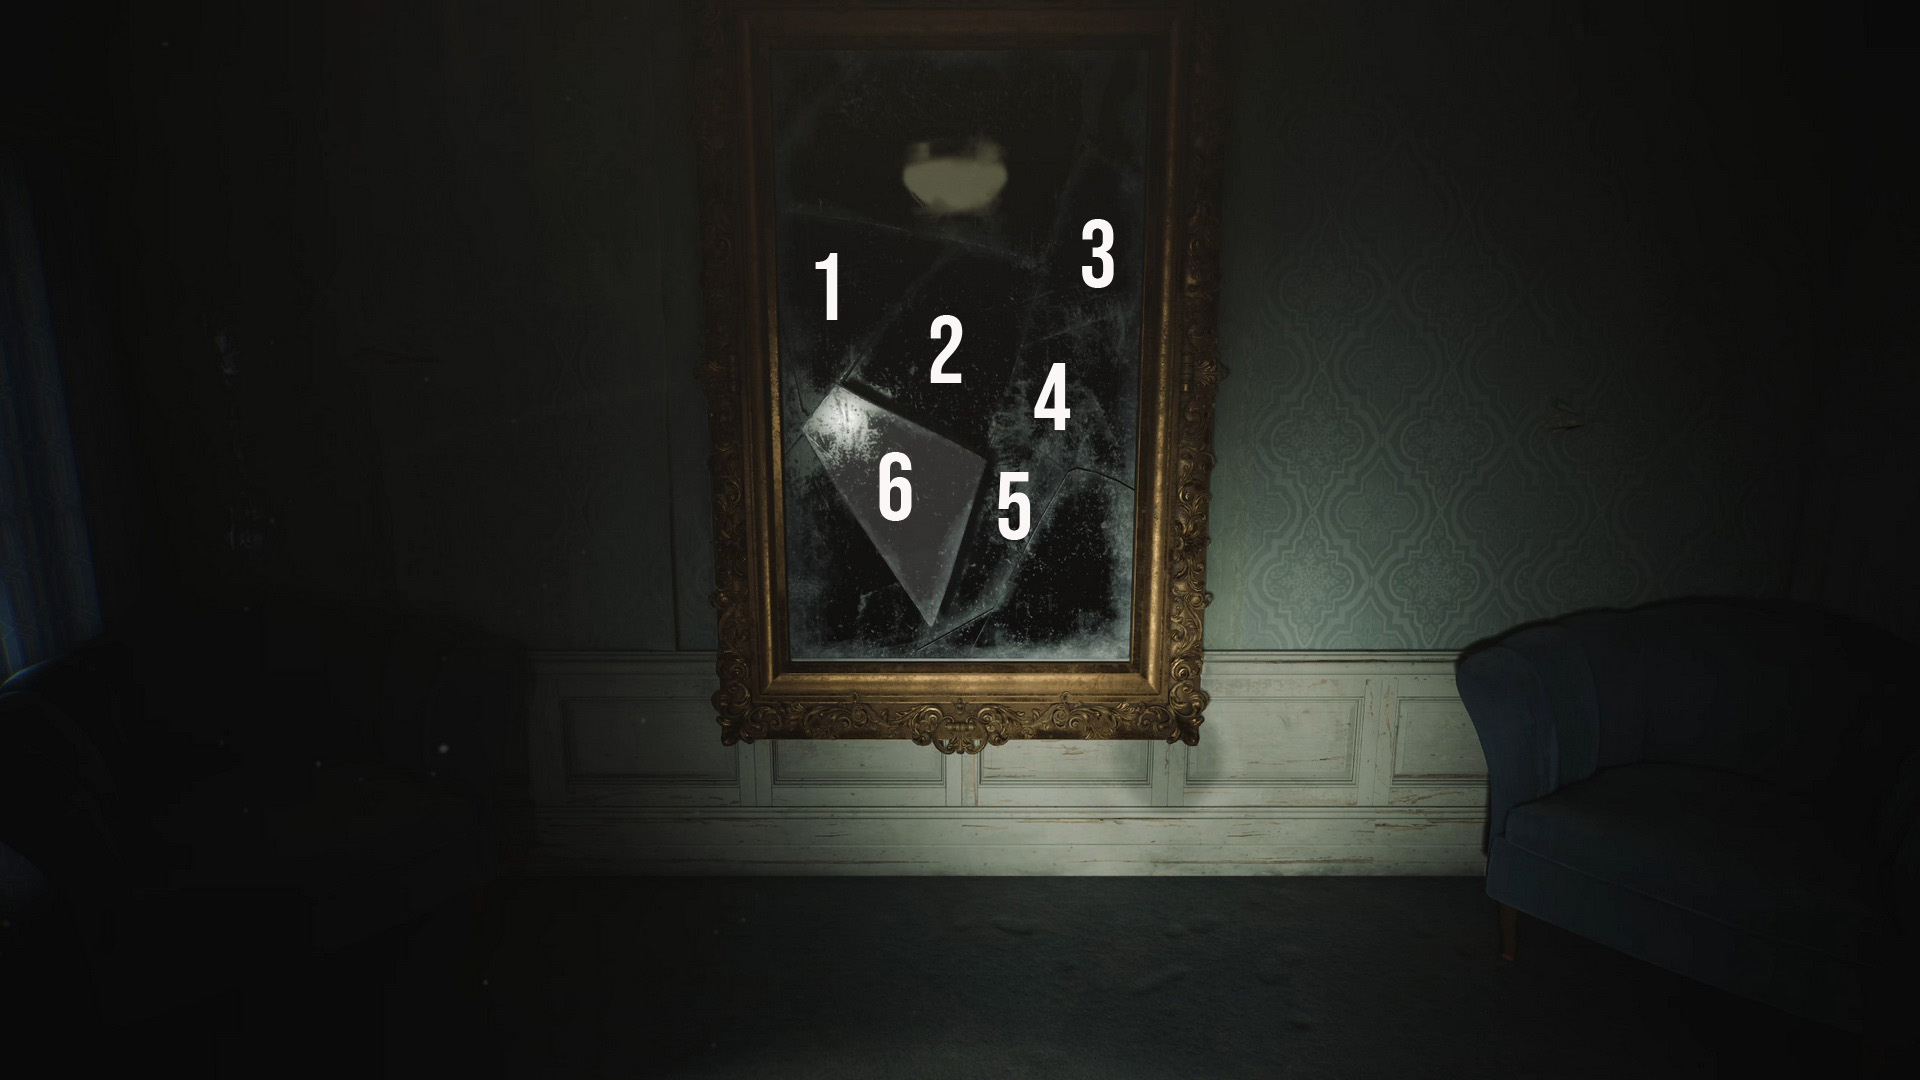
Puzzle: Room 202 Mirror
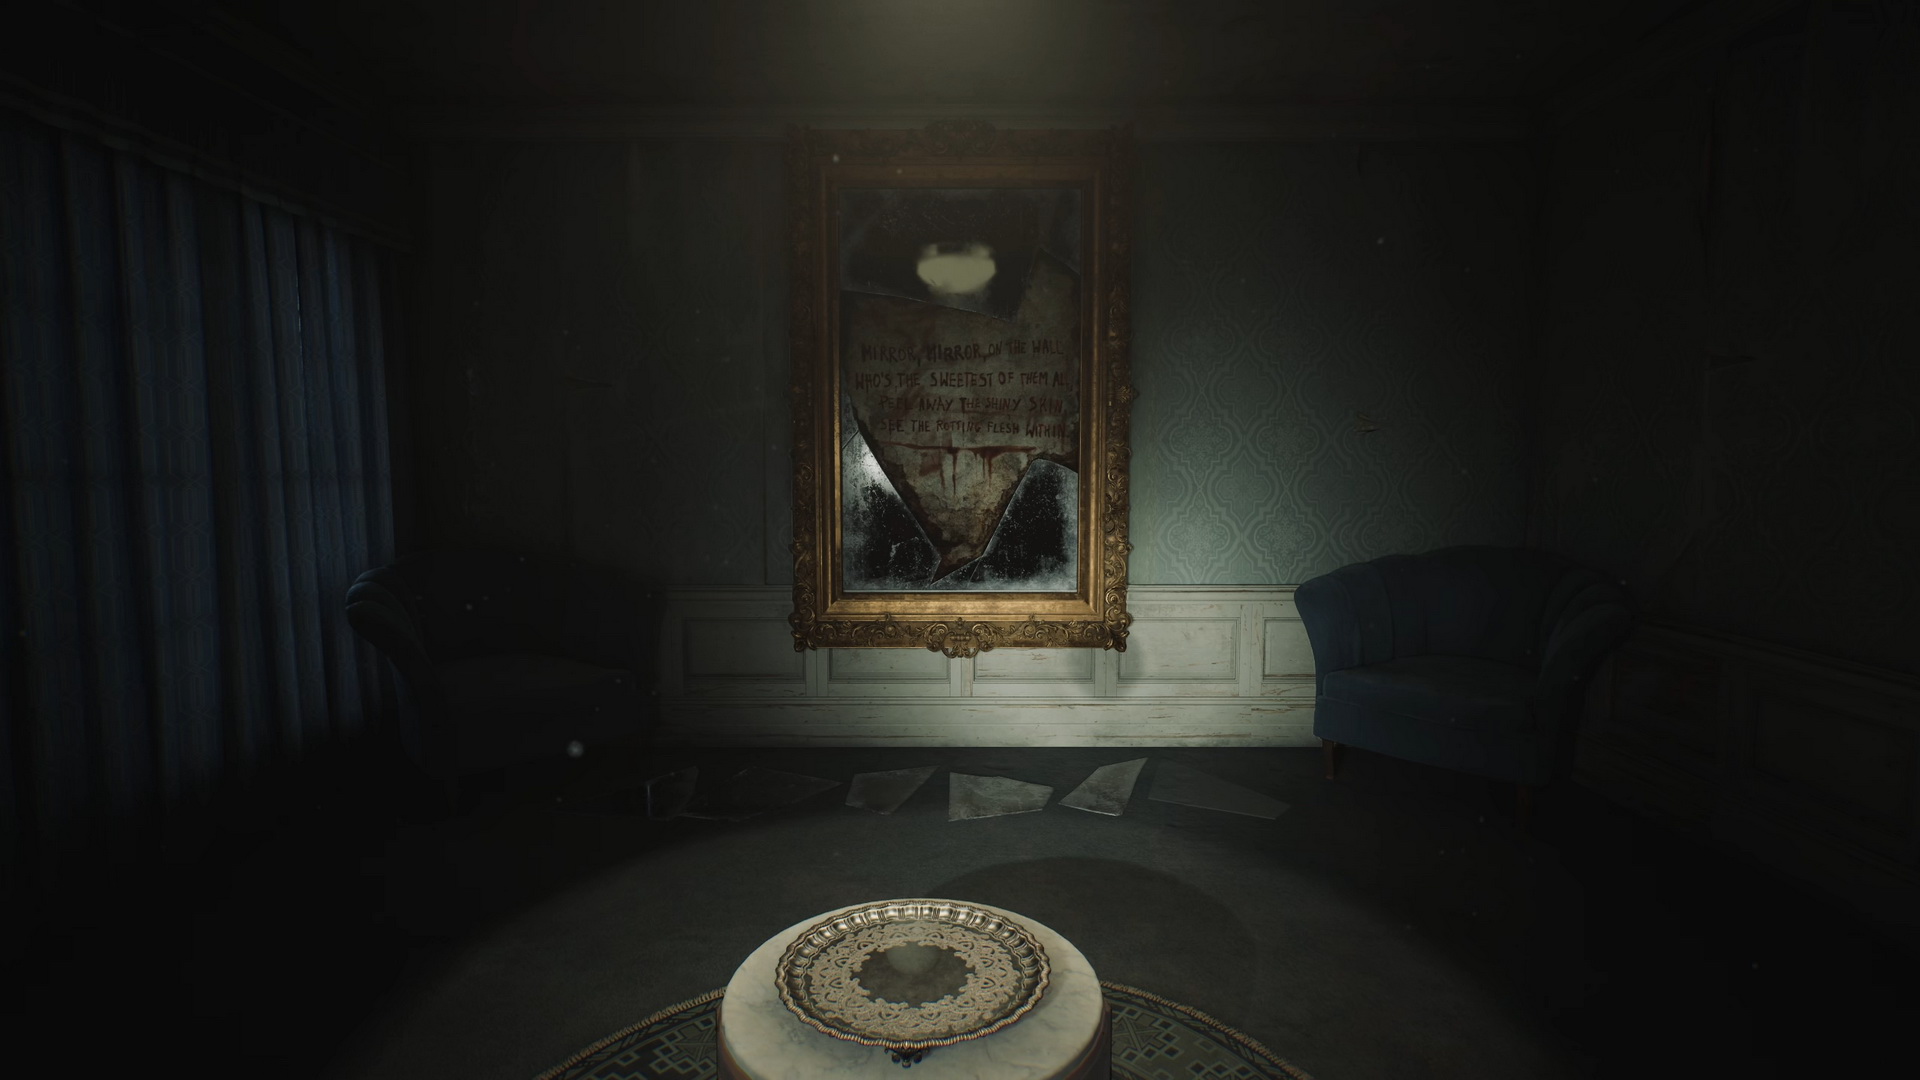
The mirror poem, alluding to the Snow White fairy tale, says:
Mirror, mirror, on the wall
Who's the sweetest of them all
Peel away the shiny skin
See the rotting flesh within
Place either the Ripe or Rotten Apple onto the plate in front of the mirror to trigger the puzzle. Your selection will affect the ending, so the choice is yours. Then place the missing Mirror Shard on the ground.
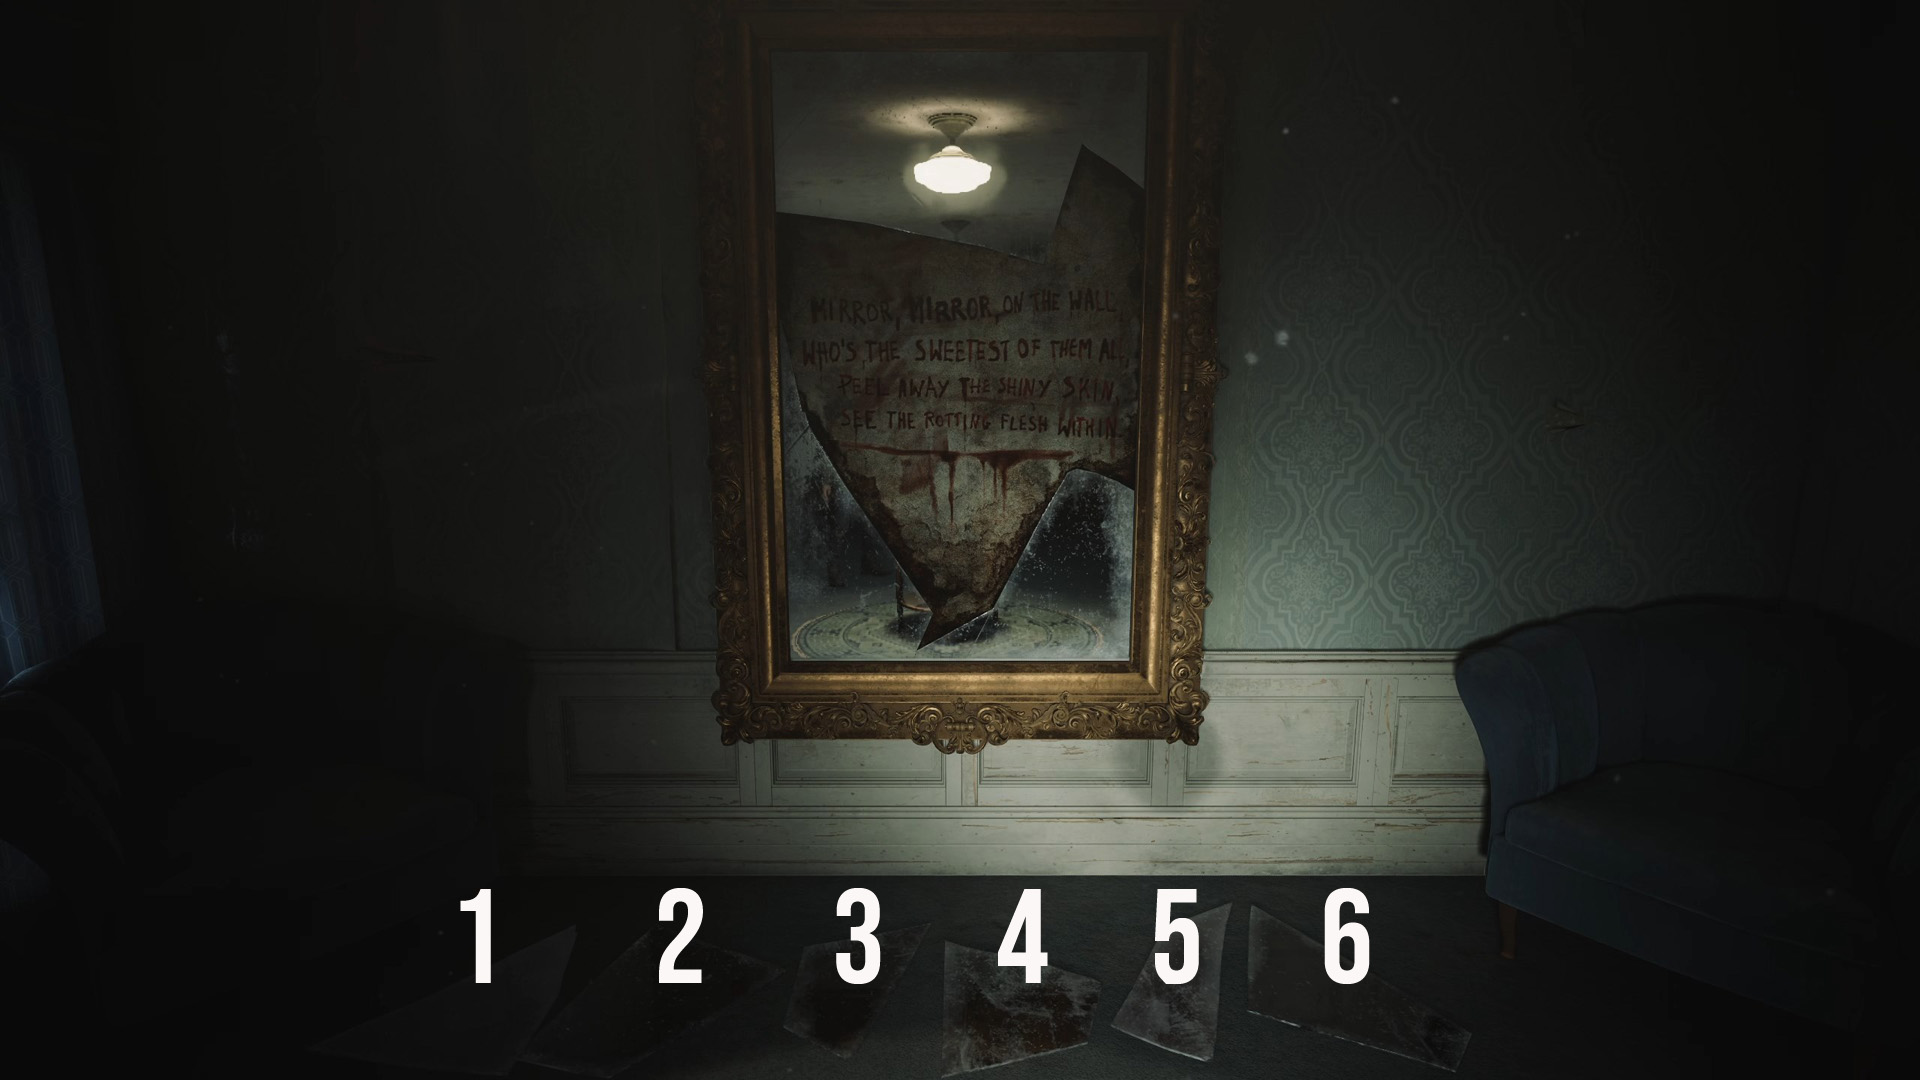
Place the shards back into the mirror as follows:
- The first shard goes to the top left spot, rotate once.
- The second shard goes to the right from the first one, rotate once.
- The third shard goes to the top right spot, rotate thrice.
- The fourth shard is below the third, rotate thrice.
- The fifth shard is below the fourth, rotate thrice.
- The sixth shard goes to the remaining spot, rotate thrice.
Go to Room 201 next door to collect your prize – the 103 Snow White Figurine. You are done with this wing of the hotel, so let's backtrack. In the corridor, you will be ambushed by an horde of Spider Mannequins. No need to fight them all – don't stop and run back to the Cloakroom and then the Hall. Exit to the balcony and hop through the windown into the Nurse's Office. Inside the office, you will find a Nurse, a Health Drink in a glass cabinet and a medical record on the desk.
 |
 |
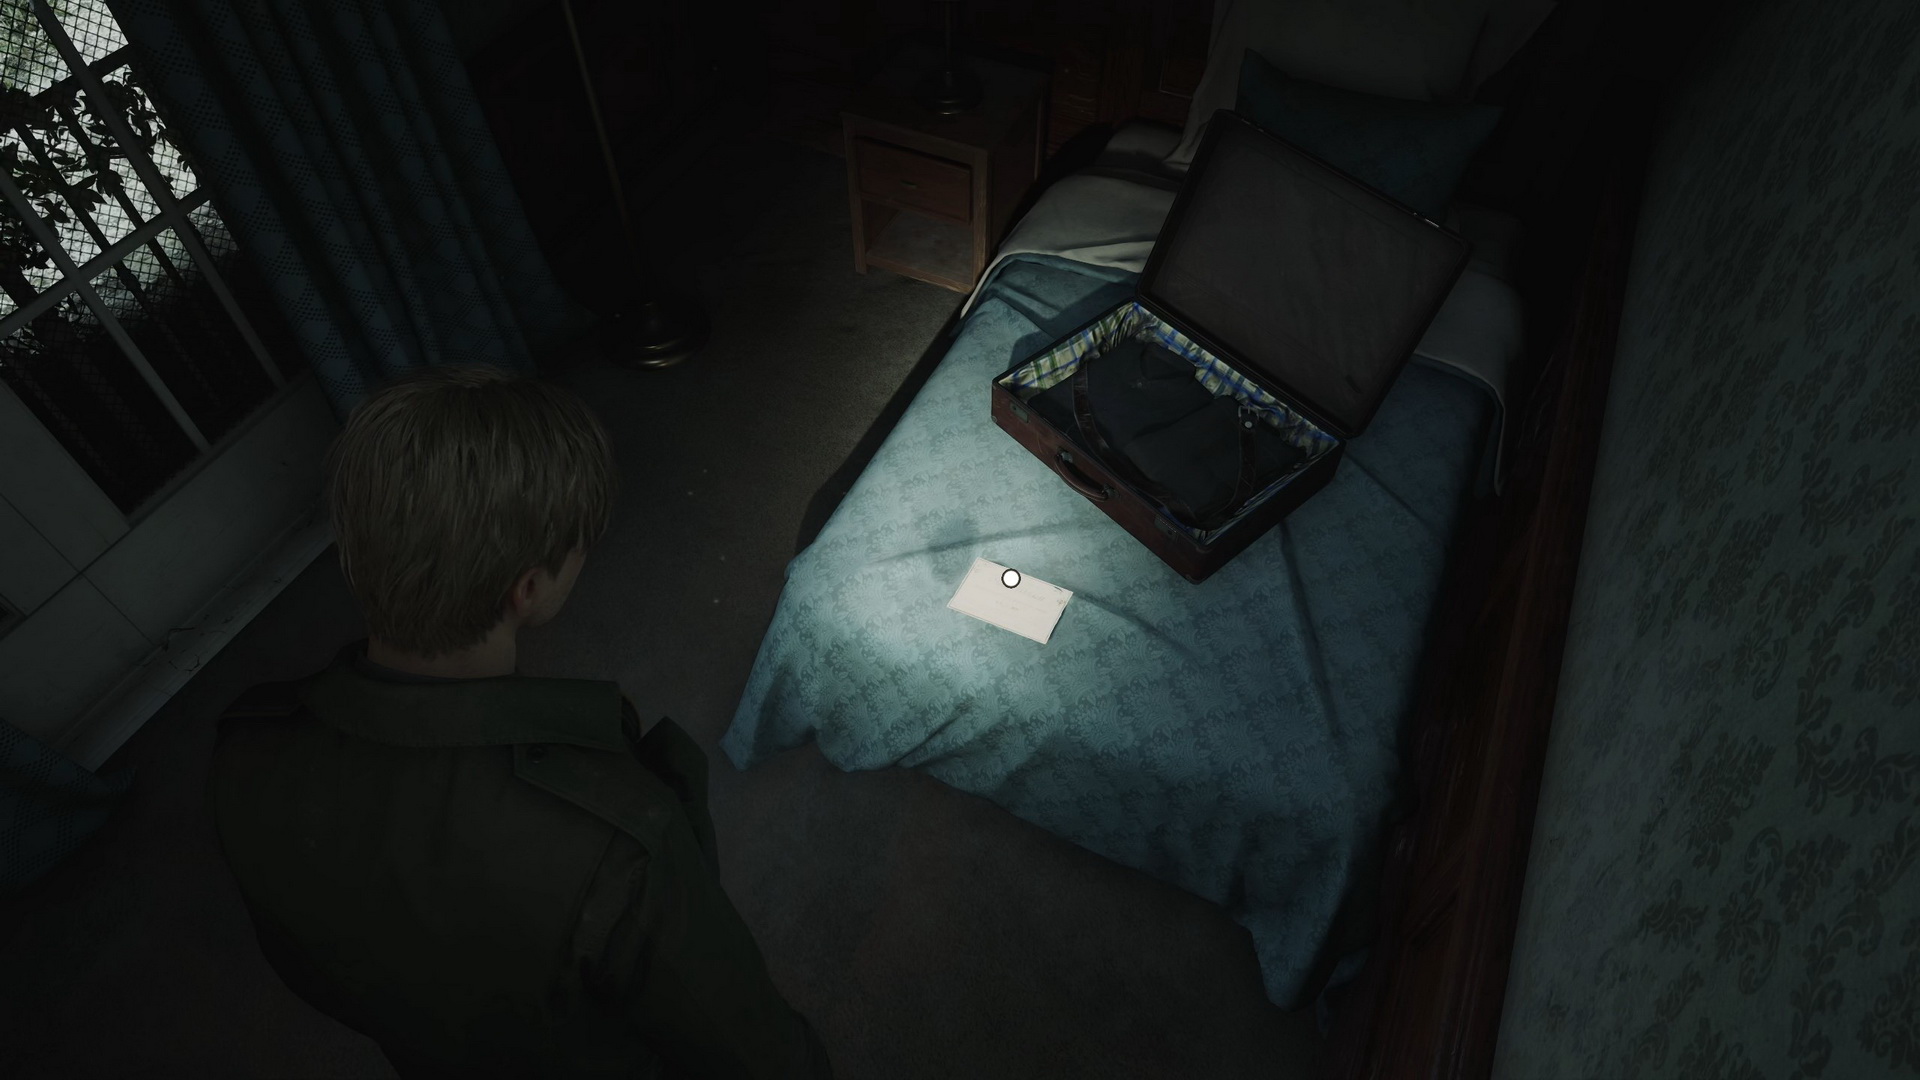
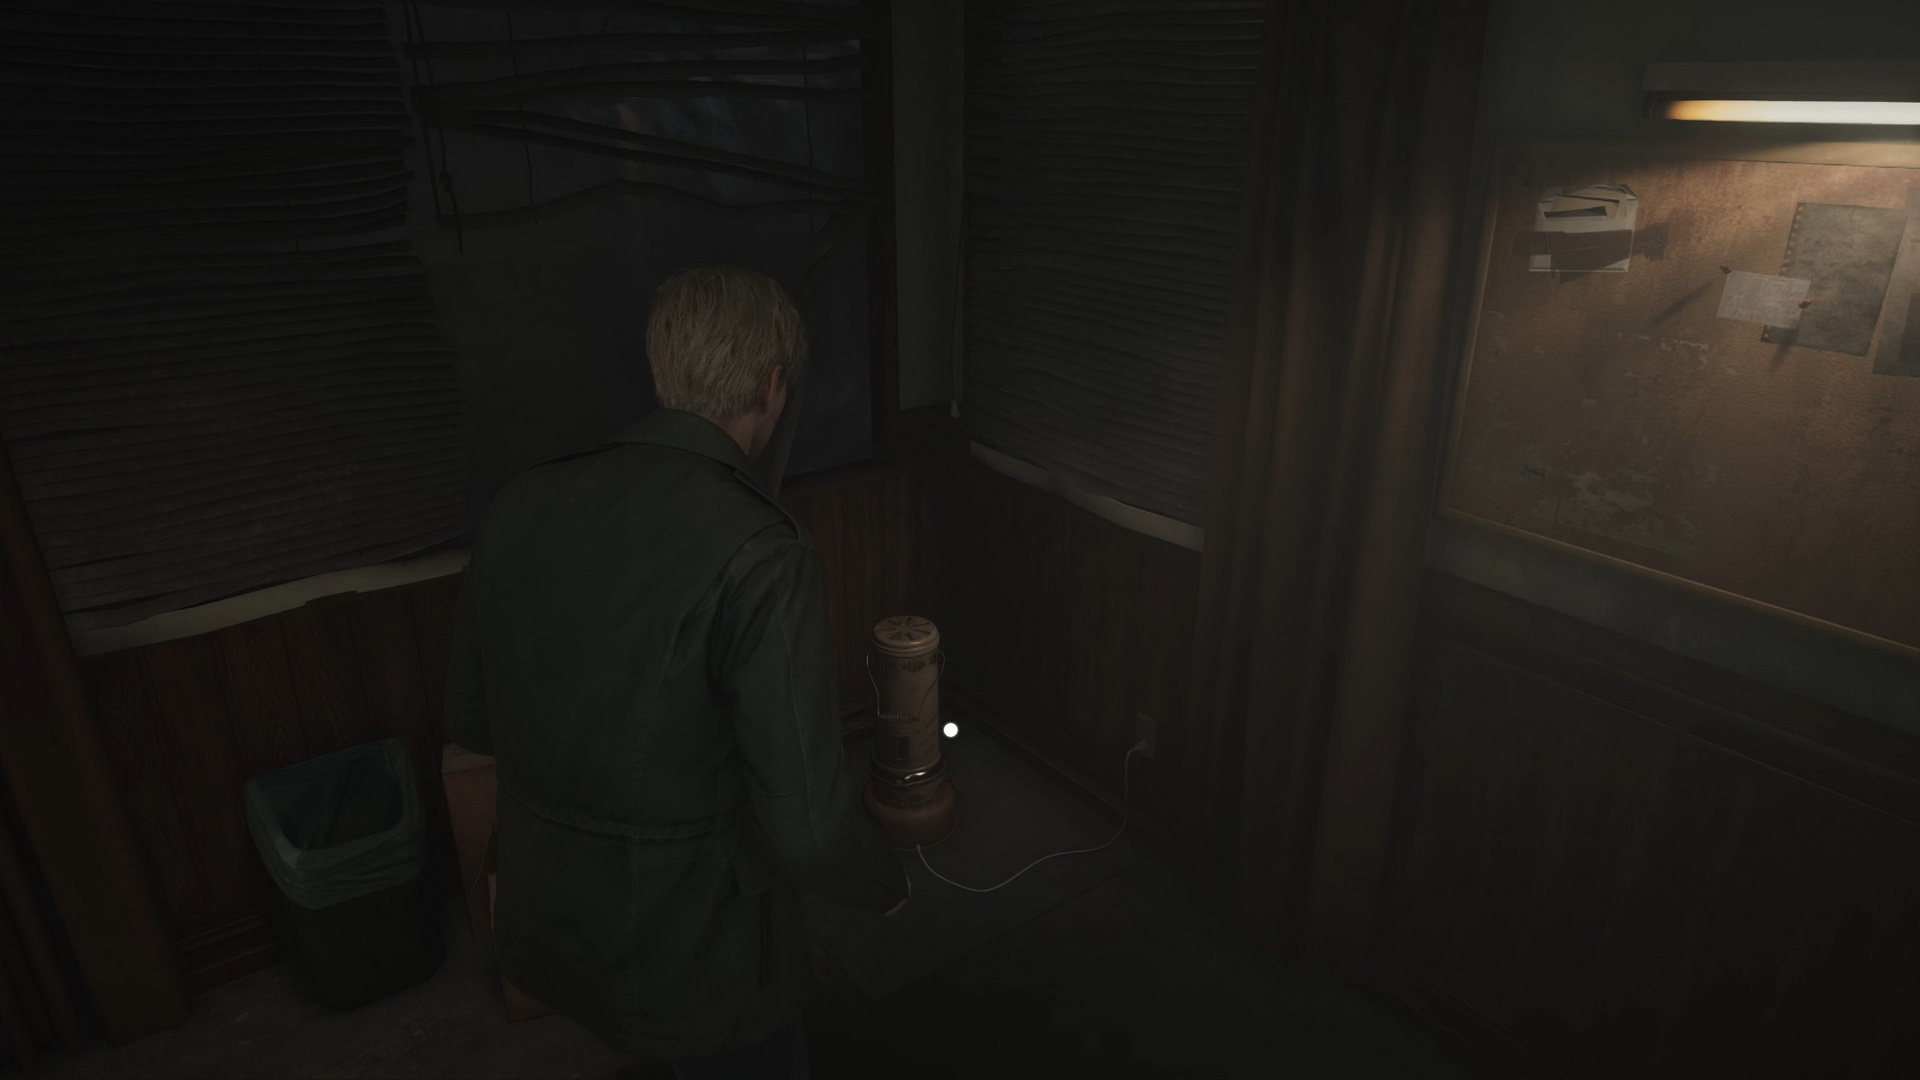
Exit to the hallway and unlock the Sunset Wing's door. Another Nurse is roaming here. You can find multiple supplies in the corridor: Handgun Ammo in the drawer next to the stairs, Shotgun Shells at the southwestern end opposite the Employee Elevator, more Shotgun Shells in the drawer next to Room 213, Rifle Rounds in the drawer at the northwestern end and another Rifle Rounds on a table at the northern end. Enter Room 212 to find a Mannequin and Glimpse of the Past #24 by examining a suitcase on the floor.
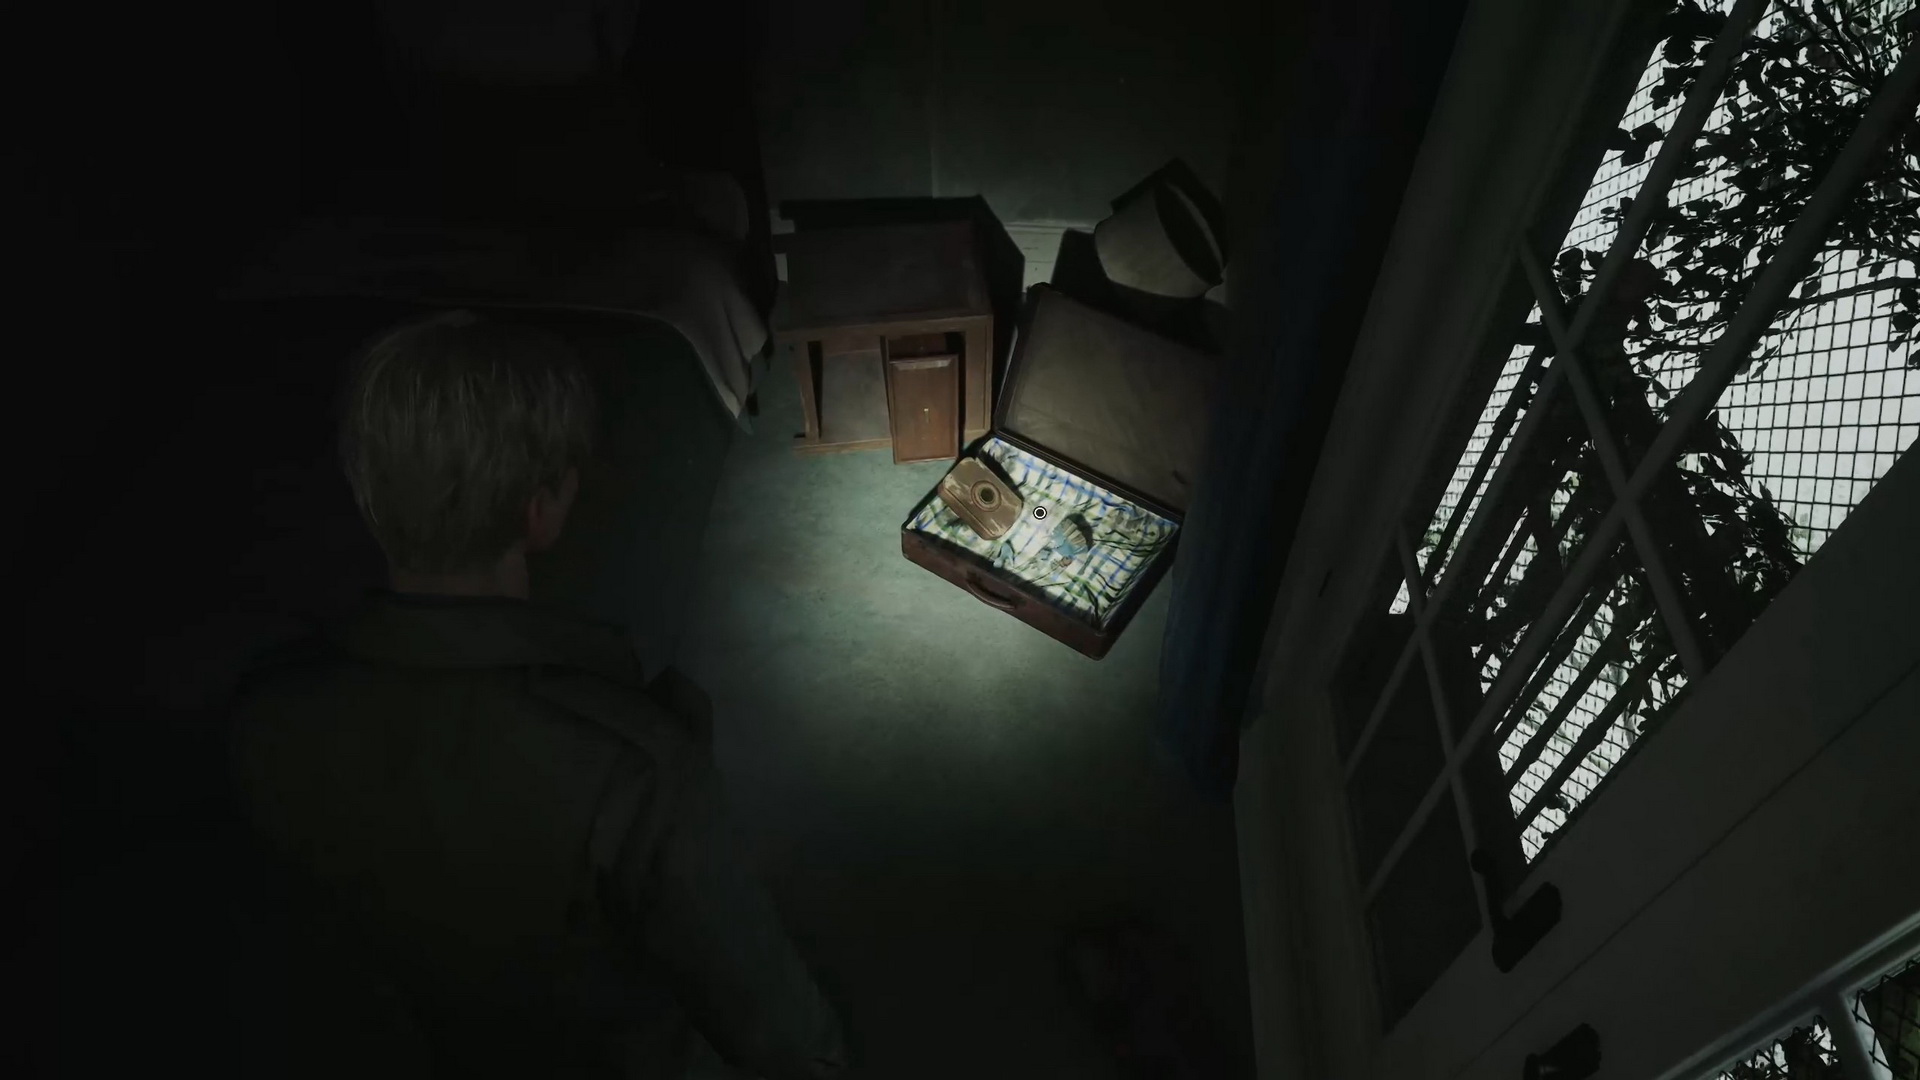 |
 |
Go upstairs to the third floor.
Exploring the Third Floor: Second Figurine
Third Floor
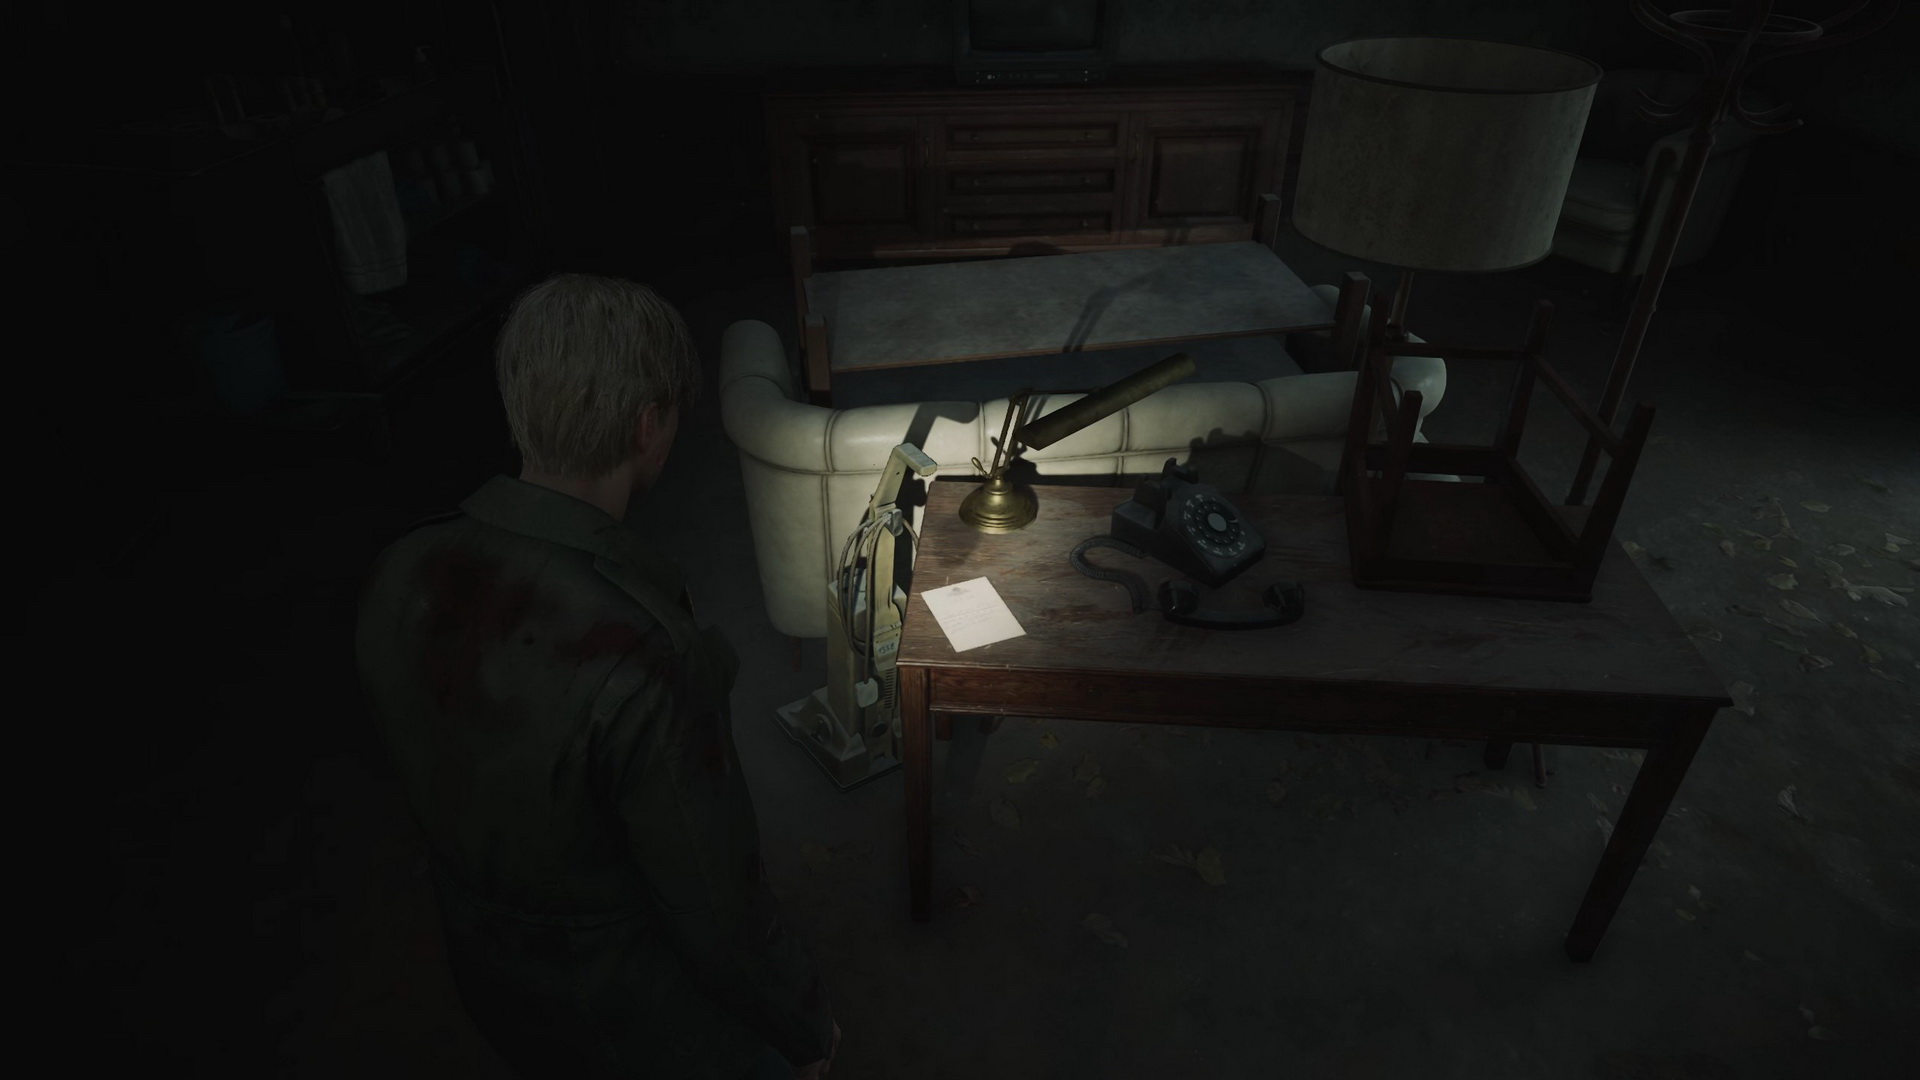
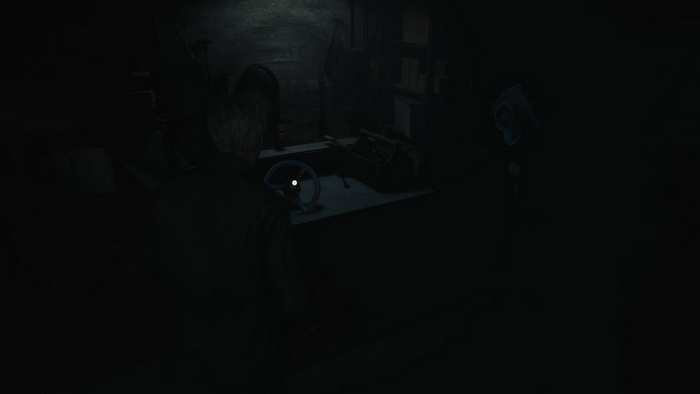
The door to the third-floor corridor is locked, and you can hear Mary's voice... You can find Rifle Rounds in the drawer at the northern corridor end. Enter the Conference Room and approach the fireplace to collect Memo #65: Cleaning Staff Note #2 and 104 Key to Hotel Room 107.
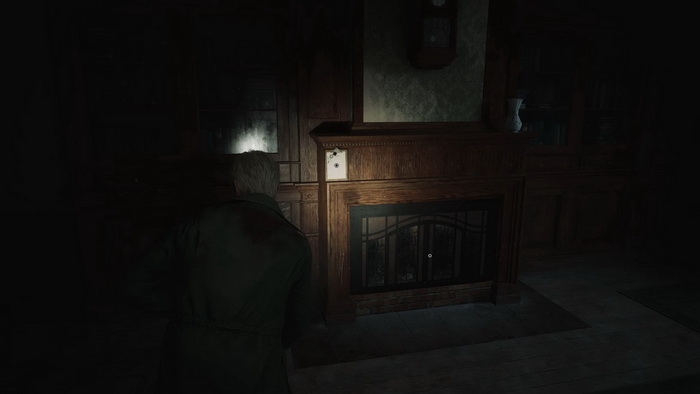
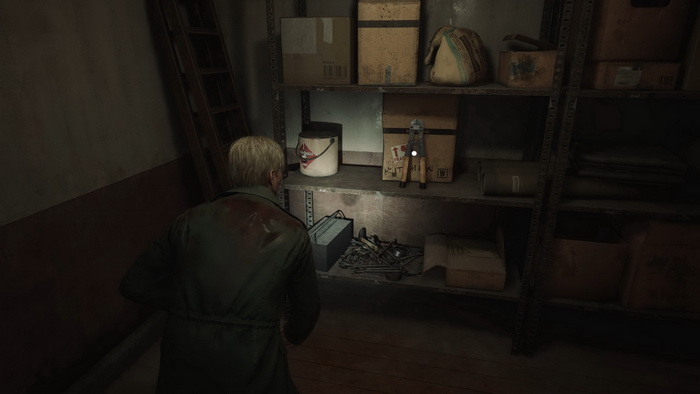
The fireplace is locked, and you must return to it later. Enter the Utility Room to find a Mannequin, Handgun Ammo in a glass cabinet, Shotgun Shells and 105 Boltcutters on the shelves.
Note: You can skip the items required for the vanity mirror puzzle, as the code message will always be the same.
Return to the hallway (a Lying Figure will appear here) and use the emergency exit to go down to the second floor. You can find Handgun Ammo on a table in a stair landing.
Second Floor
Enter Room 217. Collect Handgun Ammo from a briefcase on a bed. Go to the balcony of Room 217 and shoot the cracked skylight glass under the red book (on light difficulty, it will drop itself when you enter the balcony).
Go to Room 215, break a wall and squeeze into Room 214. A Lying Figure will crawl from the bathroom. You can also find a Health Drink in the bathroom cabinet. Return to the first floor using the main stairs.
First Floor
Go to the Lake Shore Restaurant to find the red book that fell through the skylight. Examine it to reveal a 106 Can Opener.
Note: You can skip the items required for the vanity mirror puzzle, as the code message will always be the same.
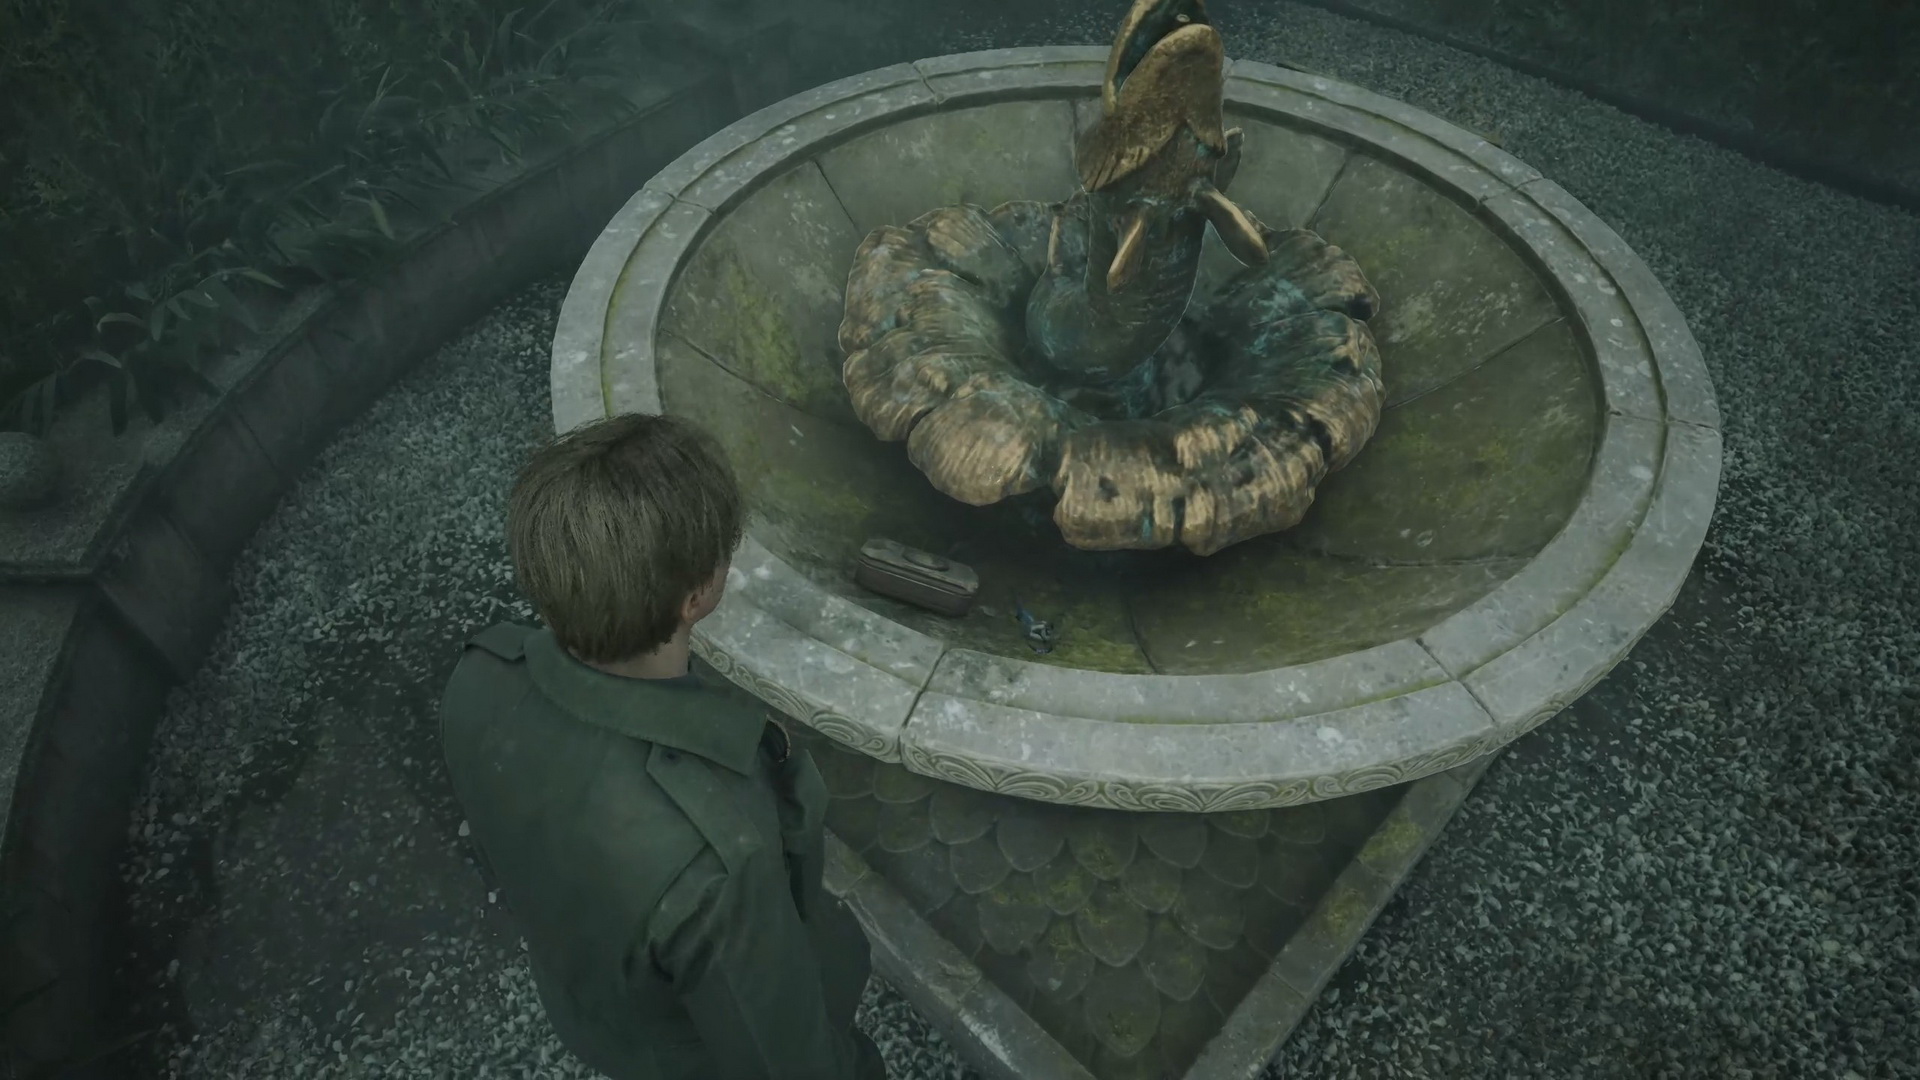
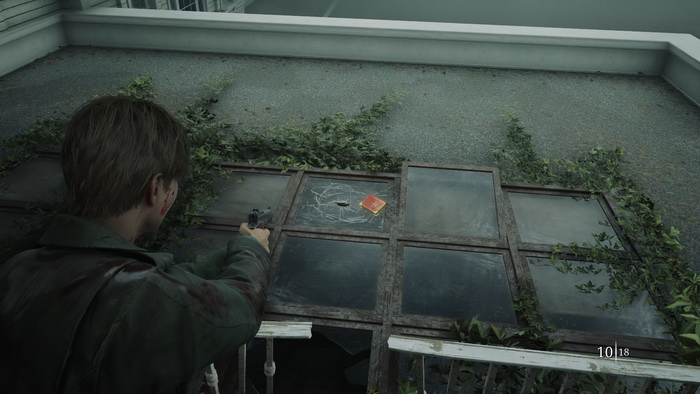
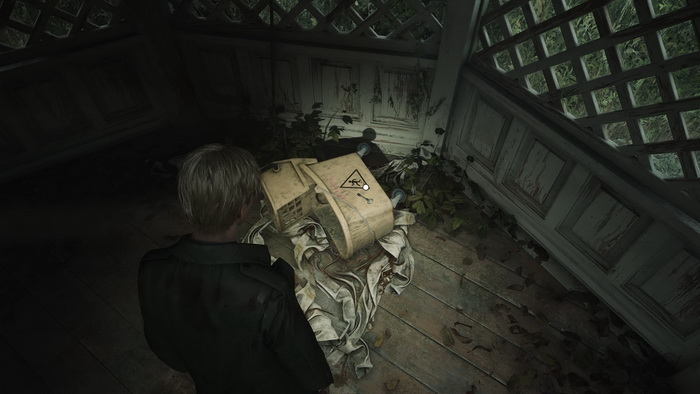
Exit to the Garden and use the Boltcutters to open the locked gate to the western section. Find and take a 107 Light Bulb from the fish statue in the fountain. You can also check the fountain's inscription.
Note: You can skip the items required for the vanity mirror puzzle, as the code message will always be the same.
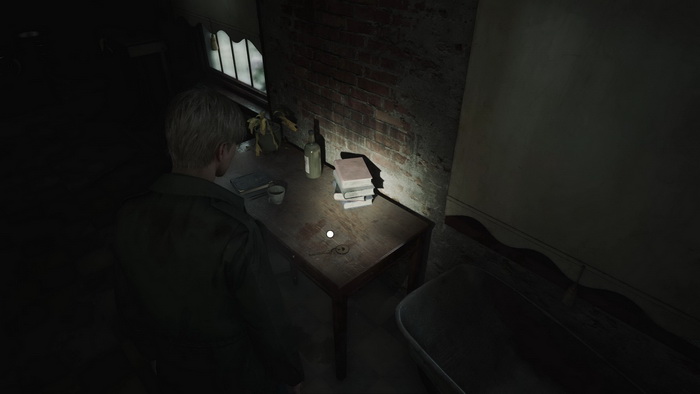
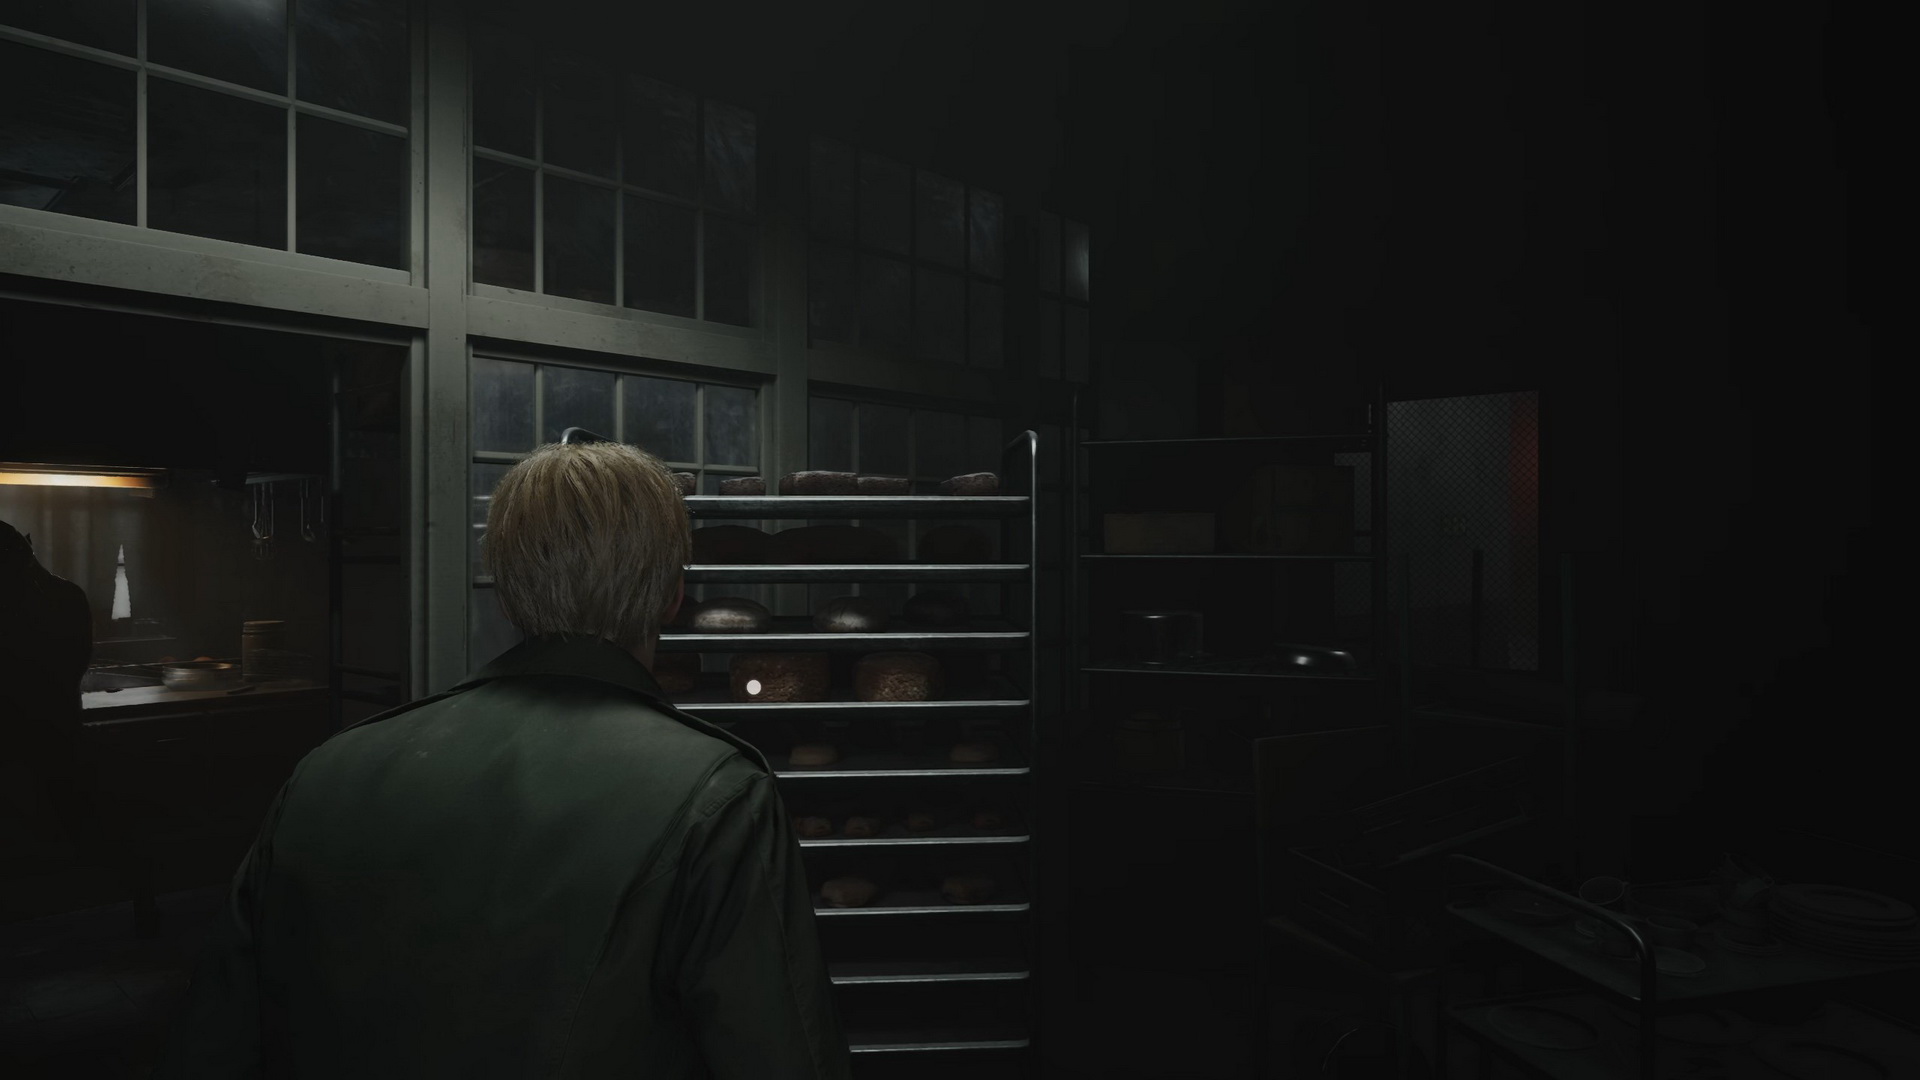
Return to the hotel and go to the east wing. Run toward Room 107. On your way, you will have to deal with the respawned monsters. Unlock and enter Room 107. In the bathroom, there's a Health Drink in the wall cabinet. Find Memo #66: Cleaning Staff Note #3 on a table in the living room.
 |
 |
Exit to the garden. Grab Shotgun Shells from a round table. You will meet a Nurse in the garden, two Lying Figures and a Mannequin. A Health Drink can be found on a bench at the east end, guarded by another Mannequin. Find a pavilion in the southeastern corner and take the 108 Fireplace Key atop a knocked-over mop bucket.
It's time to return to that fireplace on the third floor.
Third Floor
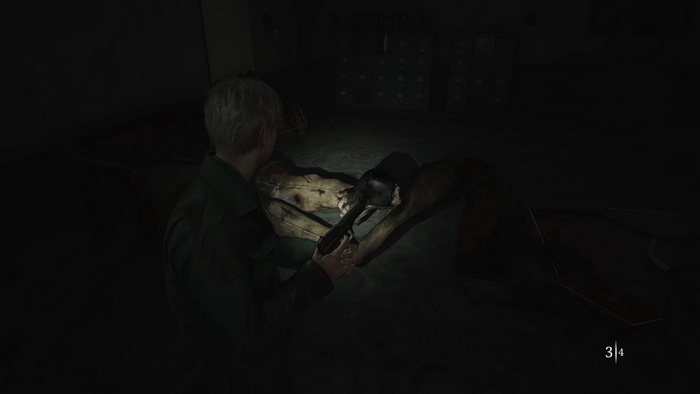
Go to the Conference Room and unlock the fireplace using the Fireplace Key. James will collect the 109 Cinderella Figurine. A Mandarin enters the stage by breaking a wall from a nearby room and prompting you to prepare for a mini-boss fight.
You can pick up some supplies from a desk in the next room: a Health Drink and Handgun Ammo. Mandarin mainly hangs from the ceiling and uses its long tongue to reach James, so keep your distance during this phase and use your firearms to inflict damage. Mandarin can also emit a sound wave, stunning James and keeping him open to the other creature's attack. When Mandarin raises its legs, it's ready for a jump attack. Dodge it by stepping to the side and use this moment to attack the creature from up close. Beware of its roundabout tongue attack while on the ground, though.
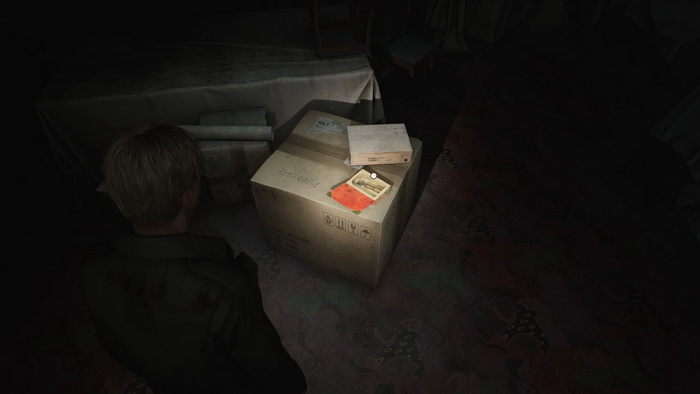
After the monster dies, proceed to push the wardrobe and break the wall into Room 317. Step onto the balcony and hop over to the next one. Enter Room 318 to find a huge mess with stains of red paint everywhere. Collect a 110 Paint Can from the coffee table.
Note: You can skip the items required for the vanity mirror puzzle, as the code message will always be the same.
Combine the Paint Can with the Can Opener to get an 111 Open Paint Can. Combine the Open Paint Can with the Light Bulb to get a 112 Red Light Bulb. Now, you can solve the vanity mirror puzzle, so head back to the second floor.
Accessing the Employee Section: Third Figurine
Second Floor
Proceed to Room 205 through the Reading Room.
Puzzle: Room 205 Vanity Mirror

Remove the broken light bulb from the vanity mirror and insert the Red Light Bulb to reveal the hidden message. The message is different on different riddle difficulties:
Light: DARK WISH
Standard: DEED DONE
Hard: LOVE LUST
|
Enter the code phrase to open the briefcase.
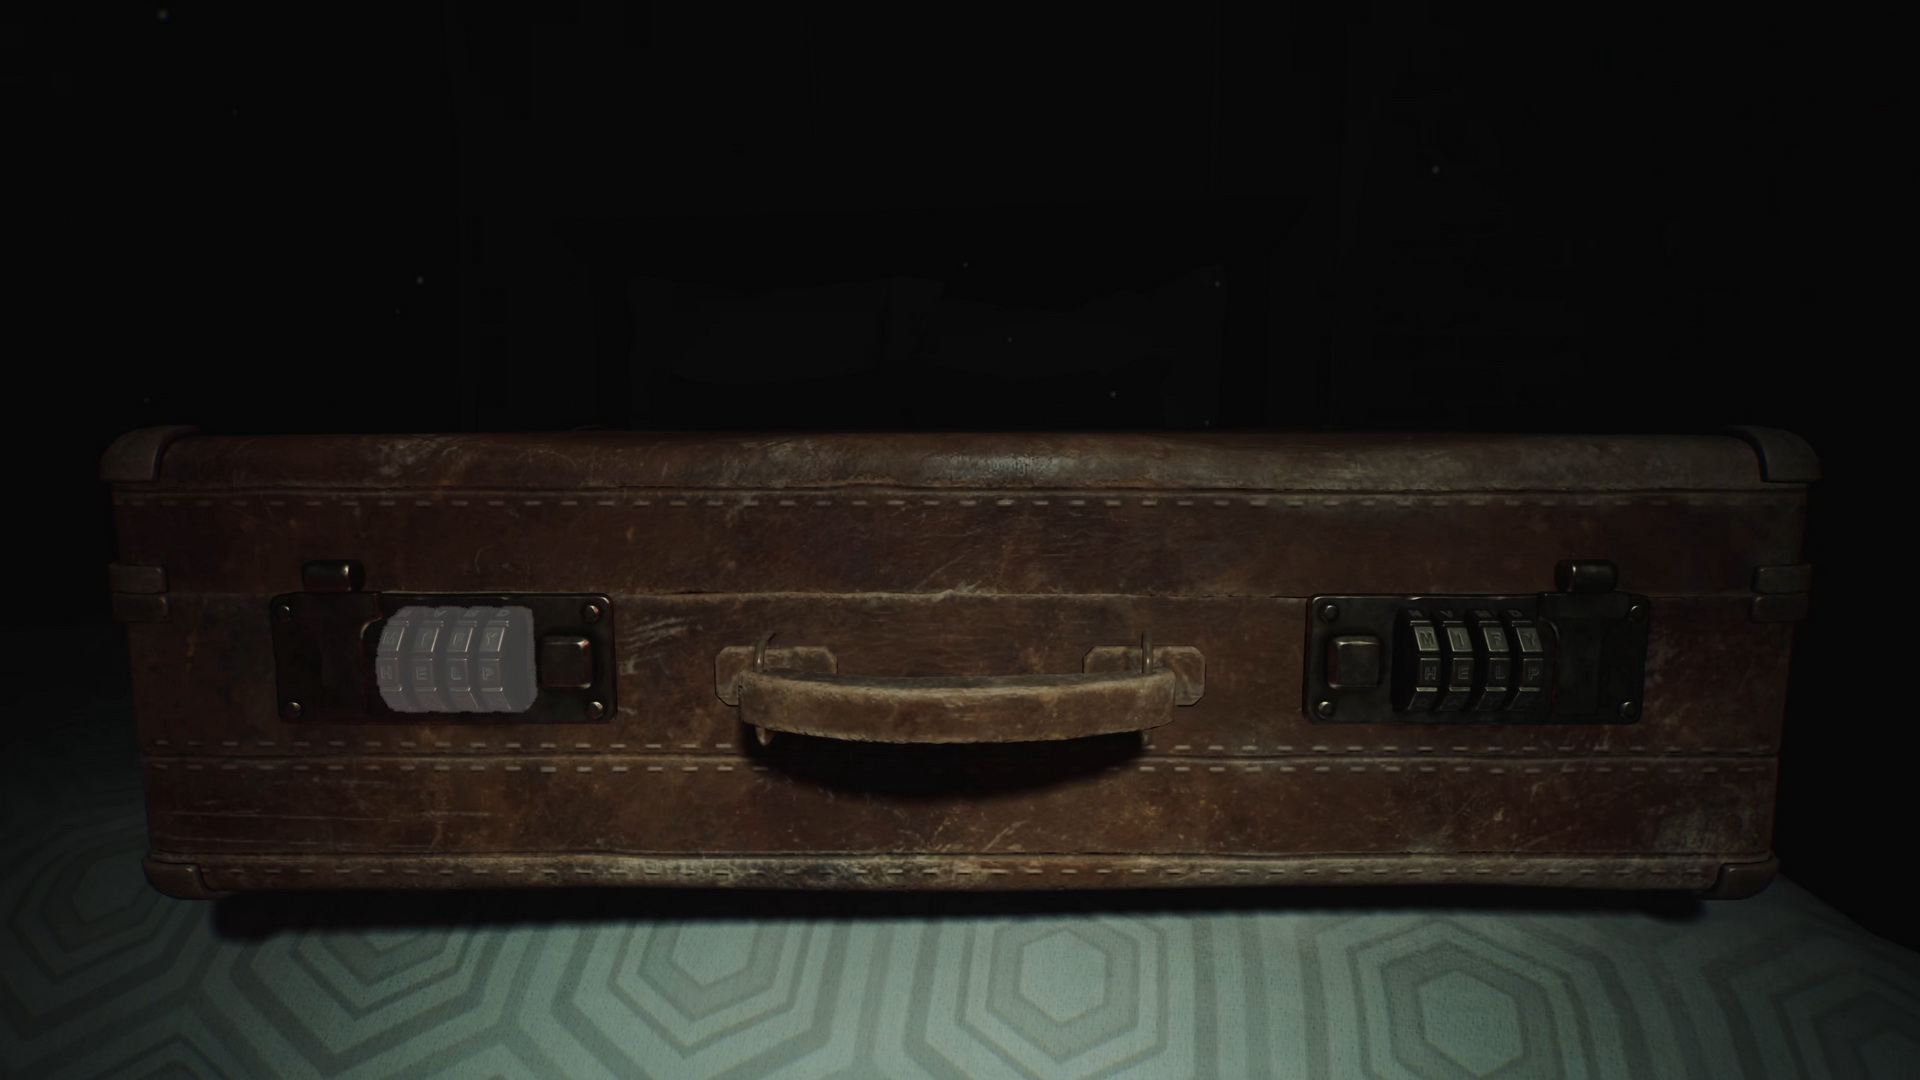
Inside you will find the 113 Employee Elevator Key.
Go to the Employee Elevator in the Sunset Wing on the same floor. There's a Save Point in the room. Entering the elevator will give you a sound alarm, and the elevator won't move anywhere. A warning on the control panel says, "Weight Limit: 1 Person".

The limitation is stringent indeed. It means you will need to get rid of all your collected items. Approach a steel cabinet in the same room to stash all your items. You can keep the personal items: Mary's Letter, the Photo of Mary and the Handkerchief. Once ready, enter the elevator and press the first-floor button.
First Floor
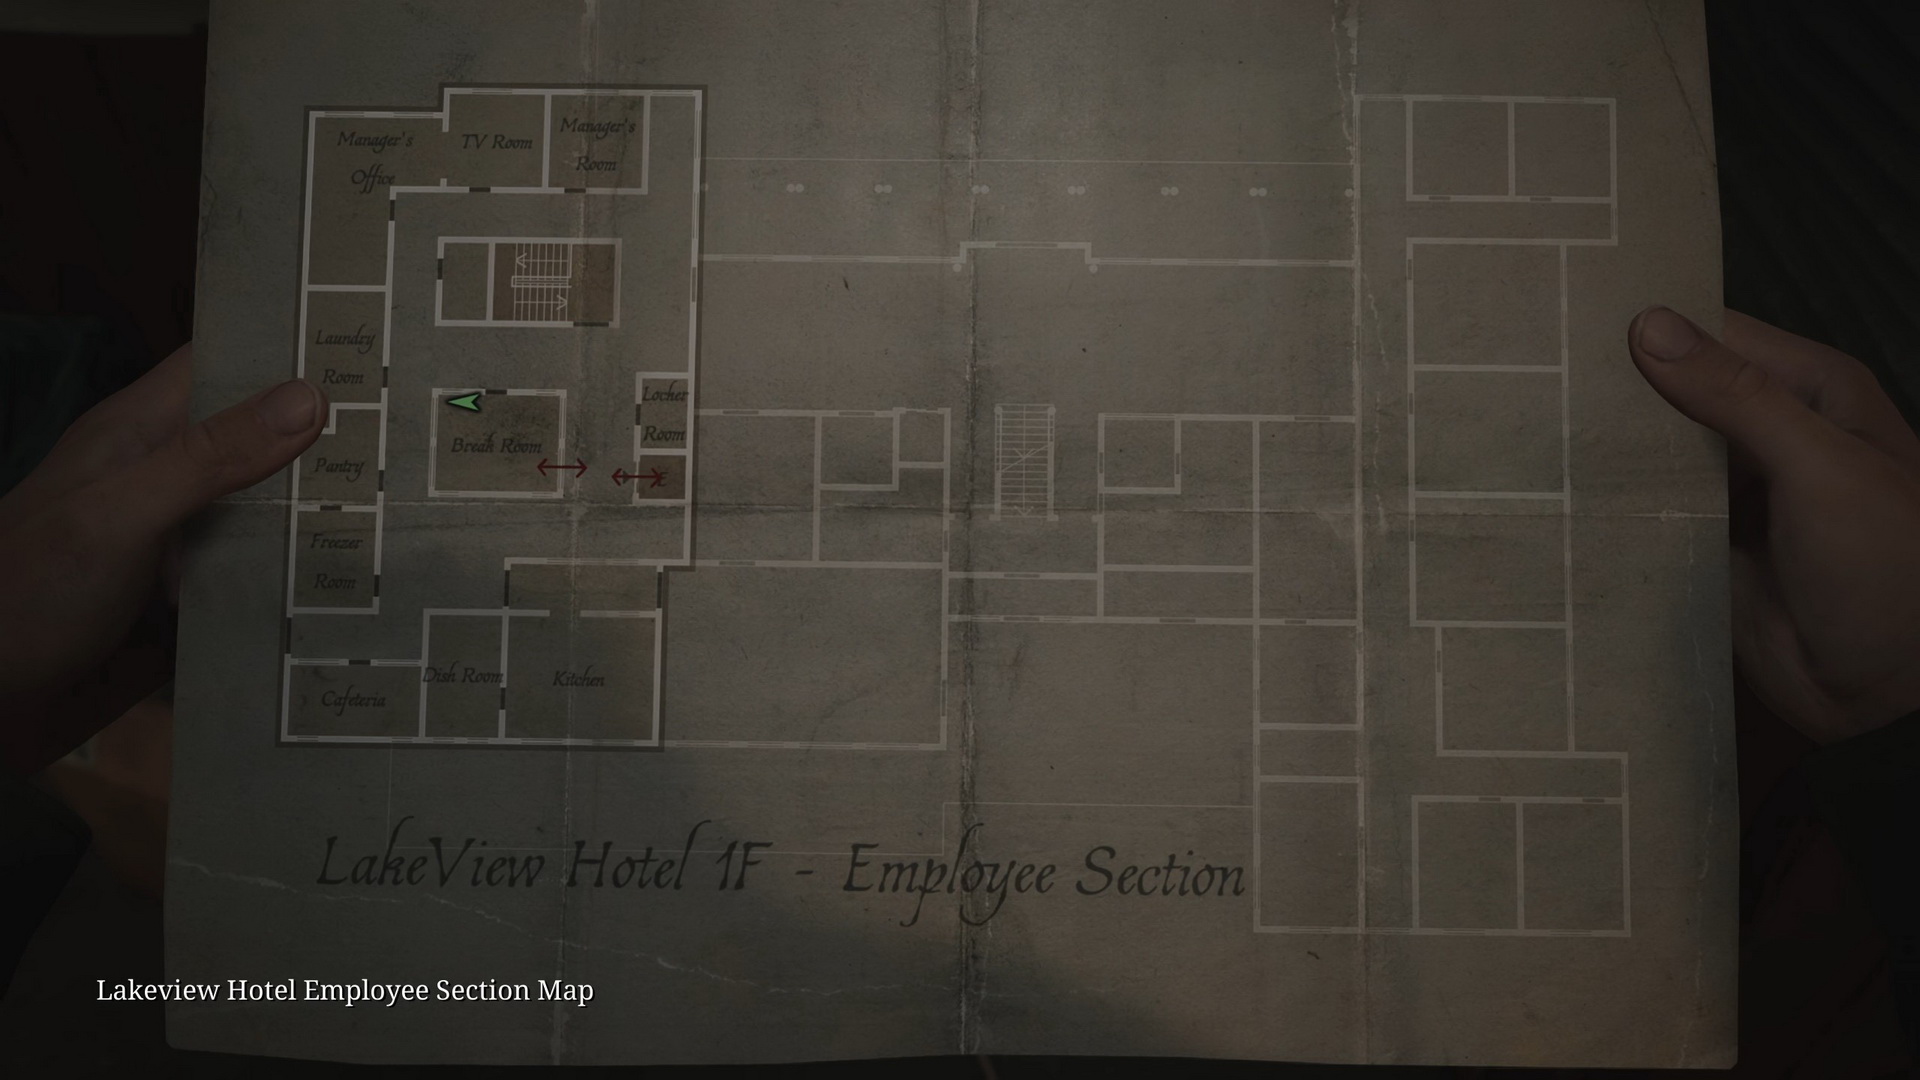
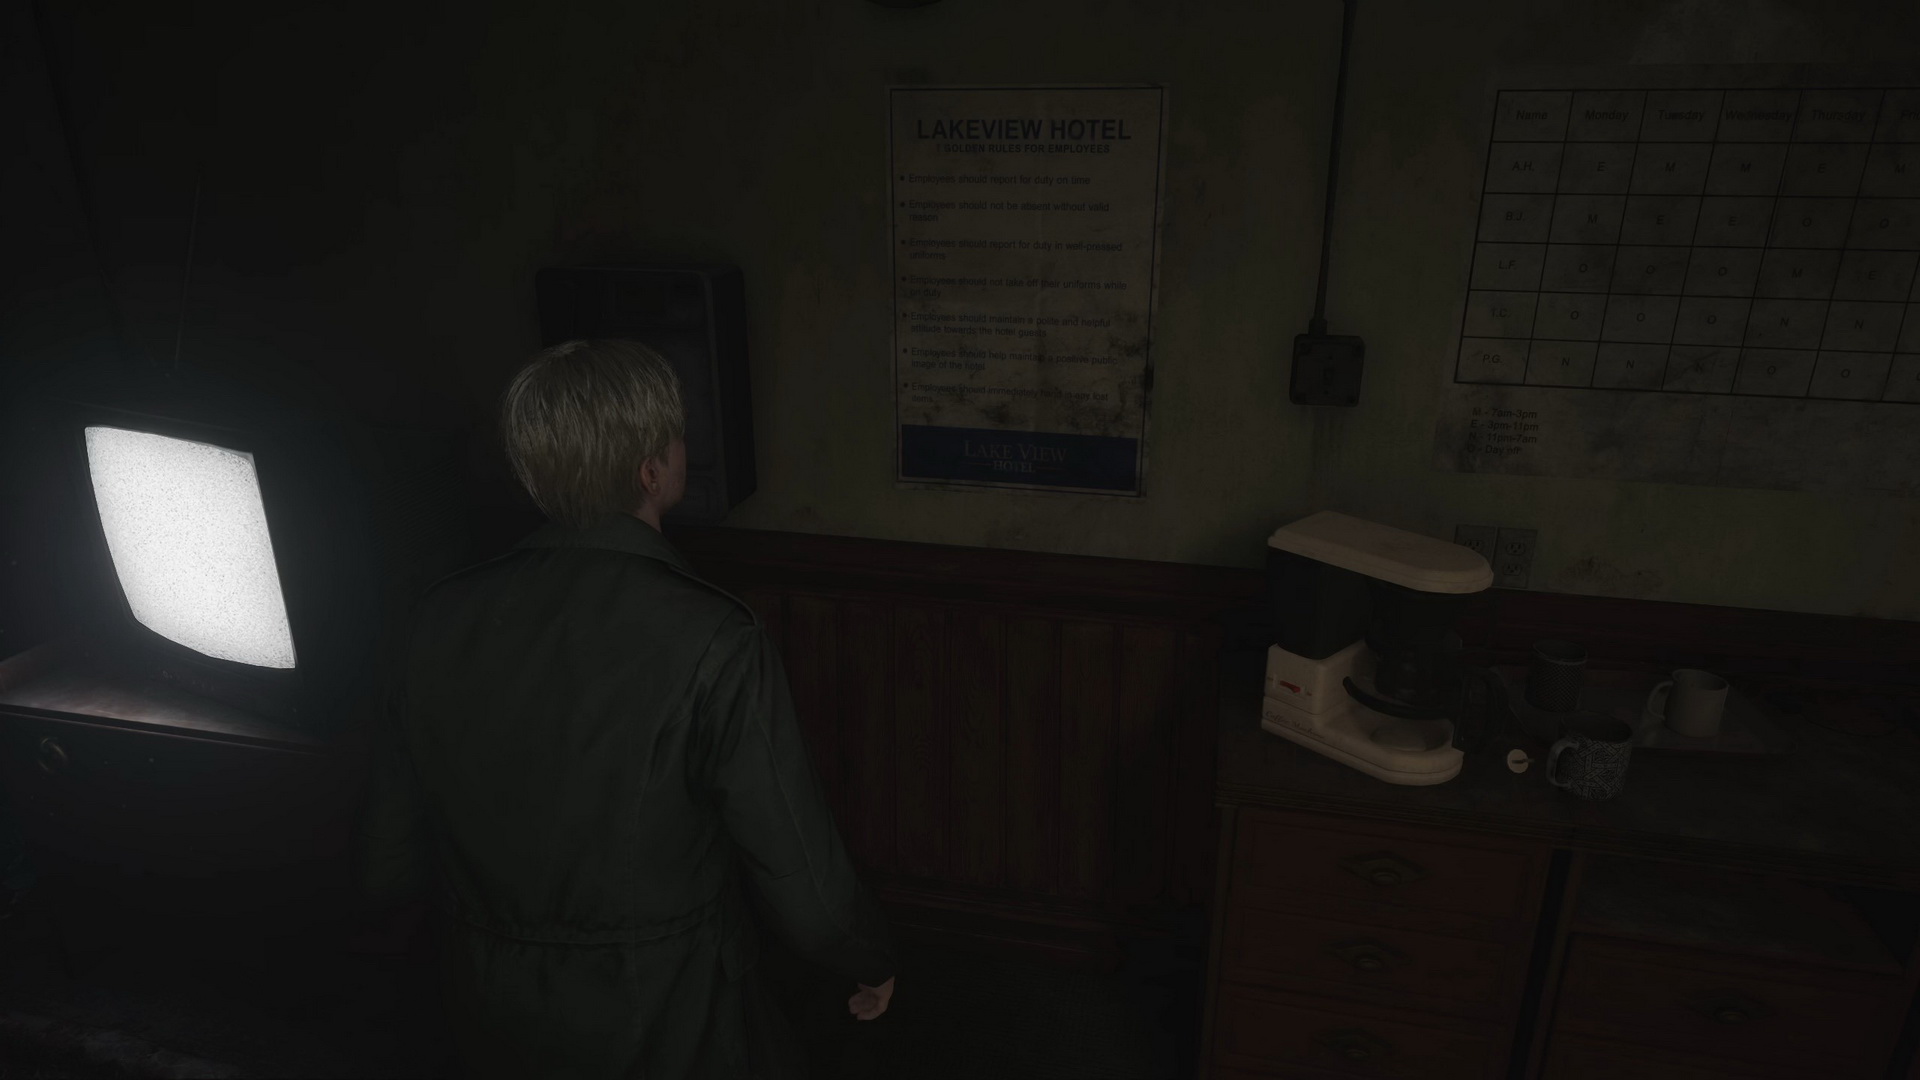
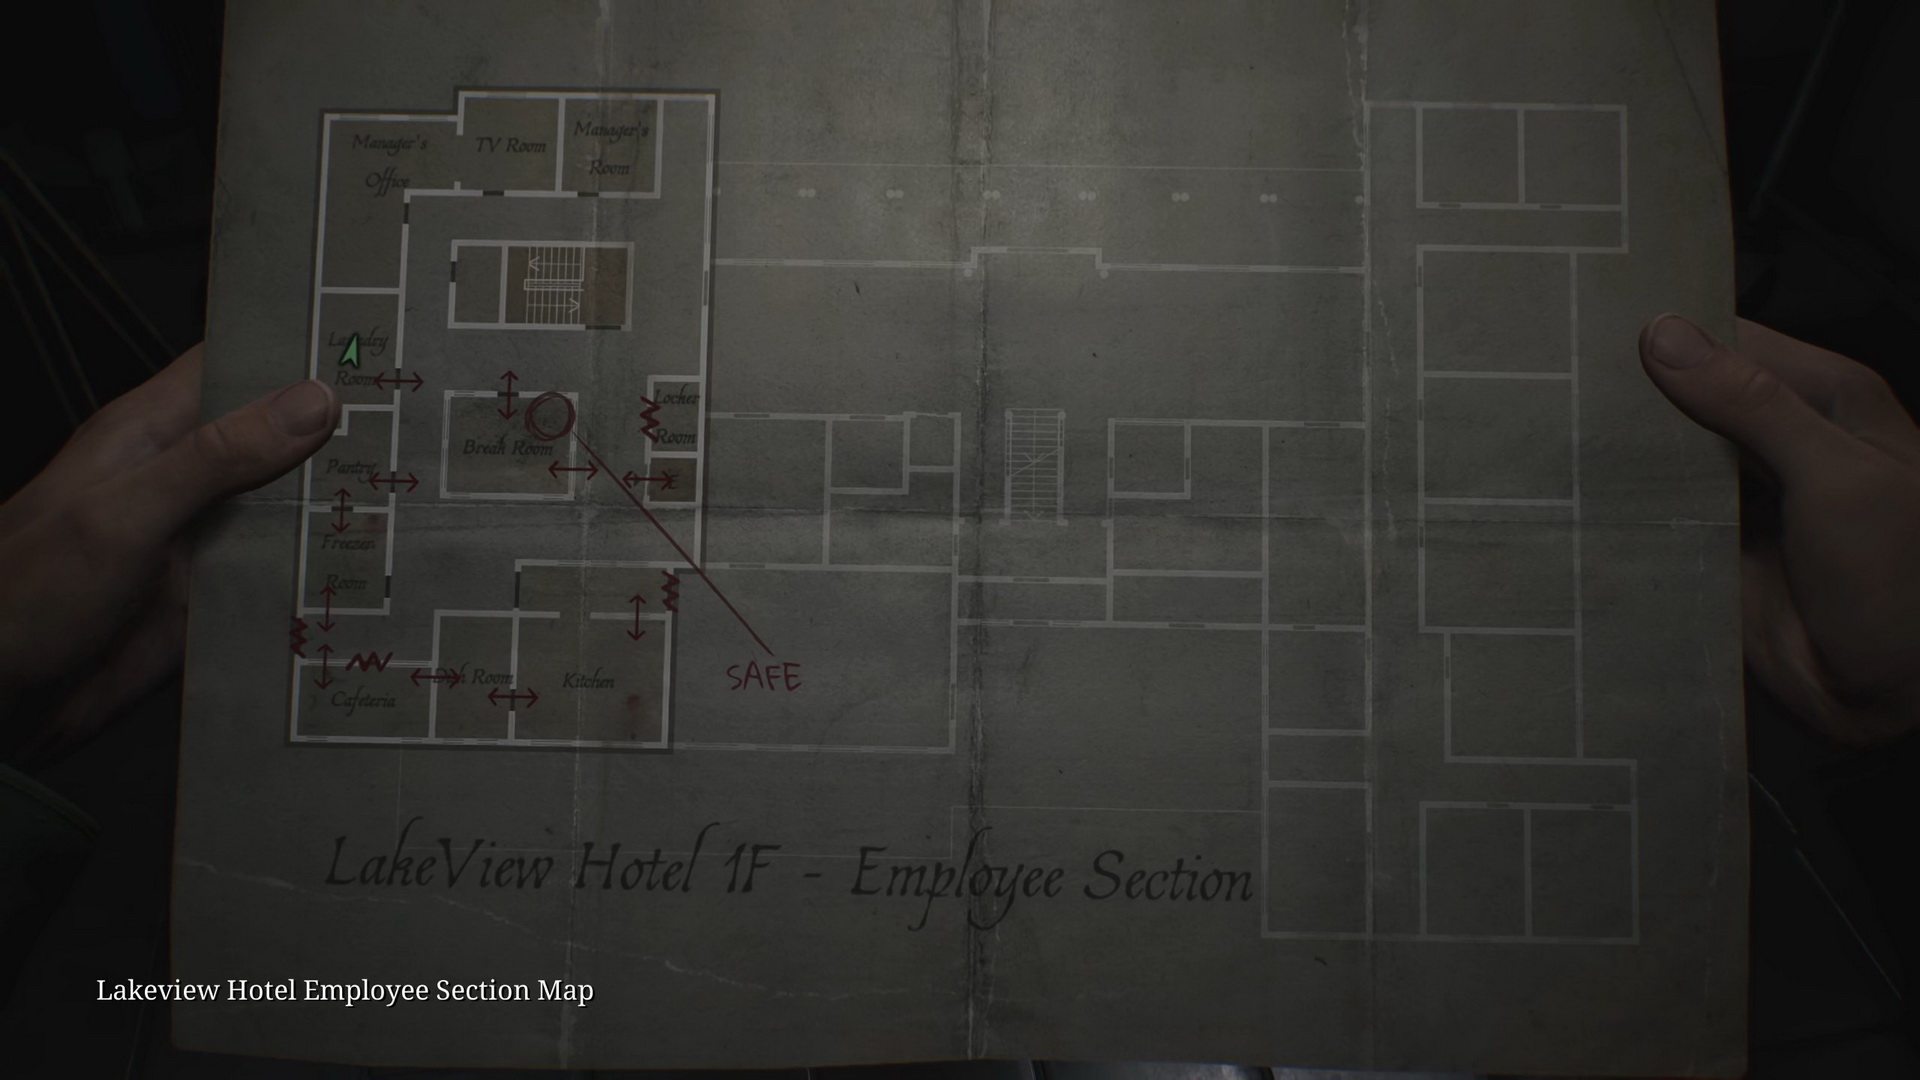
There are a couple of Mandarins in the area. Be careful and avoid enemies here since you don't have any weapons now. Go ahead and enter the Break Room. Take the Lakeview Hotel Employee Section Maps from the right wall. Next, you can check a heater in the corner and a poster for the employees on another wall.
 |
 |
 |
 |
Also, in the room, you will find a locked safe.
Note: You can skip collecting the gemstones and solving the gem box puzzle, as the Break Room safe code will always be the same. Go directly to the solution if you choose to do so.
Exit the Break Room using the west door and enter the Pantry across the corridor. Inspect a broken figurine on a shelf for Glimpse of the Past #25.
 |
 |
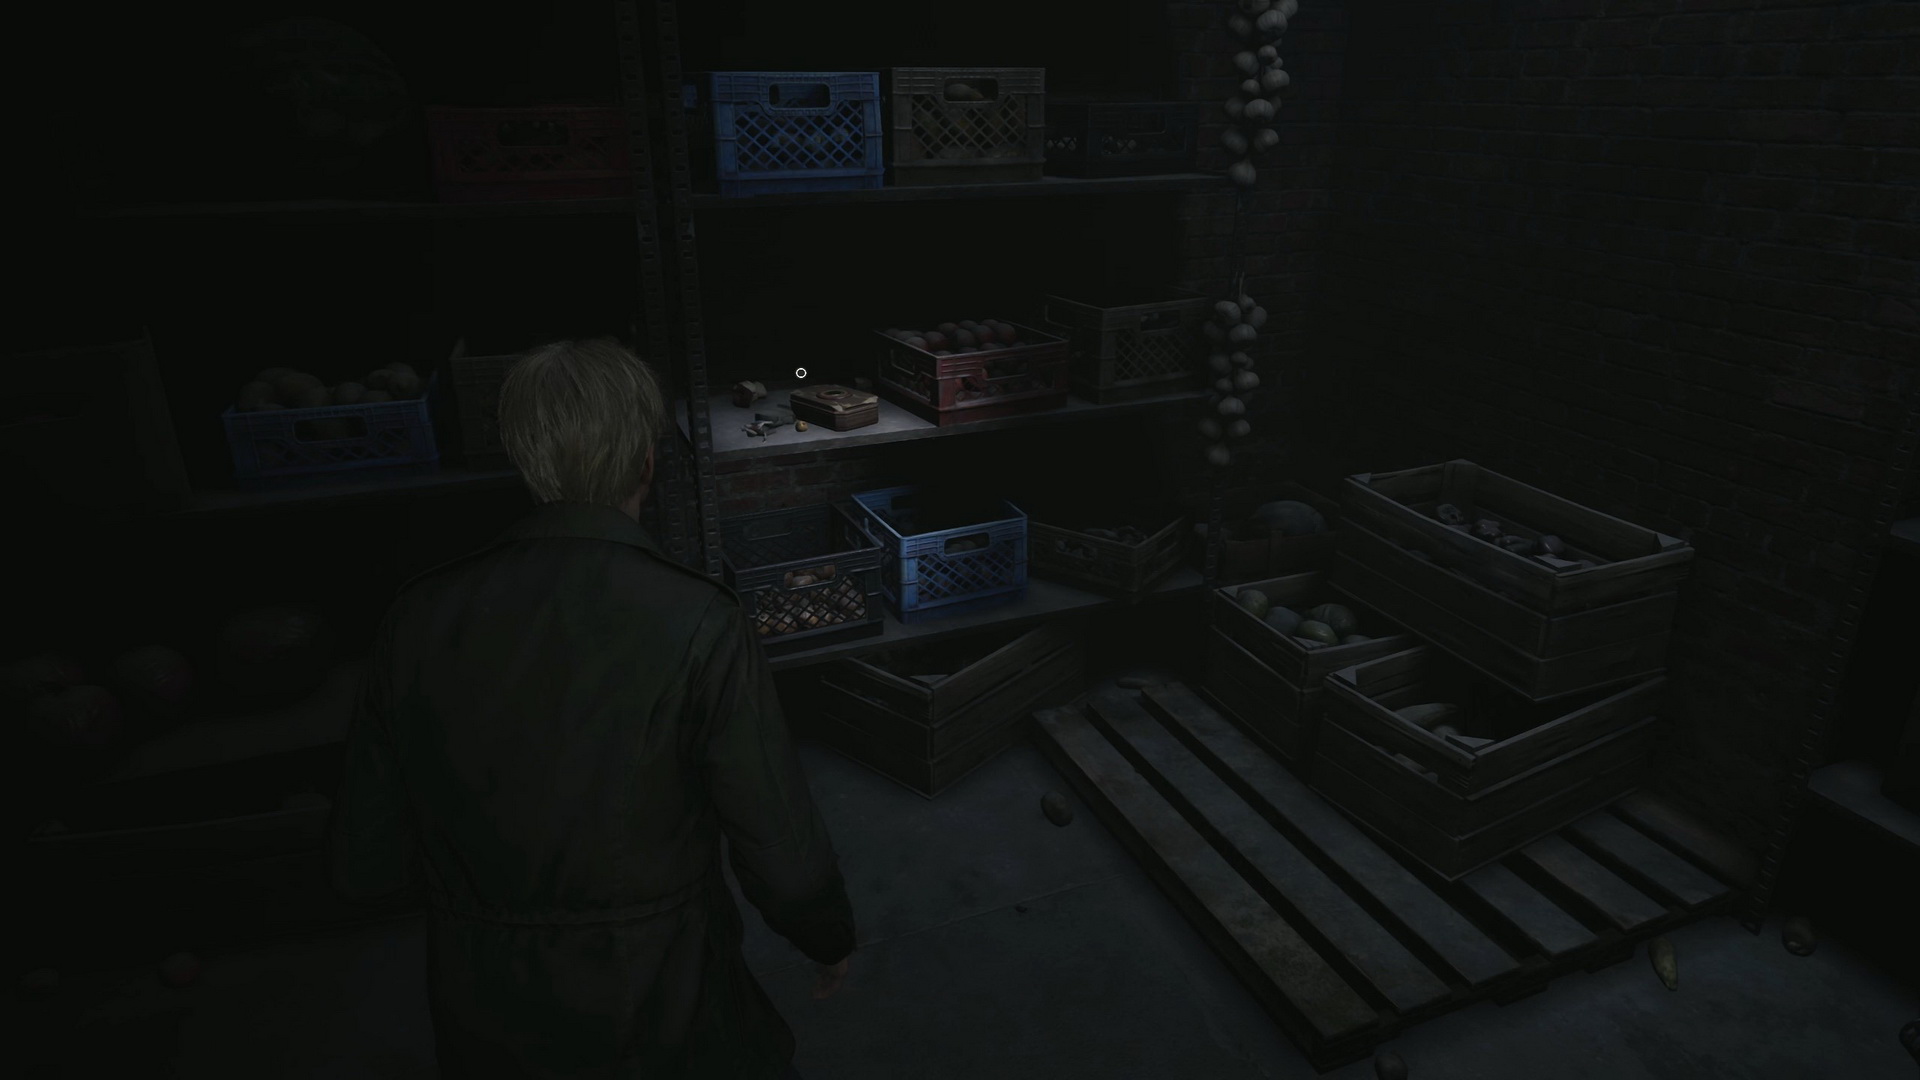
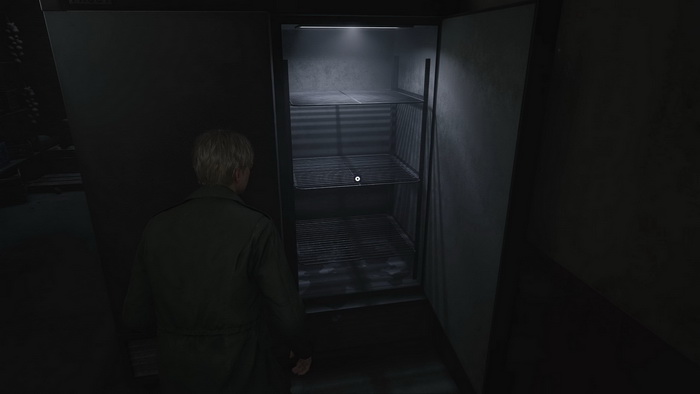
Proceed to the Freezer Room and take the 114 Blue Gemstone in an open freezer.
Use the vent opening to exit the Freezer Room and hop through the window into the Cafeteria. Squeeze through the wall opening to enter the Dish Room and proceed to the Kitchen. A Lying Figure is present in the room, so watch out. Quickly grab the 115 Green Gemstone on a kitchen counter.
Trophy/Achievement: It’s Bread |
 Examine the bread trays in the Kitchen back storage. |
Return to the corridor. The Laundry Room has nothing of interest except a blackboard message.
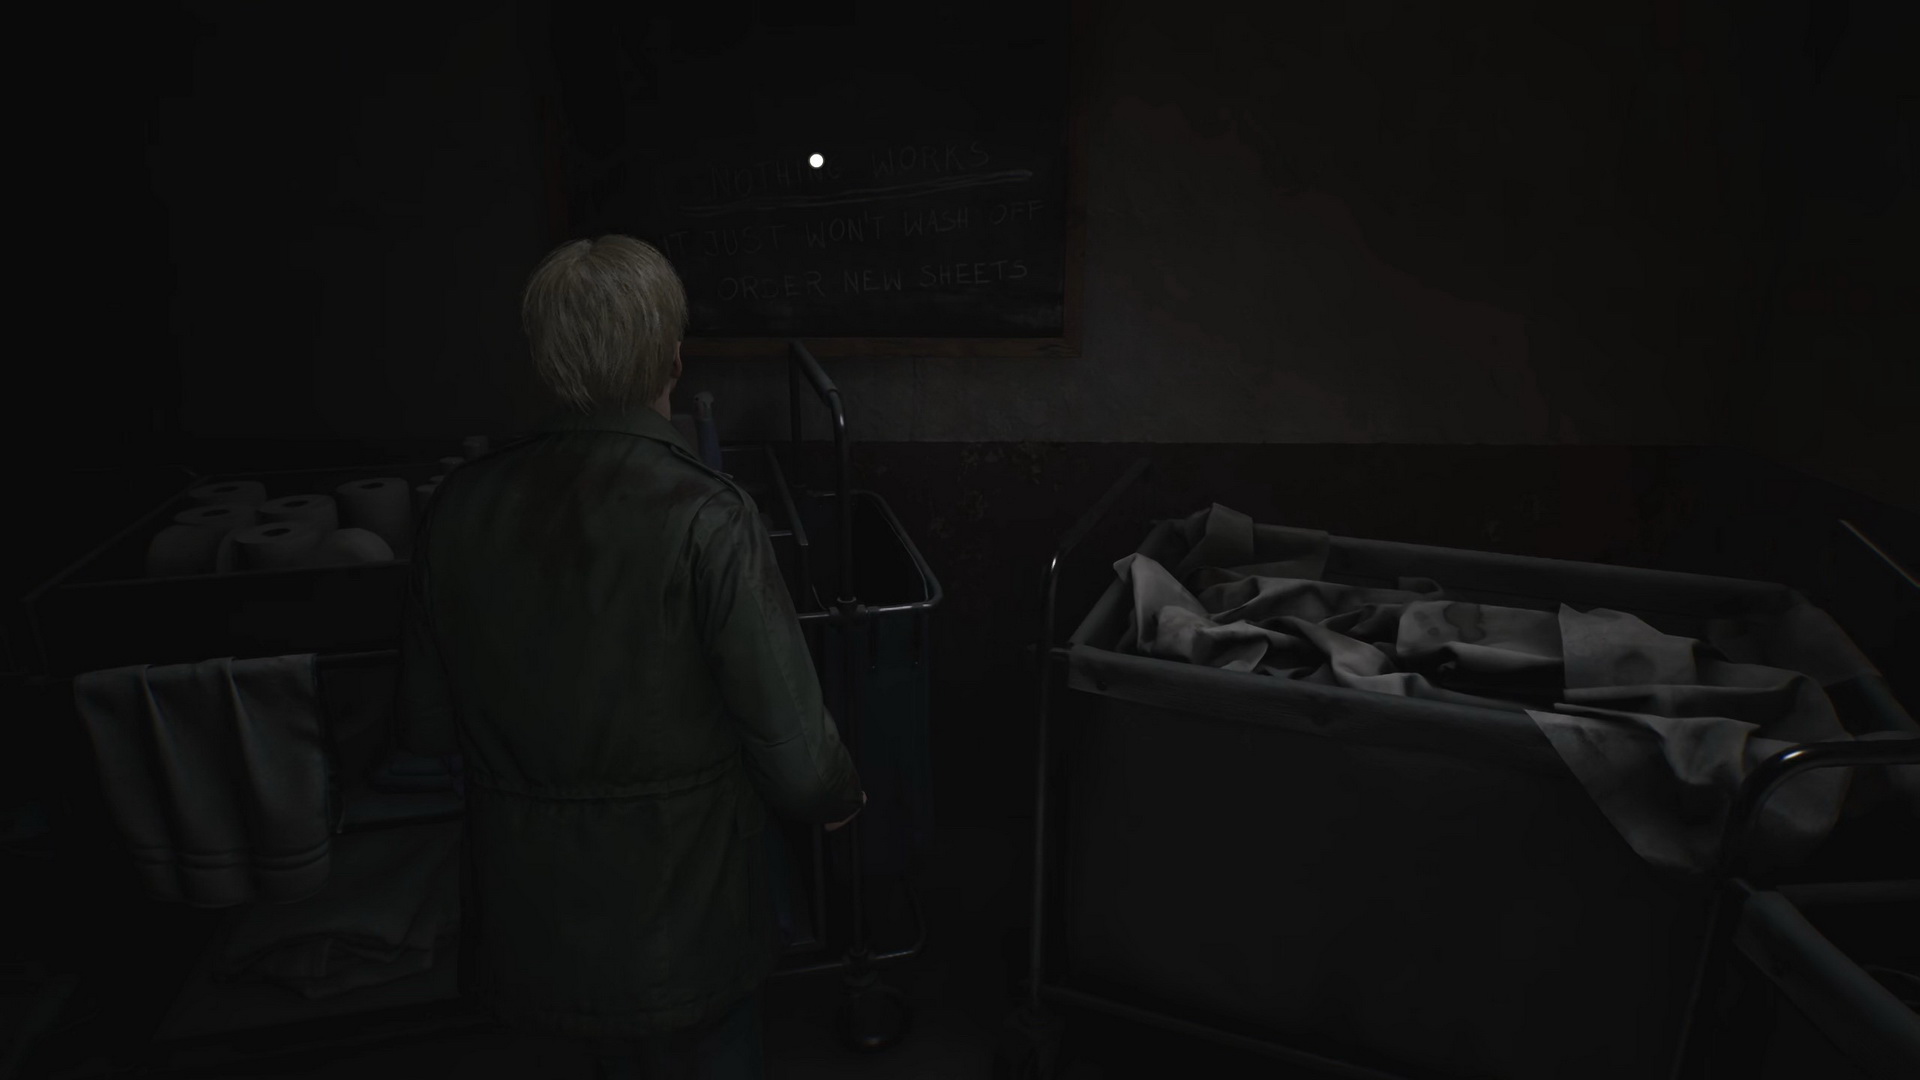 |
 |
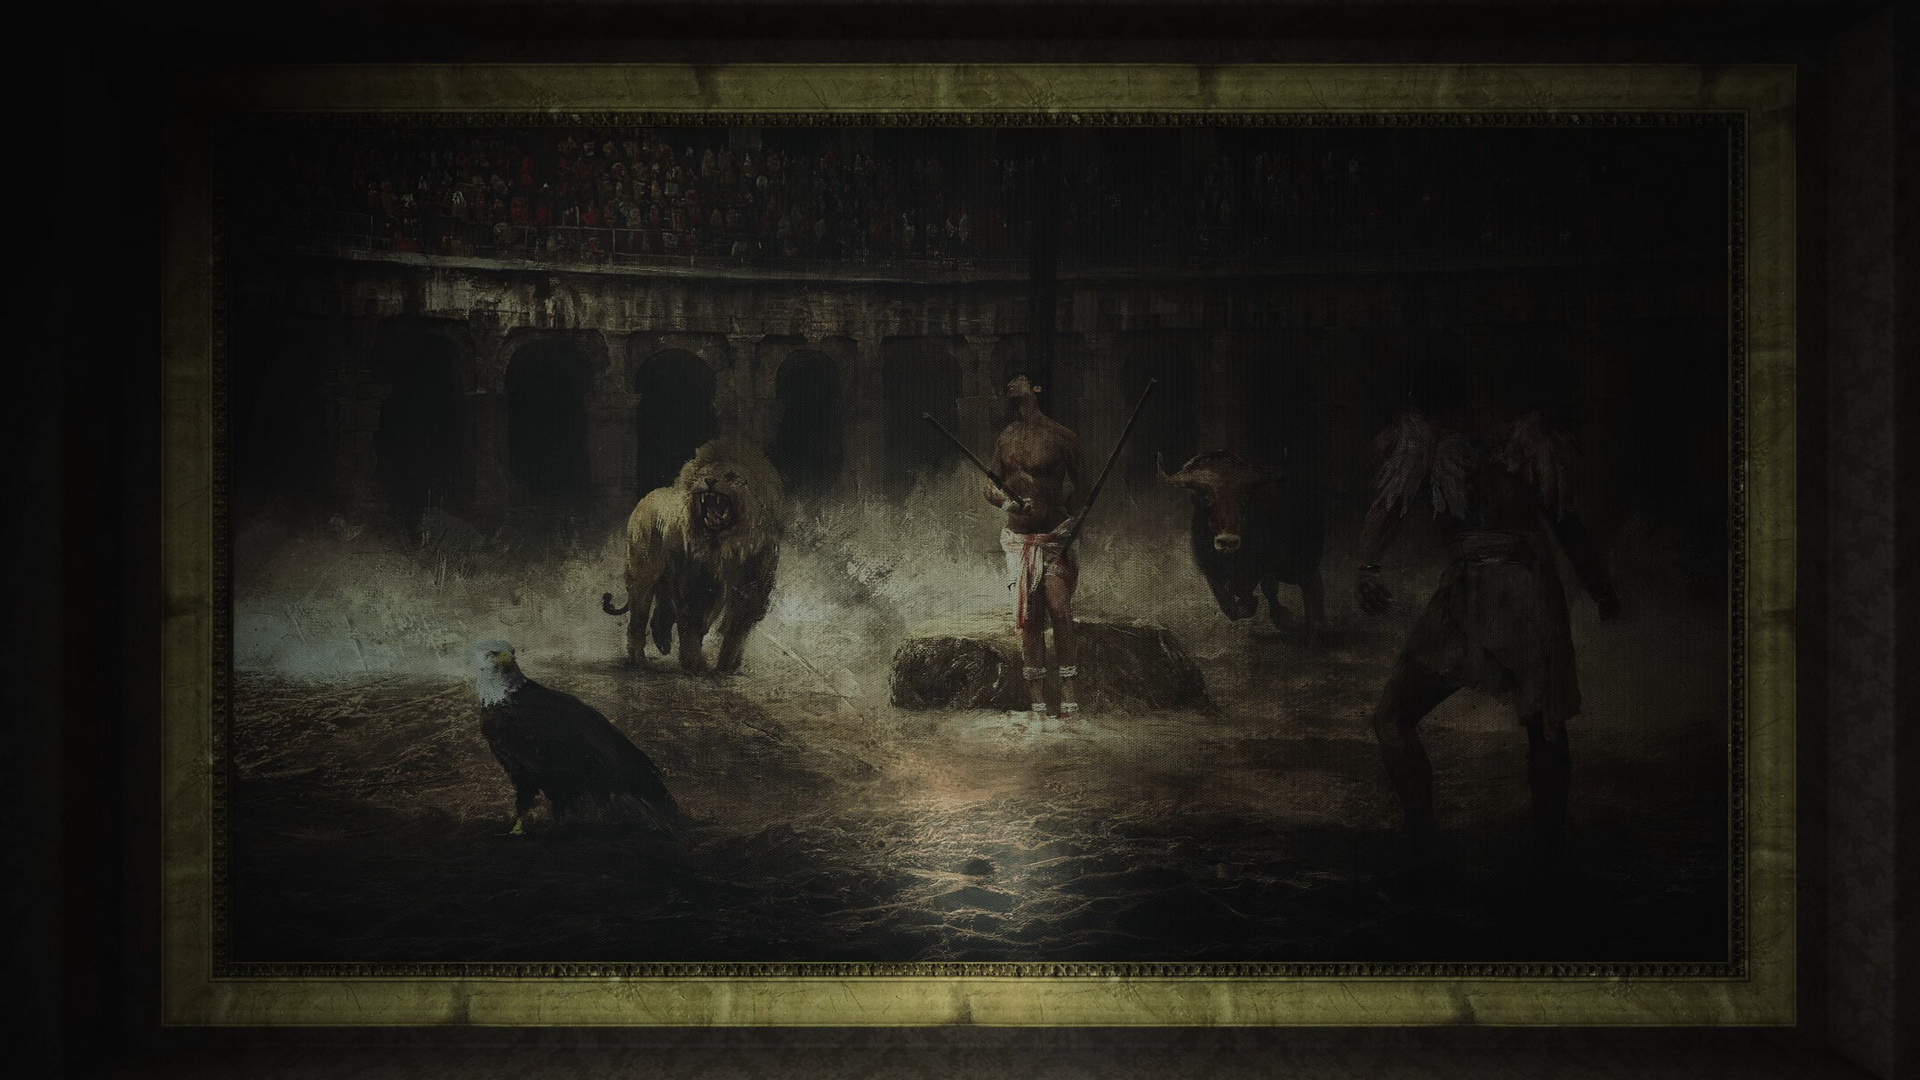
Go to the Manager's Office in the northern part. Inside, you can collect Shotgun Shells from a cabinet next to the entrance and a Health Drink in the southeastern corner. Push a wardrobe in the TV Room to enter Manager's Room. Find the 116 Red Gemstone in a decorative box on the desk.
Return to the Manager's Office and approach a gem box on the desk to solve the puzzle.
Puzzle: Gem Box
Note: This puzzle is entirely skippable as the safe code will always be the same.
To open the gem box, the gemstones must be placed so that the image in the center matches the painting on the wall in the same room.
Place the gemstones in the corresponding slots of the box to adjust the image:
- Blue Gemstone - lower left slot.
- Green Gemstone - upper left slot.
- Red Gemstone - upper right slot.
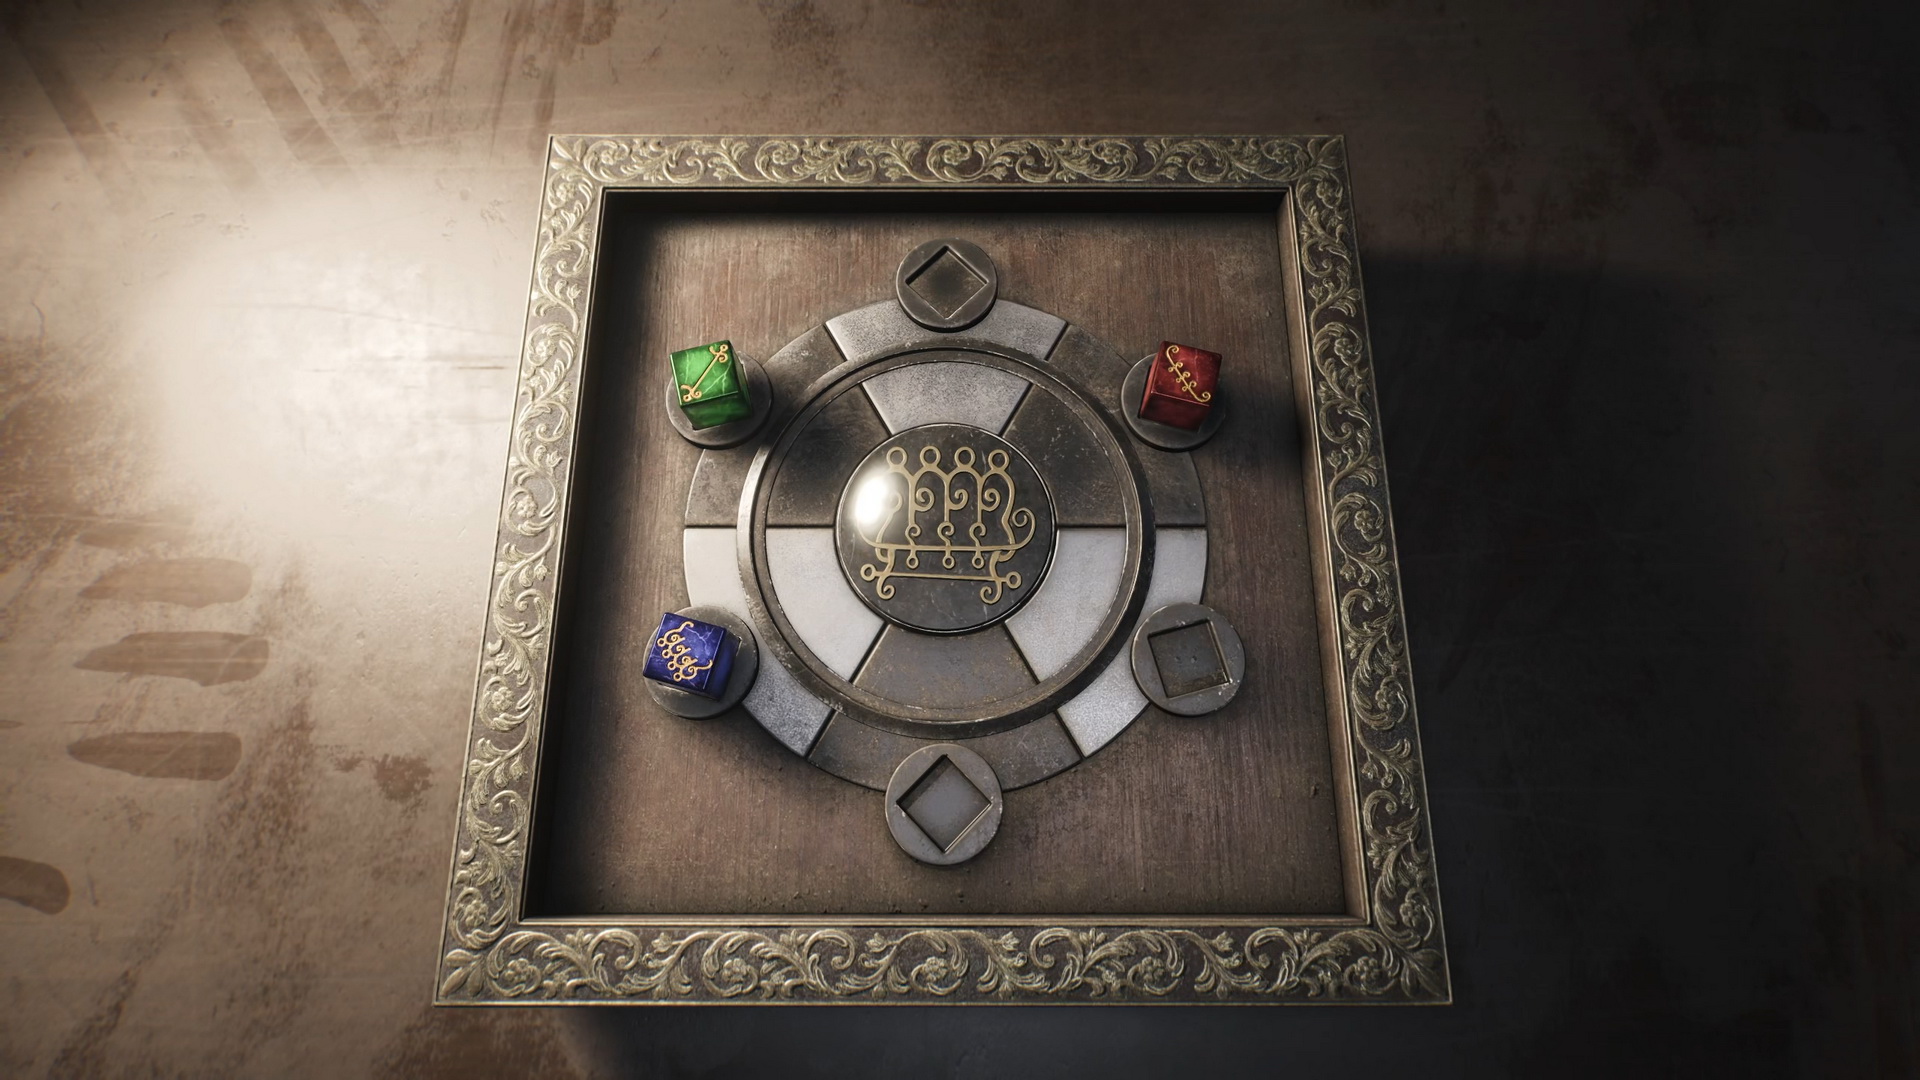
Inside you will find Memo #67: Keypad Numbers Memo that is the code for the Break Room safe. The safe code is always 7414.
Return to the Break Room and open the safe using the code 7414. Inside, you will find a 117 Video Tape and the 118 Basement Key.
Use the key to unlock the stairs and go down to the basement.
Basement
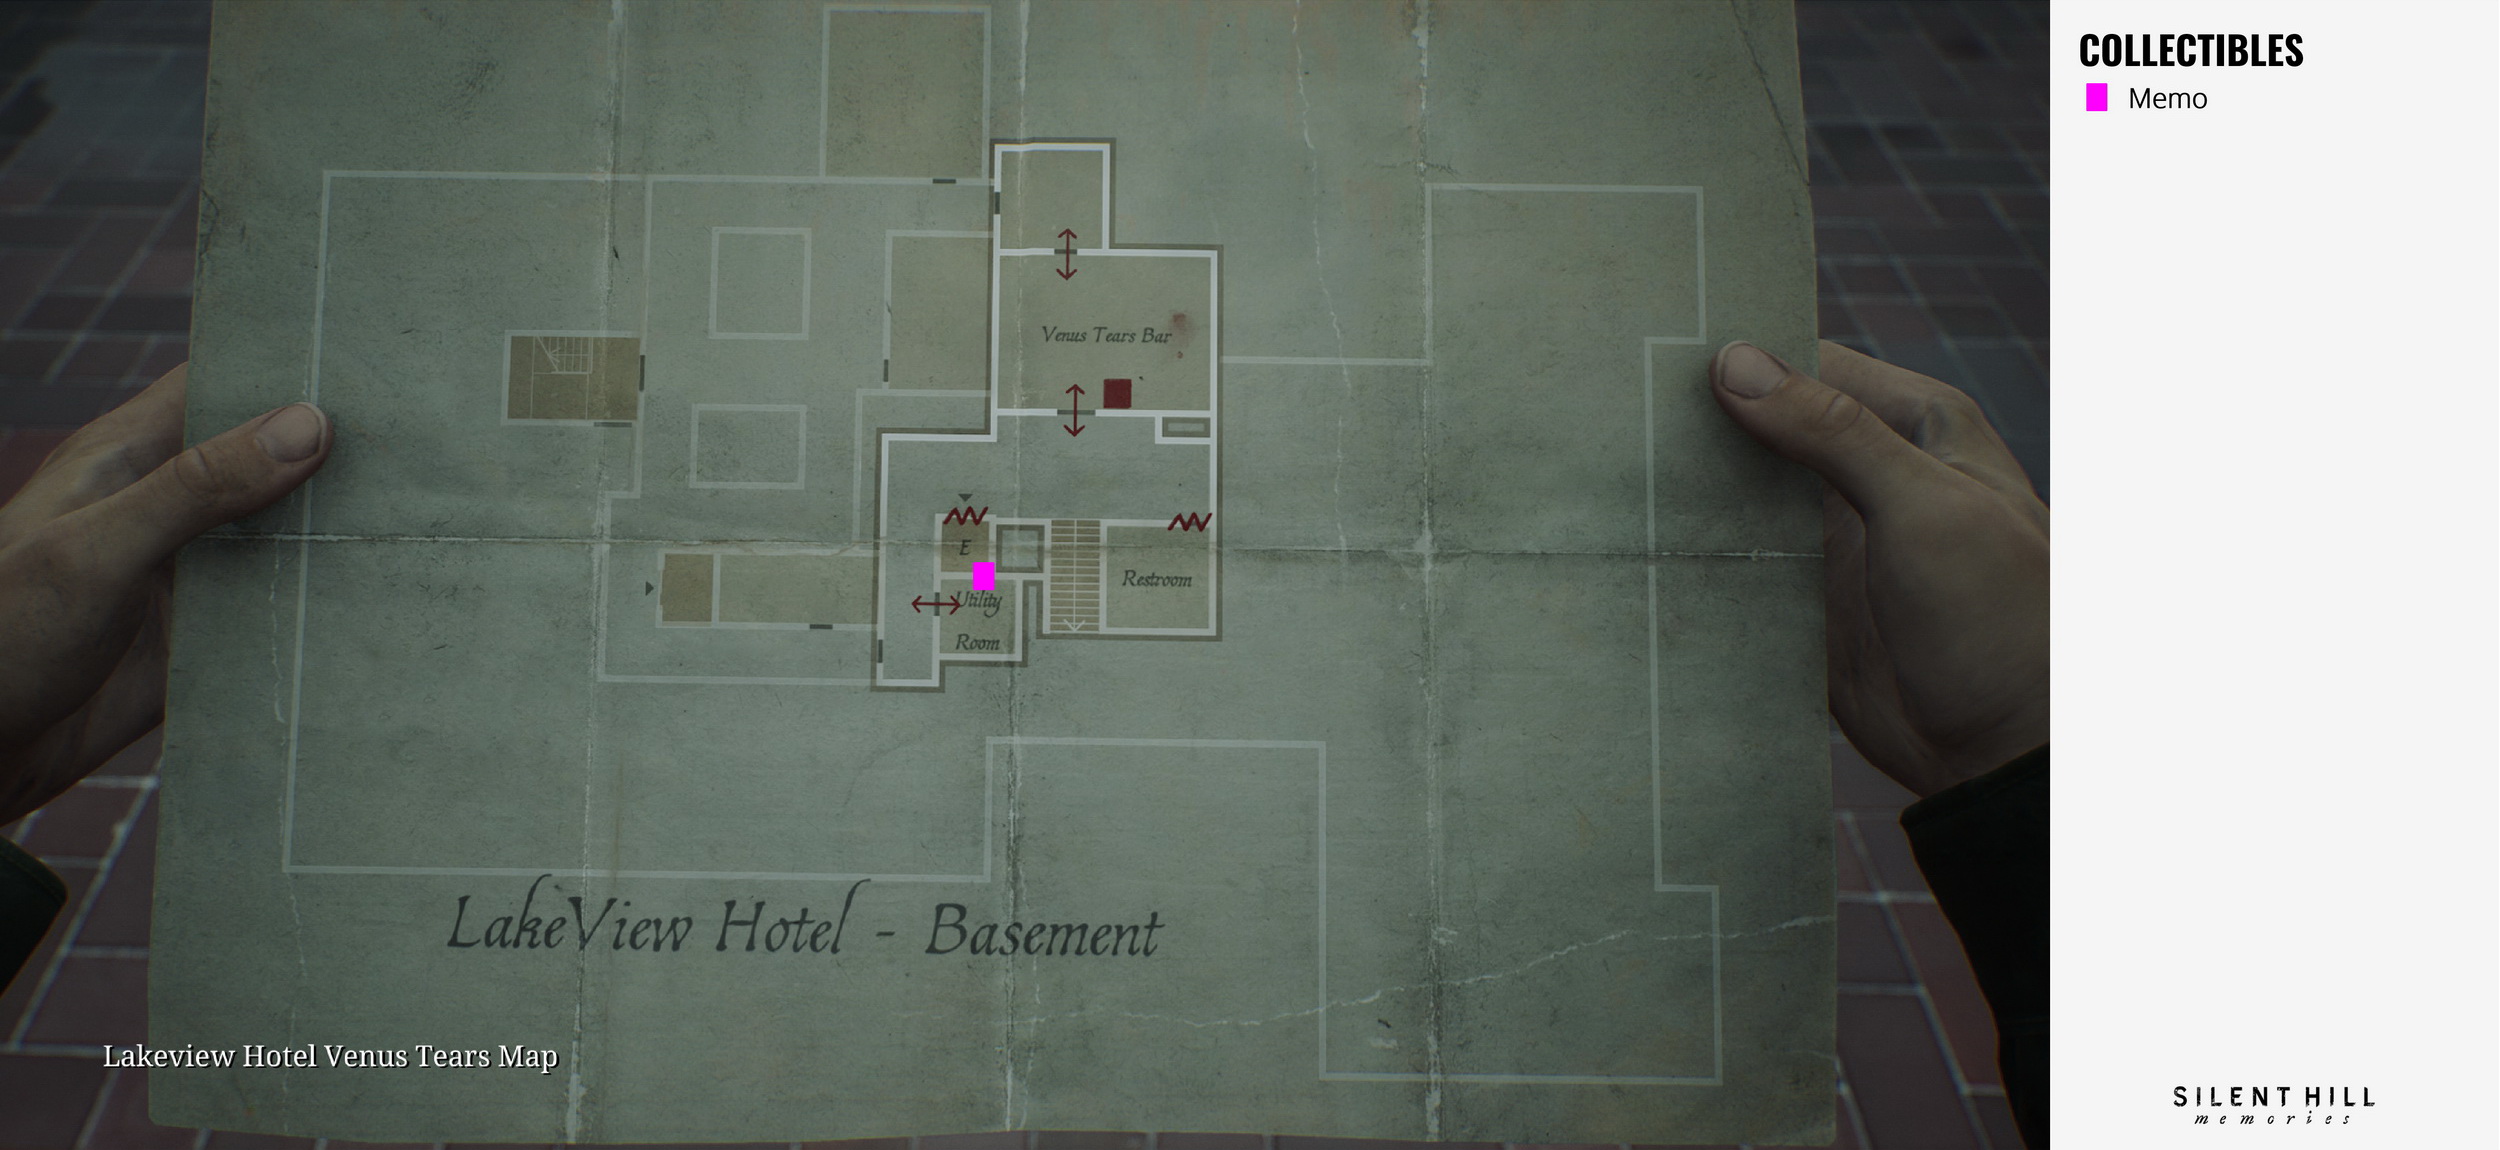
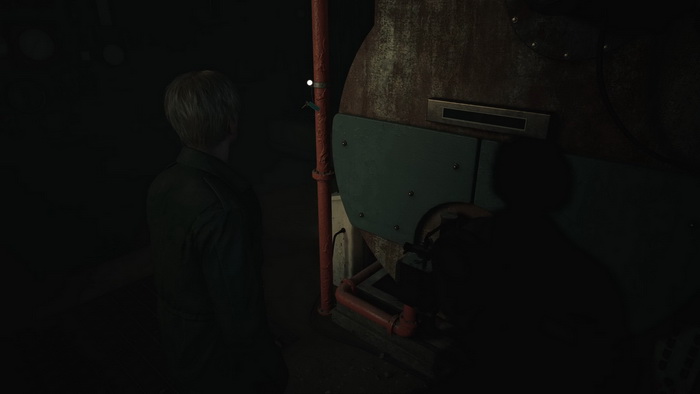
Another Mandarin is circling here. Find and enter the Maintenance Room in the southern part through a wall opening or a door to collect a 119 Pump Valve from a workbench.
Proceed to the Liquor Storage and squeeze through a wall opening. Use the Pump Valve to access the Boiler Room. On a desk, you can find a Syringe in a first-aid kit. Grab the 120 Venus Tears Bar Key attached to a red pipe.
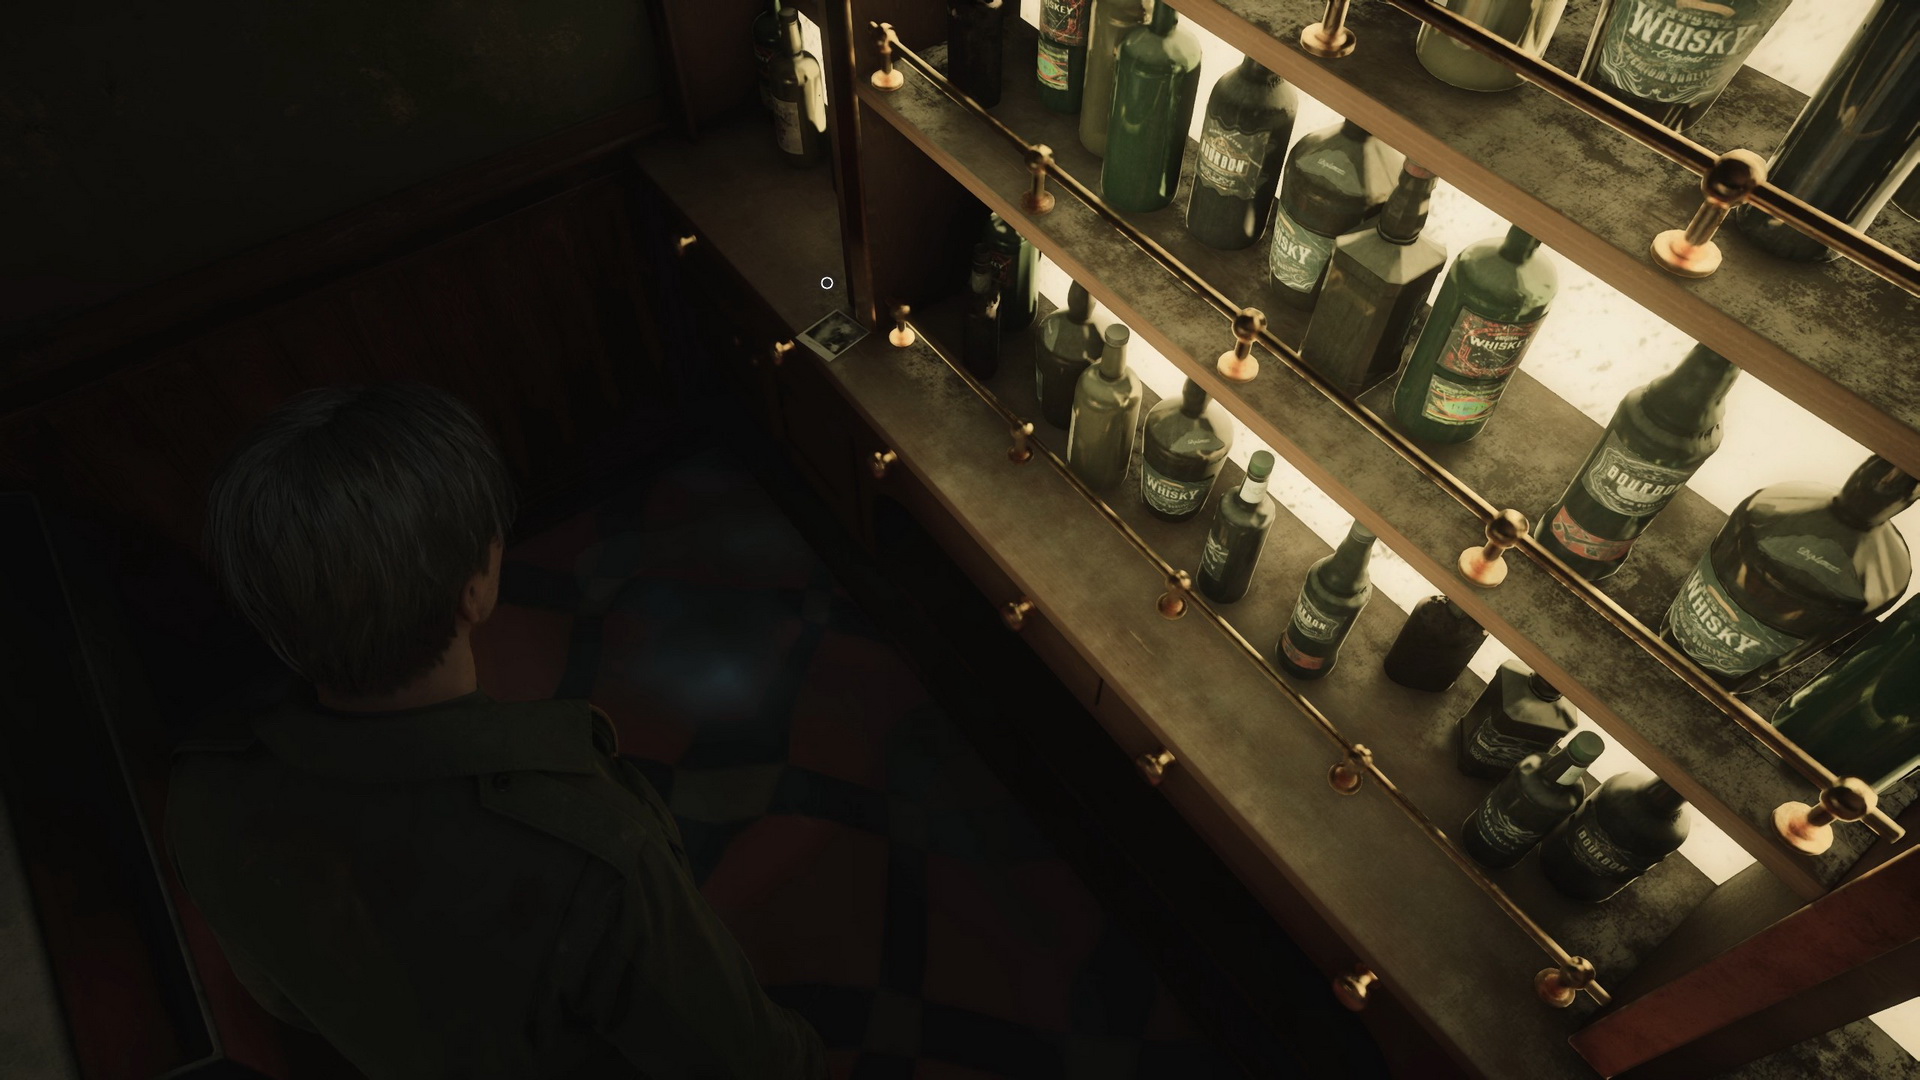
On your way out, take the Pump Valve, enter the bar's kitchen and use the valve again to unblock the exit. Strange Photo #24: "Better leave…" can be found on a shelf with bottles behind the bar.
 |
 |
In front of the jukebox, you will find the 121 The Little Mermaid Figurine.
This is the last figurine, so you can proceed to the music box puzzle now, but first, let's retrieve our belongings. Return to the Employee Elevator room on the second floor and take all the items stored in the cabinet.
Final Revelation
First Floor
Go to the music box in the main lobby on the first floor to solve the puzzle.
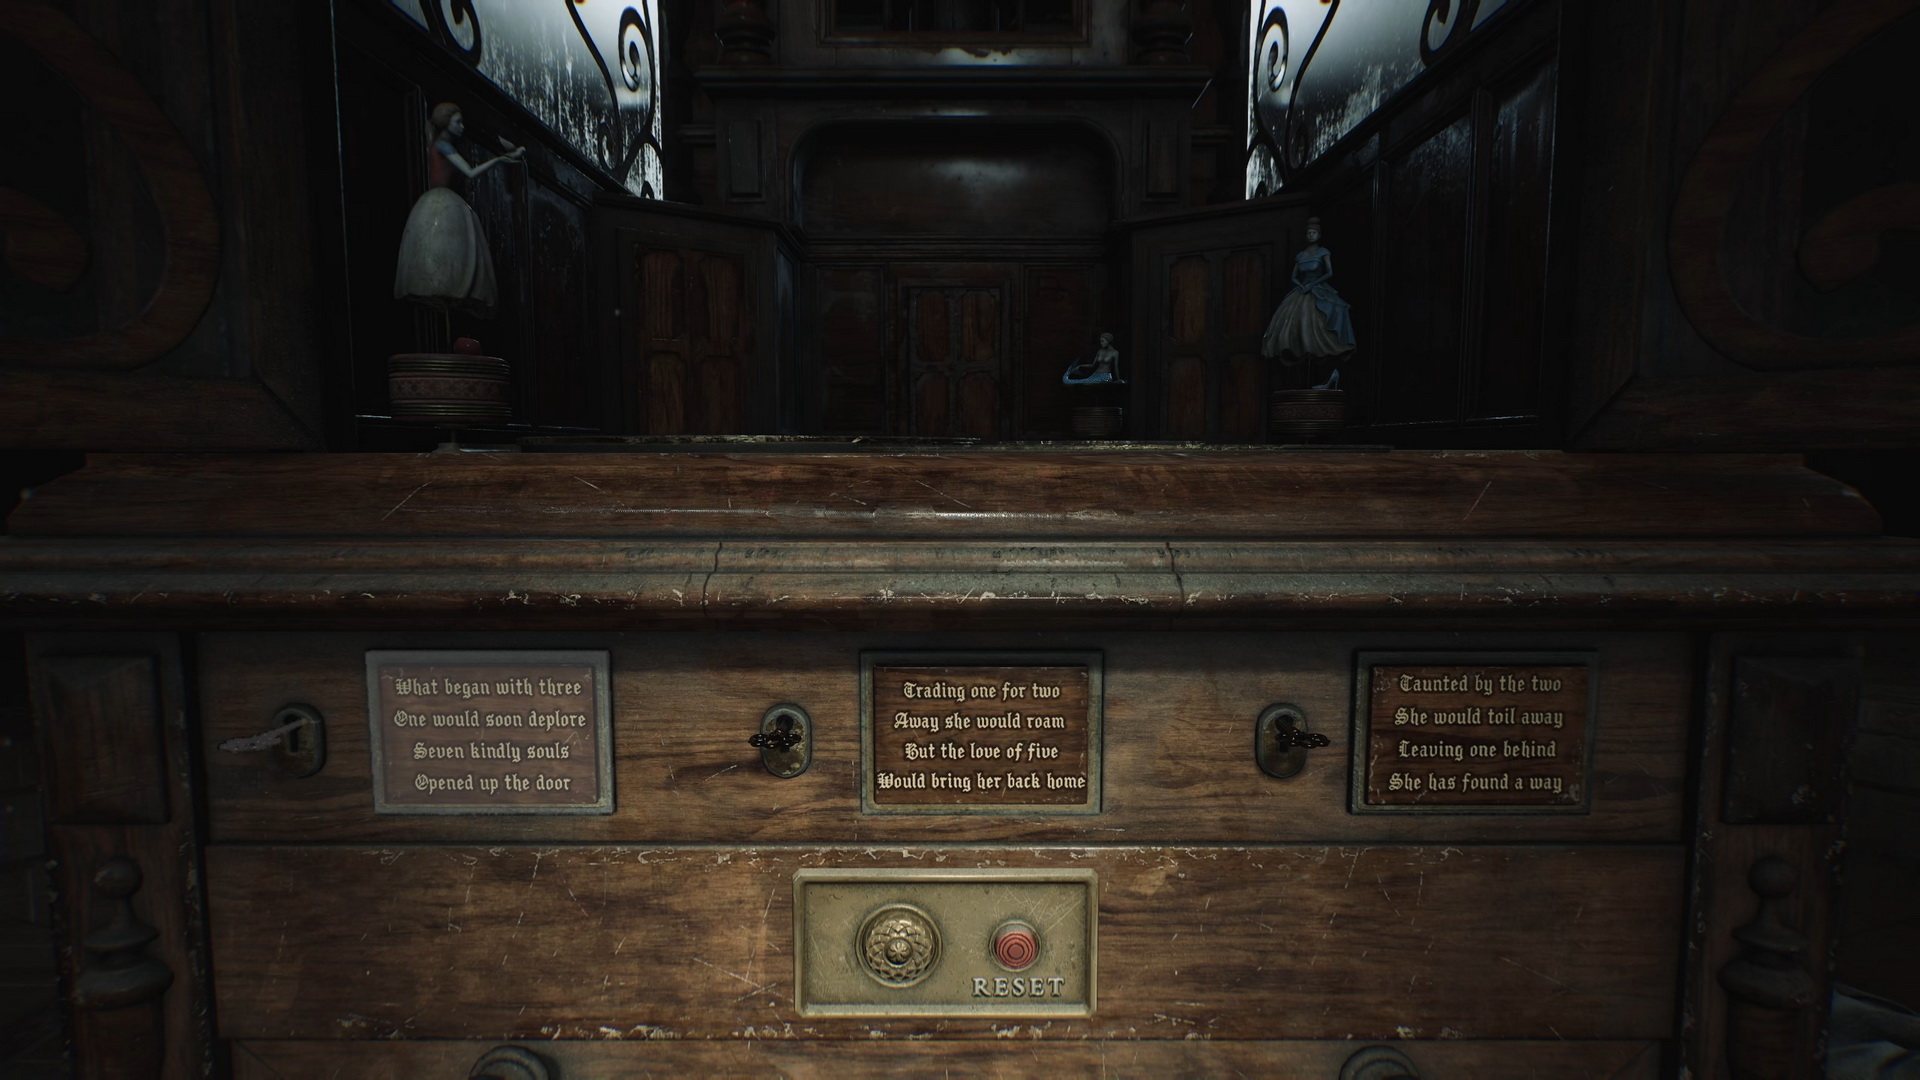
Puzzle: Music Box
Setting up the Discs
Use the Ornamental Key, obtained at the Check-In, to unlock the music box. Once you've collected all three figurines, place them into the corresponding slots:
- Snow White Figurine – left slot
- Cinderella Figurine – right slot
- The Little Mermaid Figurine – top slot
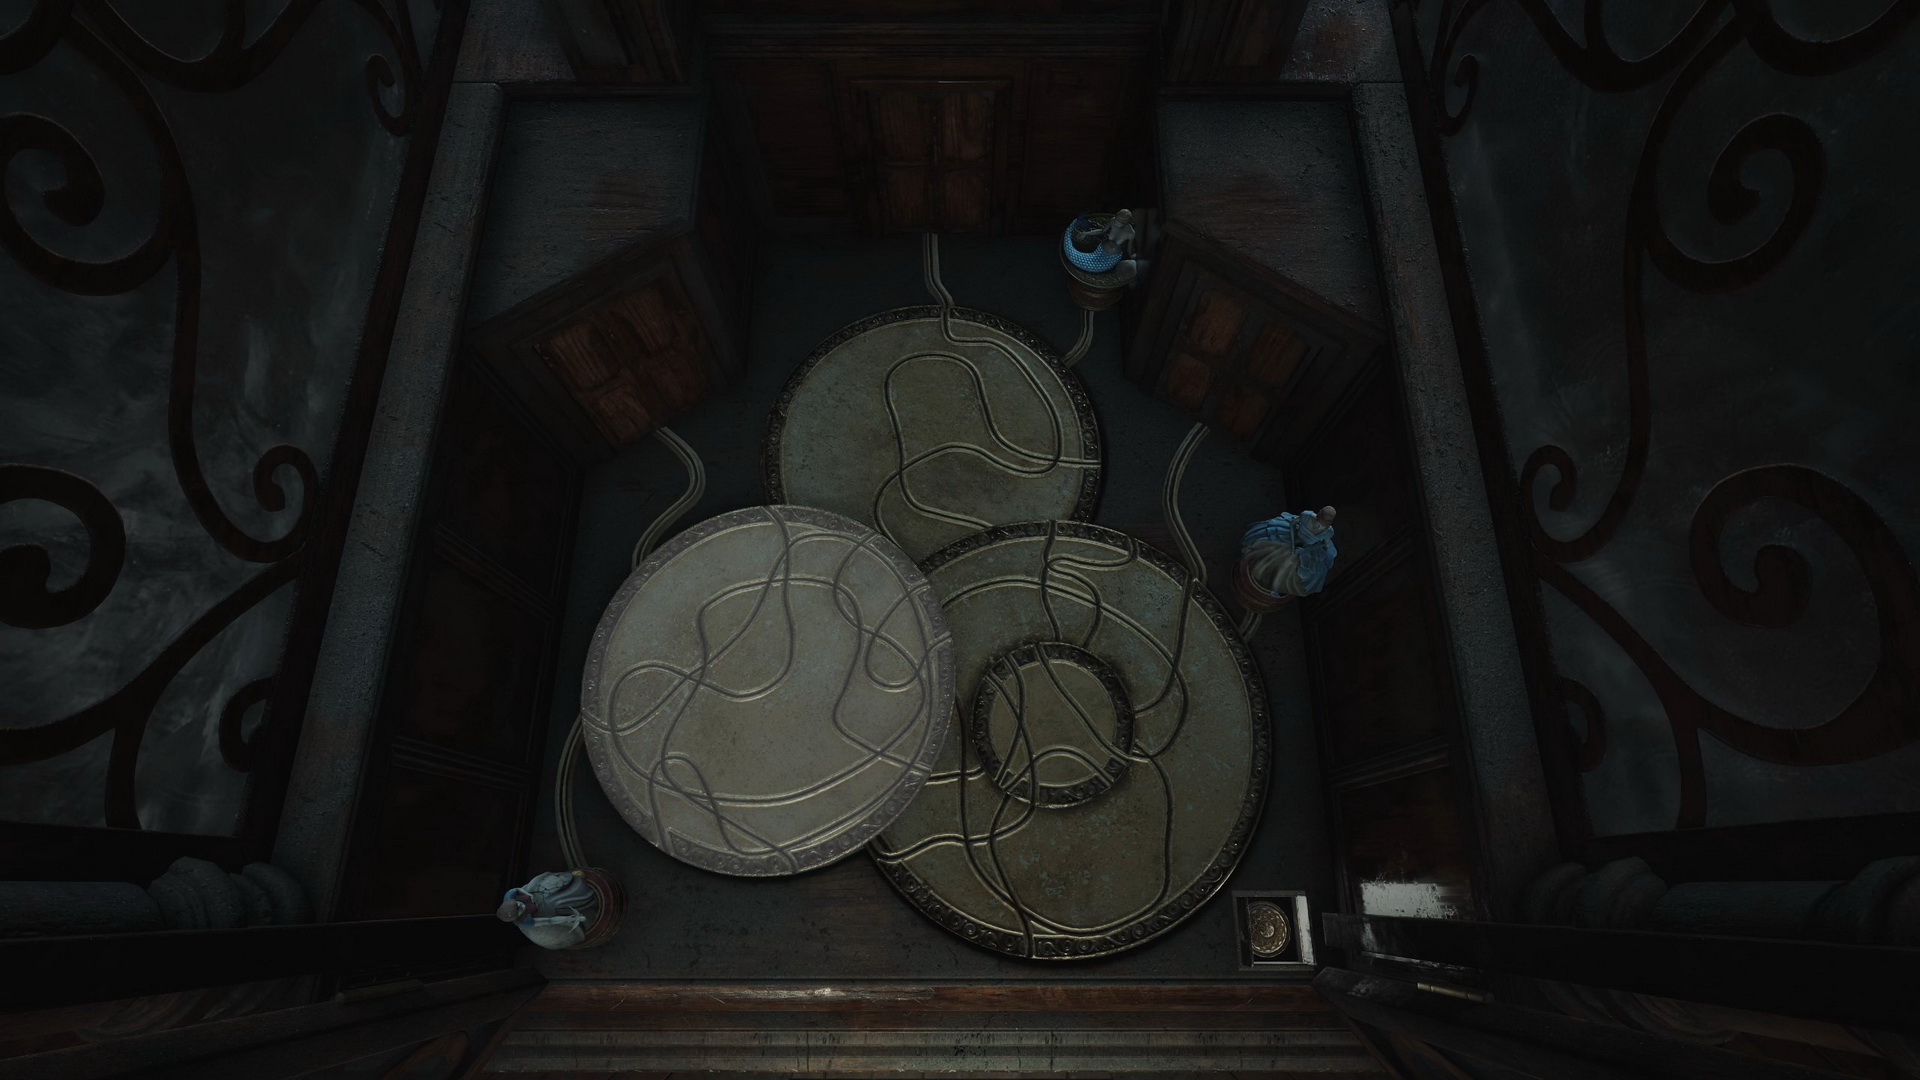
Now, you must spin the four circular plates to form uninterrupted tracks for the figurines so they can reach the doors. To do it, from the start, you can rotate the discs in the following manner:
- left disc - once
- top disc - thrice
- right disc - once
- right inner disc - five times
The tracks should now align as in the picture below. Press the button in the bottom right corner for a test to bring you to the next screen.
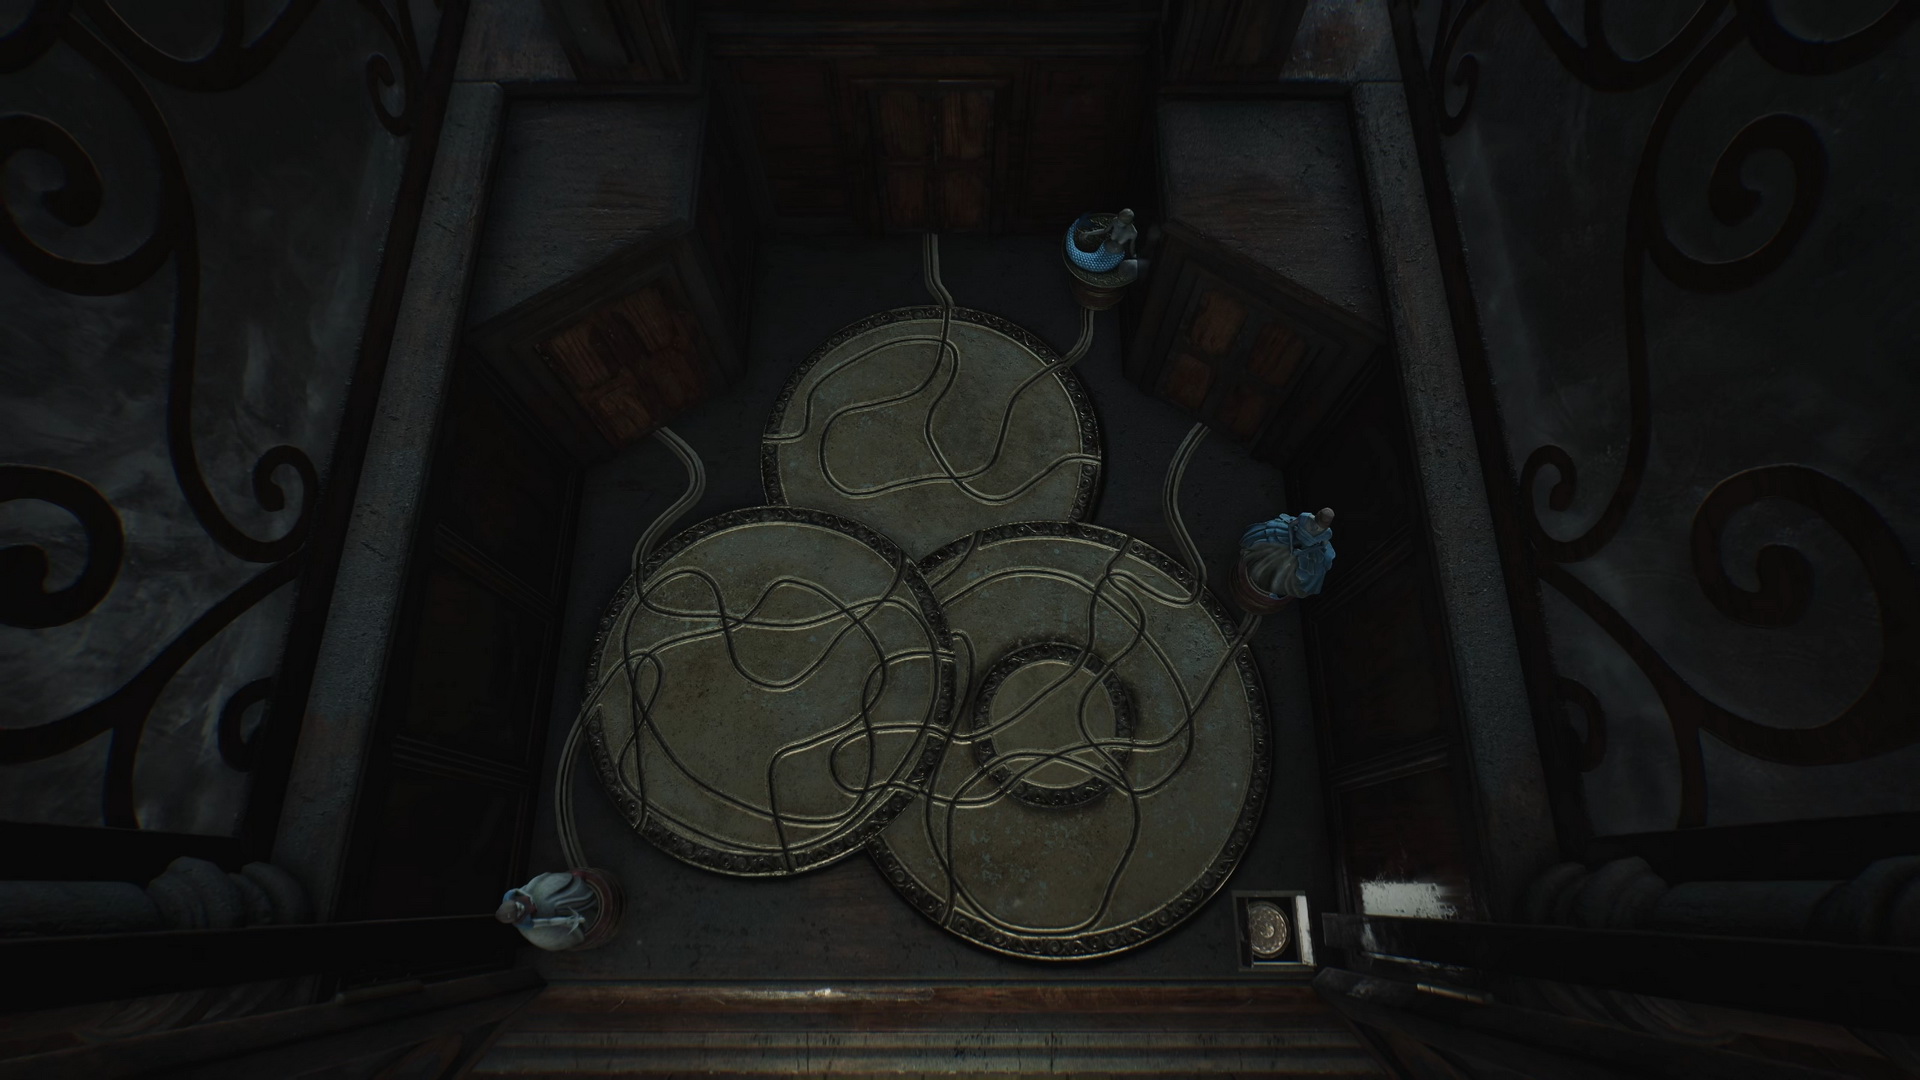
The final solution with the three poems will depend on your riddle difficulty level. You will need to turn each key a certain number of times per each poem. Note that you can press the red Reset button if you make a mistake when turning the keys.
Light
On light riddle difficulty, the poems will look like these:
Snow White
Once she couldn't stay
Once she lost her way
Seven kindly souls
Would not let her strayThe Little Mermaid
All that she would do
Was to yearn for two
Just to walk above
With the man she'd loveCinderella
In the dead of night
She would take her flight
Leaving one behind
For the prince to find
Here, the solutions are very easy. Just look for the numbers in each poem. Snow White is saved from death in the forest by seven kind dwarves. The Little Mermaid yearned to have two legs to be with the prince. Cinderella left one of her glass shoes behind when fleeing from a royal ball.
The final combination for light difficulty is 7 - 2 - 1. Turn the first key seven times, the second key twice and the third key once, then press the golden button to solve the puzzle.
Standard
On standard riddle difficulty, the poems will look like these:
Snow White
What began with three
One would soon deplore
Seven kindly souls
Opened up the doorThe Little Mermaid
Trading one for two
Away she would roam
But the love of five
Would bring her back homeCinderella
Taunted by the two
She would toil away
Leaving one behind
She has found a way
Snow White’s tale begins with a queen pricking her finger while sewing in the snow, wishing for a daughter with skin as white as snow, lips as red as blood, and hair as black as ebony. She gives birth to Snow White but dies soon after. A year later, the king remarries. At seven, Snow White’s beauty surpasses her stepmother’s, sparking the queen’s envy. She orders a huntsman to kill Snow White, but he spares her. Snow White flees and finds refuge with seven kind dwarfs. The answer for the first poem is seven.
The Little Mermaid lives under the sea with her father, the Sea King, her grandmother, and five sisters. At fifteen, she is allowed to visit the surface, where she falls in love with a prince. Desperate to be with him, she trades her voice for legs in a deal with the Sea Witch. Though the prince is enchanted by her beauty and makes her his closest companion, he marries another princess. Heartbroken, the Little Mermaid faces a choice: kill the prince with a dagger her sisters obtained from the Sea Witch or sacrifice herself. Unable to harm him, she throws the dagger and herself into the sea. Instead of dying, she transforms into a spirit of the air, gaining an immortal soul as a reward for her selflessness and rejoins her five loving sisters. The answer for the second poem is five.
Cinderella is a kind girl forced into servitude by her cruel stepmother and two stepsisters after her father’s death. When the king hosts a royal ball, her fairy godmother helps her attend by transforming rags into a gown and creating a magical carriage, warning her that the spell will break at midnight. Cinderella captures the prince’s heart but flees as the clock strikes twelve, leaving one of her delicate glass slippers behind. The prince uses the slipper to find her, and they marry, granting her the happy life she deserves. The answer for the third poem is one.
The final combination for standard difficulty is 7 - 5 - 1. Turn the first key seven times, the second key five times and the third key once, then press the golden button to solve the puzzle.
Hard
On hard riddle difficulty, the poems will look like these:
Snow White
In a slumber deep
In a poisoned sleep
On a bed of stone
Dreamless, all aloneThe Little Mermaid
And so she wept in silence
With no prince to marry
Her life to be forfeit
Heartbroken and solitaryCinderella
When the clock would strike
Into the dead of night
Hastily she would delve
Alone, all by herself
The answers to these are surprisingly simple. All poems describe the states of loneliness using the words like "alone" and "solitary." The answer to every poem is, therefore, one.
The final combination for hard difficulty is 1 - 1 - 1, so turn each key once and press the golden button to solve the puzzle.
You will receive the 122 3F Corridor Key after solving the puzzle. Go to the third floor.
Third Floor
Unlock the gate to the third-floor corridor.
New Game+ Ending: Dog |
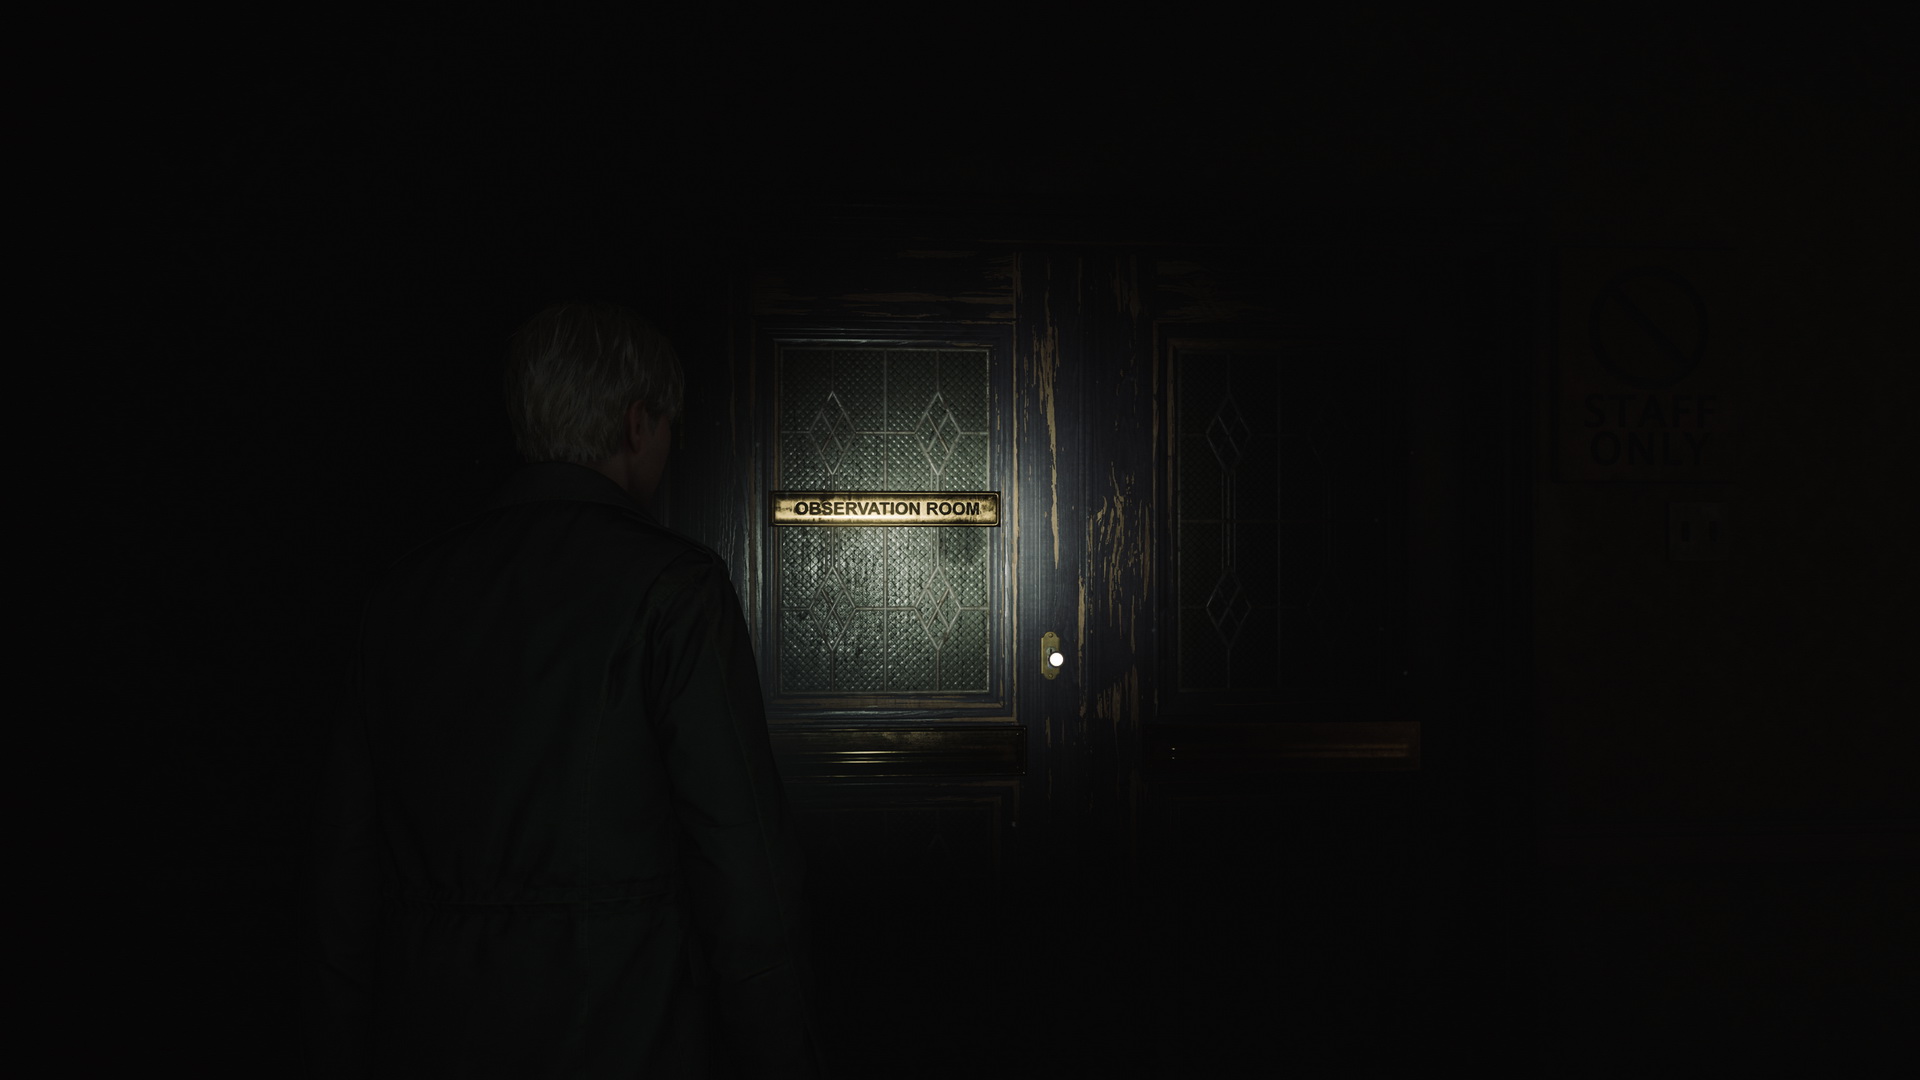 Use the Dog Key to enter the Observation Room (right next to Room 312) and immediately get the "Dog" ending. |
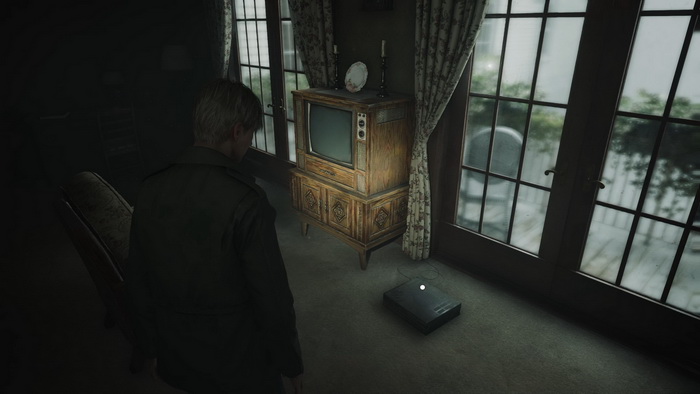
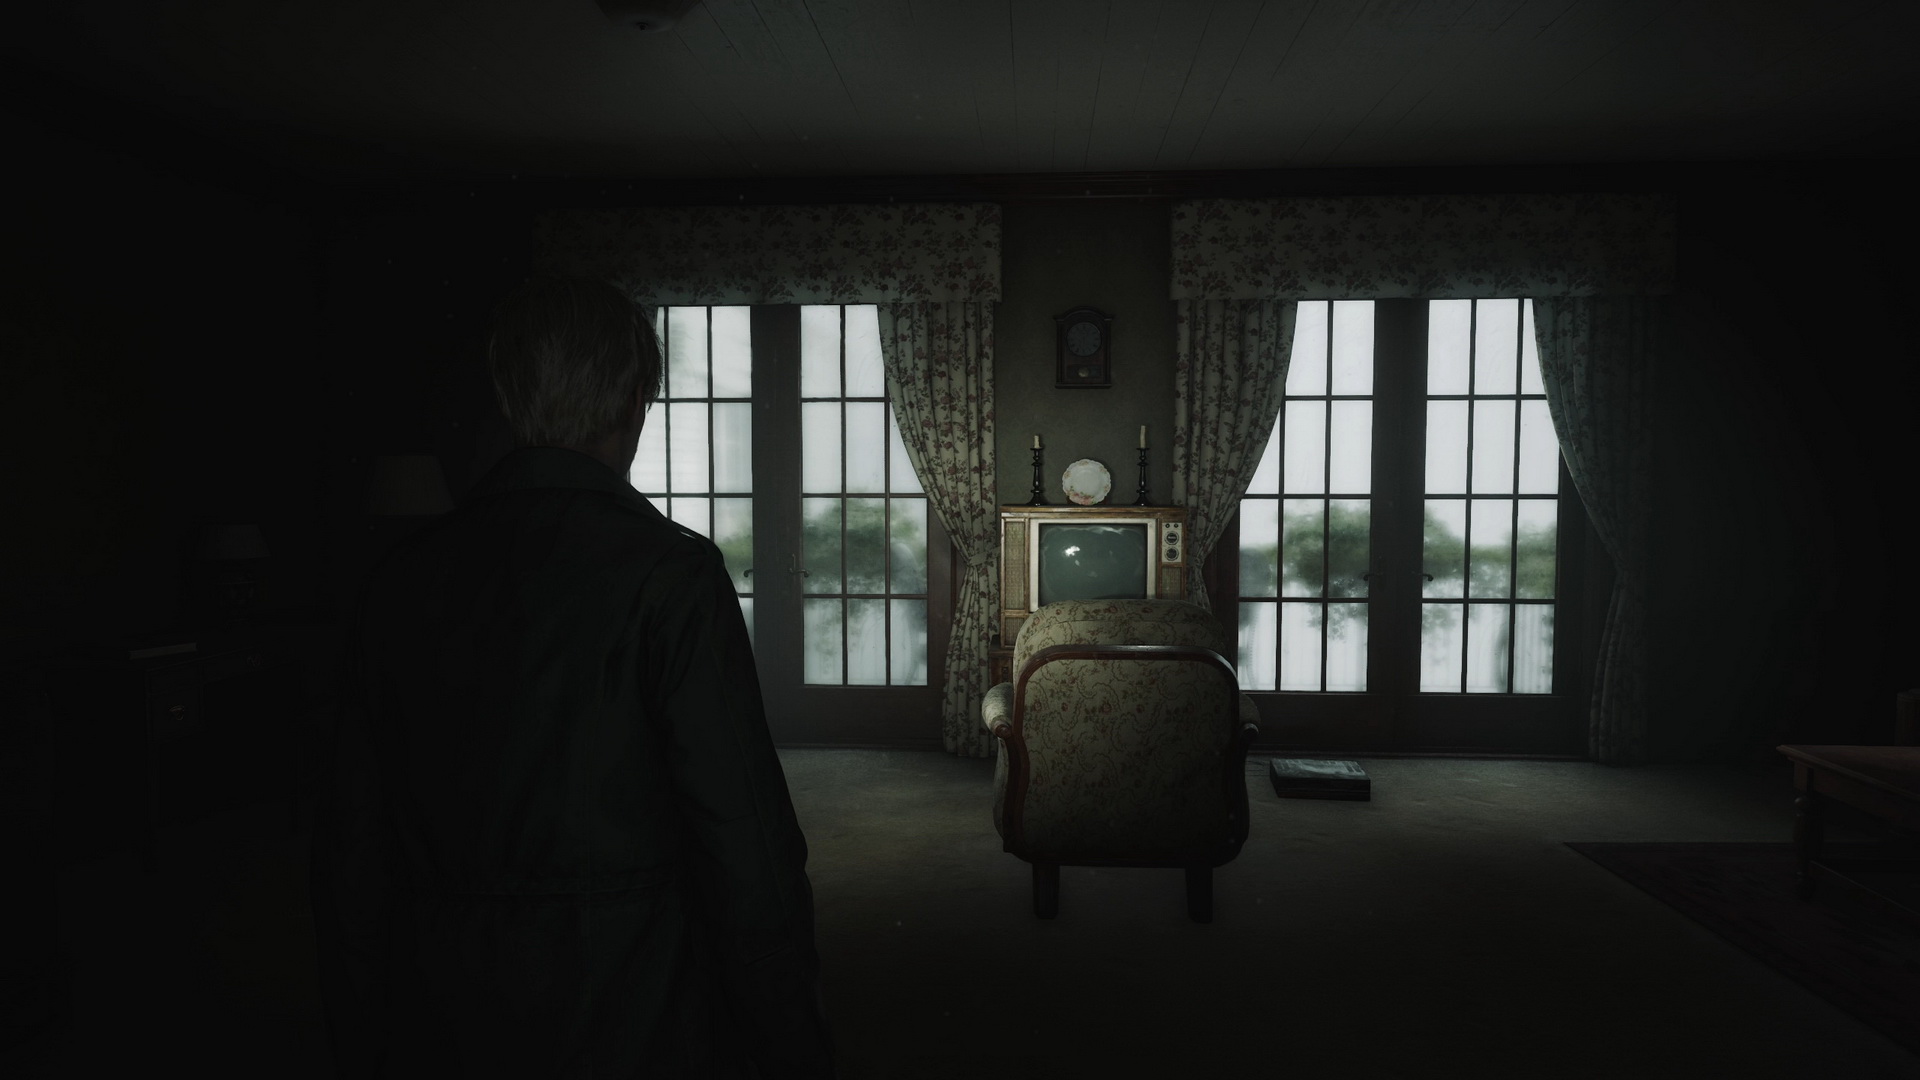
Now you can finally enter Room 312 using the hotel room key to find what you've been searching for so long. There's no Mary inside, but there is a TV set with a cassette player. Use the Video Tape on the player to start a big revelation cutscene.
New Game+ Ending: UFO |
 Use the Blue Gem for the final time in Room 312; you will immediately get the "UFO" ending. |
New Game+ Ending: Bliss |
 Use the White Claudia in Room 312 to drink the liquid. Then play the Video Tape as in the normal game, and you will immediately get the "Bliss" ending. |
| 10. Labyrinth | 12. Ruined Hotel |