Walkthrough
Letter from Silent Heaven
01. East South Vale
02. Wood Side Apartments
03. Blue Creek Apartments
04. West South Vale
05. Brookhaven Hospital
06. Nightmare Hospital
07. Dark South Vale
08. Silent Hill Historical Society
09. Toluca Prison
10. The Labyrinth
11. Toluca Lake
12. Lake View
Hotel
13. Nightmare
Hotel
Born from a Wish
01. West South
Vale
02. Baldwin
Mansion
03. Blue
Creek Apartments
Nightmare Hotel
This is a walkthrough guide for the original Silent Hill 2. For the walkthrough for the Silent Hill 2 Remake (2024), please go to this page.
Contents
- Third Floor
- Second Floor
- Flooded Basement
- First Floor Employee-Only Wing
- Lobby
- Long Hallway
- Rainy Staircase and Platform
- The End
Video Walkthrough |
Complete Maps |


|
"James. Where are you? I'm waiting. I'm waiting for you."
Third Floor
Out here you'll notice the hotel has taken a different form, all burnt and leaking water likely from the roof sprinklers or perhaps rain. If you've been paying very close attention, you may realize this is closer to the hotel's current state, rather than the earlier rendition mostly conjured from James' memory. You'll also notice your Flashlight won't work anymore, but we won't need it for the rest of the game.
Anyway, there's a Save Point down the hall on the door to room 313. Use the slim staircase to head back down to 2F once you're done in this mopey hallway of shattered memories.
Second Floor
If you check your map, you may notice some markings in a new purple marker rather than just the usual red. These purple markings work to show you which doors are inaccessible in the hotel's current state.
Inside the Reading Room on 2F, you'll find a pair of headphones on the desk. Listen to them for an optional scene that helps fill in some of the gaps in the story.
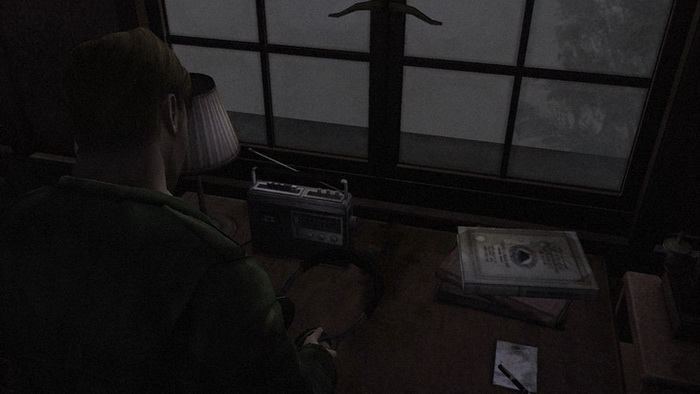
Note on cassette recording:
Examining the headphones and viewing the scene may affect the outcome of the ending received at the end of the game. I suggest just playing normally and watching the scene which is quite crucial in piecing together the timeline of the story, but feel free to read more information in the Endings section after completing the game at least once.
You'll find the first floor is blocked off if you try the stairs, so we'll have to find another way downstairs. Head over to the western 2F corridor where you may notice that certain doors won't operate normally and will instead warp you to other doors in this hallway or to the eastern 2F wing. The doors warp from and to the following:
- Room 207 >> Room 204
- Room 204 >> Room 207
- Room 202 >> Room 219
- Room 219 >> Room 220
- Room 220 >> Room 207
- Room 212 >> Room 202
The idea here is to get to the east corridor of this floor, which is inaccessible through normal methods. The only door that will warp you there from this corridor is 202. So attempt to enter 202 to warp over to the east wing in front of 219. No rooms are actually open here and some will just warp you back, so don't bother with any more room doors.
From the east corridor, get the two boxes of Handgun Bullets on the window sill to James' left. Make your way south down the corridor and enter the next corridor to the west.
In the small corridor, get the two Ampoules on the semi-circle table by the elevator. The doors leading to the Lobby balcony won't open, but what do you know, the elevator now works. Step inside and ride down to the basement, which is the only button that works.
Flooded Basement
As the elevator arrives and the doors open, you'll discover that the basement is completely flooded to about knee height. That may allow some Lying Figures to squirm through the water around you almost hidden, but just ignore and run past them, traversing as you normally would.
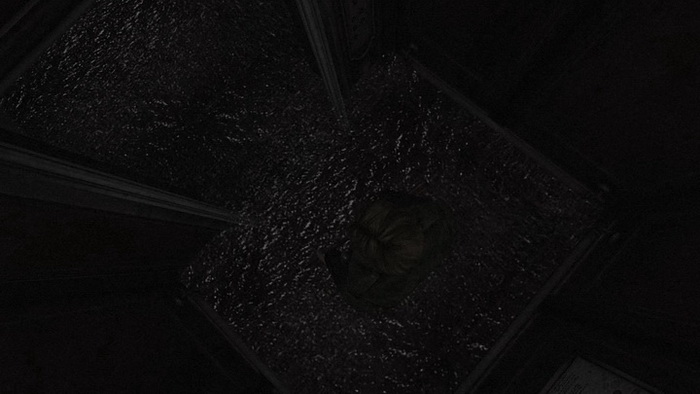
Leave the elevator and enter the Venus Tears Bar on your left, past a sneaky Lying Figure underwater. In here you'll find five Health Drinks on the back ledge of the bar, mixed in with all the liquor bottles.
Pass through the back door here to the Kitchen. There are two packs of Shotgun Shells on the counter to James' left and two packs of Rifle Shells on the back shelf. Also by the fridge is a First-Aid Kit. Pass through the other door in the room to the employee hallway, where fortunately you'll have your weapons this time around. Navigate past the Lying Figure wandering through the water and enter the staircase through the blue door at the other end of the hallway.
Suddenly in an unfamiliar place, James will meet Angela who eventually sets off and up the mystical burning stairway. James can't follow her as the flames grow stronger, so the only thing you can do is leave through the door you entered.

Now you find yourself in the real stairway, the one from your last visit down here. But what was that all about then? Well, you may notice that you yourself have already transferred from different-looking worlds to others. It appears that you experienced a brief overlap into Angela's world, offering you a look into what her sad nightmare is like. Anyway, move up the stairs and through the door at the top to the employee-only section of 1F.
First Floor Employee-Only Wing
Once up here, you'll notice that the southern section of this area by the elevator is blocked off, but if you head around the staircase to the washroom area you'll find two Ampoules on the heater.
Find the path past the stairs that leads to the northeast and take it. Get the two packs of Rifle Shells in the small alcove by the Manager's Office and continue following the path. Head through the door at the end and follow the unmapped grate path past two Mandarins and through the next door.
In here you will find nine Save Point squares on the far wall! Nine Red Squares. I think Team Silent is trying to tell you to save your game here. Just after this point are the final two bosses of the game, so I suggest you take the advice that the red squares are offering. Equip the Hunting Rifle and keep it ready for the rest of the game. Brace yourself, and head through the double doors in the middle of the room.
Lobby
In a cutscene you'll be greeted by a familiar and ever-confusing face, accompanied by a duo of Pyramid Heads. I don't think this will end well... Afterwards, it will be time for a boss fight. James finally knows the truth, and now it's time to end this.
Boss 5: Pyramid Head Duo (Lobby)
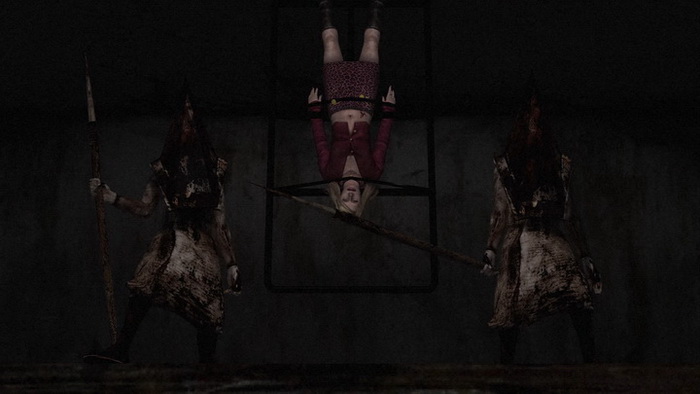
You've already fought one Pyramid Head, but two of them is a whole new story. It's perhaps not as difficult as it may seem, especially since you have a lot of space this time in the hotel Lobby, plus many more weapons to choose from. And do keep in mind that although there are technically two Pyramid Heads, they share the same health bar.
Your first move is to dash to a corner, preferably the one farthest away from the duo. From there, use the Hunting Rifle to fire off one to four shots (depending on your action level) at whichever Pyramid Head James targets, but don't get greedy. Once they near you, strafe out of the way with L1 or R1 and continue to the next farthest corner and repeat. The best strategy for movement most of the time is strafing, while using the left stick only for minor adjustments while running sideways.
Always hold L2 while firing at the Pyramid Heads to focus the camera on them and see how close they are. The Rifle is very slow to raise, fire and put down, so do take this into account to avoid attacks from the approaching Pyramid Heads, and always reload in your inventory.
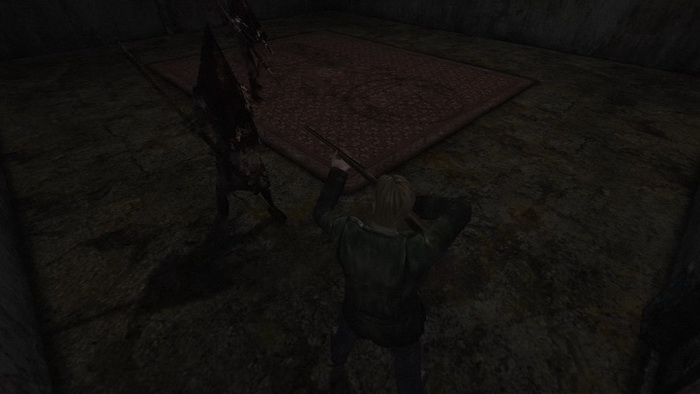
On Normal, you should be able to get off two or three shots in each corner most of the time before the Pyramid Heads reach you, and sometimes four. On the other hand, sometimes your positioning or spacing of the Pyramid Heads makes it difficult and you may only be able to get off one or two. Just make sure you're always on top of where they are at all times with L2 and how much time you have in each corner – don't take a shot if you can't escape afterwards.
Hard seems to be a mixed bag with the Pyramid Heads faster by default, limiting you to only one or two shots in each corner for the most part, but on PC Hard they are super fast to the point that it's difficult and sometimes impossible to get off even one shot in each corner without taking a hit. If this is happening to you, I'd advise switching to the Handgun and firing 4-5 shots each time while backing in a corner, but keep the same strafing strategy between setups. Do note that sometimes the Pyramid Heads do slow up and you can get in more shots, including three or four with the Rifle, especially as the fight approaches its end.
Note that when firing at one Pyramid Head, you'll get no reaction from your first Rifle shot, but the second shot will cause him to flinch backwards on Normal (third shot on Hard). While the other Pyramid Head will continue walking, this should buy you time to escape from the one you were shooting at. Thus, try to focus your aim at the Pyramid Head closer to you rather than the farther one (alternatively you can go for the other if he's closer to where you're trying to escape from). You may notice both Pyramid Heads flinch from attacking just one as you near the end of the battle.
You can also trick the Pyramid Heads and bait their attacks. If one is close and you strafe towards him, he may try to stab you as you quickly strafe away and out of range. This is great for buying time to safely escape and thus acquiring more time in the next corner.
If you ever run out of ammo or want to try something else, switch to the Handgun rather than the Shotgun, which is too slow and more suited for close quarters. The Handgun lacks power but fires very quickly and has effective handling, so you'll be able to get off a lot more shots in each corner. You can even sidestep while firing, which also primes you for an escape. Do be patient if using the Handgun, as it can take up to 300 bullets on Hard, and always reload in your inventory.
Another potential strategy for Hard, that I only recommend for skilled players or those patient enough to try it out, involves the Great Knife. Buy yourself enough time by running around and then head into a far corner and equip the Great Knife. Then as the Pyramid Heads approach, deliver a standard swing so that it hits one or both of them and then bounces off the wall to James' left and comes back to hit them again.
This buys you enough time to repeat the attack again and again, although it can only be done on Hard since weapons do not bounce off walls on lower difficulties. It can take some practice to get right, but mastering it offers a quick and "easy" way to end the battle with little or no damage taken. Also note you can sometimes start it off with an executioner swing if one Pyramid Head is a bit closer than the other, which will slow the closer one up and allow you to perform a regular swing and hit them both together right after, locking them into the repeated hit cycle. Do understand that it can be frustrating to get this right, but you may just feel it's worth the reward if you do.
Pyramid Head duo's attacks:
Both Pyramid Heads have two attacks, using their spears in different ways. The more common one is the standard spear thrust, while the other is a more occasional attack where a Pyramid Head will extend the spear on its right side and then rotate its body to swing from right to left in front of it, usually when you try to run past it. Both of these attacks inflict heavy damage, requiring you to manage your health carefully. Don't underestimate the range of the standard thrust attack either. Always leave adequate time and space to escape via strafing before one of them gets close enough to poke you, even if it means aborting your next shot.
After around 23-25 Rifle shots on Normal and up to around 50 on Hard, the Pyramid Heads will stop in their tracks, then turn and head to the center of the room. There in a brief cutscene, they'll flip up their spears and stab the undersides of their heads to finish themselves off. This is because they have always had one purpose in the game and have finally accomplished it, as James hints just before the battle. Read more in the Plot Analysis section if interested, after finishing the game.
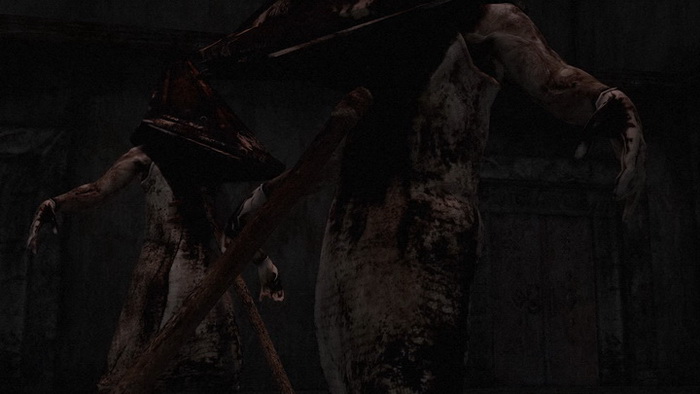
After the fight, the standing corpses of both Pyramid Heads occupy the center of the Lobby. You may also notice a familiar large marking on the floor from the first Silent Hill. Move up to the Pyramid Head remains and examine each to find a 60 Rust-Colored Egg and a 61 Scarlet Egg in their hands.
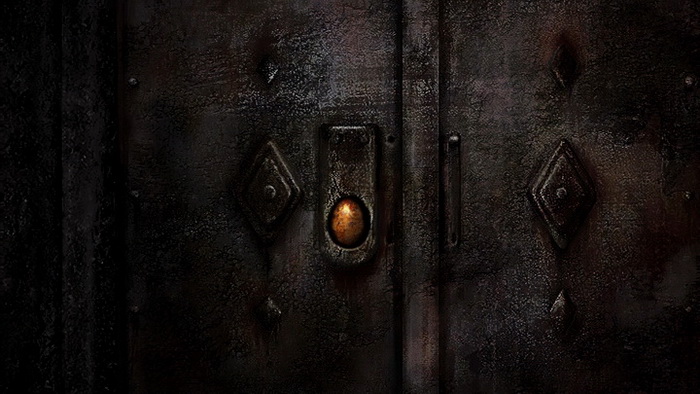
If you try to exit the Lobby through one of the two south doors, you'll find they're both locked and they each have an egg-shaped slot in them. Insert the Rust-Colored Egg into one and the Scarlet Egg into the other to unlock both doors. It doesn't matter which one goes into which door, but they must both be inserted for either door to unlock. Before moving on, consider returning to the Nine Red Squares in the previous hall to save your game since there's just one fight left now. When ready, head through one of the now-unlocked south doors.
The two side hallways are fenced off here, so follow the corridor ahead and through the back entrance door, where you initially entered a more pleasant version of this hotel.
Long Hallway
You now find yourself in a long, misty hallway instead of outside. A recording of Mary speaking to James in the hospital will begin to play. Feel free to head to the other side of the hallway as the recording plays, but be sure to listen to it all before proceeding through the end door, as it's a very sad but also informative look into Mary's (and James') psyche before her death.

Note on hallway recording:
Whether you listen to the full recording or just slip through the door at the end before it finishes may influence the outcome of the ending you'll receive at the end of the game. On your first time through I emphatically suggest listening to it in full, but once you've beaten the game at least once you can read more about it in the Endings section.
Rainy Staircase and Platform
Now you're actually outside in the rain, although in a very unfamiliar area. Step ahead and take the right path (James' left). Follow the stairs all the way up.
Once at the top, the staircase will fall behind you. There's no heading back now. Head deeper into the room. Depending on the ending you're about to receive, there will be a very familiar figure either lying on the bed or standing in front of the open window. Approach her for a cutscene and the final boss.
Final Boss: Mary/Maria (Rainy Platform)
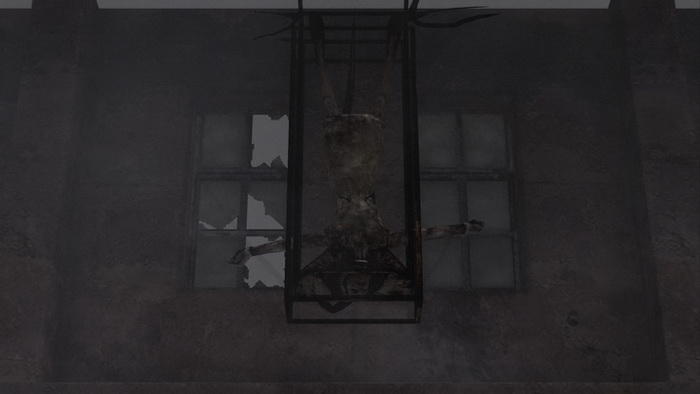
This boss is actually a bit similar to the Flesh Lips in the hospital, but it moves much more quickly and has a much wider and more lethal array of attacks. The most effective weapon to use here will be the Hunting Rifle from a distance, offering a lot of damage from safety.
Immediately turn around at the start and run into a far corner. Use the long range of the Rifle to call your shots as Mary/Maria draws closer, holding L2 to focus the camera on her. Sometimes you may be able to take three or four shots before she approaches or attacks, or maybe just one or two in other cases, so act quickly and don't get greedy. And do pay attention to Mary/Maria at all times since she will almost constantly unleash a moth-swarming attack that will get you if you're not running away from it early enough.
In order to defeat Mary/Maria, stay far away from her and use the Hunting Rifle's long range to hit her. If you can only get off two shots before she nears you or sends the moth swarm, that's fine. Take your two shots and get out of dodge. Also be sure to reload in the inventory to save time and avoid being open to attack. Additionally, be sure to watch out for the bed and the gap in the floor where the stairs were when strafing and running away from her attacks. Keep following the strategy above until she succumbs. It should take about 20 Rifle Shells on Normal and up to 40-50 on Hard, depending on your accuracy.
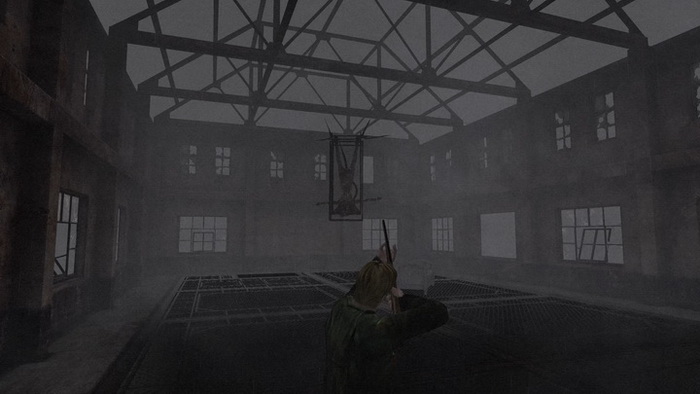
If you run out of Rifle Shells or wish to try an alternate strategy, switch over to the Handgun with its high versatility. It'll be weaker and you may have to stand closer to get your shots in, but conveniently you can walk backwards as you fire or even sidestep to prime your escape. You may find the Handgun to be even better as an overall strategy than the Rifle on Hard due to its mobility, but it will take around 200 bullets to end the battle on the highest level (although the same amount of time or perhaps less due to firing more frequently). The Shotgun can also work okay on all difficulties because of its power but it's also slow, so it may be difficult to get in close without taking serious damage.
Mary/Maria's attacks:
Mary/Maria has two different attacks. Her most common attack that she unleashes almost constantly is a cloud of black moths, telegraphed by a high-pitched screech. When this happens, a swarm of moths will zoom over and maul James in a stun-locked animation. To avoid this, as soon as you hear the screech, haul ass. The most effective way to do this is usually to strafe to one side since the swarm will be coming from in front of you.
After a few seconds, the moths will disperse and you can relax, but this attack will happen on near repeat, sometimes within seconds, so stay alert. It's pretty simple to avoid the attack this way if you react to the screech, but if it does ever land, wiggle the shoulder and directional buttons to escape the moths more quickly. Fortunately, it doesn't do too much damage but do try your best to avoid it to get your chance to shoot.
The other attack happens at close range. While hovering above, Mary/Maria will snatch James with a long black tail and attempt to strangle him. This attack can be very lethal and happen very suddenly, so try not to stay close enough to her to avoid it entirely if you can. If you notice her getting close, immediately strafe to the side to escape and head into another corner. Again, if you do get caught, wiggle the directional and shoulder buttons to escape more quickly.
Once you shoot up Mary/Maria enough times, she'll fall to the ground in her frame. Move up to the helpless Mary/Maria and don't let that soft, sweet voice get to you – it's time to finish her off and end this nightmare. Choose your weapon of choice and deliver the final blow. For dramatic effect I recommend the Great Knife's executioner swing.

The End
Congratulations on beating Silent Hill 2, one of the holy grails of the survival horror world. Enjoy your ending, a heartbreaking and absolutely beautifully-read letter, and the credits along with its own song depending on your ending.
Remember that there are still four more endings to receive (five in the Greatest Hits/Director's Cut versions, plus the extra scenario ending). Refer to the Endings section for details on how to acquire them all.
You'll also see a Ranking screen judging your performance in many different ways at the very end, tallying up your score at the bottom in the form of large and small stars. For a full explanation of your ranking and how to even achieve a perfect score, visit the 10-Star Ranking Guide.
And that's it. Feel free to check out other sections including the Speed Walkthrough for quick reference, the Unlockables and Secrets section for all extras and easter eggs, or the Plot Analysis for a thorough examination of a very intricate plot.
by Andrew Haffenden aka Conquerer (Silent Hill 2 FAQ/Walkthrough) |
| 12. Lake View Hotel |

