Walkthrough
Letter from Silent Heaven
01. East South Vale
02. Wood Side Apartments
03. Blue Creek Apartments
04. West South Vale
05. Brookhaven Hospital
06. Nightmare Hospital
07. Dark South Vale
08. Silent Hill Historical Society
09. Toluca Prison
10. The Labyrinth
11. Toluca Lake
12. Lake View
Hotel
13. Nightmare
Hotel
Born from a Wish
01. West South
Vale
02. Baldwin
Mansion
03. Blue
Creek Apartments
Wood Side Apartments
This is a walkthrough guide for the original Silent Hill 2. For the walkthrough for the Silent Hill 2 Remake (2024), please go to this page.
Contents
- Lobby
- Second Floor: Finding a Light Source
- West Third Floor: Finding the Handgun
- Second Floor: Making Sense of the Clock Room
- The Rest of the Third Floor
- East Entrance Stairwell
- The Garbage Chute
- Courtyard
- First Floor North Wing
- Fire Escape: Time to Leave Wood Side
Video Walkthrough |
Complete Maps |


|
"You too, huh. Something just brought you here, right?"
Lobby
Just inside, you'll find the Map of the Apt Bldg on the left wall bulletin board. There's also a Save Point pinned on the right wall and a Health Drink on the small brickwork by the stairs. There's a door leading to the courtyard ahead, but it's locked, so head up the staircase and through the door to the second floor hallway.
Second Floor: Finding a Light Source
It's very dark in these hallways (you can't even view the map unless under a spotlight), so let's look for a light source as the first order of business.
First, note the small laundry room by the stairwell, where James will notice a piece of garbage stuck in the garbage chute. Can't do anything yet but keep it in mind for later. To the west you'll find the end door and room 202 are locked, and in 208 to the north is a large grandfather clock you can't open and an interesting riddle in the living room, but it looks like we can't do anything there yet. Instead, make your way east past a Lying Figure and enter room 205.
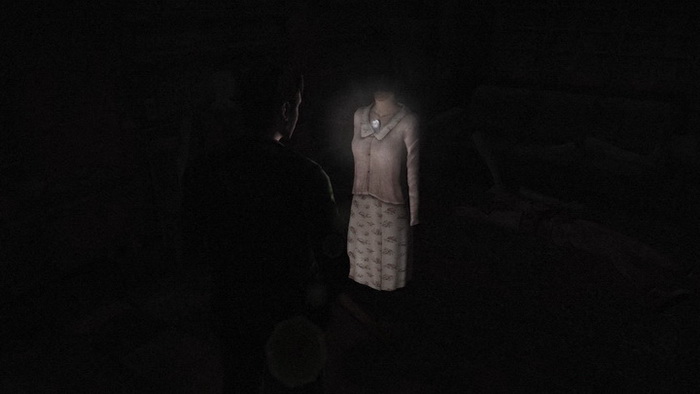
Inside the dark room, you'll notice a bright light coming from a fashion dummy, and upon further examination you may recognize those clothes... Grab the 6 Flashlight from the dummy and watch your new light source splash ahead and awaken a new enemy, a Mannequin, deeper in the room. It's not near the exit door so you can quickly exit and avoid confrontation, but they're not tough enemies anyway.
Note on Flashlight:
Now that you have a light source, you'll be able to check the map whenever you want, just as long as the Flashlight is on. Press Circle to toggle it on and off, but do make sure it is on in order to grab items in dark places. Also, with the Flashlight and Radio off, you can blend into the environment a bit more and avoid enemy confrontation if you aren't too loud otherwise, so keep that in mind. But generally the Flashlight is an invaluable tool that you'll want to use the majority of the time to see.
To finish off the floor for now, check out room 210 for some ammo. Inside you'll find two boxes of Handgun Bullets – one on the small living room table by the Lying Figure and one on the corner table in the right bedroom.
West Third Floor: Finding the Handgun
Now it's time to find a gun to use that ammo. Done on 2F for now, head up to 3F via the west stairwell since the eastern one won't open. In the hall up here, a set of bars prevents you from moving east, but you'll see a key on the floor right under the light. Reach for it for a rude surprise. Dammit...
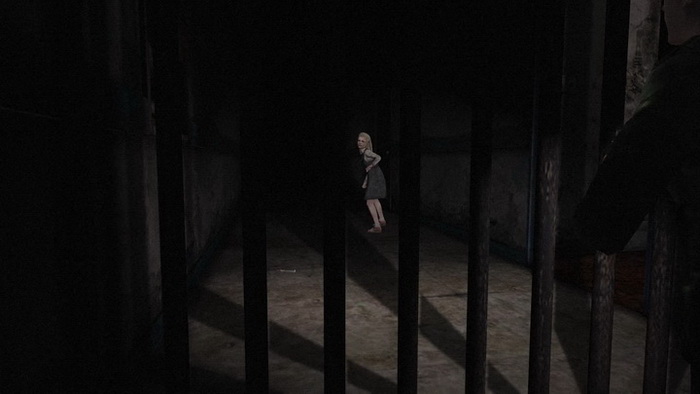
You can't reach it now, so forget about it and enter room 301 down the hall. Inside you will find a 7 Handgun in the shopping cart in the living room. Note that you need the Flashlight and to have it on to pick it up (grab it from 205 if you haven't yet). Although it may be tempting, I suggest you keep using the Wooden Plank for now as you stock up on ammo, saving it for a bit later.
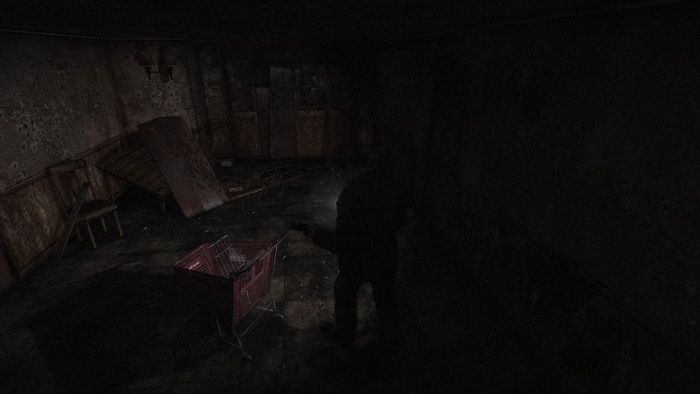
Before leaving, take a moment to notice that someone must've put this Handgun to good use. Remembering a few unknown things on the second floor, head back there now.
Second Floor: Making Sense of the Clock Room
Now with the Flashlight and Handgun to your name, head back towards room 208 to check out that clock room in further detail. Once you hit the hallway fork, a scream from the north will stop James in his tracks. With rising tension and radio static, take a look past the bars at the north end of the hallway. This nightmare is just beginning.
Shrug it off and enter room 208 to hear more static blasting in there. Instead of the Radio, it's coming from the TV. Head over to it and examine the chair there for a shocking sight...

Noticing the camera angle change, grab the newly-appearing 8 Key to Room 202 from the shelf. Through the doorway by the shelf, you'll find a grandfather clock with a riddle on the side regarding how to move it. It's firmly locked in place for now and the glass faceplate won't open either, but you did just get a new key. Exit 208 and pass any Lying Figures on your way to 202, using the Key to Room 202 to get inside.
Inside 202, grab the Health Drink on the kitchenette counter. Through the open doorway in the living room is a butterfly-infested bedroom with a hole in the wall that's seeping green liquid. Sounds enticing, right? James thinks he can see something inside, so reach in to find the 9 Clock Key. Perfect, just what we need.
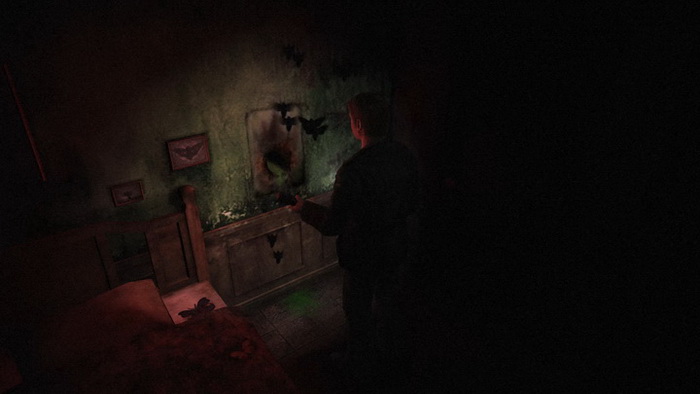
Remembering the grandfather clock, head back to room 208 and enter the small clock room by the shelf. Use the Clock Key to open up the clock face. You can now directly move the hands of the clock, but first we'll need to solve a puzzle.
Puzzle: Grandfather Clock (Room 208)
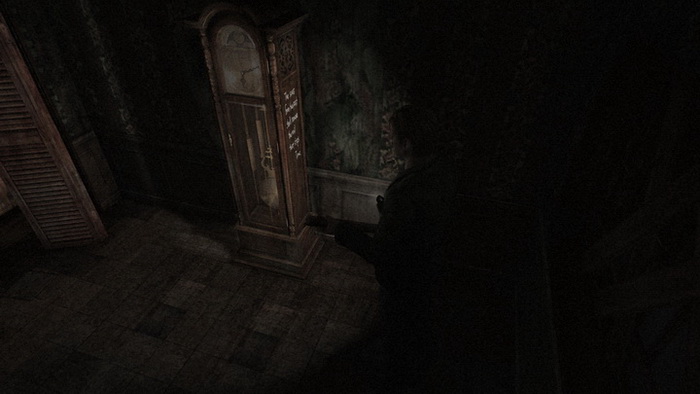
There are several clues in this apartment on how to solve this puzzle, including this small clock room and the living room.
The scars from the past shall
remove the nail that stops Time.
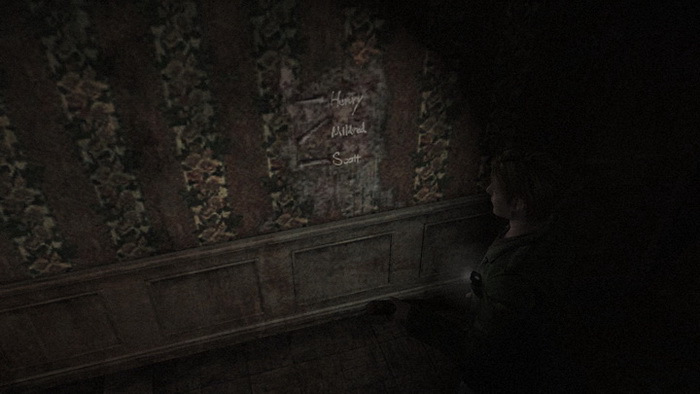
The idea is to push the clock out of the way to see what is behind it, but it won't move as is so you'll need to find more clues. Directly opposite the clock on the other wall, you'll find the "scars from the past" that the riddle alludes to. The names Henry, Mildred and Scott are etched in the wall alongside directional arrows, which appear to correspond to the three hands of the clock. But which ones? It looks like we could still use more information.
Lastly, in the living room of the apartment you'll find a memo by the phone on the small table along the wall. This memo is different depending on your riddle level.
Easy
Three different sizes,
time on the run.
Three young men circlin'
round the sun.
Henry is short and
very, very slow,
Scott can't stop,
he's always on the go.
"Three different sizes" refers to the three hands of the clock – hour, minute, second – which are of different lengths and thicknesses. It also likens the hands to men, giving the names Henry and Scott.
Henry is clearly the hour hand, which is the shortest hand and moves the slowest. Scott must be the second hand which is always on the go as it ticks around the clock face. There is no mention of the minute hand, but it must be Mildred, the only remaining name from the scars.
There's also a subtler way to tell the names of the clock hands, which confirms Mildred's identity. Notice anything about the first letters of each name of the scratches on the wall?
- (H) Henry - (H) Hours
- (M) Mildred - (M) Minutes
- (S) Scott - (S) Seconds

So that makes things very clear. But what of the arrows beside each name etched in the wall? They must represent the direction the corresponding hands face on the clock. You'll have to estimate the approximate number each arrow would be facing on the clock. Upon doing so, you should be left with this:
- Henry (hour hand): facing 9 (9 hours)
- Mildred (minute hand): facing 2 (10 minutes)
- Scott (second hand): facing 3 (15 seconds)
And there's your solution. You must set the clock to 9:10 and 15 seconds. You'll notice you cannot move the second hand, but it's already locked in place at 15 seconds. So go ahead and move the fat, short hand to 9 and the longer hand to 2 and you'll hear a clank. That is the scars from the past removing the nail that stops time. For the record, any time between 9:07 and 9:13 should work, so don't worry if it's not exact.
Normal/Hard/Extra
Three needles stand of
three different heights.
The fat, the tall and the thin.
From slow to fast they
move to the right.
Scott rests not on three,
but fifteen.
"Three needles stand of three different heights" describes the three hands of the clock. "The fat, the tall and the thin" – hour, minute and second hands.
"From slow to fast they move to the right" describes the order the hands will appear on the clock face from left to right. That means the slow hour hand will be farthest left, the faster minute hand to its right, and the even faster second hand to the right of both.
Further, the riddle concludes by telling us that "Scott rests not on three, but fifteen." This means that Scott represents the second hand, just like the Easy puzzle. When the second hand sits over the 3 on a clock face, it actually means 15 seconds. You'll also notice that the second hand already sits at 15 seconds on this clock and cannot be manipulated, so we can move past this one.
Unlike the Easy mode riddle, you're not told any other names in memo, but you'll still find the names on the wall along with directional arrows. Even if you can't deduce that the first letter of each name indicates which hand it represents (H/M/S), you can use the hint in the riddle that the hour, minute and second hands move from left to right. Therefore, you should be left with this:
- Henry: facing 9 (farthest left, therefore hour hand) = 9 hours
- Mildred: facing 2 (right of hour hand, therefore minute hand) = 10 minutes
- Scott: facing 3 (farthest right, therefore second hand) = 15 seconds

So there we go, it's the same solution as the Easy riddle. Again, you can't move the second hand but it's already set on 15 seconds. Simply use the D-pad to set the clock to 9:10 (anywhere within the range of 9:07 to 9:13 will work) and you'll hear the clank that is the nail of time being removed.
You can now push the clock and move on. For future reference, the solution to this puzzle is always 9:10 on all riddle levels.
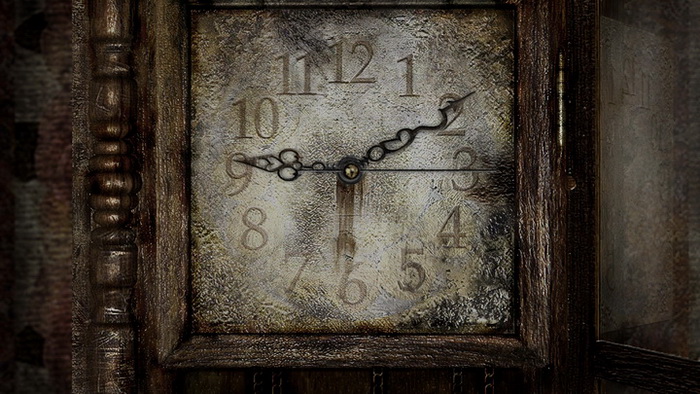
Now push the clock from the right side to reveal a hole in the wall. Pass through it to find yourself in room 209. Enter the living room to find a Save Point on the pushcart and a Health Drink on the kitchenette counter. Exit the room through the front door.
Now on the other side of the hallway bars, head north and enter the stairwell through the blue door. The 1F door below is locked, so move up the stairs and take the Handgun Bullets on the ledge at the top. Pass through the door up there to the 3F corridor.
The Rest of the Third Floor
Checking your map, you're now at the north end of 3F, which you couldn't access before. Head south down the hall and enter room 307 for a very scarring image and close call. Afterwards, grab the 10 Courtyard Key in the closet and exit the room.
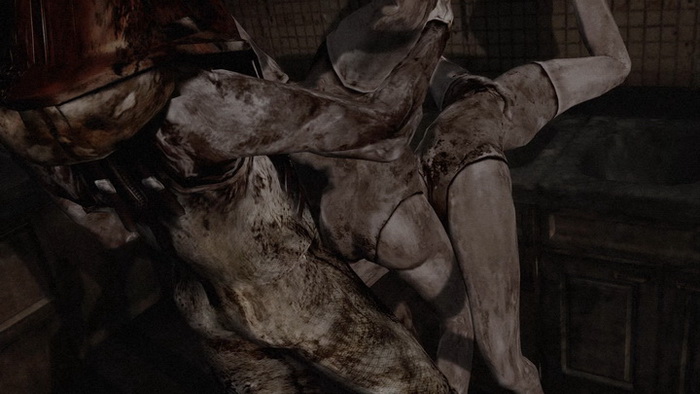
Continue past the Lying Figure to reach the south hall. Heading west, you'll find the 11 Fire Escape Key on the ground near the bars, which is the key the little girl kicked away earlier. Just hope she doesn't come out of nowhere again and tackle James. Take the Handgun Bullets on the floor in the nearby open laundry room and consider grabbing some worthwhile health and ammo from room 303.
Inside 303, ignore the right room that has a Lying Figure and nothing else inside. Instead, grab the First-Aid Kit on the small cabinet on the left side of the living room. A pack of Handgun Bullets is on the bed in the left room and a Health Drink is on the fallen fridge in the kitchenette. Leave the room before the Lying Figure finds you, and head all the way to the east side of the floor.
East Entrance Stairwell
All the other rooms up here are inaccessible, so enter the stairwell and run down past the blocked 2F door to the first floor lobby. You'll find the door leading to the northeast 1F wing broken off, so head up the hallway. All the rooms here are locked, but you'll find a pack of 12 Canned Juice of all things in front of 107 at the far end.
Well... ok then. You can't drink the juice but maybe you can use it for something else. Anything coming to mind? Finished here, head back to the lobby and exit through the double doors after unlocking them.
The Garbage Chute
Checking your map, if you head west you'll reach the west entrance where you first accessed the apartments, and you now have some new items to use on your second go around. You may notice the bottom of the garbage chute to the right of that entrance. Keep that in mind as you re-enter the west entrance and head back up to the laundry room on the second floor right by the stairs.
The garbage is still stuck in the chute, so take a look at your inventory to see if you have anything useful. How about that random six pack of juice you just picked up? It's fairly heavy and doesn't seem to have any other use, so use the Canned Juice from your inventory to chuck it down, knocking the garbage loose.
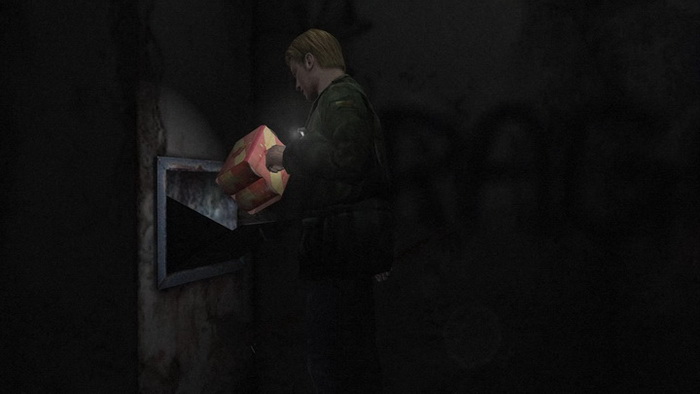
Remembering the business end of the chute outside, head back down to the lobby and exit to find it around the right corner. Investigate the splattered garbage to find a 13 Coin [Old Man] and a very interesting newspaper article. Take note of the names in here as one in particular will help you out much later on in an optional puzzle for some goodies, although you can always reference it in the Memo section of your inventory.
Courtyard
With that done, you should also have two keys that you collected in the last while: one for the 1F courtyard and one for the 2F fire escape. Head back inside the west end lobby and pass through the 1F door by the stairs, using the Courtyard Key.
Now is a fairly good time to equip and start using the Handgun if you haven't already. If you're comfortable with the Wooden Plank, by all means keep using it and save your ammo, but in trickier situations with multiple enemies, the Handgun will be helpful. Just don't go full Rambo, ok?
On your map, you may notice a large open rectangle in this area, which is a pool. Follow the short path and take James' left to and up the stairs to enter the pool area. Hearing the warning static and footsteps of multiple creatures, you'll notice the pool has been drained and that there are three Lying Figures inside along with a baby carriage in the middle. The tricky part: we need what's in that carriage.
To make things easier, you can shoot them from above, but you'll need to jump down in the pool to finish them off (without wasting ammo). On Normal it shouldn't be too difficult to just run in, quickly get it and leave, but on Hard you'll likely want to lure them to one side of the pool from above first, then jump in. Either way, grab the 14 Coin [Snake] from the carriage and head up the steps to the left to exit the pool.

Exit the pool compound and head back towards the east. You came from the south before, so now follow the east path and enter the north wing through the door there.
First Floor North Wing
Head south past the Lying Figure and enter room 101. Inside you should hear someone vomiting, so you're not alone here. Give the place a good look around to find a bloody fridge with a pair of legs poking out in the kitchenette and a pack of Handgun Bullets in the far right corner of the living room. Now move through the closed door on the left side of the room to enter the washroom and meet Eddie, the source of that beautiful sound.

Note on seeing Eddie:
Although no key items are procured here, you must meet Eddie in this room or else you won't be able to advance past a certain door that just won't open in the next area.
After James leaves the washroom in the cutscene, you can re-enter to find another room past the washroom that contains a football and posters that may provide more context to some remarks later in the game. When finished, exit back to the hallway.
The only other open room here is 104, where you'll find a Lying Figure and Handgun Bullets on a chair. There's also an interesting tourist pamphlet on the cabinet that makes for an ironic read. Leave the room when done.
Fire Escape: Time to Leave Wood Side
All that's left here is the north stairwell door, which you'll unlock upon investigating, but there's nothing new through there since you should be done checking the whole Wood Side Apartment building. You should still have a key left though, so it's time to see what's behind that fire escape door on 2F. It doesn't matter how you get there, but you have two route options: use the north stairwell here to reach 2F and pass through room 209 and 208 via the clock hole; or head back to the courtyard, re-enter the west lobby and head up to 2F that way. Go for whichever but the latter should be quicker.
Either way, head to the west end of 2F and investigate the blue end door to use the Fire Escape Key. Instead of a fire escape, it looks like another building was built next door and we can enter an apartment through a window right here. Pretty sure that's a massive fire code violation, but we have bigger concerns right now. Pass through the window into the unknown apartment, leaving Wood Side.
| 01. East South Vale | 03. Blue Creek Apartments |
