Walkthrough
00. Arrival
01. Old Silent Hill
02. Midwich Elementary School
03. Nightmare School
04. Old Silent Hill Part 2
05. Central Silent Hill
06. Alchemilla Hospital
07. Nightmare Hospital
08. Central Silent Hill Part 2
09. Nightmare Central Silent Hill
10. Sewers (Connecting to Resort Area)
11. Silent Hill Resort Area
12. Nightmare Silent Hill Resort Area
13. Sewers (Connecting to Amusement Park)
14. Lakeside Amusement Park
15. Nowhere
Nowhere"Even when I change the bandages, the blood and pus just start oozing through! Why... What is keeping that child alive?" Examination Room

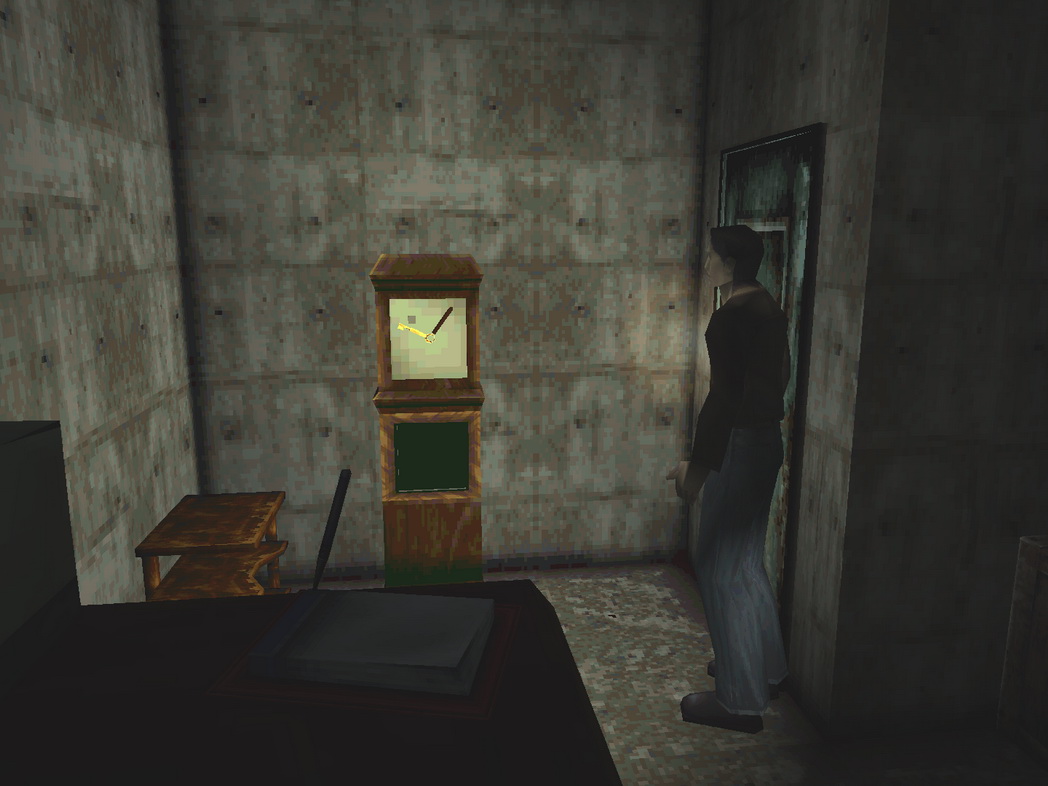
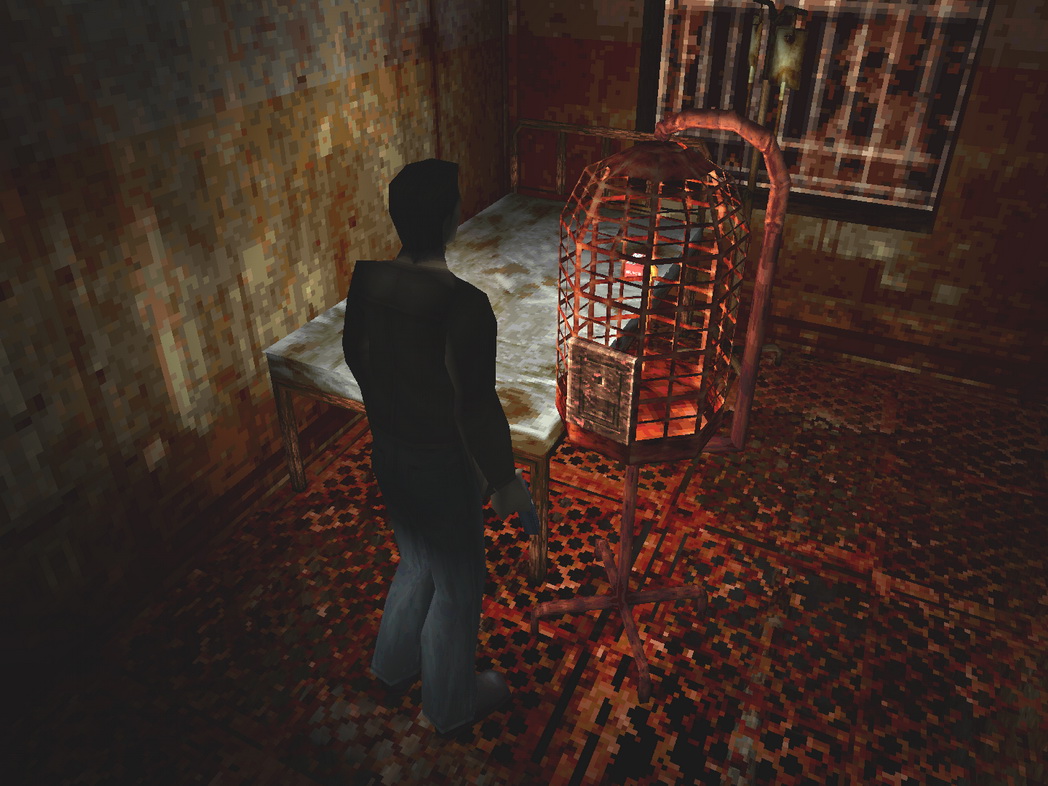
Harry awakens once again with Lisa in the hospital. Just what the hell is going on here... Lisa talks to Harry for a bit and then storms out, clearly bothered by something. With a mysterious droning sound coming from below the floor, find the Save Point on the desk. As you'll see, it describes this place as "Nowhere", which should help explain the arrangement of the place as you move through it... Because it's not quite the hospital but rather a mix and match of several areas of the game. Proceed through the door straight ahead and move down the unfamiliar walkway to the elevator. Note on navigating Nowhere: First CorridorNow in a hospital corridor, the first room on the left contains a key stuck in a faucet, while the right room contains a key locked in a birdcage. All you can do is remember for later. You may notice an apparition of Alessa just ahead along with her chuckling on the soundtrack. The room directly across from the elevator is straight from the antique shop, with a Save Point on the counter, a First Aid Kit on a chair and Shotgun Shells on the farther counter. One hand of the clock by the door is a key, but Harry cannot access it as is. Note the square depression below the clock face for later and exit the room. Back in the hall, a couple Nurses have spawned so consider handling them. I'd advise using the Shotgun for the rest of the game if you have the ammo. You may also note a few doors in the hall are locked and marked with certain words, so you'll need to find some keys. All other doors here are locked except the last door on the right at the end of the corridor. Pass through it, down the stairs and into the room below. Classroom and Back RoomNow suddenly in a classroom from Midwich, examine the desk in the middle to read some mean carvings and head through the other door. In the back room, find the 47 Screwdriver and 48 Pliers on the table and return back to the first corridor upstairs. Using the PliersRemembering the key stuck in the faucet, head back towards the elevator and enter the right room beside it. Use the Pliers to pull out the 49 Key of "Ophiel". Out in the hall, head around the corner and use the Key of "Ophiel" to pass through the door with that title on the right side.

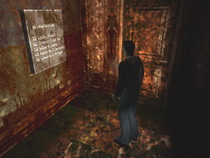
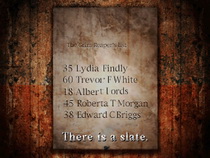
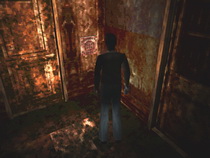
"Ophiel" CorridorJust inside the hall to the right, you'll notice a slate with names engraved on it, a door with a crazy-looking keypad beside it, and down the hall the other way is another slate with some instructions on it. It's time to solve another puzzle. The Grim Reaper's List ("Ophiel" Corridor)
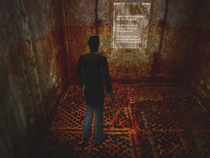
With the crazy-looking keypad keeping the door locked, you'll need to decipher its code from the two slates in this corridor. Since the near one just contains a list of names without any context, first read the other one down the hall:
All right, so let's return and read the other list to which this one refers:
The first slate directly refers to the second in its first sentence, before then explaining the key to the puzzle in its second paragraph. "The headcount is set Young and old lined up In order of age". So we must rearrange The Grim Reaper's list of five names in order of their posted ages, like so:
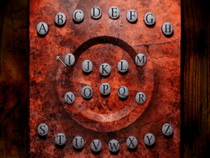
If you check the keypad you'll find it has no numbers but only letters, utilizing the full alphabet to boot. So how can we get a code from this? What about the first letter of each name in order of age? Notice anything?
Interesting. Reading the final sentence of the instruction slate, it says "Awaiting them, the frenzied; Uproar, the feast of death!" That sounds like quite the alert, doesn't it?
Turn to the keypad and enter in the code ALERT to unlock the door. Pass through the door after unlocking it with the keypad. Looks like an empty storage room so pass through the next doors to a morgue where you'll find the 50 Amulet of Solomon on the back wall. Head back to the previous room to meet a scared Lisa. Enjoy the beautiful scene before Harry leaves back to the Ophiel hallway. After, you can re-enter the storage room and read Lisa's diary on the floor.

Back in the Ophiel hall, turn around the corner and enter the second room on the left side, which is the only other unlocked room in the hall. Inside you'll find a bunch of zodiac signs posted along with a series of keypads at the back of the room above a square stone plate. It's time for yet another puzzle. Astrology Puzzle (Astrology Room)

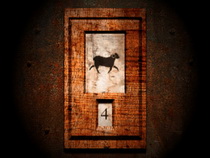
This is probably the most difficult puzzle in the game and requires an open and observational mind to even understand the basis of it, but it ultimately comes down to a very simple concept. Firstly, you'll find two zodiac signs on the left wall and two more on the right, each with a number underneath it. Additionally there are three more zodiac signs with keypads instead of numbers under them on the center pillar at the back of the room. Your task is to find the pattern between the four wall signs and their numbers and apply that same pattern to the signs above the keypads to determine the correct codes. With the keypad buttons resetting for every press, the resulting codes will be just one number. Let's take a look at the symbols on the walls and numbers underneath:
Then there are three symbols on the pillar with keypads:
The use of astrology signs is ultimately a red herring and completely irrelevant to understanding the puzzle, but what do these numbers mean? That mystery is the entire key, so give the symbols each a good look and see if you can gather the correlation to the numbers. The Libra scale may throw you off because it's an inanimate object while all the others are animal forms. But the fact that there's 2 sides to the scale and its number is 2 should begin to clue you in to something. The 0 of Pisces may also be confusing so let's look at Aries and Cancer. Aries is a ram with the number 4 while Cancer is a crab with the number 10. The ram has 4 legs, doesn't it... And the crab? 8 legs plus 2 large arms for 10... And with that we've unlocked the key to the puzzle. The numbers correspond to the number of limbs each sign has. But what about Pisces? Well, it seems a tail doesn't count as a limb, nor do gills or fins, and so Pisces remains 0. You may have your thoughts about it, but that's the logic here. And while the Libra is an inanimate object, it still has 2 arms. With that, let's turn to the three signs on the pillar and apply the same pattern.
Remember the fish tails of Pisces didn't count so the Taurus tail doesn't either. And with that:
Upon inputting the correct third key, the stone plate will fall to the floor. With the puzzle completed, grab the 51 Stone of Time on the floor and leave the room. Remembering the clock in the first hallway shop, return there past some newly-spawning Nurses. First Corridor: Using the Stone of TimeTake a left and enter the second room on the left side to step back in the antique shop. Insert the Stone of Time into the clock's square depression. After ding-donging five times, the clock face glass shatters in Harry's unsuspecting face. Grab the now reachable 52 Key of "Hagith" on the clock face and exit the room.
Take a right in the hall and use the Key of "Hagith" to pass through the double doors at the end, allowing access to the elevator. Ride up to the second floor and pass through the doors into the first hallway up there. Second Floor First CorridorHandle the Nurses here however you wish and enter the third room on your left, which is the trashed jewelry shop from the Town Center. Locate the 53 Crest of Mercury in the smashed display case, plus Rifle Shells on the table in the corner and the extremely important 54 Ring of Contract in another display case deeper in the room. This ring will save your life if you know where to use it, so pay attention. Back in the hall, avoid the Nurse and pass through the double doors to the next hallway. Second Floor Second CorridorPut the Nurse ahead out of her misery, turn just around the corner and enter the only room on the right side. Grab the Handgun Bullets on the right table and the 55 Camera deeper in. Two more Nurses linger down the hall back outside, where you can enter the last room on the left. On the back wall in there you'll find the same screwed-in plate from the hospital, but this time you have a tool to remove it. Use the Screwdriver to reveal a key with electricity flowing through it. Harry can't grab it as is, so you'll need to find a way to de-electrify it and come back later, perhaps by turning off the power. Back in the hall, you can head up the other way and unlock the last door on the right by the corner, which will then transport you to the first hallway on the first floor if you pass through it. Of course it does, this is Nowhere after all. Either way, return to the elevator from the first floor (take a right and through the end double doors) or the second floor (pass through the previous two double doors) and head up to 3F. In case you're curious, there's no button for the basement so we'll have to wait to turn off the power. Third Floor Altar HallJust outside the elevator in front of another Alessa apparition is an altar with two paintings on either side, plus two locked doors with odd-looking button input keypads for another Nowhere hallmark: a puzzle. The Light Puzzle (Third Floor)
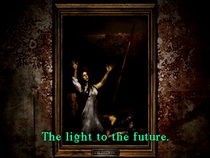
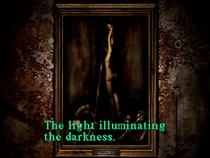
On either side of the short hall you will find locked doors, each with three sets of very peculiar keypads. As many buttons can be pressed as you choose, so we must first uncover the key to the puzzle. With no hint at how to operate these, let's instead turn to the paintings on either side of the altar which together provide the only clues in solving this puzzle. They each come with different captions although they seem to share a theme:
So what do they have in common? They both have the word "light" in their captions. Do you have anything that you can use here? How about the Camera with its description, "Camera with flash"? Use it in front of each painting for its flash to expose hidden shapes within them like so:
So now what? Well, let's take a look at those weird keypads again. Notice anything? The three shapes line up in the same way as the three keypads on each door, don't they? The idea of this puzzle is to input the three shapes from the painting on each side into the keypads on the same side door. To do that, push the keypads like so:
As you can see we've drawn the same shapes from the paintings into the corresponding keypads. Each door will unlock once you push the correct buttons as shown above. With both doors now unlocked, the room on the left contains the 56 Bird Cage Key on a chair. Inside the right room is a Health Drink on the counter beside a red botany book about an herb called White Claudia, which can only be read if you checked the chalkboard in the Police Station. On the back desk may also be a newspaper article about a fire highly relevant to the story, but it only appears in the PAL and Japanese versions and only sometimes. Return to the elevator and head to the first floor. First Floor: Using the Bird Cage KeyHead through the double doors, follow the hall around the corner and enter the room left of the non-functioning starting elevator. Inside, use the Bird Cage Key to access the 57 Key of "Phaleg". Back in the hall, use the Key of "Phaleg" to pass through the next door on the right.
"Phaleg" CorridorIn here you'll be greeted by new enemies called Stalkers. As the adult form of the pathetic Larval Stalkers you've found on several occasions, they are basically Grey Children in apparition form. Since they can be hard to see, make an effort to eliminate them quickly to remove any surprises in this hall, preferably with the Shotgun if you have the ammo. Enter the first room on your right to find a suspicious-looking fridge that's been re-positioned at the center of the room and also has the 58 Dagger of Melchior stabbed into it. While taking it, Harry will also notice a broken chain link below, which may have been why the dagger was stabbed into it... This is all very suspicious so think carefully before leaving. Since that dagger looked to be there for a reason, enter your inventory and use the Ring of Contract to close the chain link and lock the fridge door. Now head back to the door to hear something banging from the fridge... That ring just saved your life. If you didn't use the ring, you would've been grabbed and killed by the monster inside, so be thankful you weren't greedy.

Back in the hall, another Stalker may appear so act accordingly. The next door on the right down the hall leads to a storage room where you'll find Handgun Bullets, a Health Drink and a bag of jellybeans of all things. Open the bag for Harry to carelessly tear it and send jellybeans flying everywhere. Good job, buddy... Guess there's no jellybeans left for Harry. Check the floor afterwards and pick up the 59 Key of "Bethor" that was in the bag. Pass through the other door, and I don't blame you if you're still laughing at that jellybean incident. In here is a familiar hospital room with a TV and VCR. Insert the Video Tape you got all the way back in the actual hospital, if you did. If you went back and viewed it in the hospital it was very staticky and hard to understand, but now you can listen to the entire recording without issue. Leave both rooms back to the hall when done. Enter the room directly ahead to hear a girl crying and see another apparition of Alessa in a graffiti-filled room. Grab the 60 Ankh on the wall and leave the room. With the right end door locked and marked "Aratron", the last door at the left end of the hallway leads to a child's bedroom with another locked door that has five depressions for items to be inserted, some of which you have. But you're still missing one of them so leave it for now. Head back down the hall and use the Key of "Bethor" to pass through the marked door on the right side. In the familiar Generator Room, turn off the generator. Remember that electrified key on the second floor? Now we can go back and get it. Retrieving and Using the Electrified KeyHead back through the right door in the hall to the initial Nowhere corridor. Note that with the power out the elevator will not work, but remember the warp door that leads to the correct 2F hallway if you unlocked it from up there earlier. That's the second door on the right ahead of you. If you forgot to unlock it from 2F, you'll need to turn the power back on, head to 2F and unlock it in the second full hallway from the elevator, then turn off the power again and use that door.

So use that door to warp to the 2F second hall and enter the last room on the left. Grab the no longer electrified 61 Key of "Aratron" at the back (unscrew the plate with the Screwdriver if you haven't yet). Exit the room to meet more Stalkers on each side. Plow through them and return through the warp door to 1F in the corner. With more Stalkers here, turn left and pass through the Phaleg door in front of you. Use the Key of "Aratron" to pass through the right end door into a familiar hospital room where a cutscene will take place. After, take the 62 Disk of Ouroboros on the life support machine panel by Alessa's photo. Now leave the room and pass through the door directly ahead into Alessa's bedroom. Alessa's BedroomOn the desk in the room is a Save Point, which you should definitely use due to approaching the final boss and end of the game, but consider waiting until you're ready to pass through the other door. Checking that door, it's locked but explains to "evoke five rites" to "unveil thy fate". With that, insert the Amulet of Solomon, Crest of Mercury, Ankh, Dagger of Melchior and Disk of Ouroboros to unlock the door.

If you're missing any of these, read back in the walkthrough to find its location. Do not forget to save your game before leaving this room. Pass through the now unlocked door when ready. Beyond The Five Rites Door: Unveiling Thy FateAfter a cutscene, proceed through the house hallway and down the stairs into the darkness below.

A long cutscene will play in the open arena below, differing depending on your actions regarding Cybil in the amusement park and whether you completed the optional quest involving Kaufmann in the resort area. After, it'll be time to fight the final boss, which again will take on a specific form depending on whether you completed the optional quest in the resort area that ends with the discovery of a relevant item that reappears in this scene if found. Either way, prepare to fight the final boss, which is no pushover. Boss 5: Incubus / IncubatorIf you and Kaufmann found the vial in the resort area, he'll make an entrance to alter things here, making you fight the Incubus which is the more menacing demon creature with wings. If you did not complete that optional quest, you'll instead fight the Incubator, which appears as a strikingly bright and holy-looking young girl as the combination of Alessa and Cheryl, but no less evil than the Incubus. Refer to the strategies below for each form, noting you will only see one or the other, not both. Incubus (Good & Good+ Endings)

Make sure you start this battle at full health because this creature deals an insane amount of damage per hit, capable of killing you from one initial hit that freezes you in place as more strikes hit you. But we'll deal with that more specifically in a second. Also use L2 at all times or when needed to focus the camera on the flying Incubus to make sure your bullets are landing and to see when it's about to fire lightning, telegraphed by red static electricity forming around it. To start things off, equip the Hunting Rifle and unload 5-6 shots into the Incubus, then prepare to run around the arena to avoid its red lightning strikes. For best success, try running in an aggressive circle until the lightning stops striking and then start shooting again and repeat. If you're ever hit by a lightning strike, immediately enter your inventory and heal to full health, since you may die if you just stand there and let the lightning keep striking you, as it will do for another few seconds unless you luckily only caught the last strike. Once you heal upon the initial strike, you will not take any more damage despite being continuously hit by the lightning. So don't mess around and always heal immediately to avoid any risk of death, as long as you have the health needed. When firing, never take more than six shots in a row since Harry will be forced to reload in-game. Instead, lower and re-raise your weapon to automatically reload, or just run around and reset after the incoming lightning strikes. You may only be able to get 4-5 shots off safely before the lightning comes if you're a little late to start shooting during the window. On Hard especially, the lightning becomes insanely ridiculous to avoid. I'm serious, it seems to be 50/50 at best whether you can avoid it even through the best aggressive circle-running strategy, so it can be insanely frustrating to avoid damage here, or to beat it at all if your health is limited. But if you have enough health supplies you can more or less tank all the hits and just focus on shooting it enough to drop it. If you ever run out of ammo, switch to the Shotgun or the Handgun to finish it off, knowing it may take a while longer but it's all you've got. Incubus' attacks: The one and only attack during this fight is a series of lightning strikes which inflict insane amounts of damage and can kill you if hit for more than a second or two consecutively without healing. Always heal to full health immediately upon being stricken to make sure you don't die, and note that despite continuous strikes immediately upon healing you will not take any more damage. Also try not to get too frustrated from being hit since it can be rather difficult to avoid it. Just try to hang in there and fire back after taking any damage, while managing your health. After firing 24-26 Rifle Shots at the Incubus on Normal and Hard, it'll drop dead and the fight will be over. Incubator (Bad and Bad+ Endings)

Unlike the flying Incubus, the Incubator stands at Harry's level in the center of the arena, but otherwise the fight is near identical due to it using the same lightning strikes, although this time blue-coloured. To start things off, unload 5-6 Rifle shots to empty the Rifle and then prepare to run in a circle around it as it fires blue lightning at you. It can be very difficult to avoid, and nearly impossible sometimes on Hard, so if it does hit you, immediately enter your inventory and heal to full health. Once you return to the game after healing, the lightning will continue to strike you but will deal no more damage since you already healed during the attack. Use this trick to your advantage throughout. Continue the same strategy of firing 5-6 shots each time, while using L2 to focus the camera on the Incubator. Always start running in an aggressive circle around her to avoid her incoming lightning attacks, and remember to immediately heal if hit to avoid dying, which can happen if you don't heal and continuously take damage for a second or two, or if you don't heal up enough and die on the first strike of the next series of strikes. Just as well you can just stand there and eat all her lightning attacks while healing in the inventory when needed and otherwise firing back constantly. As long as you have enough health to last a few hits then you'll be fine and you can avoid running around the arena. If you ever run out of Rifle ammo, pull out the Shotgun or the Handgun to finish things off and just hang in there. Incubator's attacks: The Incubator uses the same lightning attacks as the Incubus except they are blue instead of red. They are just as lethal and capable of killing Harry when consecutively struck. However just as with the Incubus, as long as you heal to full health immediately upon being struck, you will not take any more damage as the current lightning attacks continue to strike you. The Incubator will drop dead after about 20 Rifle shots Normal and Hard. The EndAfter defeating the Incubus or Incubator, you've completed the game. Congratulations on making your way through Silent Hill! Enjoy your ending, the credits song, blooper reel, and your final ranking. Note that there are still four more endings to receive on subsequent playthroughs, plus a bunch of unlockable weapons and items to find. After completing the game your first time you will unlock Next Fear upon saving your file. What this does is up the difficulty to the next level for your next run where you can acquire said extra weapons, items and remaining endings. For more information, refer to both the Endings and the Unlockables and Secrets sections. Additionally, check out the 10-Star Ranking Guide section to learn more about how to increase your ranking stats revealed at the very end, including advice for attaining the highest possible ranking, which while quite the challenge is achievable with enough practice. While completing successive runs, consider using the following speed walkthrough as a quick reference for the bare essentials to get you through the game most efficiently. |
|||||||
by Andrew Haffenden aka Conquerer (Silent Hill FAQ/Walktrough) |
| 14. Lakeside Amusement Park |
