Walkthrough
10. Overlook Penitentiary
Contents
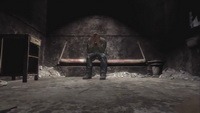
Ok, we're in the prison now, with no items and a new logical objective.
Escape from the prison
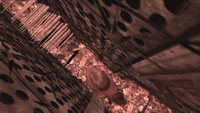
 Exit the cell, turn right and head forward to the end of the walkway. Pick up the the Handwritten Note (43/54) from the ground after it drifts down. Take a walkway to the left, approach a damaged beam and push it down. Go ahead and cross over to the central watchtower. Enter the tower and climb down the ladder. Pick up a First Aid Kit from the wall cabinet ahead and the Prison Block A Map from the left wall. Check the locked gate and take a Fire Axe to the right of the door. Head down the stairs. On the second level take the Psychological Evaluation (Overlook) (44/54) from the desk. Take a note of a Shotgun locked in the gun rack here.
Puzzle: Watchtower Safe
Easy
Normal
Hard
After you open the safe, it reveals a Small Key and a Quarter Dollar. Use the Small Key to unlock the gun rack in the watchtower and get that Shotgun. |
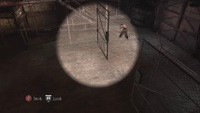
 Clear the planks from the board with the mug shots. You'll see that Murphy’s prisoner number is illegible on the photo. Look at his jumpsuit to learn the number and that's gonna be the code to the safe -
 Head further downstairs and take an Access Card and a Flashlight from the body on the lower level. Return to the top of the tower and exit through the locked gate using the Access Card. Take a path to the right, over the bridge and check the Cloak Room. There's a Walkie-talkie here in the locker to the left and Pistol Bullets in the locker to the right. Go back to the wakway and head forward. Before going downstairs check the cells to the right to find the Prisoner’s Letter 1 (45/54) on the desk in the last of these cells. Make it back to the stairwell and descend to level A2.
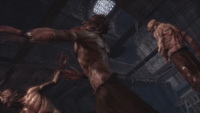
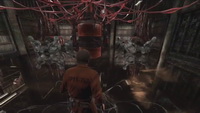
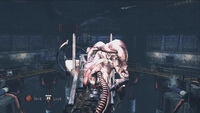
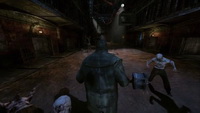
 Fight a Minion here and then walk to the north. Enter the first cell to the right, pull a shelf from the wall and tear down a poster to get the Prisoner’s Letter 2 (46/54). The next cell has a Minion inside and the last cell holds a Colt on the ground. Return to the stairwell and walk east along the cells and then north. Watch as a ball rolls out of a cell. As you approach the cell, a barrier formed from a barbwire will appear cutting you from the rest of the walkway. Enter the cell which then will transform into a flooded hallway. Reach the end of the hallway and take the Letter from Carol (47/54) from the small table. You'll return to the Normal Prison. Exit to the walkway and go left. Head forward for a short cutscene and a fight with a new enemy - a Prisoner Juggernaut. After you deal with him, go through the open gate up the stairs.
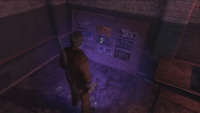
The Checkout Zone ahead is locked. Smash the padlock on the gate leading to the left and walk forward. A Prisoner Juggernaut is going to grab Murphy as you try to squeeze through. Break free and either kill him or just flee running past the exposed wire. The wire will take care of the enemy. Approach the fuse box to cut power to the wire, then enter the Control Room nearby using your Access Card. Take a look around. You should find here 2 First Aid Kits in the wall cabinets, the BOLO Alert (48/54) and Pistol Bullets in the drawers as well as 2 Shotgun Shells (you'll have to unlock one of the gun racks with your Small Key). After collecting all the items, approach the control panel and press the button after its cover opens. Watch a small freaky scene and exit the room. Run straight to the Checkout Zone.
Use your Access Card on the door to the left and squeeze through the opening after the door malfunctions. Check the lockers just ahead of you for the Magazine Article (Overlook Penitentiary) (49/54) and a First Aid Kit. Explore the room to find the Prison Block B Map in the drawers. Proceed into the Security Booth. Leave your belongings on the left counter, as the metal detector won't allow you to go through with metal items on you, and press the button to open the gate. Exit the Security Booth and pass through the metal detector. After that don't forget to collect your possessions from the counter and continue through the gate into Block B.
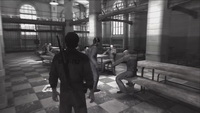
 Watch a cutscene and prepare yourself for a pretty hard fight with a Juggernaut and two Prisoner Minions. A good idea to use your Shotgun now. After you're done with the them, explore the first cell on the south side of the Main Hall to pick up the Prisoner’s Letter 3 (50/54) from the ground. Head south into a hallway. To the right you'll see a locked door with the keypad. Further to the right is a boarded up room where you can find a First Aid Kit in the cabinet. Enter the Workshops on the other side of the hallway. The first workshop room has a First Aid Kit in the wall cabinet. The next room contains another First Aid Kit in the cabinet and the Work Release Program Application (51/54) on the desk. Head to the last room here and grab a Forensic Flashlight and the Prisoner’s Letter 4 (52/54) from the ground. Now you're going to learn the code for the locked door.
Puzzle: Workshop Storage Keypad
The spots, where you should look for the digits, are:
The keypad code is:
While walking in the workshops, some machines may switch on themselves. When this happens, quickly turn off the active machine, as the noise coming from it attracts creatures to the workshops. |
Enter the workshop storage using the code on the keypad and the door will slam shut behind you. Search the room for a Quarter Dollar (if you haven't collected it earlier in the watchtower) and Shotgun Shells on the shelves. After a short time a beast will start pounding on the door and water will start flooding the room. Quickly push a crate under the nearby vent cover, climb onto the crate and use your Quarter Dollar to remove the screws. When Murphy gets inside, mash the button on-screen to escape from the beast.
 After Murphy falls down from the duct, watch the cutscene and then you'll find yourself in the dayroom with a Prisoner Juggernaut and two Minions. Take care of them and then proceed through the gate to the east using your Access Card on the nearby column (it takes some time for the doors to open). Head upstairs to the walkway and into the room to the left. Take Shotgun Shells from the
gun rack by the doorway and the Newspaper Headline (53/54) from the table. Pick up the Notification (54/54) from the ground by the lockers. Explore the room downstairs to the left to find a good weapon and Shotgun Shells. Return upstairs and head down the other stairs here. Run to the showers and enter the room (a Juggernaut is lurking in the hallway).
After Murphy falls down from the duct, watch the cutscene and then you'll find yourself in the dayroom with a Prisoner Juggernaut and two Minions. Take care of them and then proceed through the gate to the east using your Access Card on the nearby column (it takes some time for the doors to open). Head upstairs to the walkway and into the room to the left. Take Shotgun Shells from the
gun rack by the doorway and the Newspaper Headline (53/54) from the table. Pick up the Notification (54/54) from the ground by the lockers. Explore the room downstairs to the left to find a good weapon and Shotgun Shells. Return upstairs and head down the other stairs here. Run to the showers and enter the room (a Juggernaut is lurking in the hallway).
In the showers you need to examine a crime scene. There are four evidence marks which you should look at: a blood stain, a Prison Shank in the basin, a Mourning Badge on the ground and a Crime Evidence in the locker. After you examine all the markers, environment will start to change. Head to the exit and go through the doors. Approach the body on the ground and the world will transform.
Otherworld: Prison
At the first stop it's gonna be two Screamers. Deal with the foes to continue the ride. At the second stop you'll get attacked by two Screamers and one Prisoner Minion. Kill the enemies and enter the control room to find a Shotgun, a First Aid Kit and press the button to continue going down. At the third stop you're going to fight against three Screamers and one Prisoner Minion. After you defeat the last enemy, the lift will restart for the last time and then malfunction and tilt to the side. Jump down to the walkway, turn left and follow the path until the end. Climb onto the catwalk to the left, pick up a First Aid Kit and climb up the ladder. Continue by following the path. Eventually you'll get onto an iron bridge. Go ahead and steel cages will fall down. Go around them. After you pass the second cage, the bridge will collapse and you'll have to quickly press buttons on-screen to save yourself. When you're back on the bridge head ahead and enter the mirror room. By the way, you no longer have any weapons.
Next room contains four sets of spinning blades. Stand on the nearest symbol plate to stop the blade ahead. When the blades come to a complete stop, run along the right wall and stand atop the next symbol. This will deactivate two other sets of blades. Cross the room diagonally and stand on the last symbol plate. Run along the left wall after the machine stops and you'll be out of the room. Take a First Aid Kit from the wall cabinet. Next room has another wheel. Turn it to flip the room. Now you can check the same wall cabinet in this environment for another First Aid Kit. When you're ready, head to the nearby corridor and drop down through the hole. Follow the path and you'll find yourself in the prison yard.
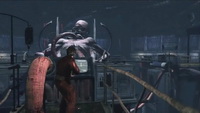
You'll get into a prison block. Move ahead, make your way through the crack in the wall. After the door slams in front of you, head for the stairs behind and the Void will appear. Climb up the stairs and make a 180-degree turn to the right, run ahead and turn right at the junction, then turn right again and make it to the next stairs. Try to stay away from the cells as the Juggernauts will grab you if you're too close. Also beware of the Wall Corpses on your way. Climb up to the 3rd floor. Just run straight here on this level to the next stairs and climb up. On the 4th floor veer to the left, move through the guillotine-blades, follow the path around the room and look for the lift on the left side at the end. Grab a Shotgun from the weapon rack and a First Aid Kit from the cabinet, then move to the scales. Put the Prison Shank, Mourning Badge and Crime Evidence into one of the scale’s bowls and proceed through the gate. Boss: The Wheelman
Ok, now that you know the tactic, follow this simple instruction to defeat the boss. Run straight and turn right to one of the two pumps accessible here. Ride up, collect Shotgun Shells and a First Aid Kit from the partition and use the spotlight to blind the boss. Ride down and pull out the first tube. Run to the second pump and ride up. Here you can grab Shotgun Shells. Again, use the spotlight, ride down and disconnect the tube. Now you have to make your way to the other two set of bellows across the room. Go to the outer walkway and go around the room. On your way you'll meet multiple enemies: Screamers, Minions and Wall Corpses. You can find a First Aid Kit in one of the cells along the walkway. Deal with the foes or just try to squeeze past them and then cross the bridge at the end of the path. Disconnect the two remaining life support tubes using the same tactic and the encounter will end. Watch the cutscene and prepare yourself for the final fight. Boss: Anne
|

| 09. Pleasant River & Port District |