Walkthrough
06. The Centennial Building
Contents
- Enter the building via the service elevator
- Find the unlock code
- Unlock the elevator to the radio station
After the cutscene open the door and you'll get the Memorandum (17/54). Collect the Centennial Building Map from the rack past the door. Continue into the garage. The security office is locked as is the gate leading to the elevator. To get there is your next objective.
Enter the building via the service elevator
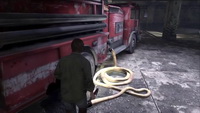
 Let's explore the garage floor. You can open the back door of the blue van, but don't do that as you'll get attacked by a Screamer in the result. Check the police car for a couple of items. Open the front passenger door to find the Internal Memorandum (Investigation) (18/54). In the trunk of the car there's a Forensic Flashlight. Now you can toggle between normal and UV beam. Certain clues and enemies (Shadows) are visible only in the UV light. For example, in the garage you can see the drag marks from the police car to the service elevator. Go to the locked gate by the fire track and smash the padlock. Use the track's fire hose to drain the flooded basement - first throw it into the water and then turn the fire track's pump on. By the way, you can watch a short cool scene here if you examine the walled-up door to the east of the fire track.
After the basement is drained head down the stairs. Make your way to the end of the path and take a Security Card from a wheelchair. Return to the garage which is now crawling with Weeping Bats. Quickly run to the Security Office and use the Card to open the door. Step inside and use the control panel to unlock the gate leading to the elevator. Before you leave, check the shelves in the back room of the office for a First Aid Kit. Take the elevator to the upper floor.
As you exit the elevator take a Fire Axe to the right if you don't have a similar weapon with you. Move through the storage, cut the boards and squeeze between boxes. Deal with a Screamer here and push a movable crate to find a First Aid Kit in the wall cabinet in the back. Trace back and step through the door into the Library. The drag marks lead into the Main Hall, but the path is blocked. Go forward along the main passage and the bridge will collapse in front of you. Take the path to the left. The game will tell you to use your UV flashlight for clues here. On the shelf nearby there is a book with the fingerprints visible in the UV light which you can read. You can find more such books in the building. There is no practical use from reading them though, just for the fun of the thing. Continue your way and check the opposite alcove for the Internal Memorandum (Napier) (19/54) at the end of the passage. Be very careful as a Weeping Bat is lurking here. Move further to the east and use a moveable ladder here to climb to the 2nd floor.
Follow the path to the end and go into the room. The Vault door is locked and you'll have to figure the code out. Go through the door to the north. Move through Room 208 into the Main Hall. The elevator doesn't respond and the door ahead is keypad locked. You need to go through that door.
Find the unlock code
The only way to go is downstairs to the 1st floor. Check the drag marks on the ground which lead you to the lift. You'll be attacked by a Doll here - remember, it's more effective to attack the Doll itself rather than her Shadows. Turn to the right from the lift, go into room 106 and then to the office area. Step into Room 104 to collect an ID Card from the dead body. There's also a Colt on the desk. Go to Room 105 and unlock it with the ID Card. Enter the room and approach the desk to solve a puzzle.
Puzzle: Envelopes
|
Now you can return to the locked door on the 2nd floor. Before returning to the Main Hall, check the bathroom in the back of the office to find a First Aid Kit in the wall cabinet. Go through Rooms 101 and 102 to collect some additional items. Room 101 has Pistol Bullets on the sofa. In the Main Hall head upstairs an enter the code - 851136 - to enter the door. Go into the hallway through the room and enter Room 204. Take the Psychologist’s Flyer (21/54) from the top of the desk and climb up the stack made from furniture to the 3rd floor.
Hop through a hole in the wall, cross the chasm via beams and deal with a Doll here. Check the small office to the right for some Pistol Bullets on the desk and then continue to Room 301. Climb down the ladder and head to Room 200. Take the Psychological Report (22/54) from the drawers across the door and Slides from the desk. Return to the 3rd floor and go into the Main Hall. Pull a wheelchair blocking the lift's doors away and enter the lift. You need to go up to the Radio Station, but you cannot do that without a security card.
Unlock the elevator to the radio station
Take the elevator to the 2nd floor and go straight into the Video Archive. Approach the projector on the desk and insert the slides to learn the code to the Vault.
Puzzle: Vault Door
Easy Normal Hard No matter what puzzle difficulty you chose, the combination is going to be the same - IX, VI, I (9, 6, 1). |
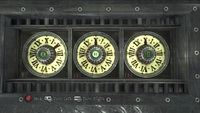
Check out the upper gallery in the room to find a First Aid Kit, then go to the vault's door. Set the dials to display the combination - IX, VI, I - and go inside. Collect an ID Card from the hanging body and enter the vault's main room for a flashback scene. After the scene ends take the Annual Employee Review (23/54) hidden in the book on the shelf, exit the vault and take the lift to the 18th floor.
Take the Studio Map from the wall rack to the right and enter the Studio at the end of the hallway. After a long cutscene proceed through the door ahead of you and enter Room 1703 to pick up a Diluent in the adjoining storage room (on Hard puzzle difficulty the Diluent is in the kitchen area in the lift hall). There's also a Lighter in Room 1703 if you don't have one and a First Aid Kit in the wall cabinet. Use first the Diluent and then your Lighter on a trash pile nearby and the world will change again.
Otherworld: The Centennial BuildingRun straight ahead from the Void through the fire exit, open the gate using the valve on the left wall and run through. When you reach the junction take the path to the left. Run to the end of the corridor and make a turn to the right when you reach the van. Run straight until you bump into a mirror. Turn the invisible valve on the wall to open the gate and go through. The Void will appear once again. Quickly run ahead through the fire exit, then through another gate. In a garage area the path is going to split. It's easier to stick to the left path. Avoid the cars falling from the ceiling. Eventually you're going to get to the closed gate. Flip the switch to the left of it and run through. Go ahead and you'll get into the upside-down security office. Press the button and exit through the door. Make your way through the corridor and step into the cage.
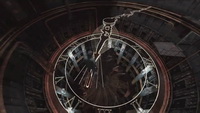
In the clock tower press the button to make the clock hand stop by you and step onto it. Balance on the clock hand and step until the end. In the next room you'll have to get past the blade traps. Watch for the pattern and run quickly through. After one of the traps collect Shotgun Shells and Pistol Bullets. When you reach the end of the path, a cutscene is going to follow and a sliding sequence will start. Slide down avoiding obstacles and blades on your way to finish the level. |
| 05. Pearl Creek | 07. Chastain Heights |

 There are six envelopes with fragments of numbers on the desk. To learn the original combination you must arrange the envelopes. Depending on the chosen puzzle difficulty a different number of the envelops will be already in place. After some trial and error you should
align the envelops in the right way and get the code -
  The
vault door has three numbered dials. The code to the door is learnt from the slides you picked up earlier. Once inserted, the projector cycles through a series of three slides. To decipher the combination, you must determine the digit and dial indicated by each of the slides.
  After the ride the Void will appear for the third time in this world. Navigate between and through the cages and eventually you'll fall down through the floor. Take a