Supplies
Refer to the chart for a brief overview of each supply's availability and effectiveness, with more detailed descriptions below. |
| Health Chart | Health Drink | First-Aid Kit | Ampoule |
| Availability | 5 | 3 | 1 |
| Health Restored | 25% | 50% | 100% |
| Ammo Chart | Handgun Bullets | Shotgun Shells | Submachine Gun Bullets | Stun Gun Batteries |
| Availability | 4 | 3 | 1 | 1 |
| Power | 3 | 5 | 2 | 4 |
| Other Chart | Beef Jerky |
| Availability | 3 |
| Usage Rate | 2 |
Availability: Health Restored: Power/Usage Rate: |
Health Supplies
As per Silent Hill tradition there are three different health pickups you'll find on your journey, all described below. |
Health Drink |
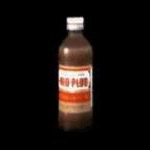
Description: "It's full of nutrition and should help me recover at least a little of my strength." This is the most common health item found in high frequency throughout the game. It will recover a quarter of your health, good for healing smaller wounds of light blue or yellow status, or multiple drinks for heavier damage. Be sure to combine Health Drinks with First-Aid Kits for serious wounds. |
First-Aid Kit |
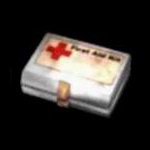
Description: "This will help me patch up my wounds fairly well, I think." First-Aid Kits are still fairly common and recover half your health, making them great for bigger wounds of deep yellow or red status. If lighter yellow, consider just using a Health Drink, but go ahead and combine the two for serious wounds in deep red or maybe use an Ampoule if critically injured. |
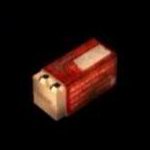
Ampoule |

Description: "This is the stuff! It'll wipe out all the pain and help recover my strength." Ampoules are very rare but extremely powerful, bringing you back to full health no matter how badly you're hurt while also maximizing your stamina for a few minutes. Therefore you shouldn't use them if you can still take a bit more damage and only if your health status is a deep throbbing red. Otherwise, consider using a combination of First-Aid Kits and Health Drinks. |
Ammunition Supplies
For every firearm there will be pickups found to keep up your supply of ammo. While you can reload in the inventory while hovering your equipped gun or the ammo itself, you can also equip the ammo and use R3 as a shortcut for an in-game reload, but be sure to do this away from enemies. |
Handgun Bullets |
Description: "Bullets for a handgun." Found in relatively high frequency, these ammo packs contain 10 bullets and should be the ammo you'll be using the most often in the game. You may even find additional packs in various places if low on ammo, so keep an eye out for them and also try to conserve your ammo and use melee weapons when it's not totally necessary. |
Shotgun Shells |
Description: "Ammunition for a shotgun." Not found in too high frequency, conserve your Shotgun ammo and use it wisely on tougher enemies and bosses. Each pack normally contains six shells which give a heavy punch with a wide range. If surrounded, consider using some shells for some quick crowd control. |
Submachine Gun Bullets |
Description: "Ammunition for a submachine gun." This ammo while very effective is extremely hard to come by, with only a few magazines found in the game. Therefore this weapon won't be too helpful for you outside of small bursts, and you'll find its 32 bullet capacity flies by quickly so prepare to reload or make your escape. |
Stun Gun Battery |
Description: "A battery for a stun gun." Another type of ammo only found in short supply, Stun Gun Batteries only hold four charges but each one is very powerful and quite useful in the right circumstance. Just like firearms you'll have to reload your batteries after emptying their charge. |
Other Supplies
New to Silent Hill 3 is a different type of supply outside of ammo and health. Be sure to give it a try and see what you think. |
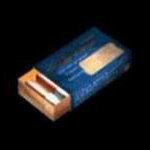
Beef Jerky |
Description: "Processed, dried meat. Sometimes it's just enough to distract monsters." While it's easy to completely forget this even exists, it can be very helpful drop some jerky in a hallway full of Double Heads or Slurpers to guide them to a certain spot or buy you some more time to sneak past. It doesn't always work so don't count on it saving you if enemies are already well aware of you, but it's a small little way that can help you from time to time to get an enemy to come chomp on it. Jerky comes in packs of four and can be used from your inventory, but the most practical way is to equip it and then press R3 during gameplay to drop one. Drop any more as you wish and watch out for any incoming enemies. |
| by Andrew Haffenden aka Conquerer (Silent Hill 3 FAQ/Walkthrough) |